Showing posts with label Megan Nielsen. Show all posts

Thursday, 22 September 2022

Megan Nielsen Durban Jumpsuit

The Megan Nielsen Durban jumpsuit has been on my "to make" list for some time now, and I'm pleased that it finally reached my sewing table and now has a firm place in my wardrobe.

The Durban jumpsuit has lots of mix and match options so you can make quite a few different versions, giving you good value from the pattern. 

You can choose from a round or V neckline, short or long sleeves or a sleeveless bodice, patch and/or in-seam pockets, tapered or wide full-length legs or shorts, and optional belt loops with a tie belt or D-ring belt. That's definitely a lot of scope for creating variations!

The pattern also comes in a good range of sizes, with the regular version of the pattern covering hip measurements from 34" to 48", and the curve range going from 42" to 62" hip. As someone who is slightly taller than average, I also appreciated the fact that the trousers are marked for regular and tall in-seam lengths.

For my version, I used the V neckline, sleeveless bodice, tapered legs, in-seam pockets, patch pockets on the back (there is also an option to put the patch pockets on the front of the jumpsuit instead), belt loops and the tie belt.

The instructions were very detailed and easy to follow, with nice clear diagrams. The skill level is rated as 3 out of 5, and I think that's fair. There's nothing that's very tricky, but there are quite a few steps so it might feel a little overwhelming for a beginner. You do also need to be quite accurate to get a nice finish at some points. 

I took my time working through the project and really enjoyed the sewing process. I thought that sewing the bottom of the front button placket might be a bit fiddly, but the instructions made it nice and simple. 

In terms of sizing, I made a 14 at the bust blending out to a 16 at the waist and hips as recommended for my current body measurements. I also used the tall in-seam length. 

The instructions include advice about how to measure yourself to see if you're going to need to lengthen the pattern, which is helpful. I definitely needed to lengthen mine - this is an adjustment I almost always have to make. 

I added 2" to the bodice for my toile and that got the waist to the right place, but I felt like I needed a little extra length in the rise of the trousers so I also added 1" there for my final version. As I'd added extra length, I also used more buttons than the pattern calls for - I think I ended up with eight instead of six.

I'm pretty happy with how the fit turned out. There's enough room for the jumpsuit to be really comfortable to wear, but it's not baggy. 

The fabric that I used is a printed chambray/lightweight denim from Croft Mill. It was a really easy fabric to work with and I like the sweet and simple floral print. I've used other printed chambrays from Croft Mill before (in my Lyra dress last year and my Cassie dress a few months ago) and they've worn really well so I'm hoping the same will be true for this one too!

All in all, I'm really happy with my Durban jumpsuit - the instructions were great so it was a pleasure to sew, and the finished jumpsuit is just what I wanted. I think it'll also work layered with t-shirts underneath, so hopefully I'll still get a bit more wear out of it as the temperatures start to drop - I hope I do anyway because I don't want to leave it sitting in my wardrobe until spring!

Tuesday, 1 September 2020

Megan Nielsen Olive Dress and Tops

 When a new pattern comes out, you buy it almost immediately and then make three versions within about a month of owning it, it's a fairly good sign that it's a winner, don't you think? That's what happened for me with the Megan Nielsen Olive dress/top (also available in sizes 14-30 here).

The Olive is a relaxed fit top or dress with a V-insert at the neckline. It has a drop shoulder, various sleeve finishes (bias bound (which I used for all three of my versions) or banded short sleeves, or longer sleeves), dress or top variations (with two top lengths) and an optional breast patch pocket. The dress has a gathered skirt and in-seam pockets.

I've been hankering after a looser fitting dress this summer so that was what initially attracted me to the pattern, but the first version I made was actually the shorter length top. That was mainly because already had the perfect fabric for it in the form of this super pretty floral lawn (now out of stock) from Selvedge & Bolts. I knew I wanted to make a feature of the V-insert so for that I used some white cotton lawn that I have in my stash (I tend to keep a small supply of white lawn because it's useful for bodice linings). 

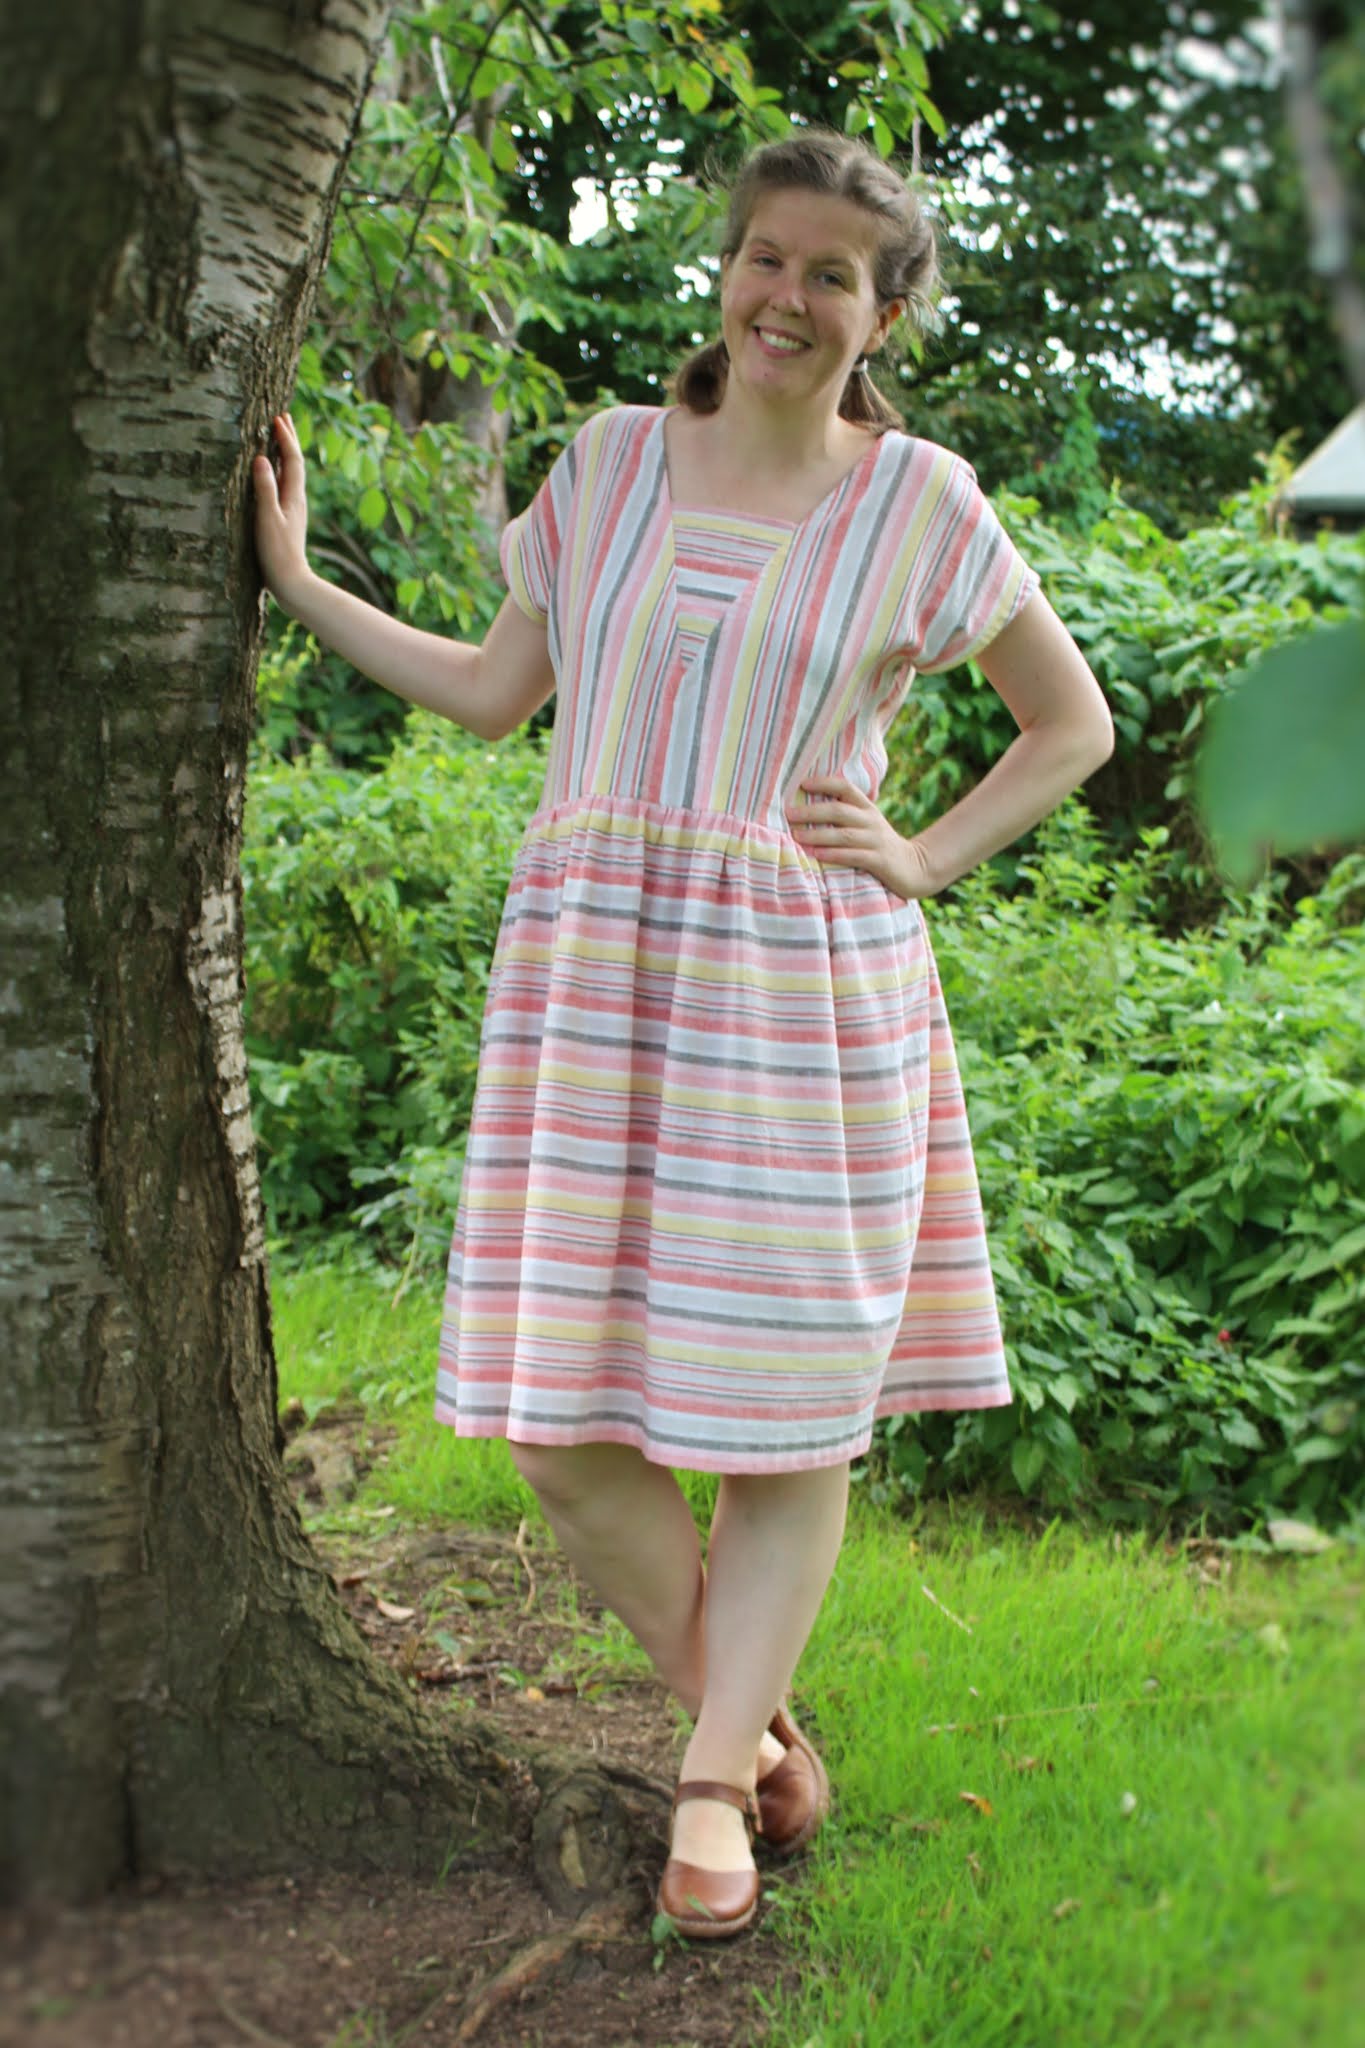
I loved how my top turned out so I pretty much immediately started planning a dress version. The Olive is a great pattern for playing with stripes so I was on the lookout for some nice stripey fabric and thankfully spotted the perfect candidate in the form of this yarn-dyed linen-cotton fabric from Cloth Spot. It's an excellent quality fabric and is a great pairing for this pattern. It's got a bit of body to it, but will still be lovely to wear on hot days. This dress is so easy to wear and comfy. My only slight disappointment is that I hadn't finished it in time to enjoy it in the heatwave we had a couple of weeks ago!

Now we come onto my third version! My mum really liked both my top and dress so asked me to make an Olive for her, and I was happy to oblige. This version is the full length top. The fabric is from Cloth Spot again - although I think this one is now out of stock apart from a remnant (still available at the time of writing!). This one is a viscose and is nice and drapey. It was slightly 'interesting' to sew because my machine didn't completely love the change in texture when sewing over the woven stripes, but as long as I took it slowly it coped with it OK. And mum is happy with the end result so it's all good!

The Olive is a nice pattern to sew. You have to take a bit of care sewing the V-insert, but you do that first and once that's done it's pretty simple and fairly speedy to sew. 

The instructions are really detailed and easy to follow. They also give you two options for sewing the V-insert - one where the edges end up fully enclosed, and one that is simpler but leaves the edges of the V exposed on the inside. I used the first, apparently slightly trickier option for all of my Olives and it does give a really nice finish. It's not too difficult as long as you're willing to be quite precise. There's also a sewalong for the Olive on the Megan Nielsen blog if you're struggling with anything.

As the Olive has a relaxed silhouette, fitting isn't too complicated. For both of my versions I blended from a 12 at the bust to a 14 at the hips (my measurements are 38-32-42) and added an inch to the length of the top/bodice. For my dress, I also lengthened the skirt by 2" (I'm about 5'9"). My mum's top blends from a 12 at the bust to a 16 at the hips and is the length from the pattern (she's about 5'6").

I love how all three of these Olives turned out. It's a really satisfying pattern to sew and the finished top/dress are lovely to wear. I'm not sure I'll use the long-sleeved version, but I'll definitely be keeping my eye out for pretty fabric for another top or dress version next summer!

Thursday, 3 May 2018

Sewing Lingerie - #sewoutofthisworld

After crossing one of my 2018 Make Nine projects off my list with my Carolyn pyjamas in my last blog post, today I've got another two of my nine finished and ready to share with you - specifically a Cloth Habit Watson bra and some Megan Nielsen Acacia knickers.


I've been interested in the idea of sewing lingerie for a while now, not least because it seemed like it would be a good way of using up leftover pieces of jersey, but it kept getting pushed down the sewing list in favour of garments that I could show off to the outside world.

When I heard about the Sew Out of This World challenge that is currently (until tomorrow anyway!) being hosted by Sew Loco, it seemed like taking on mission one of the challenge would be a good incentive to finally give lingerie making a try.


I decided to start with the easier half of my mission and tackle knickers first. The Acacia knickers are low rise bikini cut - a nice simple pair of knickers for my first attempt. Especially because this is a free pattern (who doesn't love a freebie?!). The fact that this is a free pattern in no way means that you're not getting something as good as if you'd paid for it - the fit is good, the pattern pieces all match up well, and the instructions are clear and thorough, even including three different elastic insertion methods (regular elastic, lingerie elastic and foldover elastic).

The knickers were really quick to sew, although it has to be said mine aren't perfect. This is in no way any fault of the pattern - it's just due to the fact that I hadn't used lingerie elastic before and my sewing in that area could definitely have been tidier. They're perfectly wearable though, which is the main thing!


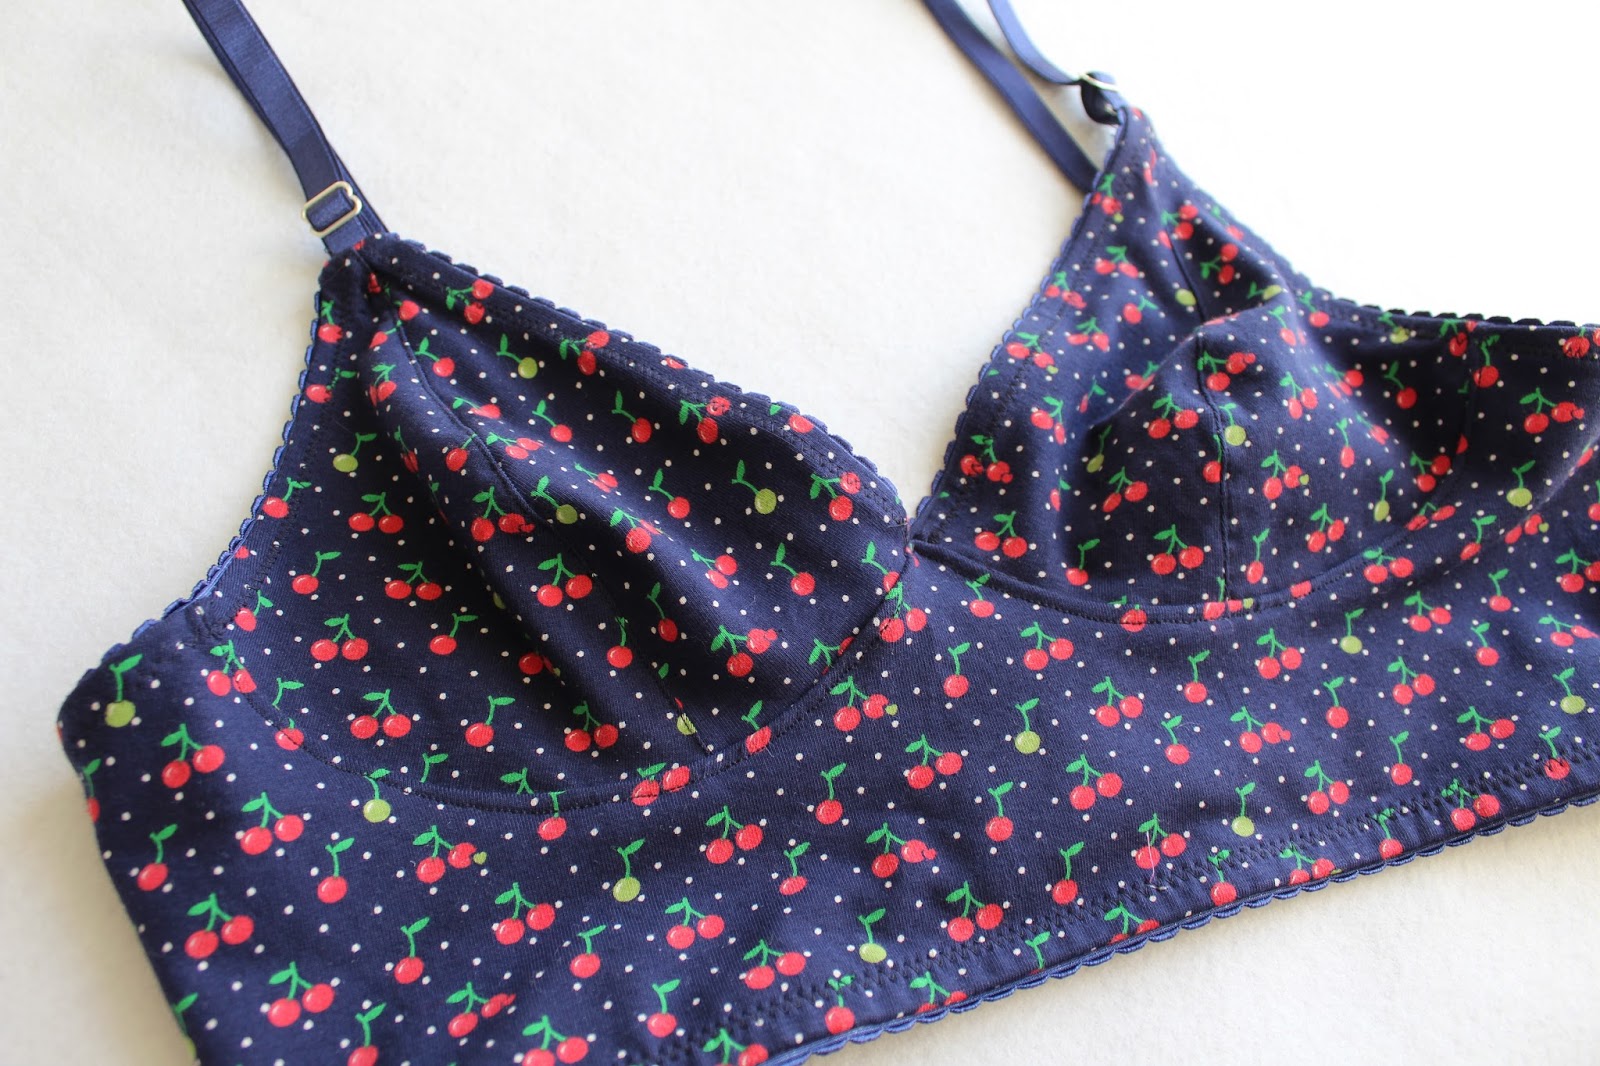
Next, I moved on to the Watson bra. This is a soft, non-underwired bra with a plunge neckline and the options of a longline style or a shorter band - I went for the longline version.

Like the Acacia, the instructions for the Watson were very thorough - I particularly liked the fact that they included specific details on the width/length of zigzag stitch that should be used for each of the individual steps. This meant that the process was fairly straightforward, even though it was my first attempt at bra making.


While I didn't have any trouble working out what I should be doing, I did struggle a bit with actually getting my sewing machine to sew what I needed it to! Sewing the top of the cups down after looping them through the rings was a particularly tricky because the layers of elastic were quite thick, but I made it work in the end (although I wouldn't want the neatness to be subject to close scrutiny!).

Based on my measurements, I made a 38A and the bra fits me really well. I was slightly dubious about how supportive such a soft bra would be but, for me and my not-especially-large bust, it's fine for light daily wear.

The cherry print jersey I used for both of these project is left over from a top I made (but apparently didn't blog) a few years ago. The findings for the Watson came in a pack from Sewn (but Marie isn't running her shop at the moment), and the lingerie elastic for my Acacia was from this ebay seller.


Having finished my two original intended projects, I decided to go with the space theme of the Sew Out of This World challenge and make some star print knickers. This time I used the Scroop Patterns Wonder Unders pattern, which I'd bought a while ago with the intention of making the slip (haven't got around to that yet!).

These are very similar to the Acacia knickers, but with slightly more coverage. The construction was also similar, so there were no big surprises there. The major difference for me was in the elastics that I used for the two different pairs - both pairs use lingerie elastic, but the blue on my Acacia knickers is fairly soft and stretchy, whereas the black on the Wonder Unders is much firmer and needed much more force to stretch it to fit. Because of this, my Acacia knickers feel ever-so-slightly loose, while the Wonder Unders are a touch tight. Both are wearable, but with the benefit of hindsight and experience, I should probably have cut the Acacia elastic a bit shorter and the Wonder Under elastic a bit longer.


So, what's my verdict on lingerie making? Well, I'll definitely be making more knickers! They're a quick project, and a great way of using up leftover jersey. I'd quite like to try out a couple of other patterns to work out my perfect style, which I could then make over and over. As for bras, I'm definitely not ruling out making more, but there's a part of me that thinks that this is one case where M&S can probably do a better job! Have you tried sewing lingerie? Any patterns to recommend to me?

Tuesday, 6 September 2016

Megan Nielsen Reef PJs

My summer pyjama selection has started to look a bit sorry for itself. Winter sleepwear has a regular annual replenishment in the form of cosy Christmas presents, but most of my warmer-weather PJs have been worn so much that they're verging on falling apart and really need replacing. I've considered various summer PJ patterns before, but none of them ever seemed quite right - apparently I'm quite picky in my loungewear requirements. Then Megan Nielsen released the Reef camisole and shorts set, which ticked all my boxes.


The camisole is cut on the bias, has a V neckline, a cross-over back yoke and a high-low hem. The shorts come in two versions - one with pockets and a curved hem, and a second shorter version with no pocket and a straight hem. I made the first version, but omitted the pockets because I wasn't sure how they'd work with this fabric and, much though I love pockets in my daytime clothes, I didn't think I'd use them much in pyjamas.


One of the first things to point out about my version is that I did something a bit wrong when constructing the back - mine doesn't cross over as much as it should. I think I must have matched up the wrong notches or something, but everything seemed to be working out fine so I only noticed once I was a bit further down the line. Being as they're pyjamas, and so it wouldn't matter if the fit was a bit off, I decided just to plough on and not go back and unpick things. Happily, the camisole still fits nicely, although I'll make sure that I get it right next time because I do like the cross-over yoke.


I would say that this mistake is entirely down to me, and in no way a reflection of the instructions or the pattern. I'll openly admit that I was reading the instructions pretty quickly as I went along. When you're actually paying attention to them, the instructions are perfectly clear and easy to follow, with helpful added tips along the way like block fusing the interfacing instead of cutting out the interfacing and fabric pieces separately and then fusing afterwards.


In terms of sizing, for the camisole I graded between a medium at the bust and a large at the waist. Due to the loose shape, I could probably have got away with making the whole camisole in a medium, but I wanted to stay true to the breezy, flowing shape intended in the pattern. I made the shorts in a straight size large, and they fit nicely.

I'd say that both the camisole and the shorts have just the right amount of ease to make them nice and comfortable (as you want pyjamas to be), whilst not being so baggy that they become sack-like and unflattering.


The fabric I used is a pretty viscose that I picked up on a whistle stop tour through the rag market in Birmingham. My uni friends (none of whom are into sewing) and I have a habit of converging on Birmingham to meet up for the day from our various areas of the country, and I always seem to arrive before everyone else, which really just "forces" me to go and look at fabric while I'm waiting. It's a tough old life, isn't it?!

Anyway, this is lovely and drapey and was only £2 a metre. Perfect for trying this pattern out for the first time. I'm happy to make toiles for actual clothes, but it would seem a bit over-the-top for pyjamas to me, but at the same time I wouldn't want to commit expensive fabric to a pattern and end up disappointed. This way, it wouldn't be a disaster if things went a bit wrong. Thankfully that didn't happen!


I really love my Reef set. For me, they're pretty perfect as summer pyjamas - small enough to be nice and cool to wear, whilst still being covered up enough for me to be able to wander round my flat in them quite happily without having to worry about the fact that my neighbours can see right into most of my windows. The only thing I regret about this is that I didn't get round to sewing them earlier in the summer. I think I probably won't fit in sewing a second set this year, but another Reef set will definitely be high on my sewing list for next summer.

Thursday, 5 May 2016

Jenna & Veronika

Hot on the heels of me saying last week that I needed more pink in my wardrobe, here is more pink! Albeit partially combined with various shades of blue and green, but that's no bad thing. This combination is a Muse Patterns Jenna cardi and Megan Nielsen Veronika skirt.


I've made the Jenna cardigan twice before (once for me, once as a Christmas present for my Mum), but I didn't ever get around to blogging about it - partly because it was in the run up to Christmas and I was pretty busy, and partly because they're both plain navy blue so aren't that easy (or interesting) to photograph. I've worn mine loads though, so I knew it wouldn't be long before I'd be sewing another version.


This is the waist-length version of the Jenna cardi with long sleeves, and omitting the optional yoke detailing. I made a size 38, with a couple of adjustments to the sleeve. In my first version the sleeves worked nicely, but that was using a sweatshirting, and the lighter jersey I used here (which is from Fabworks - although I can't find the exact one on their site now) produced a very different fit and the sleeves were too big and too long. I took 5cm off the length of the sleeves, and slimmed down the sleeves by about 3cm at the cuff, tapering up to join the original seam line at the underarm.


I'm pretty happy with it, although if I make it again I'd probably add a little bit of length. I've mainly been wearing my first version with dresses, and then the length seems fine, but wearing this version with a skirt makes me think that it might be better just a touch longer so that I don't end up with that little gap around my waist. It's only a small niggle though, and definitely won't stop me wearing it!


The skirt is my fifth version of the Veronika skirt (other versions here, here, here & unblogged). Yes, Veronika is just a circle skirt and I could draft my own - but if someone is going to be nice enough to do the drafting for me and give it to me for free then I'm not going to look a gift horse in the mouth.

I don't think I strictly needed this skirt, but when I saw the fabric on Fabric Godmother's Instagram feed I just had to have it. The large-scale print seemed like it would be well suited to a circle skirt so I ordered enough for a Veronika. I wasn't disappointed when it arrived - it's a really nice stretch cotton, and the colours are gorgeous.


All in all, I'm really pleased with both of these, and especially with how nicely they work together. I think the cardi will be getting more wear than the skirt because it'll go with quite a few of my dresses/skirts, but if I'm honest the skirt is the more exciting part of this outfit - you can't beat a twirly skirt in a pretty print, can you?!


Wednesday, 2 September 2015

Butterick 6217 Blouse & Veronika Skirt

Today you get the second (and final) installment of blog-photos-that-I-took-on-holiday, which sees me twirling around the picturesque surroundings of Alnwick Garden showing off a Butterick 6217 blouse and a denim Veronika skirt.


I got some funny looks when we were taking these photos - you could see people wondering why we were focussing on me instead of all the pretty plants and landscaping - but I've got to the point now where I don't mind as long as the onlookers aren't the kind of people who are going to start shouting comments at me. The average garden visitor tends towards the more decorous end of the scale so I was safe here!

Anyway, back to the sewing itself...


Butterick 6217 is one of the Patterns by Gertie line, and it instantly appealed to me when it was released because I liked the shape of the neckline. I then realised it needs very little fabric, especially if you make view C as I did here, so it seemed like it would be a good way to use up some of the larger remnants I have from other projects. Regular readers may recognise the fabric I've used here as the leftovers from the Vintage Shirt Dress that I made earlier this year.

I made this a couple of weeks ago now, so some of the details of sewing it are a little hazy in my mind, but I know it was a quick project and I didn't make any notes in the notebook I keep by my machine so I assume it was all relatively straightforward and pain-free!


I really like the shape of the blouse, although it's worth noting that to get the fit shown on the pattern envelope you'd definitely need to size down. My measurements put me ever-so-slightly above a 16, but when I made a toile of the 16 it was bordering on tent-like. I sized down to a 14, which fits nicely but I still feel like my version has more ease than shown on the envelope.

The photo above is meant to show the nice shape created by the darts in the back before I tucked the blouse in for the day, but in reality I just think it makes my back look odd!


Now, on to the skirt! This is my second version of Megan Nielsen's free Veronika pattern (version 1 here), and I can tell already that this one is going to get worn a LOT! I don't wear trousers really so denim skirts do the job for me that jeans do for most people, but this one will be a particular favourite because it has the practical goes-with-everything side, but at the same time is also beautifully twirly and fun!

The fabric is a lightweight denim that I got a couple of months ago from The Splendid Stitch. It doesn't seem to be in stock anymore, which is a shame because it's the perfect denim for this kind of skirt. I'd definitely recommend ordering from The Splendid Stitch though - Amy has put together a gorgeous range of fabrics, and dispatched both my samples and fabric order really quickly.


I don't think you'd want to make a circle skirt in any old denim. I know I've worked with some which would be far too stiff and heavy, but this one really is a different kettle of fish. I did cut the inner waistband and pocket linings from a thinner cotton just to keep down bulk, but for the rest the denim has great drape and the finished skirt is gloriously swishy as I walk in it. The only problem is it makes me want to twirl about excessively, which is probably annoying to those around me!

For this version of Veronika, I stuck with the narrow waistband but also added on the scalloped pockets too - they're lovely deep pockets and have proven quite useful when trying to hold down the skirt on breezy days! I also added my own simple belt loops on the waistband, because I knew I'd want to wear belts quite a bit with this skirt.


In case it's not already obvious, I'm really pleased with how these both turned out! I'll definitely make more versions of B6217 as I identify suitable candidates in my stash, and I know this version of the Veronika skirt will become a bit of a wardrobe workhorse. In fact Veronika may fast be becoming a TNT and at some point in the not-too-distant future I'd really like to try a knit version. Have you discovered any TNTs recently?

Thursday, 23 July 2015

Aurora & Veronika

Do you ever find that when you're working on a project serendipity comes along and makes the result far better than you imagined? That definitely happened here - I was making a skirt, and pondering whether I actually had anything in my wardrobe to wear with it, when it dawned on me that I had a good fabric and pattern already in my stash to create a solution to that problem. Enter my versions of the Megan Nielsen Veronika skirt and Seamwork Aurora top...


One of my problems when it comes to separates is that nothing ever seems to go together, but hopefully in this case that won't be an issue because I know that these two were made for each other. I'll probably still keep an eye out for top-appropriate fabric that matches the other colours in the skirt though, after all it's always nice to have options, isn't it?

So, on to the individual patterns themselves....


As soon as Megan Nielsen generously released the free Veronika skirt pattern, I knew that I'd be making one. I'd been meaning to draft my own circle skirt pattern for a while, but had never quite got round to tackling the maths. The Veronika pattern means that I don't have to do that anymore! It's a basic circle skirt with two waistband widths and the option for cute scalloped pockets.

For this version, I used the narrower waistband and left off the pockets (which seemed sensible with this large-scale print), but they'll definitely be added to a future Veronika which is sitting in my mind waiting to become a reality.


As you'd expect for a circle skirt, this was a nice easy project and only took a couple of hours to do most of the sewing. As is always the case, the worst part was giving the nearly-finished skirt enough time to hang before hemming. So frustrating when you want to wear your new creation!

The fabric is from the Riley Blake Floribella collection, and I managed to pick it up for a bargain price from the Village Haberdashery sale section (as I'm writing this, they only seem to have a bolt end left - unsurprising given how much of a bargain it was!). When it arrived, I was slightly surprised by the scale of the print as I'd just imagined it would be smaller than this for some reason, but I actually love how it looks in this skirt.


The top is the Aurora pattern from June's issue of Seamwork. It's a simple vest top with added pretty details of gathering at the front and a pleat at the back (which I now reaslise I failed to get any close-ups of) where the separate yoke meets the main sections of the top. I really liked the pattern when it was released and added it to my mental list (which is rather long!) of things I want to sew.


Then when I was sewing the skirt, I realised that the fabric I had left over from making my tea-cup print Astoria was actually a pretty perfect colour match for this skirt and I had more than enough to get an Aurora out of it. As I said when I was talking about my Astoria, the fabric isn't the best quality in the world but it's worked out OK here.

As you'd expect with any Colette/Seamwork pattern, the instructions are thorough and really clear. The top comes together really quickly - I'd say their 2 hour estimate is about right and I'm not particularly speedy.


When I was sewing the top, I wasn't entirely won over by the finish it produces. Basically, you start by hemming the front neckline and the armhole sections of the front and back, then make the yoke (which is self lined), and then attach the yoke to the front and back. That means that the seams are right at the edge of the garment, whereas I'm more used to sewing the seams first and then enclosing them with the hem, and I think that looks neater. It didn't bother me at all when I was wearing it though and, let's face it, how many people are really going to study the inside of my top?! So it might not be my favourite finish, but it wouldn't stop me making another Aurora.


I really like my versions of the Aurora and Veronika together. And considering that Veronika is a free pattern, Seamwork patterns are fairly cheap, the floral fabric was a bargain and the jersey was left over from another project, I think this is a fairly thrifty outfit! I'll definitely be making both again - I already have some lovely drapey denim for a Veronika, and Aurora is a great basic-but-not-boring top so will always come in useful. And on that note, I'll leave you with a twirling shot, because surely all blog posts involving circle skirts have to feature twirling somewhere, don't they?!