Showing posts with label Blouse. Show all posts

Wednesday, 2 September 2015

Butterick 6217 Blouse & Veronika Skirt

Today you get the second (and final) installment of blog-photos-that-I-took-on-holiday, which sees me twirling around the picturesque surroundings of Alnwick Garden showing off a Butterick 6217 blouse and a denim Veronika skirt.


I got some funny looks when we were taking these photos - you could see people wondering why we were focussing on me instead of all the pretty plants and landscaping - but I've got to the point now where I don't mind as long as the onlookers aren't the kind of people who are going to start shouting comments at me. The average garden visitor tends towards the more decorous end of the scale so I was safe here!

Anyway, back to the sewing itself...


Butterick 6217 is one of the Patterns by Gertie line, and it instantly appealed to me when it was released because I liked the shape of the neckline. I then realised it needs very little fabric, especially if you make view C as I did here, so it seemed like it would be a good way to use up some of the larger remnants I have from other projects. Regular readers may recognise the fabric I've used here as the leftovers from the Vintage Shirt Dress that I made earlier this year.

I made this a couple of weeks ago now, so some of the details of sewing it are a little hazy in my mind, but I know it was a quick project and I didn't make any notes in the notebook I keep by my machine so I assume it was all relatively straightforward and pain-free!


I really like the shape of the blouse, although it's worth noting that to get the fit shown on the pattern envelope you'd definitely need to size down. My measurements put me ever-so-slightly above a 16, but when I made a toile of the 16 it was bordering on tent-like. I sized down to a 14, which fits nicely but I still feel like my version has more ease than shown on the envelope.

The photo above is meant to show the nice shape created by the darts in the back before I tucked the blouse in for the day, but in reality I just think it makes my back look odd!


Now, on to the skirt! This is my second version of Megan Nielsen's free Veronika pattern (version 1 here), and I can tell already that this one is going to get worn a LOT! I don't wear trousers really so denim skirts do the job for me that jeans do for most people, but this one will be a particular favourite because it has the practical goes-with-everything side, but at the same time is also beautifully twirly and fun!

The fabric is a lightweight denim that I got a couple of months ago from The Splendid Stitch. It doesn't seem to be in stock anymore, which is a shame because it's the perfect denim for this kind of skirt. I'd definitely recommend ordering from The Splendid Stitch though - Amy has put together a gorgeous range of fabrics, and dispatched both my samples and fabric order really quickly.


I don't think you'd want to make a circle skirt in any old denim. I know I've worked with some which would be far too stiff and heavy, but this one really is a different kettle of fish. I did cut the inner waistband and pocket linings from a thinner cotton just to keep down bulk, but for the rest the denim has great drape and the finished skirt is gloriously swishy as I walk in it. The only problem is it makes me want to twirl about excessively, which is probably annoying to those around me!

For this version of Veronika, I stuck with the narrow waistband but also added on the scalloped pockets too - they're lovely deep pockets and have proven quite useful when trying to hold down the skirt on breezy days! I also added my own simple belt loops on the waistband, because I knew I'd want to wear belts quite a bit with this skirt.


In case it's not already obvious, I'm really pleased with how these both turned out! I'll definitely make more versions of B6217 as I identify suitable candidates in my stash, and I know this version of the Veronika skirt will become a bit of a wardrobe workhorse. In fact Veronika may fast be becoming a TNT and at some point in the not-too-distant future I'd really like to try a knit version. Have you discovered any TNTs recently?

Monday, 23 March 2015

Sewaholic Oakridge Blouse

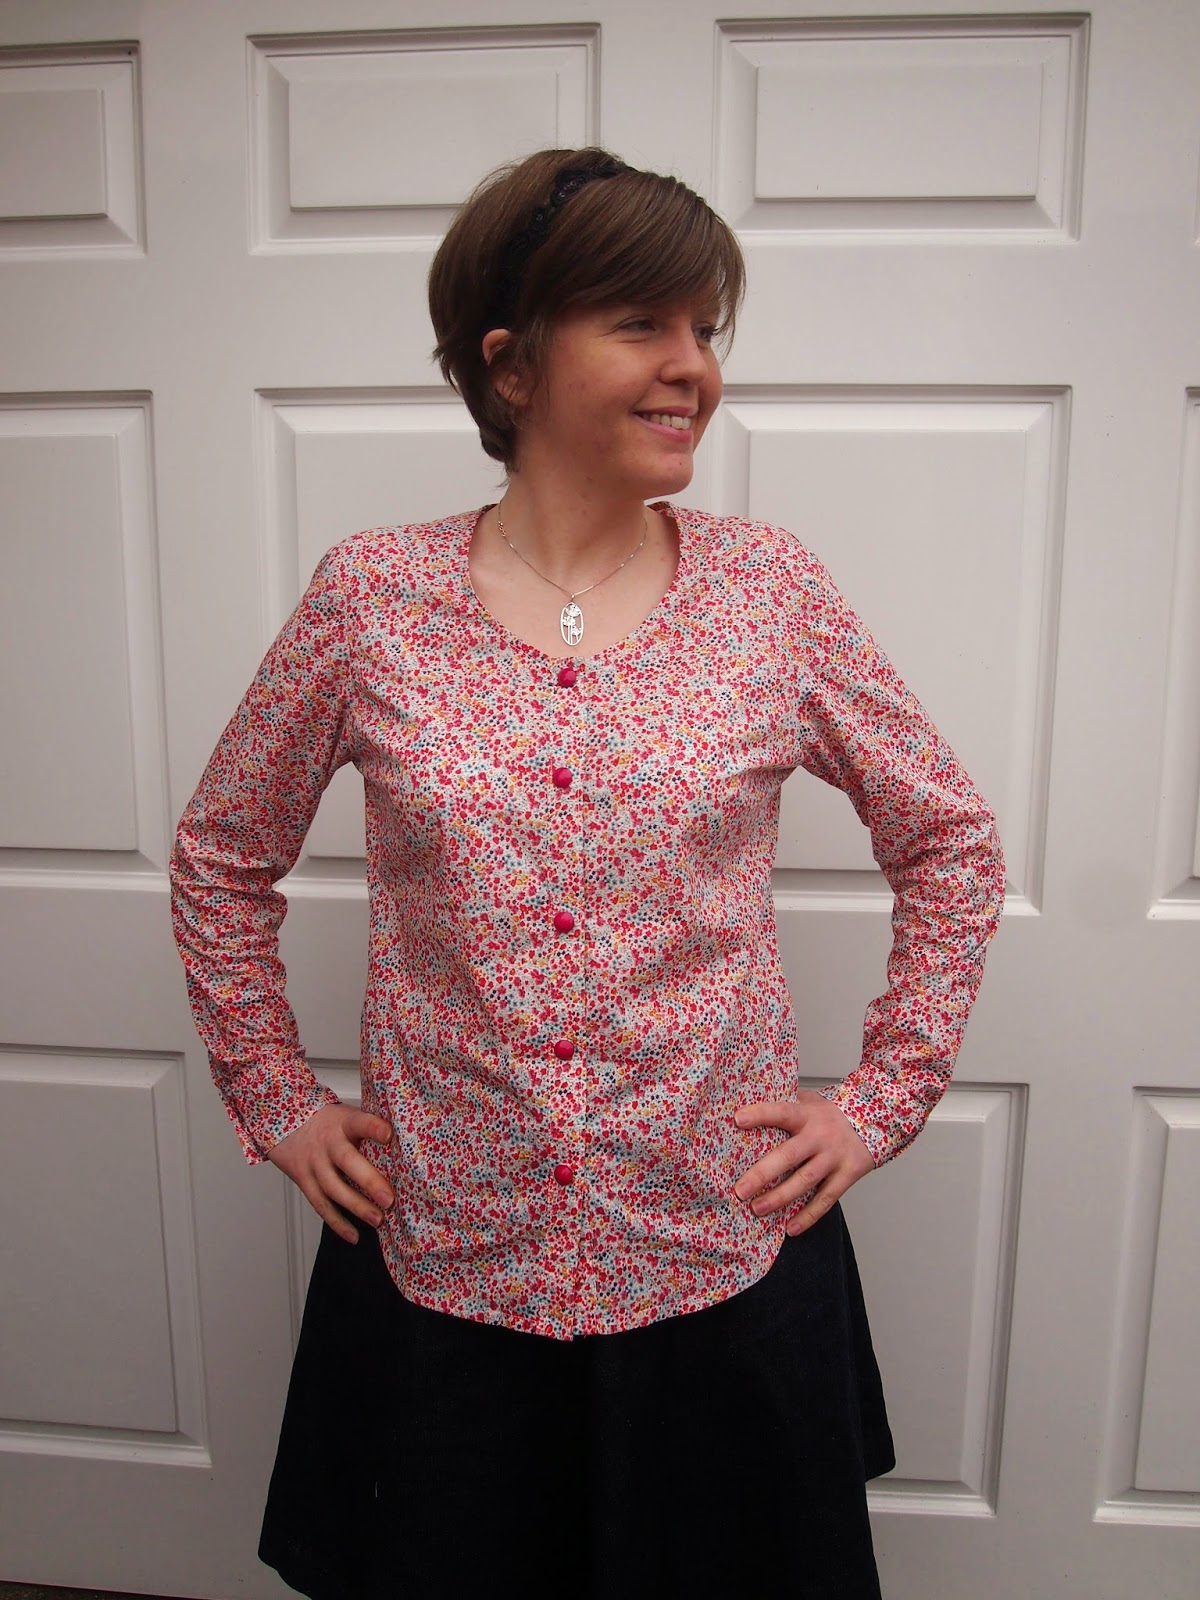
Look! I made something that's not blue! Yes, there's some blue in there, but I think we can agree that it's not the dominant colour. And all those lovely colours combine with Sewaholic's Oakridge pattern to make pretty much the perfect blouse for spring.


This is view C of the Oakridge. Views A and B have a bow neck and while in principle I'd like to try them, because generally I'm all for a good bow, for some reason bow neck blouses just never feel quite right on me. I loved the simple collarless version of the Oakridge as soon as it was released though so I knew I'd be sewing one before too long.

The pattern is really well designed and the instructions are clear and easy to follow so I enjoyed sewing my Oakridge. As with my Granville shirt, the only thing I found a little bit fiddly was the sleeve placket. Thankfully one of my lovely friends got me The Dressmaking Technique Bible for my birthday at the end of last year, and I consulted that to make sure that what I'd understood from the instructions was actually what I was meant to be doing - thankfully it was so it was all good.

I used French seams throughout so my blouse is nice and neat inside. I do like a good French seam - they do take a bit longer to do than normal seams and zigzag stitching (I don't have an overlocker so that's my usual method of seam finishing) but I think the extra effort does definitely pay off.

(I'll probably always wear the blouse tucked into skirts, but thought I'd leave it untucked here to show the full length)
My measurements all fall right in the middle of a 12 and a 14 for Sewaholic patterns. My Granville is a 14 and I like how that fits, but for my Oakridge I thought I could get away with a slightly smaller size so I made a 12. Also on the basis of my experience with the Granville, I shortened the sleeves on my Oakridge by an inch. I made a toile to check that I was right about the size and sleeve length and everything was fine so I went ahead, and I like how the finished blouse fits.


The fabric is 'Phoebe' Liberty lawn (funnily enough Lauren of GBSB and Guthrie & Ghani fame made an Oakridge in this exact same fabric!), which I got from Kat's Fabrics on ebay. I've seen quite a few bloggers recently who've bought Liberty lawn there - and with good reason! The fabric is factory seconds so is much cheaper, but just as lovely, as 'proper' Liberty. The fabric is listed as having no visible fault but unfortunately mine did have one area where the print was a bit blurry which you can see here...


Obviously this is a very small fault, it was very easy to cut round, and to be honest lots of people probably wouldn't notice it but it was one of those things where once I'd seen it, I knew it would bother me if I didn't make sure I avoided it. It definitely won't stop me from buying Liberty lawn from the same seller again, but I just thought I'd mention that it might be worth having a good look at your fabric if you buy from there to check that there are no faults before you start cutting.


The buttons I chose were some lovely bright pink ones that I found in a local wool shop. I was originally planning to find buttons to pick out the bluey-green of the flower stems in the print, but that didn't work out quite as I planned, and when I saw these buttons in the shop they just seemed to make the print sing and enhance its natural prettiness. Decision made!


So there we go, a pretty successful first version of the Oakridge blouse! It's already been worn a few times and has been perfect for the sunnier spring days we've been having recently. What are you sewing for spring?

Tuesday, 23 September 2014

Bellini & bunnies

If I really like a finished garment, it's fairly common for me to then dream up an infinite number of different versions in my head that I could possibly create. Most of these don't happen because I don't have endless amounts of time on my hands, or enough money to be able to afford all the fabric that I'd need, but sometimes the perfect fabric is just sitting there already patiently waiting to be used, and that's just what happened for this project, my second version of the Capital Chic Bellini blouse!


I quite like making second (or third, or forth....) versions of a pattern. I know some people might prefer to always use different patterns so you're potentially using new skills and not just doing the same thing, but the way I see it, a second version of a pattern means that you don't have to worry about muslins and possible fitting issues, and you can just get on with the fun of sewing - always a good thing as far as I'm concerned. Plus you can be fairly confident that you're going to like the end result if you liked your first one. I also figure it's fine to have multiple versions of the same pattern as long as they're all a little bit different and you're going to wear all of them. And that's definitely true in this case!


In some ways, there are similarities between my two Bellinis; they're both made of fabric with a small-scale print on a blue background (albeit different shades of blue), but they feel very different. I made my first Bellini using a nice crisp cotton, whereas the fabric for this version is viscose, which has much more drape to it so feels very different to wear. Plus the prints are different - this one may look like slightly odd blobs from a distance, but look at it up close....


....and you see it's actually BUNNIES! Yes, I have a whole herd (is that the right collective noun?!) of rabbits jumping about all over my blouse. It's probably meant for children, but I like it so it's all good. I bought it from Fabric Rehab, at the same time as I bought the fabric for my Cambie and first Lilou - that was a good fabric haul!

I used the same buttons as I did for my first Bellini, but this time in pink to match the pink bunnies. I realised that I actually also used the same buttons in blue on my Sureau dress last autumn! Obviously I like little flower buttons, and the people that make them have a strange ability to produce them in exactly the right colours to match my fabrics.


In terms of the pattern itself, I stand by everything I said in my post about my first Bellini - the instructions are nice and clear and I really like the finish of the blouse, it's all so neat and tidy and professional-looking. This one was slightly less of a joy to sew than my first one, but that's entirely down to the viscose not behaving as nicely as the cotton did. It didn't slip about too much though and was totally manageable, just not quite as cooperative as cotton!

I possibly like this one slightly less than my first one too. That's not to say that I don't like it, I definitely do, but the way that the viscose hangs means that I can sometimes get a bit of gaping between the buttons if I'm not standing quite right, which doesn't happen with my cotton one. It's a minor problem though, and I should probably just use it as an incentive to have better posture - it definitely won't stop me wearing the blouse anyway.


So there we go, that's my second Bellini for you! I'd like to try another version with the scalloped collar, or possibly some collar embellishments at some point, but it might have to wait for a while because I've got so many other ideas buzzing round my head at the moment! Do you like making multiple versions of the same pattern too?

Wednesday, 20 August 2014

Capital Chic Bellini Blouse

I love the excitement of seeing new patterns released and imagining all the possible garments that could be created from them, so a whole new pattern company popping up all over my twitter feed and blog reader not so long ago was a particular treat! You've all heard of Capital Chic by now I'm sure (if not, check out the lovely patterns!), well here's my version of the Bellini blouse.


In some ways, I'm not the target audience of Capital Chic - the patterns are designed for work and cocktail wear, whereas I work from home and unfortunately have very few occasions that call for a cocktail dress (I should probably do something about that.....), and my slightly vintage-esque tastes are fairly well catered for by many of the other pattern companies out there. However, I love the idea of patterns that focus on slightly more advanced techniques, and the designs, while not all necessarily being completely my current style, are gorgeous and a bit different. Plus, the beauty of sewing is surely that you can put your own spin on patterns to make them suit your own tastes and lifestyle.


The Bellini is a loose-fitting blouse with cap sleeves, so could work really well for lots of different styles. It also has two different collar options (the cutaway one that I used here and a cute scalloped version), and Sally suggests embellishing the collar, which I'd definitely like to try at some point.

It's designed to be worn fully buttoned up, which I like in theory and on other people, but it suits me a lot better with the top button open.


I really enjoyed sewing the blouse. It uses French seams throughout, the armholes are bias-bound and there's a machine rolled hem. I'd never done a machine rolled hem before, but the instructions and diagrams were nice and clear, and easy to follow (as they were throughout the pattern) so it was no trouble. I think the whole finish of the blouse feels quite professional - my Mum was definitely impressed with how good it looked when I showed her (I'm never quite sure whether to be flattered when that happens or slightly insulted that people didn't think my skills were up to much before!).


Generally, I'm not a huge fan of PDF patterns, and if there's an option for a paper pattern version then I'll always pay more to go for that, but this PDF was the best one I've used so far. It was possibly helped slightly by the fact that being a top, there were way fewer pages than for a dress, but all the pages fit together perfectly, and there was no wasted space on the pages.

I cut a straight size 16 and didn't need to make any adjustments. I usually always make a toile of a new pattern, but as the Bellini is loose fitting I decided to live on the wild side this time, and just did some quick tissue fitting to check that everything looked OK.


Part of the reason why I did this was because I was using some material from my stash that, while really pretty, has definitely already been more than worth what I paid for it. I got somewhere in the region of 5m of it on ebay for less than £5 years ago, and it has been used for a huge variety of accessories and things for me and for presents, so I wouldn't have been heartbroken if this hadn't turned out completely right. Luckily for me, that wasn't a problem and the blouse fits me nicely.

I wanted to pick out the red in the print so used some cute little flower buttons from a local shop. Since I've finished the blouse I've also decided that I now need a red skirt to wear with it too, so expect to see one popping up here at some point soon!


There'll probably be another Bellini at some point as well - I got some pretty viscose a little while ago that I think would work nicely for version 2. Has anyone else tried a Capital Chic pattern yet? If not, I'd definitely recommended them based on the Bellini, and I quite fancy trying out the White Russian at some point too!

Thursday, 26 June 2014

Sewaholic Belcarra Blouse: Take 2

I mentioned in my post about my first Sewaholic Belcarra blouse that my second blouse was already cut out, and as it's a nice, easy pattern to sew up, it didn't take long for it to get from being cut out to a finished blouse and slotting perfectly into my summer wardrobe. Here it is...


This time I didn't have to worry about reusing oddly shaped bits of material, so I stuck to the pattern straight out of the envelope. Like last time, I cut a straight size 12, and I'm happy with the fit. The neckline seems to have turned out a little wider than in my first version (maybe I was a bit too enthusiastic in my cutting or something!), and I do sometimes end up with a bra strap peeping out at the shoulder when I'm wearing it, which I don't with my first version, but it's not much of a problem.

I chose to sew view B as I thought that being as I was using a plain fabric the cute tucks along the shoulders would stand out well and add a bit of interest, and avoid the risk of a plain top being a boring. 


The tucks were the only bit of the construction that I hadn't already tested out on my first version but, like the rest of the blouse, they're simple to sew - you just need to take a bit of time and care to make sure that they're all nice and even. 


The fabric that I used this time is a pretty pink cotton lawn from Croft Mill. I was a little bit worried when it arrived that it would be too sheer and that it would need underlining, or that I'd need to wear an extra layer under it, but it's actually turned out just fine for this top. I think you'd need a lining of some kind for a more fitted top or a skirt though.


There are a whole load of different materials that I've got my eye on to buy at the moment, but I was good with this one and stuck to a plain material for a change instead of being seduced by all the fun prints that I usually go for. Like a lot of the online sewing community, I've realised that while all the pretty patterned materials are great (and don't worry, I'll definitely still be using them), I do also need some plain separates here and there to make sure that I'm not wearing a complete mess of different prints. This fits that bill well, as it goes nicely with a couple of my skirts - and as an added bonus is a perfect match for the flowers on the necklace I'm wearing here which I treated myself to recently!


I'm keeping my eye out for a nice fabric to make a slightly smarter Belcarra with as I think it's the kind of style that could easily be dressed up with nice accessories if you made it in the right fabric, but having been sensible with this project, I might allow myself to make another pretty patterned dress or two now! What's everyone else working on this week?

Tuesday, 10 June 2014

Sewaholic Belcarra - refashioning a dress into a blouse

Has everyone seen the new Sewaholic Belcarra blouse? I was instantly drawn to the pattern when it was released; not only is it meant to go with the Gabriola skirt, which I love, but it's also a very similar shape to an old favourite RTW top of mine. I snapped it up as soon as it was released, and here's my first version....


This is essentially view A of the blouse, with the one difference that you may have noticed that I split the front and back sections in two to use two different materials. This was entirely down to an old dress that I'd bought second hand and then never worn, and which I'd decided needed to be refashioned into something else. I stupidly forgot to take a photo of it before I hacked it to pieces, but it was a pretty short, strapless, white cotton eyelet lace empire line dress - there aren't many days a year when it's hot enough here in the UK to wear something like that and to be honest, it didn't do much for me! I think I only bought it because the material was so pretty....


This is a close-up of the material - something like that really shouldn't be left unloved in a wardrobe should it? Then the Belcarra came along, and I thought it would be a perfect match given that the pattern doesn't have any darts or anything to break up the material. The only problem? It turned out the skirt of the dress was a good few inches shorter than the Belcarra pattern pieces (this possibly gives you an idea of quite how short the dress was!). I considered shortening the Belcarra, but when I measured my RTW top it was exactly the same length as the finished measurements for the Belcarra, and I knew I didn't want it shorter. By now though, I had my heart set on using this material, so I came up with the idea of making the arms and top of the front/back pieces from some plain white cotton and using the eyelet material for the rest of the front and back. Problem solved!


I made a quick muslin and measured where I wanted the join between the two materials to be (in my case 17 inches up from the bottom), marked a line across the front and back sections at that point (the red line on the front section shown on the right above), then used that to cut two new pieces for both the front and back with an extra 5/8" added to each piece for the seam allowance - hopefully you can see where my two new front pieces cross over on the photo above.

Once I'd cut out all my pieces, I underlined the eyelet material using the lining of the original dress (a very lightweight cotton), basting the two materials together within the seam allowance and then treating them as one piece of material. I then joined the top and bottom sections of the front together, and did the same for the back, and from then on I followed the original instructions for view A (the plainest version; view B has tucks on the sleeves, and view C has different cuffs and a patch pocket).


Don't worry, I don't make a habit of hanging my clothes in random trees (especially not after the odd looks I got from a passerby when I was taking this photo! The things we do in the name of blogging!), but it seemed like a good way of making the pattern stand out more - getting detail to show up properly in the photos when I was wearing the top wasn't easy!


So, onto the Belcarra itself! This is a really great, simple pattern and doesn't eat up too much fabric. As I mentioned above, it doesn't have any darts which means it's a super speedy project if you've got a bit of experience - I had mine finished in an evening, including the time messing about with cutting my different sections. Obviously it would also be great for beginners, or for trying out new materials. I haven't sewed using silk yet so maybe I'll have to try that and make myself a more fancy Belcarra.

The fact that there's no darts does mean that you need a light weight material with a nice drape to avoid it looking too boxy. My white cotton I used for the sleeves/yoke is leaning more towards medium weight, but the eyelet is still pretty light weight even when underlined so I think I just about get away with it!


I cut a straight size 12 and didn't need to make any alterations to the fit - after all I am definitely pear-shaped so pretty much Sewaholic's target audience! It's quite a relaxed style though, so I think in general it's not going to cause as many fitting issues as more structured or closely fitting garments.

It's really comfy and easy to wear, but I think it looks a bit more dressed up and put together than an ordinary t-shirt. It also looks great either tucked into a skirt or untucked with trousers - I'm wearing mine here with my denim Hollyburn skirt and the only pair of trousers I own that can be worn outside of the house (I pretty much don't wear trousers, but it's nice to know I now have a new top for the odd occasions when I do!).

All in all, another successful creation as far as I'm concerned. Like the other Sewaholic patterns I've used, this came together really easily and the instructions were great. Version 2 is already cut out and waiting to be sewn up, and I'll definitely wear this top much more that I would have worn it as a dress! What does everyone else think of the Belcarra? And has anyone else had any refashioning successes lately?

Sunday, 8 September 2013

Colette Laurel Top

Here's my latest finished project - a Colette Laurel top.


Having made two skirts already, I thought it was time I tried to make something for my top half. I think part of me had been putting this off because I was a bit scared about the fact that a top involves much more need for fitting than a twirly skirt, and when I was on my dressmaking course, this seemed to lead to quite a lot of problems for my fellow students. With this in mind, I decided to abandon my usual need to have things finished quickly and make a muslin out of an old sheet to check everything was OK. I cut a 12 and (luckily!) it all seemed to fit fine without any alterations so I set to work on the "proper" version of the top.


Sadly I think the muslin may have fit me a little better than my finished version but I think it fits fine still so it's all good! The instructions were really good for a beginner like me, so it was no trouble to sew it all together and I got through all the steps reasonably quickly. 


The fabric is a cute blue and white floral cotton that I got from Fabric Godmother a while ago, it was originally for another project but I think it works well for this top - and I'm happy with how the white bias binding works with the floral print, especially the pretty lace-edged binding I used on the sleeves.


Overall, another project I'm happy with! I wasn't 100% convinced when I first finished it so I put it on and wore it straightaway in the hope that that would help me make up my mind (otherwise it would have been likely to hang unworn in my wardrobe for months because I'd never have been sure about it!) and I'm happy to say that it worked - it's a definite thumbs up now, and I quite fancy making one of the dress versions of the Laurel pattern soon.

And now I'll finish with a plea for help - has anyone got any tips for taking photos of my dressmaking projects? Either in terms of the technical photography stuff or how not to feel (and therefore look) embarrassed while you're taking the photos...


I'm quite keen on photography but don't generally like pointing the camera at myself so any pearls of wisdom would be very welcome!