Showing posts with label Jennifer Lauren. Show all posts

Wednesday, 6 October 2021

Jennifer Lauren Esme Top

As I mentioned in my post about my Itch to Stich Glenelly top, I always like t-shirt patterns with a bit of a twist. It was therefore no surprise that I treated myself to the Jennifer Lauren Esme top pattern as soon as it was released!

The Esme top has gentle batwing sleeves with cuffed long or short sleeve options, and either a shawl collar or V-neckline. It also has regular and long-line bodice options. The pattern has multiple cup sizes (A to D in the original pattern, and C to F in the curve version), and the two size ranges cover hip measurements from 35.25" to 62.75".

I really like the shawl collar option and think that will be really nice for a long-sleeved top for winter, but I decided to try the V-neckline first.

The top above is the first version of the Esme that I made. It was actually intended to be for me, but when I tried it on it just didn't feel quite right. It was a little clingy around the waist, and although I really like the fabric itself, the colours didn't completely suit me when I was wearing it for some reason. I think if I'd only had one of those two issues, I'd probably have got over it fairly quickly and worn the top, but with the combination of the two I just wasn't feeling it.

Thankfully all was not lost and my sister happily agreed to adopt the top instead. She's slimmer than me so it's a little bigger on her than the pattern intends, but I think we can all agree that it's perfectly wearable and it's better for her to have it and enjoy it rather than it sitting in my drawer while I convince myself to like it!

Although my first version of the Esme didn't quite work out, I liked the overall shape so I decided to make another version of my own. For this one I blended out from a 14 at the shoulders/bust to a 16 at the hips. In contrast, my first version was a straight size 14. That's pretty much what's recommended for my measurements (my waist measurement is just fractionally above the 14, but is much closer to the 14 than the 16) and it did fit me, but it was just slightly clingy for my liking. Blending out to a 16 gives me that little bit of extra room to make me more comfortable.

Given that I've made two versions of the Esme now, I'm happy to report that it's a really nice pattern to sew! The instructions are very thorough. I'd say the only slightly tricky bit of the pattern is making sure that you get a nice neat finish on the V-neckline, but the steps are set out very clearly and I found that they made it a lot easier than I was expecting it to be. 

The fabric that I used for my top is a lovely cotton jersey from Like Sew Amazing - I really like the colours and the combination of stripes and florals!

The fabric for what is now my sister's top was from the Sew Hayley Jane outlet shop last year. It's a viscose jersey and so is a bit lighter weight - I think it still works OK for this pattern, but on balance the cotton jersey was better when sewing the V-neckline in particular.

I really like the Esme pattern, and I'm glad that I persevered and got the second version that works for me. In a funny way I'm also glad that the first one didn't work out quite right for me because I think it looks really nice on my sister. I'd happily recommend the pattern if you're in the market for an interesting jersey top, and I'll definitely be making a shawl collar version at some point soon!

Thursday, 29 April 2021

Jennifer Lauren Aisling Blouse

 The Aisling blouse from Jennifer Lauren is a pattern that I've been meaning to sew pretty much since it was released, and definitely since I made and loved its sister pattern - the Asteria dress (my Asteria is here). I was given the final push to make it when the pattern was included with issue 80 of Simply Sewing magazine.

Aisling is a square-necked blouse with a slight A-line shape and blouson style sleeves with an elasticated cuff. It has options of a button front and collar, or you can make a simple cut-on-the-fold blouse as I did.

The pattern has A-D cup sizes, and hip sizes from 35"-53". I made a 14 with the B cup option, as is recommended for my measurements. I know from previous experience that Jennifer Lauren's patterns tend to fit me fairly well, and the Aisling is no exception - I didn't need to make any adjustments. 

To me, the fit seems good - it sits nicely at the shoulders and bust and then flares outwards slightly to be roomy enough to make it really comfortable to wear without feeling at all baggy. 

The instructions are clear and with enough detail to make sewing the blouse a breeze. Actually, in the version that I made there's really nothing complicated about this pattern so it came together fairly quickly. Obviously it would take a bit longer if you were making the buttoned version or using the collar, but even then I'm sure the instructions would mean that you wouldn't have any trouble with it.

For my fabric, I chose a cotton lawn that I got from Emporia Fabric. It has a really pretty floral print and, possibly more importantly, it feels just as good as it looks - it's so soft to wear, and perfect for this pattern I think.

I also added a little bit of hidden positivity in the form of a 'Today is a good day' label from This Is For Makers. I was fairly late to the party when it comes to adding labels to handmade garments, but now I really like sewing one to my projects as a little finishing touch to make them extra special.

I think that my Aisling blouse has turned out really nicely - the square neckline is lovely, and I particularly like the elasticated blouson sleeves. Add in a pretty fabric and you can't go far wrong really, can you?

Wednesday, 29 April 2020

Jennifer Lauren Asteria Dress

Recently the urge to make myself a pretty dress had become a bit of an itch that I needed to scratch. Dresses are what originally kick-started my sewing journey and, however much I've enjoyed my recent experimental projects, there's nothing like a new favourite dress to put a smile on my face. So when Jennifer Lauren released the Asteria dress it was just begging for me to make it.


The Asteria dress pattern was always going to appeal to me - it has a hint of vintage style but will also easily fit into my daily life.

The Asteria is a short-sleeved dress with a lovely square neckline. It's semi-fitted from the bust down, shaped with ties at the natural waist. There's an optional collar, as well as the possibility to make a button down bodice, or one cut on the fold (as I did). The full skirt is shaped with box pleats and has generously-sized side seam pockets. The pattern also has separate bodice pieces for cup sizes A to D.


I think one of the nice things about the Asteria is that it has no fastenings so it's a fairly simple project to sew. Often the thing that new sewists fear is inserting zips or making buttonholes, and this pattern gives you the ability to make a fairly impressive looking dress whilst not having to tackle those processes that can initially seem a bit "scary" (although, there's really nothing to be afraid of about them!).


The fact that the Asteria has more ease than normal through the waist and is shaped with ties also means that it's more comfy than dresses of this style can sometimes be. I love wearing my other waisted dresses, but they can occasionally feel a bit tight on particularly hot days (or after a big meal!), but with the Asteria you could have a very similar look but just loosen off the waist ties a bit if you wanted to.


As with other Jennifer Lauren patterns I've made in the past, the instructions for the Asteria are very thorough and clear throughout. It includes extra little tips to make the process easier, such as advising you to press the sleeve hem up and then unfold it again before sewing the sleeve seam so you have lines there ready for when you get to the hemming. I tend to do this anyway (it's definitely easier to press a hem on a flat pattern piece than on a tube of fabric), but I haven't seen many patterns recommend this step.


In terms of sizing, I made a 14 and used the A cup bodice. My measurements are currently B 38", W 32", H 42" and my full bust/under bust difference puts me at the top of the A cup range. The 14 A cup is technically meant to be for a slightly smaller bust measurement than mine, but from the finished garment measurements I was pretty sure that would be the best option for me. I made a bodice toile to check and thankfully it looked pretty good! I just needed to lengthen the bodice by 1", and I also lengthened the skirt by 2" (I'm about 5'9").


The fabric that I used is a textured cotton from Seasalt a couple of years ago. It's a really gorgeous quality and I was lucky enough to find a five metre piece of it in one of their outlet shops for a particularly bargainous price (I can't remember exactly what it was now, but I think it was something around about £25). Obviously I didn't need five metres for this dress, so my mum is now looking forward to me making something for her with the leftovers!


All in all, I love my Asteria dress! It was a real joy to sew, and is a lovely dress to wear. It's possibly slightly overdress for mooching about my flat in lockdown, but it's nice to feel fancy every now and then isn't it?! It probably won't surprise you to know that I'm keeping my eye out for some bright and colourful fabric to make another version. Anyone got any suggestions to tempt me?!

Thursday, 25 July 2019

Jennifer Lauren Raine Dress

Usually I buy fabric with a specific project in mind, but sometimes I spy a print that's so pretty that it demands to be bought before plans have been formulated. The cotton that I've used for today's project definitely falls into the latter category.


I'd seen various online shops selling it last summer and was tempted but managed to resist it. That all changed when I saw it in the flesh in the John Lewis sale - I think the colours just come across better in real life than they do on screen. Although to be fair, the fact that it was 50% off may have also helped because I do love a bargain! The only downside was that it was January so definitely not seasonally appropriate to sew immediately.

Two and a half metres came home with me and were squirreled away in my stash to await warmer weather. Over the last couple of months I'd been pondering what to make with it whenever I saw it sitting on the shelf.


After I made my Eden jumpsuit, I had decided that this would make a nice second version of that pattern but when I went to cut it out I had this horrible vision of ending up with flowers or leaves bursting out at unfortunate places around the crotch seam! Once I'd had that thought, I couldn't get it out of my mind and it seemed like it would be difficult to avoid due to the spacing of the flowers. It's the sort of thing that most people wouldn't notice but I definitely would and it would have annoyed me.


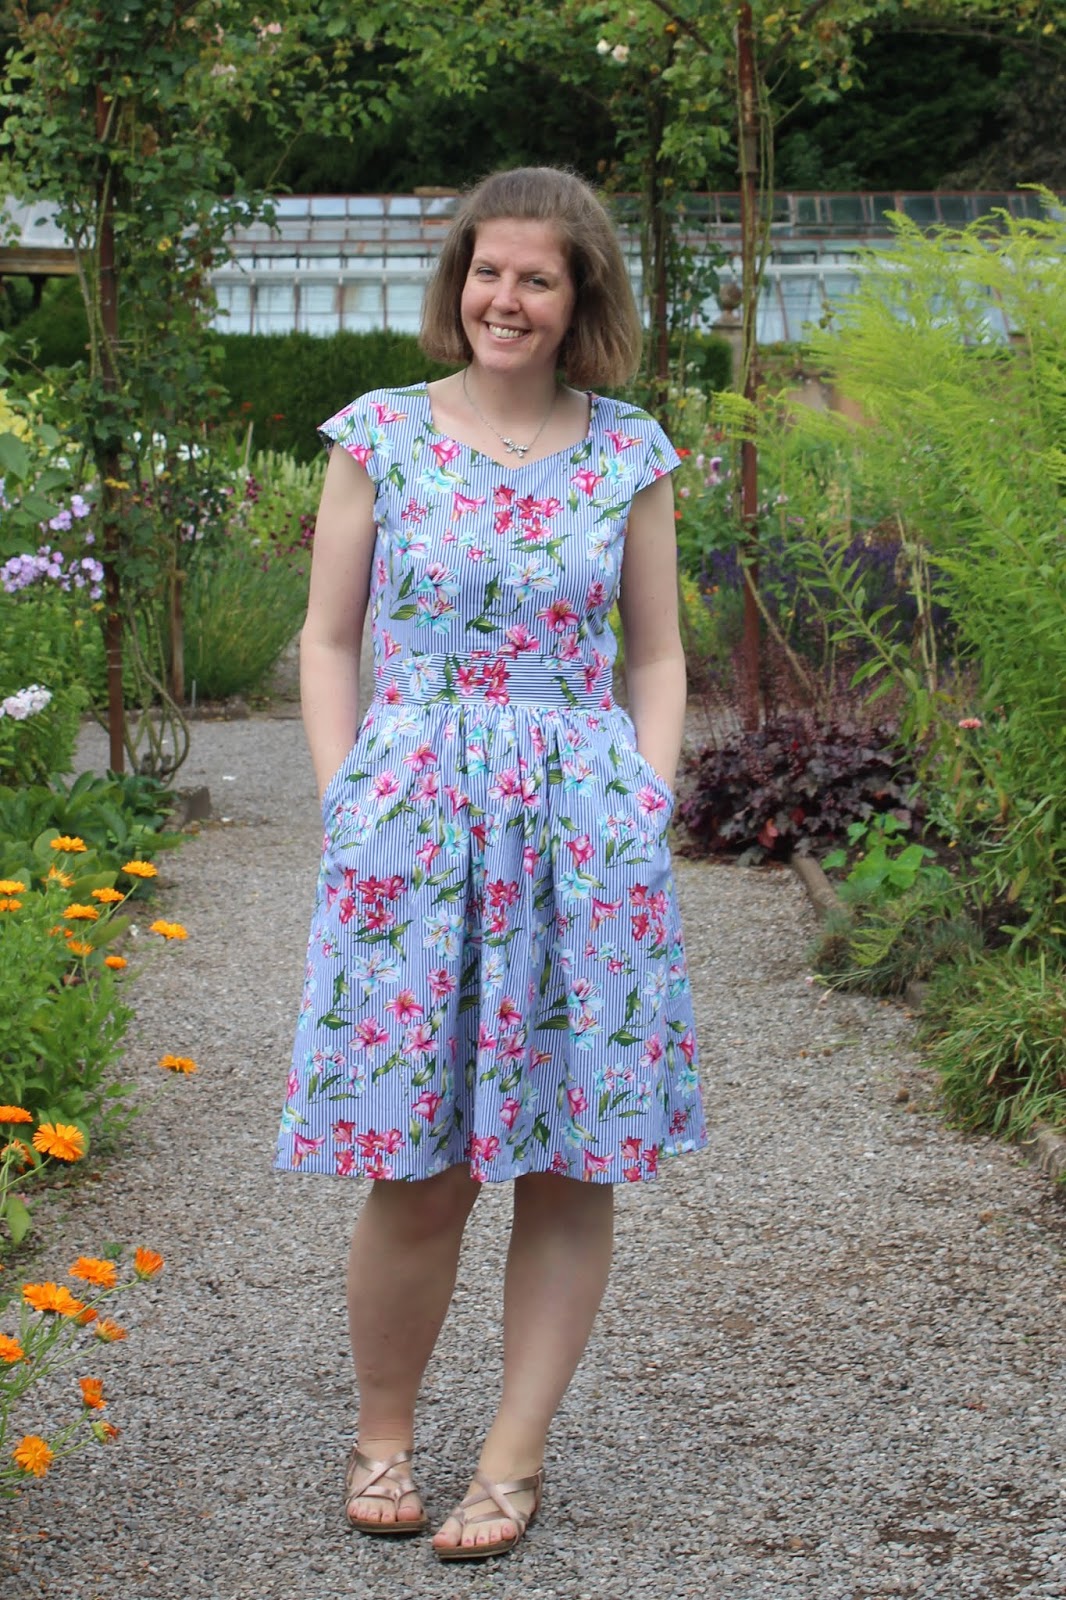
So the jumpsuit plan was scrapped, and I went back to the drawing board. Then when I was wearing the Jennifer Lauren Raine dress that I made last year it suddenly struck me that this would be the perfect pattern for my beautiful floral stripes. The simple darted bodice with grown on sleeves and lovely full skirt are perfect for showing off a print, and the waistband would give me the opportunity to play with the stripe direction. Changing the stripes around also really shows off the nicely shaped waistband, which is good because I think it got a bit lost in the print that I used for my first Raine dress.


There's not a lot new to say about the construction of this dress that I didn't say when I talked about my first Raine dress. The only thing that I did differently this time was to lengthen the skirt a bit more - I added an extra 2 inches onto the length for the biggest size.

The Raine dress is a satisfying pattern to sew - there are some slightly trickier construction steps in comparison with what you'd usually expect from a simple looking unlined dress, but the instructions are very clear so as long as you follow them you should be fine. They give a nice finish on the inside as well, which is always pleasing.


All in all, I really enjoyed sewing this dress, it's lovely to wear and I'm glad that I finally found the right use for this cotton. It's worth taking the time to be sure that you make the perfect pattern and fabric pairing, isn't it?

Tuesday, 13 November 2018

Jennifer Lauren Pippi Pinafore

What's your opinion of pinafore/dunagree dresses? Personally, I love them! I wear both my denim Lilou dress (still going strong four years after I made it!) and last year's Freja dress loads, and for a long time now I've been meaning to add another pinafore or two to my collection. I was very tempted to make another Freja dress, but then decided that it would be good to try something a bit different so opted for a Jennifer Lauren Pippi pinafore instead.


The Pippi pinafore has a fitted bib, deep patch pockets and a side button fastening. The skirt has pleats in the front and darts in the back to give it a little bit of shaping. The straps cross over at the back, and the instructions include directions for using either buttons or traditional metal overall hardware for attaching them to the bib. 


The fabric I chose for my Pippi pinafore is a lovely magenta stretch denim from Sew Me Sunshine. As the fabric description says, it really is a perfect weight for a dunagree/pinafore dress and the small amount of spandex in the fabric makes it super comfortable to wear.

You're actually getting a double dose of Jennifer Lauren patterns and Sew Me Sunshine fabrics in this post, because the top I'm wearing under the Pippi is a Gable top that I made earlier this year using some Cotton & Steel jersey from Sew Me Sunshine (sadly no longer in stock, but it is available in a different colourway).


I really enjoyed sewing the Pippi pinafore. As with the other patterns of Jen's that I've sewn (my Raine dress, my Gable tops and dresses, Bronte top, and Enid sweaters), the instructions were really clear and detailed. I particularly liked the way that the skirt notches are labelled with letters that are referenced in the instructions so that you know exactly what notches you're meant to be using for each step. 


One thing to note so you don't make the same silly mistake I did - make sure you cut the button band and buttonhole facing the right way up! I'm a fan of pattern piece tetris and often flip pattern pieces over to cut them out if it means I can be more economical with my use of fabric, but you only cut out one of the button band/buttonhole facing so they do need to be cut the right way as indicated by the pattern piece. 


The Pippi pattern gives you a really nice finish on the pinafore. The lined bib and waistband give you neat insides (I used some lawn left over from my Susie blouse for the lining), and I really like the side button closure.

I chose to use buttons instead of hardware for securing the straps to the bib, mainly just because I like buttons better than hardware. While I was tempted to use some pretty buttons, I decided to be sensible and go for buttons that stood out whilst being neutral enough to allow me to wear the pinafore with as many tops as possible.


In terms of sizing, I made a size 14 and used the A cup bib (the pattern includes cup sizes A to D). That's the size recommended for my measurements, and it worked out nicely. The only adjustments I made were to lengthen both the bib and skirt by an inch, which is fairly standard for me. The finished pinafore has just enough ease to be comfortable whilst still being fitted enough to give it a bit of shape. 


All in all, I liked my finished Pippi pinafore as soon as I tried it on, and now that I've worn it properly I really love it. I'm already dreaming up more versions of the Pippi that I'd like to make in the future which is always a fairly good sign that a project has been a success, don't you think?

Tuesday, 7 August 2018

Jennifer Lauren Raine Dress

Sometimes a new pattern is serendipitously released just at the same time as I get my hands on some perfectly suited fabric. That's what happened for this project, when Jennifer Lauren introduced the Raine dress to the world just as Seasalt had a fabric sale and I picked up some pretty cotton voile (sadly no longer in stock).


The Raine dress is a 1940s inspired dress with a gently curved waistband, sweetheart or scooped neckline, slanted pockets, and a gathered or pleated skirt.

I particularly like the sweetheart neckline - it's a little more angular than sweetheart necklines often are, which I think makes it look slightly more contemporary whilst still retaining a vintage influence. I also like the fact that the curved waistband (which I'm hoping you can see more clearly in the photo below than in the photos of me wearing the dress where it's pretty much camouflaged!) makes it a bit different to other patterns I own, so I snapped it up pretty much as soon as I saw it.


Another nice feature of the Raine dress is that it comes with multiple bust cups (A to D), which should help to eliminate some fitting adjustments.

Having said that, the bust cups and general body measurements did make me a bit unsure about what size to pick - I'm firmly an A cup (or if anything, less than an A according to the measurements in the pattern!), but my actual bust measurement (38") put me between a size 14 and 16 for the A cup bodice measurements. My waist and hip measurements both put me in a 14, so I decided to go with the A cup bodice in a 14 and see what happened when I made a toile.


Thankfully, my toile fit fairly well so I think that was the right choice! I just needed a fraction more room around the bust, so I resewed the side seams with a 1cm seam allowance instead of 1.5cm. I also adjusted the shoulder seams by the same amount, because I felt like I needed a tiny bit more space in the sleeves/armhole.

I also did my standard bodice lengthening adjustment (this time by 2cm), and cut the skirt at the length for the biggest size, which effectively lengthened it by a couple of centimetres (for reference, I'm about 5ft 8"). If I make this again (and I'd definitely like to!), I'd probably lengthen the skirt just a tad more, but I'll happily wear the skirt this length in this version.


The Raine dress is rated as being for intermediate to advanced sewists, and I think that's probably fair. There are a couple of steps that are slightly trickier than an average unlined dress, such as the all-in-one facing and the side zip. The instructions are really clear and thorough though, so if you've got a couple of dressmaking projects under your belt and you feel like a challenge then just take it slowly and you should be OK.


I really like the finish on the inside of the dress - the all-in-one facing and a facing/lining inside the waistband mean that I'd say that it's the neatest looking non-lined bodice that I've ever made.


The instructions do also call for you to topstitch around the waistband and neckline, which I elected not to do mainly because I couldn't find quite the right shade of blue thread, and when I tried white topstitching it looked a bit too prominent for my liking.

I also deviated slightly from the instructions when it came to gathering the skirt. The instructions call for you to gather the whole skirt including the pockets, but my pockets completely refused to gather so I gave in and just gathered the front skirt in the middle between the pockets. It's a bit different, but I think it looks fine.


All in all, I'm really pleased with my Raine dress. It was a pleasure to sew, and it's lovely to wear. The vintage inspired silhouette is really pretty, and the cotton voile is nice and breezy to wear in this glorious weather. What more could you want from a summer dress?!

Tuesday, 16 January 2018

Winslow culottes & Gable top

How's 2018 going for you so far? It's not been too shabby for me, and I've got a couple of projects finished and ready to share with you today. I decided to kick off this year's sewing with a couple of tried and tested patterns to get things off to a guaranteed good start. So here are my latest versions of the Jennifer Lauren Gable top and the Helen's Closet Winslow culottes...


I've really enjoyed wearing Gable tops and dresses this autumn/winter, which in part was prompted by spending a week wearing them for OWOP at the end of last year, and I knew that another one would definitely fit in well to my wardrobe. This one is made using some lovely Cotton and Steel jersey that I bought from Sew Me Sunshine. It's on the pricey side for my fabric buying budget, but sometimes it's worth splashing out for something that you know you're going to love sewing and wearing. 

Gable top worn with my Freja dress and a Pink Coat Club Seamstress pin

I haven't made any changes since I sewed my first Gable top, so all the details in that blog post still apply (I've just noticed that I said in that post that I might slim down the sleeves - I haven't subsequently felt any need to do that!).


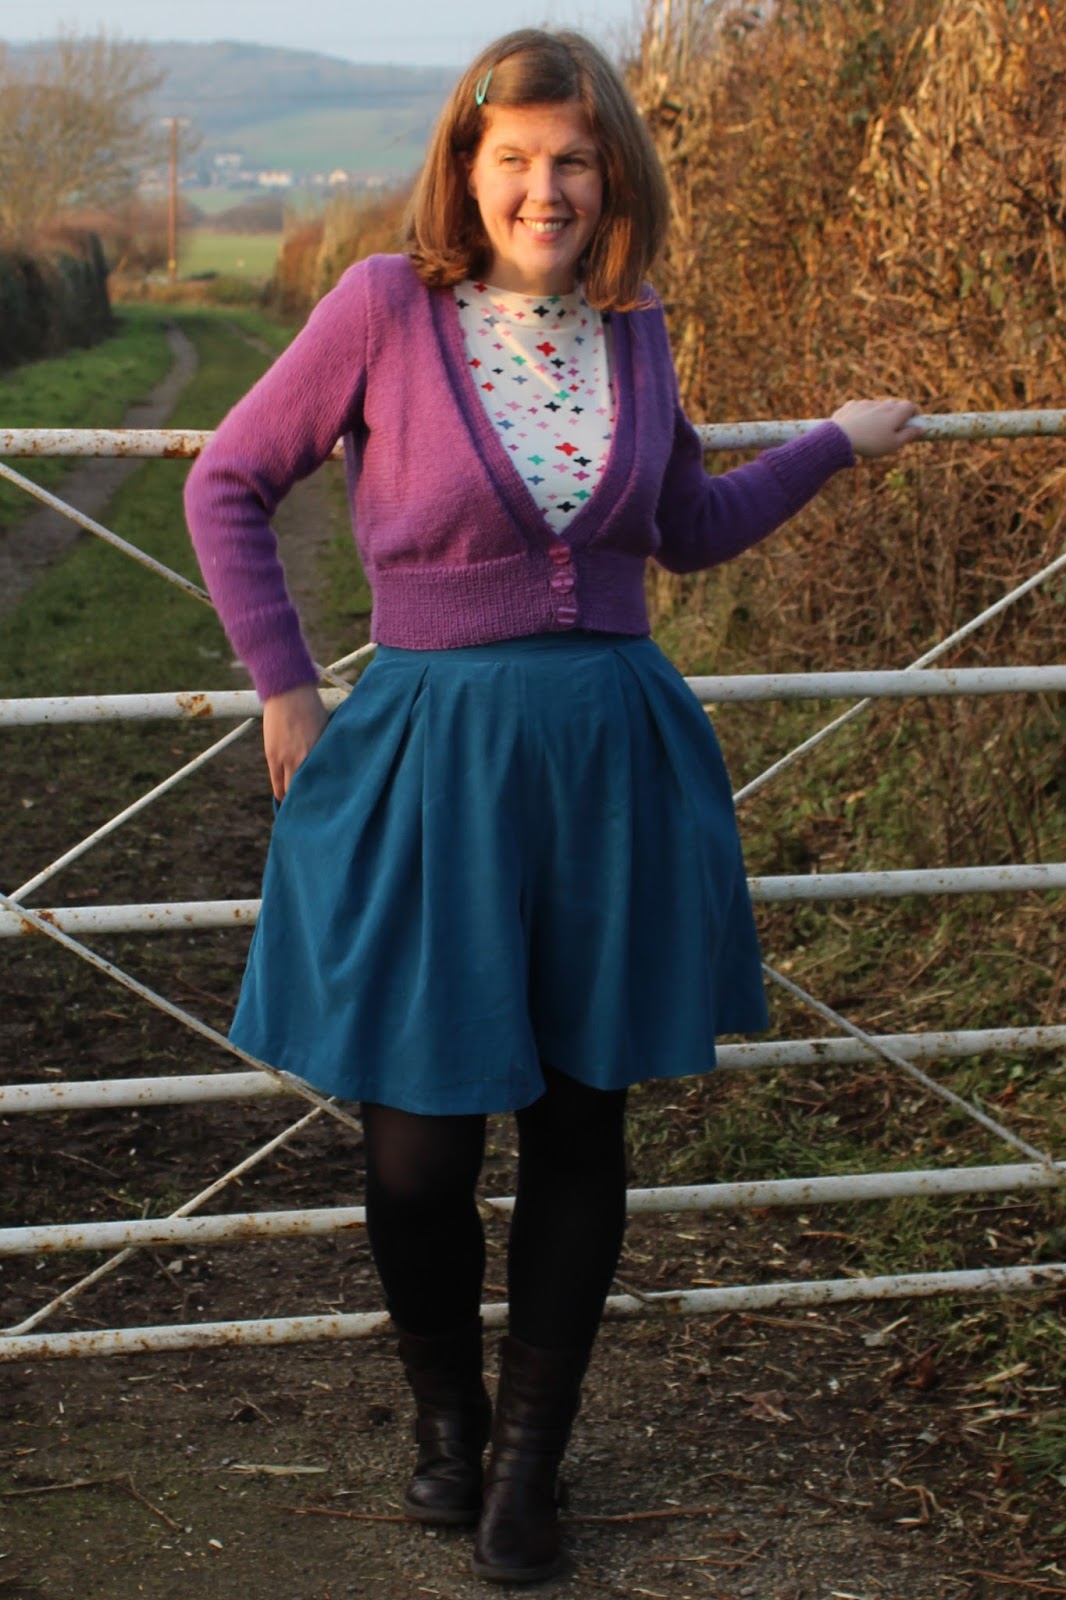
Now onto the Winslow culottes (and I'm sorry, I had to cover the Gable top up with my purple cardigan - it was just too chilly without it!). My original cord Winslow culottes were a bit of an experiment, but happily that experiment had a very successful outcome and I wear them fairly frequently in autumn/winter. One of the main benefits being that culottes are much less prone to (although not always immune from!) blowing up in the wind than all my full skirts!

This version is sewn using some beautiful aqua babycord from SewLoco (a fairly new UK-based online fabric shop - check out the lovely fabrics that Lucy has available if you haven't already!).


I made a slight change to the pattern for this version of the Winslow culottes. After the problems I had with the invisible zip on my first cord Winslows, this time I decided to split the waistband piece into two (in the pattern, the waistband is folded over on itself to create the facing). I then cut the waistband itself in the babycord and cut the second waistband piece in some Tana lawn (left over from making my Vogue 9239 dress last summer) to use as the facing. 


Doing this reduced the bulk at the waistband seam, and meant that using an invisible zip was no problem. While there's nothing wrong with the regular zip I used in my navy culottes to get round the waistband bulk problem, I do prefer the look of the invisible zip that I've used here.


So all in all, I think I can safely say that this year's sewing has started successfully. I know that both my Gable top and my Winslow culottes will be worn a lot, and it's an added bonus that they look pretty good together! How's your sewing been going lately?

Saturday, 2 December 2017

OWOP 2017: The Jennifer Lauren Gable Top/Dress

If you're part of the sewing community on Instagram, then you're probably well aware that One Week One Pattern, or OWOP, has been happening over the last week, this time hosted by Sheona of Sewisfaction.

Day 1 - Anchor print dress with a knitted cardi (blogged here)
For the uninitiated, it's a fairly simple challenge - you just pick a pattern and wear a version of it every day for a week. It could be all different versions or the same garment styled differently for 7 days (if you're better at not spilling things on yourself than I am!).

Day 2 - Gable top in Art Gallery jersey with my corduroy Winslow culottes, and my Turin cardigan
I had fun taking part in the OWOP a couple of years ago (when my hair was much shorter!), so I decided to sign up again. The obvious pattern for me to pick would have been the Emery dress; even discounting very summery versions, I've got enough that I could have worn a different one every day so the challenge would have been fairly easy. However, I decided that it would be more interesting to pick something different so I went with the Jennifer Lauren Gable top and dress.

Blue ponte Gable dress with beads, brooch and very red tights!
I really love the Gable top/dress at this time of year - as it's a knit pattern it's super comfy to wear, and, while I know some people aren't fans of the fairly high slash neckline, I find that it helps to make me feel cosier than patterns with lower necks. Plus it also gave me the benefit of having both tops and dresses to play with over the week.

Pink Gable top, with a denim Veronika skirt and teal cardigan
Gable is also a simple pattern to sew, which meant that I had time to squeeze in a new version (the navy anchor print dress I wore on days 1 and 6) to add to my collection before OWOP started. If you're interested in more of my thoughts on the pattern itself, I blogged about my first Gable top here, and my blue ponte Gable dress here.

Gable top with my Freja dress
I had four Gables at my disposal - 2 dresses and 2 tops - and I found it really easy to wear one of them every day for the week. That's definitely helped by the fact that 3 of them are shades of blue, which is pretty much a neutral colour in my wardrobe so there were plenty of options for me when it came to putting an outfit together every morning.

Anchor print dress with my Toaster sweater
As it's been on the chilly side (by the standards of southern England anyway!) this week, so I was glad to be wearing knit garments (they just always seem warmer to me), and to be able to combine them with my knitted cardigans, or my crochet shawl on the last day.

Blue ponte Gable dress with my crochet flowers shawl
I really enjoyed participating in OWOP again this year. Putting on one of my Gables every morning didn't feel like too much of a constraint, and it didn't get boring - in some ways it actually make getting dressed easier because I couldn't be indecisive! I definitely don't think these four versions of the Gable are the last ones you'll see from me either - there's room for more of both the top and dress versions in my wardrobe. It's also been really interesting to take part in the challenge on Instagram and to see how other people have styled the various patterns that they chose. Thanks to all the sponsors, and of course an even bigger thank you to Sheona of Sewisfaction for hosting OWOP this year.