Wednesday, 10 April 2019

Knitting: Lace Hearts Cardi

As has become customary in recent years, I've finished knitting a cardigan just as the temperatures should be about to rise so I won't be wanting to wear it for a few months. Given the grey and chilly day outside my window as I type though, it seems likely that this project will get a few more outings this spring. Here's my Lace Hearts Cardi!


The Lace Hearts Cardi is a pattern by Martin Storey published in the book Knit Red. I picked my copy up secondhand for a few pounds, which was a bit of a bargain considering there are 31 patterns in the book. Admittedly I wouldn't want to make them all, but there are a couple that I definitely like the look of - particularly the slip stitch beret by Ysolda Teague and Debbie Bliss's dolman sleeve sweater.
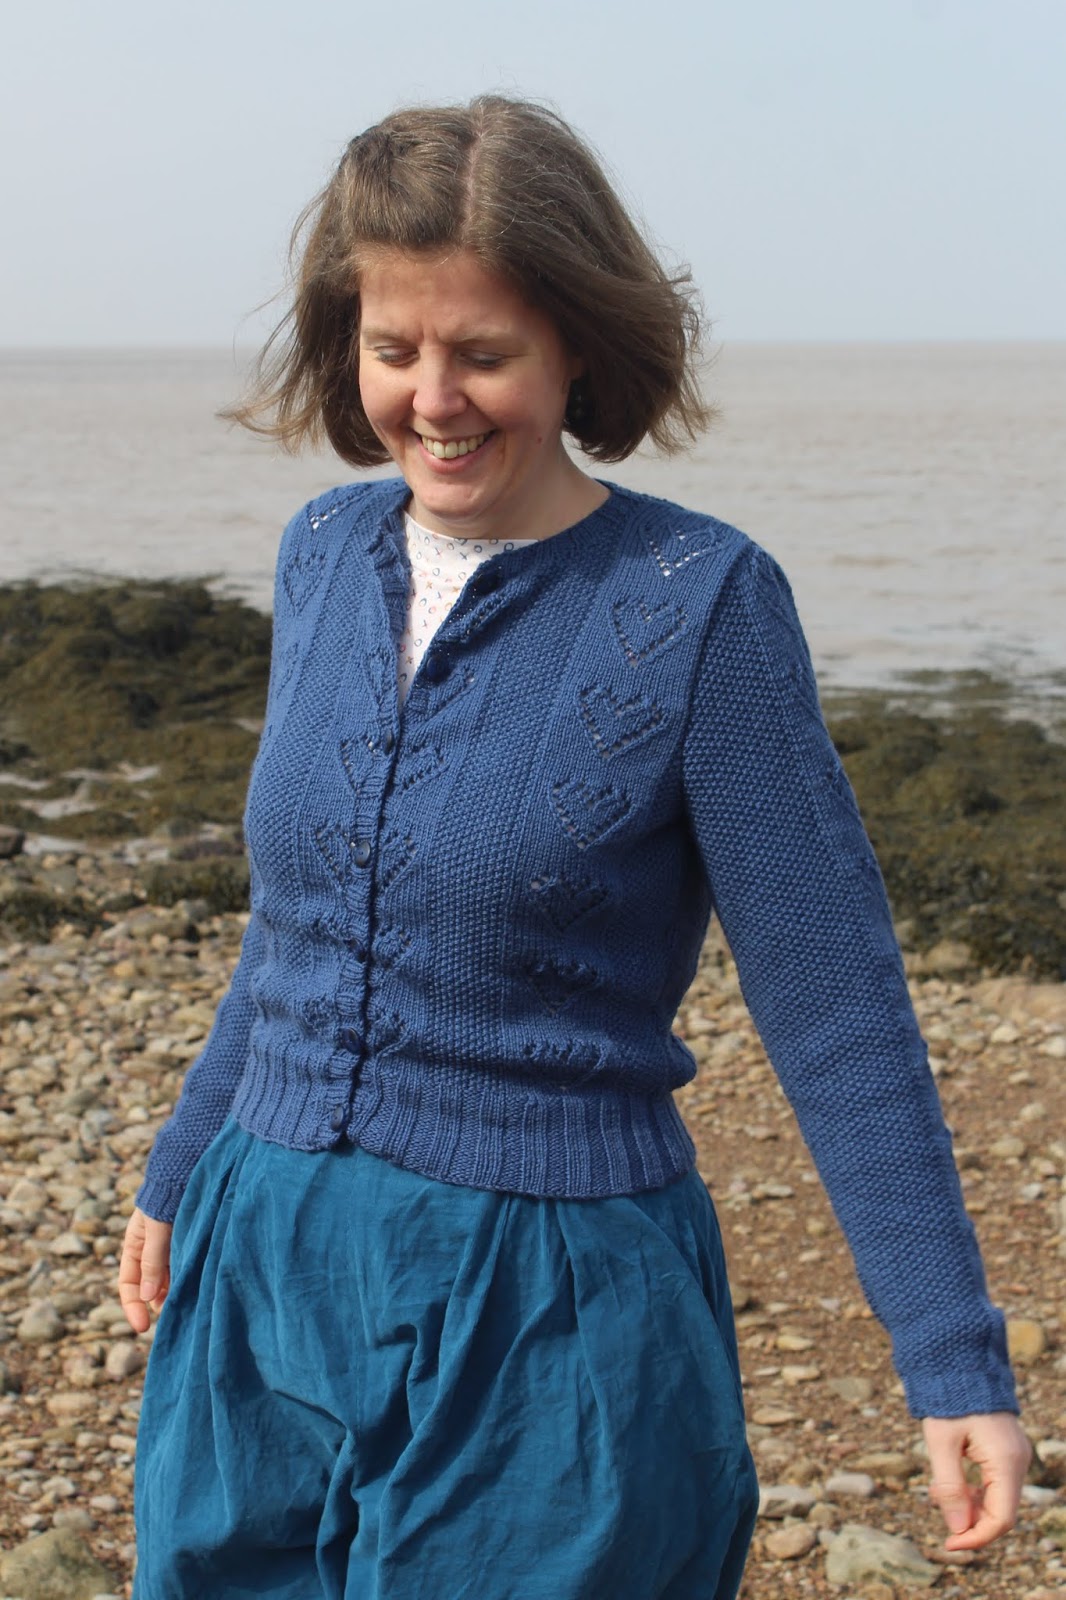

Anyway, back to the Lace Hearts Cardi! It's a classic, slighty cropped and nicely fitted cardigan that alternates between moss/seed stitch panels and the eponymous lace heart motif on a stocking stitch background. It's knit in pieces and them seamed, which is my comfort zone when it comes to garment knitting. I didn't have any problems at all with knitting the cardigan, and the pattern for the lace hearts is simple and effective, and fairly intuitive to knit.


The pattern calls for DK yarn, and I chose to use Willow & Lark Ramble from Love Knitting in the Bluebell colourway. It's a 100% merino wool - I loved knitting with it and it seems to me like it's soft enough to wear against the skin. If it wears well in this cardigan, I'd definitely like to use it to knit something else. If you're interested in using it yourself, it's worth keeping an eye out for offers - I got mine for 40% off which made it pretty affordable, and I've noticed (and been tempted by but so far managed to resist!) a few similar offers over the last couple of months.


I had to go down a needle size to get gauge for the pattern. Even with the smaller needles, my swatch came out fractionally bigger than it should have been but I did some calculations and worked out that if I knitted the 37" size, then I should end up with a cardigan with zero ease (my bust measurement is 38"). I think my finished cardigan might be a little bigger than that, but I'm happy with the fit so it's all good.


The sleeves are perhaps fractionally longer than ideal, but that's because I knitted a little more than recommended before starting the cap shaping so that the decreases would end ready for me to bind off with a complete heart at the top of the sleeve. I decided I'd rather have a slightly longer sleeve than have one that was just the right length but with the final heart cut off in the middle at the shoulder, and I'm happy with that decision. And it'll help keep my wrists warmer!


All in all, I'm really happy with how my Lace Hearts Cardi turned out, and it's another item that I can cross off my Make Nine list. I'm making way better progress with my Make Nine challenge this year than in previous years - obviously I must have planned it better this year! How are you getting on if you made a Make Nine list?

Thursday, 28 March 2019

Cotton + Chalk Zoe Dress Sewing Pattern Review

A couple of weeks ago I wrote a blog post about my fabric stash and the fact that I'm trying to shrink it a bit, and the project I have to share with you today is the first step in that process. This is my Cotton + Chalk Zoe dress.


The Zoe dress was originally included with an old issue of Simply Sewing magazine, but I picked up my copy in a charity shop a month or two ago. It's an easy-to-wear pullover trapeze style dress with side-seam pockets. Not so long ago, I wouldn't have been drawn to this pattern, but I really enjoy wearing the Closet Case Patterns Ebony dress that I made at the end of last year so I thought I'd give this silhouette another try.


This pattern is really simple to sew - there are no darts or fastenings, just front pieces, back pieces, back straps, facings and pockets. Happily for me, that meant that I was able to sew it up at the end of last week just in time to take it away for a long weekend in Cornwall, where these photos were taken.

The instructions are clear and easy to follow. Although it has to be said that with a pattern this simple it would be hard to make the instructions complicated!


In terms of sizing, the pattern recommends a M for my bust measurement (38") and L for my waist and hips. I knew there wouldn't actually be any need to size up in the waist and hips with all the volume in this dress. I checked the finished bust measurement for the M (42") and decided that it would be bigger than I wanted so I actually ended up making a size S and just used a fractionally smaller seam allowance at the underarms (about 1.2cm instead of 1.5cm) to give a little bit more room around the bust. The finished dress fits nicely around the shoulders and bust, and as you can see there's definitely also plenty of space for my waist and hips.


I made the shorter version of the dress (view A), but lengthened it by 10cm. I would say that the illustration on the pattern envelope is a bit misleading about the length of the shorter version as it makes it look knee length, whereas the photos from Simply Sewing clearly show that it's significantly shorter than that.


The fabric I used here is some Robert Kaufman chambray. It's been sitting in my stash for almost 3 years, which I was able to work out because I won it in a giveaway from Simply Sewing with the jersey that I used to make my first Gable top back in 2016. While it's lovely fabric, I always think that black isn't the best colour on me so it took me a while to decide what to make. Recently I realised (not sure why it took me so long!) that if I used it to make a pinafore, wearing a t-shirt under it would mean that the black wouldn't be directly next to my face so would make it easier to wear. In these photos, I've paired it with my cowl neck Freya top.


If you like the look of this dress, the pattern may not be the easiest to come by being as it's from a magazine released over a year ago, but as I type there are a few listed on ebay so it's definitely not impossible to find.


All in all, I'm very happy to have used this fabric at last. The finished dress isn't the most practical thing I've ever made (in case anyone's wondering, it really isn't the best thing to wear on a breezy beach!). However, it's (unsurprisingly) very comfy and the neutral colour will mean that I can combine it with lots of tops, so hopefully it should get a decent amount of wear. Now I just need to make some plans for some more fabrics in my stash!

Thursday, 21 March 2019

A little knitting round-up

After realising in the middle of writing my post about my coat last week that I hadn't yet blogged my Land of Sweets cowl, it quickly occurred to me that there were a few other knitting projects that I hadn't shared here too, so I thought I'd do a little round-up of them for you. Let's start with my cowl being as it's what inspired this post in the first place.


The Land of Sweets cowl is a pattern by Helen Stewart that's designed to use the mini skeins from a yarn advent calendar. Instead of doing that, I used 10 mini skeins from a variety of UK indie dyers (they're listed on my Ravelry project page) that I collected together gradually over the course of a year or so. As I had 10 colours, I used each one twice and omitted four of the sections in the pattern so I have 20 stripes instead of the intended 24.


It was a really fun pattern to knit, and became slightly addictive as I was always wanting to get to the next colour change. If you're thinking about knitting this pattern and wondering about how much yarn you'll need, it's worth mentioning that having used each of my mini skeins twice I still had about half of each one left so my Mum is currently in the middle of knitting another cowl for herself using my leftovers.


Going back in time a bit further, last autumn I knitted a Sockhead Slouch Hat for my sister for her birthday. The Sockhead hat is a free pattern by Kelly McClure. It's super simple so was nice and relaxing to knit. The yarn that I used for this one was from Lamington Lass. It's on her Soft Sock base in the Swirling Flock Splash colourway, and I loved it so much that I was "forced" to buy another skein so I'd have some to knit for myself (more on that later!).


I really liked the feel of the hat and decided I'd like one for myself. I don't wear hats that are too slouchy though, so I made mine significantly shorter - I knitted 3 inches of rib, then 5 inches of stocking stitch before starting the decreases. It worked out really nicely and it's a very useful hat - warm enough to keep me cosy, but small enough to be easy to shove in my bag when it's not needed.

The yarn that I used is from What Mustard Made - it's her Bert the Yarn colourway. It's super fun with all the colourful speckles, and the good news for me is that this hat used less than half of the skein so I think I've got enough left for some socks if I combine it with a contrast colour for the heels/toes/cuffs.


Speaking of socks, last year I decided that it would be a good idea to knit socks as Christmas presents for my Dad, siblings and siblings-in-law. I'm not a quick knitter, so thankfully I had the foresight to get started early! I cast on the first pair in August so I effectively had to knit a pair of socks per month to meet my deadline - definitely do-able! In the end I actually managed to finish them well ahead of schedule, which is rare for me as I'm often making Christmas presents right up until the last minute.


I used different patterns for all of them (because knitting the same pattern five times in a row would have been a bit tedious!). Working clockwise from the top left, the patterns for the four above are Vanilla Latte, Atlantic Current, Riverbend and Rockpool. The final ones, which are in the foreground of the first sock photo, were Staggered Path socks.


Once I'd finished knitting all of those socks, I was definitely ready to make something for myself again! As I mentioned earlier, I'd ordered myself a skein of the yarn from Lamington Lass that I used to knit my sister's hat and I decided to combine that with a semi-solid skein from Woolly Mama Yarns to make the Right Around The Corner shawl by Lisa Hannes.


This pattern is beautifully simple but effective, and it was the perfect pattern for me to have to knit on whilst still being sociable when I was with family over the Christmas period. The two yarns that I used also work perfectly together, which is a happy coincidence being as they came from different dyers!


I think that's about all I have to share for today! I really enjoyed knitting all of these projects. In fact I've been really enjoying knitting in general recently. I've got a cardigan almost complete and another shawl and two pairs of socks on the needles, so hopefully I'll have some more finished projects to share with you soon. Have you been knitting anything recently?

Thursday, 14 March 2019

McCalls 7848 Coat Sewing Pattern Review

The project I have to share with you today has been finished for a few weeks already but, thanks to unseasonably warm temperatures in the middle of February meaning that I didn't need to wear a wool coat, it took a while to get photos of it. This is my version of McCalls 7848 - another project to cross of my Make Nine list!


McCalls 7848 is a pattern for a fitted lined coat with front zipper closure, side seam pockets and neckline, sleeve and length variations. I basically made view D (which is a collarless, maxi-length coat) but using the skirt length from view C (which is just fractionally below knee-length on me).

A collarless coat winter coat might seem like an odd choice in some ways, but I'm currently in the middle of a bit of an obsession with knitting shawls, and I thought that a collarless coat would be a good way to show them off. I'm wearing it in most of these photos with my Land of Sweets cowl, which I've just realised I've never blogged - I should probably do something about that!


As coats go, the construction of this one is fairly simple and the pattern doesn't call for any kind of tailoring. In terms of the sewing itself, if you're happy making a lined dress then there's nothing that should be particularly challenging as long as you're comfortable working with whatever fabrics you've chosen to use.

As with most commercial patterns, the instructions are fairly succinct but they are clear and there wasn't anything that I found confusing.


My outer fabric is a micro dot reversible wool and acrylic blend from Textile Express. It's a gorgeous colour and a lovely fabric, especially for the price, but I wonder whether this particular pattern might have benefitted from a fabric with slightly less body and more drape than this has. In particular, setting in the sleeves (something which I'm usually fine with) definitely wasn't easy and, despite my best efforts, the sleeve cap still isn't as smooth as I'd like it to be.


My lining is a navy teal viscose lining from Fabworks. You definitely couldn't accuse this fabric of not having enough drape! I don't think I could have picked two more different fabrics really - the wool blend stays where it's put and when I was sewing two layers together they stuck to each other almost like felt (which made it very easy to get all of the seams to match up nicely!), whereas the lining wanted to slip and slide all over the place. I managed to tame it enough to do a decent job of sewing it though!


In terms of sizing, I had the problem that my bust measurement is a 16 for this pattern, while my waist and hips are an 18 which is in the larger sized pattern. I went with my bust measurement and got the smaller size range, knowing that commercial patterns are often more generous in their sizing. I made a toile of the 16 and it fitted fairly well, but I thought it was a bit snug around the waist for a coat that I'd want to wear over cosy winter clothes. I simply reduced the seam allowance around the waist a touch and that gave me enough extra room for winter layers. I also made my standard adjustment of lengthening the bodice, although I had to lengthen it more than usual (4cm instead of 2.5cm). In case it helps to know for reference, my measurements are B 38", W 32" H 42", and I'm about 5'9".


I wasn't completely convinced about the coat when I'd first finished it. I think a large part of that was because the lining had dropped a fair bit when I left it to hang, and evening it up and hemming it was a little stressful so that had tarnished my feelings about it a bit!

Having worn it a few times though, my McCalls 7848 is definitely growing on me! That "bulky" feeling that I mentioned above is slowly fading and I was pleasantly surprised when I looked at the photos for this blog post - the coat looks better on camera than it does in my head! I love the colour, it's nice and cosy and is doing a good job of keeping out the gale force winds that we've been battered with recently. So overall, I think we can call it a success, don't you?

Thursday, 21 February 2019

To stash or not to stash?

I've got a bit of a different kind of post for you today - no finished project to show off, just some thoughts to share. Specifically, thoughts about fabric stashes! I hope that's OK?


When I started sewing, I never intended do develop a fabric stash. I would buy the fabric that I needed for each project as I was getting ready to make it and that worked well for me. I'd see pictures and hear stories of the fabric stashes that more seasoned seamstresses had accumulated and wonder how they'd managed it - now I know very well quite how easily fabric will multiply!

Between the temptations of picking up bargains in sales, being over-ambitious about how many projects I'll get through in one season then not want to sew up super summery fabric in winter, and online purchases not being quite what I expected them to be therefore not being suitable for my original intended project, this little collection has gradually been growing in the crafting corner of my flat.


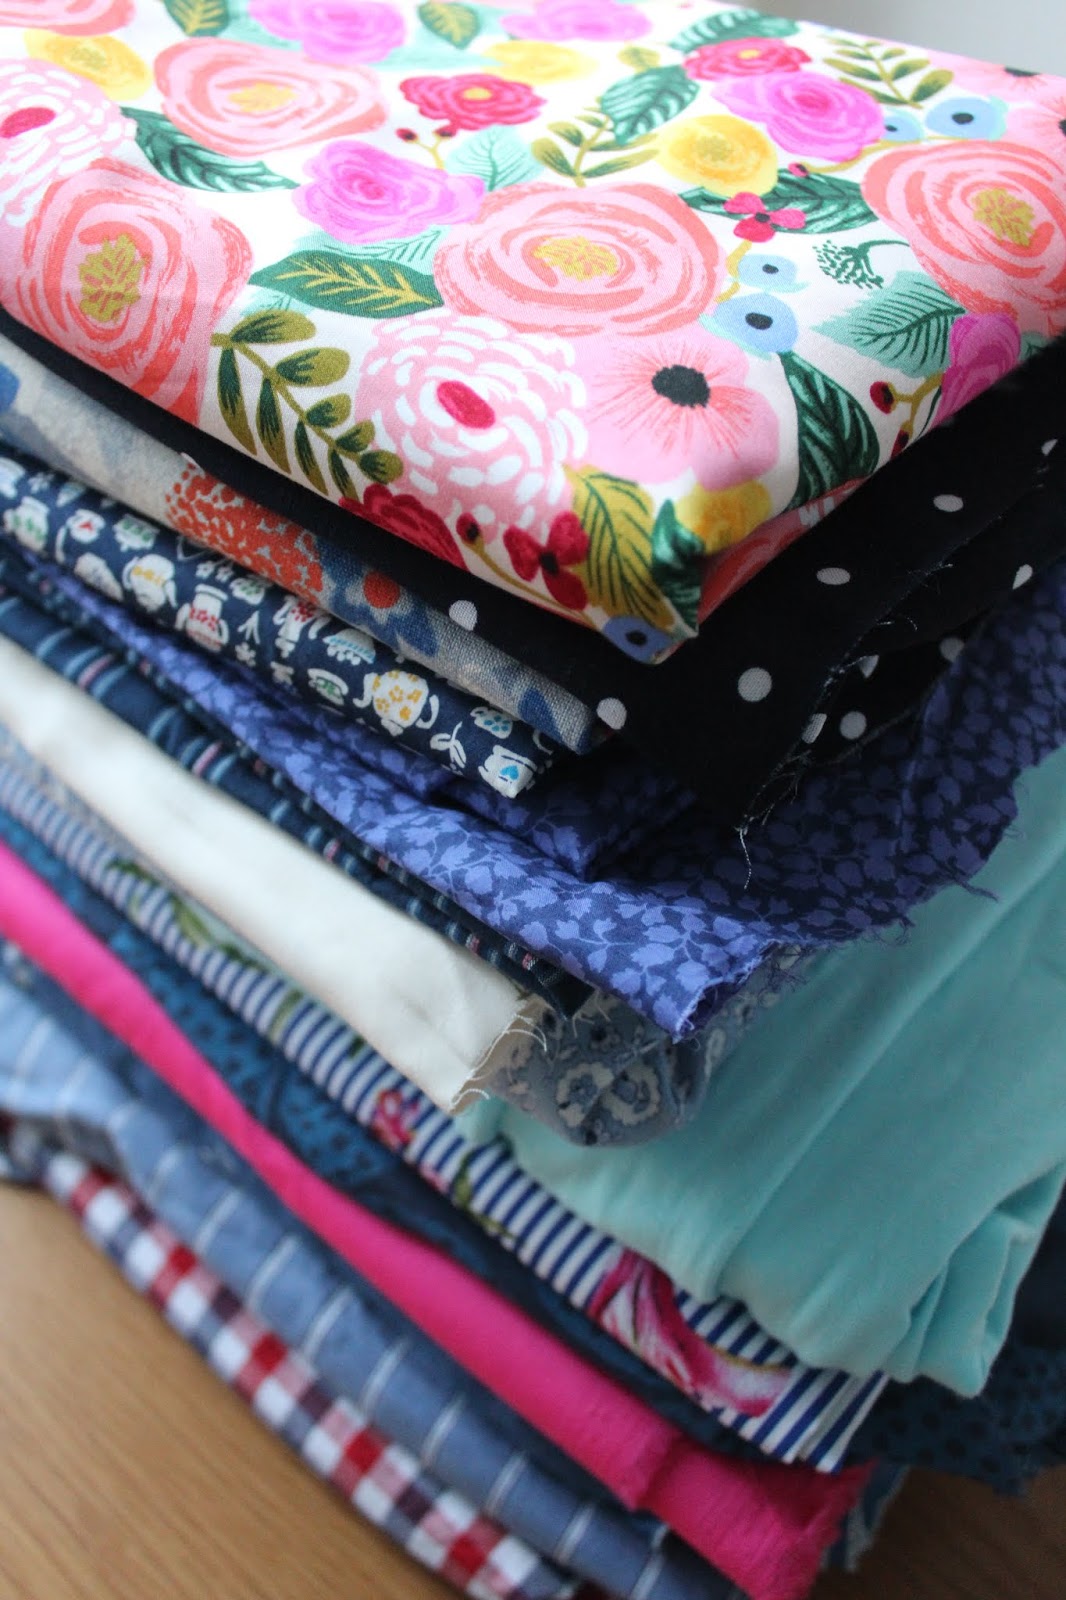
The stack of fabric that you can see in these photos is the vast majority of the lengths of fabric that I have that are big enough for a Ruth-sized garment of some kind (there are a couple of other pieces but they're packed neatly in a bag and I didn't want to disturb them!). Compared to some fabric stashes, this is fairly small but it's bigger than I want it to be.


Don't get me wrong, there's nothing wrong with having a voluminous fabric stash if that makes you happy and helps fuel your creativity. For most of us, sewing is a hobby and when it comes to hobbies I'm firmly of the belief that you should do what works for you. Personally though, I've realised that having a mound of fabric waiting to be used doesn't act as a source of inspiration for me, and instead it feels like a never-ending to-do list. And not in a good way!


So I'm now going to make a concerted effort to try to sew some of these pretties. That really won't be too much of a hardship because I do like each and every one of these pieces, but in some cases I do need to work out exactly what project they want to be used for.

I'd also like to try to make a bit of a dent in my leftover bits of fabric - some of which you can see above. These are all too small for garments, but hopefully will make some pretty bags, pouches and other small projects.


I'm being realistic - I'm not going to say that I'm not going to buy any fabric. For a start, my stash is mostly woven cottons, so if I want to sew a pattern that calls for stretch fabric or something fabulously drapey then I'm probably going to need to go shopping.

Also, sometimes you just see something that's so beautiful that it needs to come home with you (case in point: the Rifle Paper Co rayon on the top of the pile that I picked up recently at the launch party for Like Sew Amazing's bricks and mortar shop in Bristol).

And finally, if I say that I'm not going to buy any fabric at all, it's only going to make all the pretty things that flood my email inbox and Instagram feed on a daily basis seem even more tempting than they already are.

However, I am going to try to go back to how I purchased when I started sewing - fabrics for specific projects. I'll order swatches to avoid online purchasing mishaps. And I'll only buy things in sales if I would have wanted them at full price, not just be sucked in by bargains.


I'm not setting myself any deadlines for using my stash, but hopefully over the coming months you'll start to see some of these fabrics appearing here transformed into finished projects, and I'll start to feel like I'm ticking off some items on the fabric to-do list!

How about you? Do you have a bounteous and beautiful stash, or do you prefer to buy the perfect pieces for your projects as and when you're ready to use them?