Showing posts with label embroidery. Show all posts

Monday, 29 June 2026

Embroidered Helen's Closet Orbit Bag

The project I'm sharing today has been quite a long time in the making. It started with some embroidery that I mostly finished last summer, and then I did the final touches and sewed it into its final form – a Helen's Closet Orbit bag – over the last few weeks.

The Orbit bag has always appealed to me because it's a bit different to other patterns. It's a circular quilted cross-body bag. It includes instructions for sewing a patchwork star for the front and stripes for the back, or there's an option to use solid fabric (which means you can also use pre-quilted fabric). 

The bag has a zipped closure at the top, and there are options to make either a fixed length or adjustable strap. The bag is finished on the inside with bound seams.

It occurred to me last year that the circular shape of the bag would make it the perfect way to show off an embroidery project, as they're often designed to fit circular hoops. I've long admired Bloom and Floss's beautiful embroidery patterns and at around the time I had my idea about the bag, they released a cherry pattern, which seemed perfect for the bag.

The intended size of the design seemed a little small for the bag, so I printed out the pattern at 120% (I think! I can't find where I noted down the details now) to get it closer to the size I wanted for the bag. 

My thread colours may also differ slightly from the ones called for in the pattern – I have a big box of mostly unnumbered threads that I got partly from an auntie and partly from a charity shop, so I used what looked like the best colour matches for the pattern from those.

I really enjoyed stitching the cherries. I love the different textures created by the various stitches used in the embroidery pattern, and they combine together cleverly to create a really interesting design.

Once I had my finished embroidery, it was time to turn it into a bag! That was also a mostly enjoyable process – personally, I liked sewing the Orbit bag, but my sewing machine definitely wasn't always keen on sewing some of the thicker seams!

The instructions for the Orbit bag are very thorough and are accompanied by clear diagrams. If you haven't done any quilting before, they'll tell you everything you need to know to sew the optional patchwork star front and to quilt the pieces. 

The pattern gives you options and recommendations for quilting, but you can choose what you want to do. For my front panel, I chose to quilt in circles around the cherries to highlight the embroidered design. For the back outer pocket piece, I used straight line quilting, and I used diamonds for the main back piece.

The outer fabric of my bag is a lightweight denim that I found in a charity shop. I think it looks great as the background of the embroidery and as the finished bag, but it probably didn't make my life easy. While it is fairly lightweight denim, it is definitely heavier than a quilting cotton would be so made my seams bulkier – which undoubtedly didn't help with the sewing machine issues I mentioned above! If I make another Orbit bag, I think I'd stick to lighter weight fabrics.

I decided to continue the cherry theme on the inside of my bag and used some cherry print cotton left over from the Simplicity 8384 dress that I made last year. I also used up some of the binding that I had left over from making my Wildwood jacket. I love how the inside looks – I'd happily use the bag inside out too if it weren't for the fact that it would be difficult to use the zip that way!

I'm really pleased with how my Orbit bag turned out. I think the embroidered cherries are really effective, and the bag feels nicely finished and seems surprisingly spacious. It'll be the perfect little bag to use for summer!

Thursday, 24 August 2023

Embroidered Tilly & the Buttons Stevie Top

I bought the Tilly & the Buttons Stevie pattern quite a while ago, and it's been floating around on my sewing list ever since. I finally got around to making it, and decided to embellish the simple top with some pretty embroidered flowers.

The Stevie is a boxy fit top or tunic dress with a round neckline and grown-on sleeves. It closes at the back neckline with ties or a button and loop, and there are options to use patch pockets or sleeve cuffs (I didn't use either of them this time). There's also an add-on pack that you can buy to give you the possibility to add longer sleeves or turn the top into a dress with a gathered skirt.

The pattern covers hip sizes from 33" to 61".

Stevie is simple to sew - it would be a good pattern for beginners, or it's a nice relaxing project if you've got more experience. The instructions are detailed and very easy to follow, helped by the fact that they're illustrated with clear, bright photos.

I enjoyed sewing my Stevie top, and didn't have any problems at all as I was making it. I like the way the neckline facings are topstitched down - I think it gives a nice neat finish. Everything came together easily and it was a relatively quick project.

In terms of sizing, I made a size 6. My bust and waist measurements are currently between a 5 and a 6 in Tilly & the Buttons sizing, and my hips are bang on the measurement for the size 6. I looked at the finished garment measurements and decided that the 6 would probably be the best bet. I'm happy with how it turned out.

After making a toile, I decided to lengthen the top but my finished top then felt a bit long so I actually ended up taking my top back to the original length from the pattern.

The fabric that I used is a white and grey-blue striped cotton (or at least I think it's cotton!) that I found in a charity shop. I bought it thinking that it would be a good base for embroidery, and the simple shape of the Stevie top seemed like it would be a good canvas for some embroidery too.

I decided to design the embroidery myself and sketched out a couple of ideas before eventually deciding to use this idea of flowers trailing from one shoulder. My flowers have satin stich petals with accents added in straight stitch and French knots in the centres. The leaves are done in fishbone stitch, and for the stems I (appropriately!) used stem stich. It turned out just how I was hoping it would!

I enjoyed both sewing and embroidering my Stevie, and I really like the finished top. It's nice and easy to wear, but the embroidered flowers make it feel a bit more special to me. The pattern would be great for showing off a fun print so I suspect I may make more in future!

Wednesday, 30 June 2021

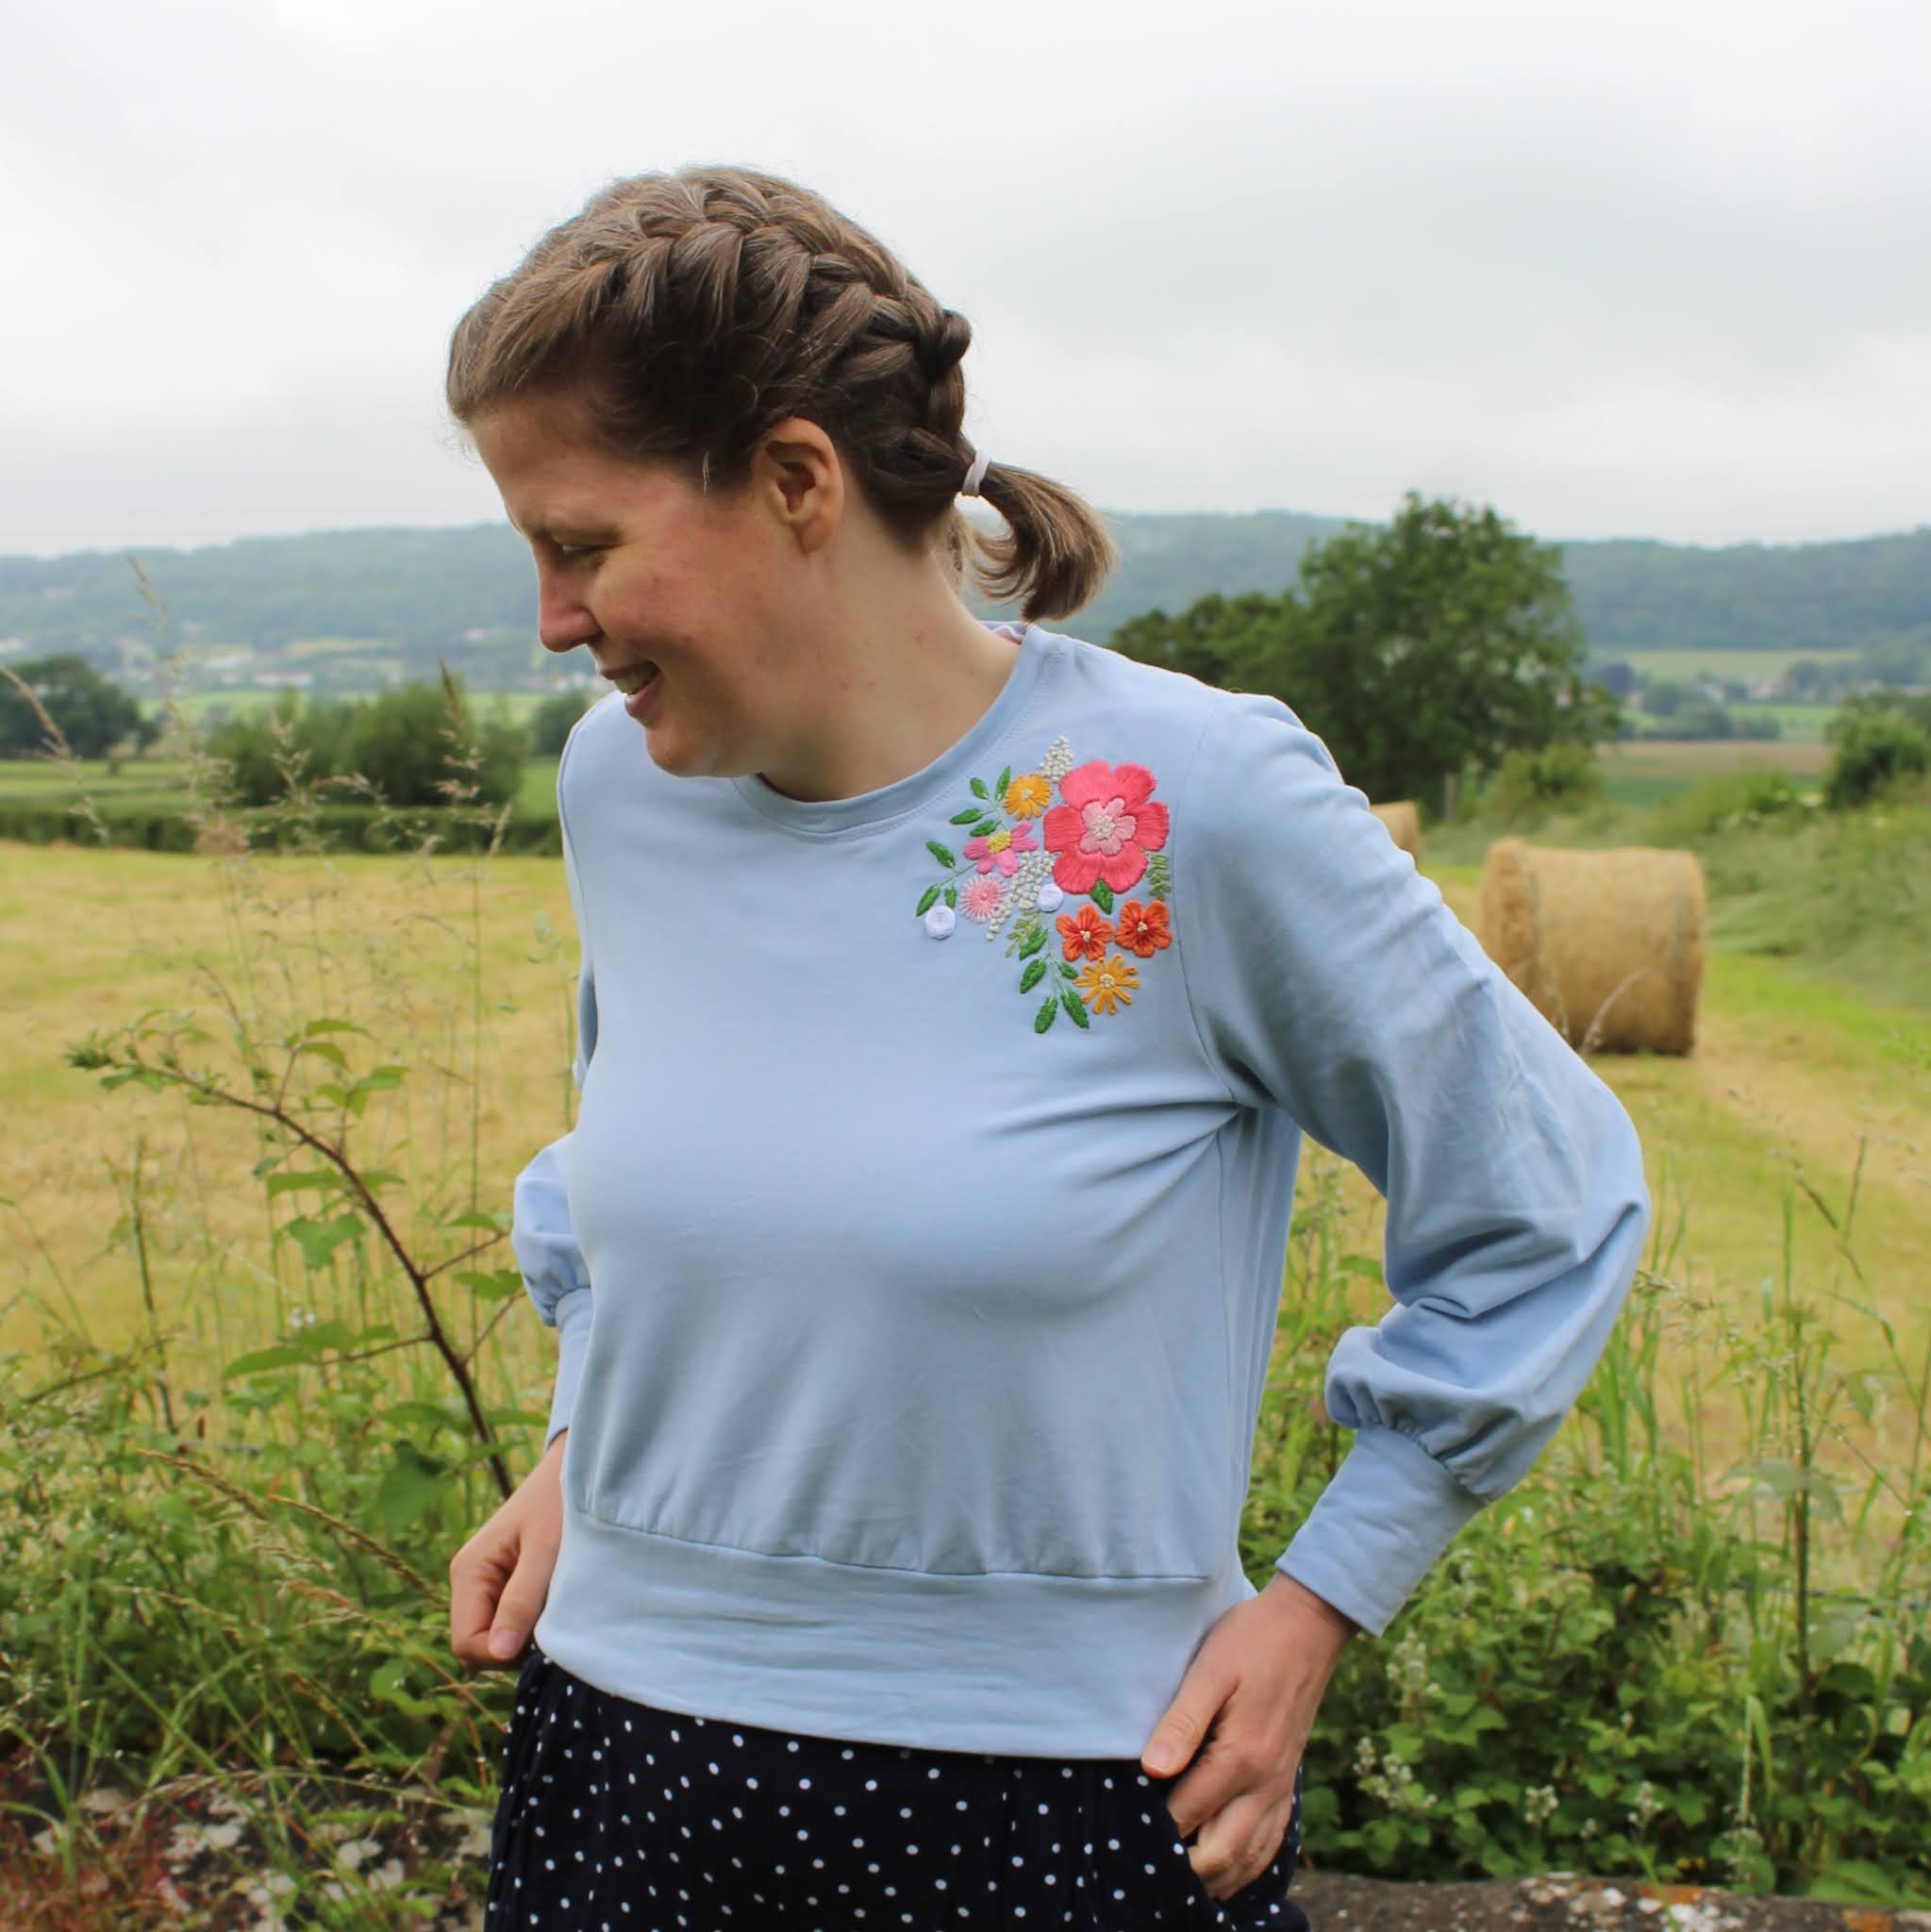
Embroidered Hey June Sheridan Sweater

Over the last year or so I've been enjoying dabbling in a bit of embroidery. I've made a few pieces that I'm planning on turning into a wall of hoop art, but with my love of sewing it was only a matter of time before I gave embroidering clothes a try, wasn't it?

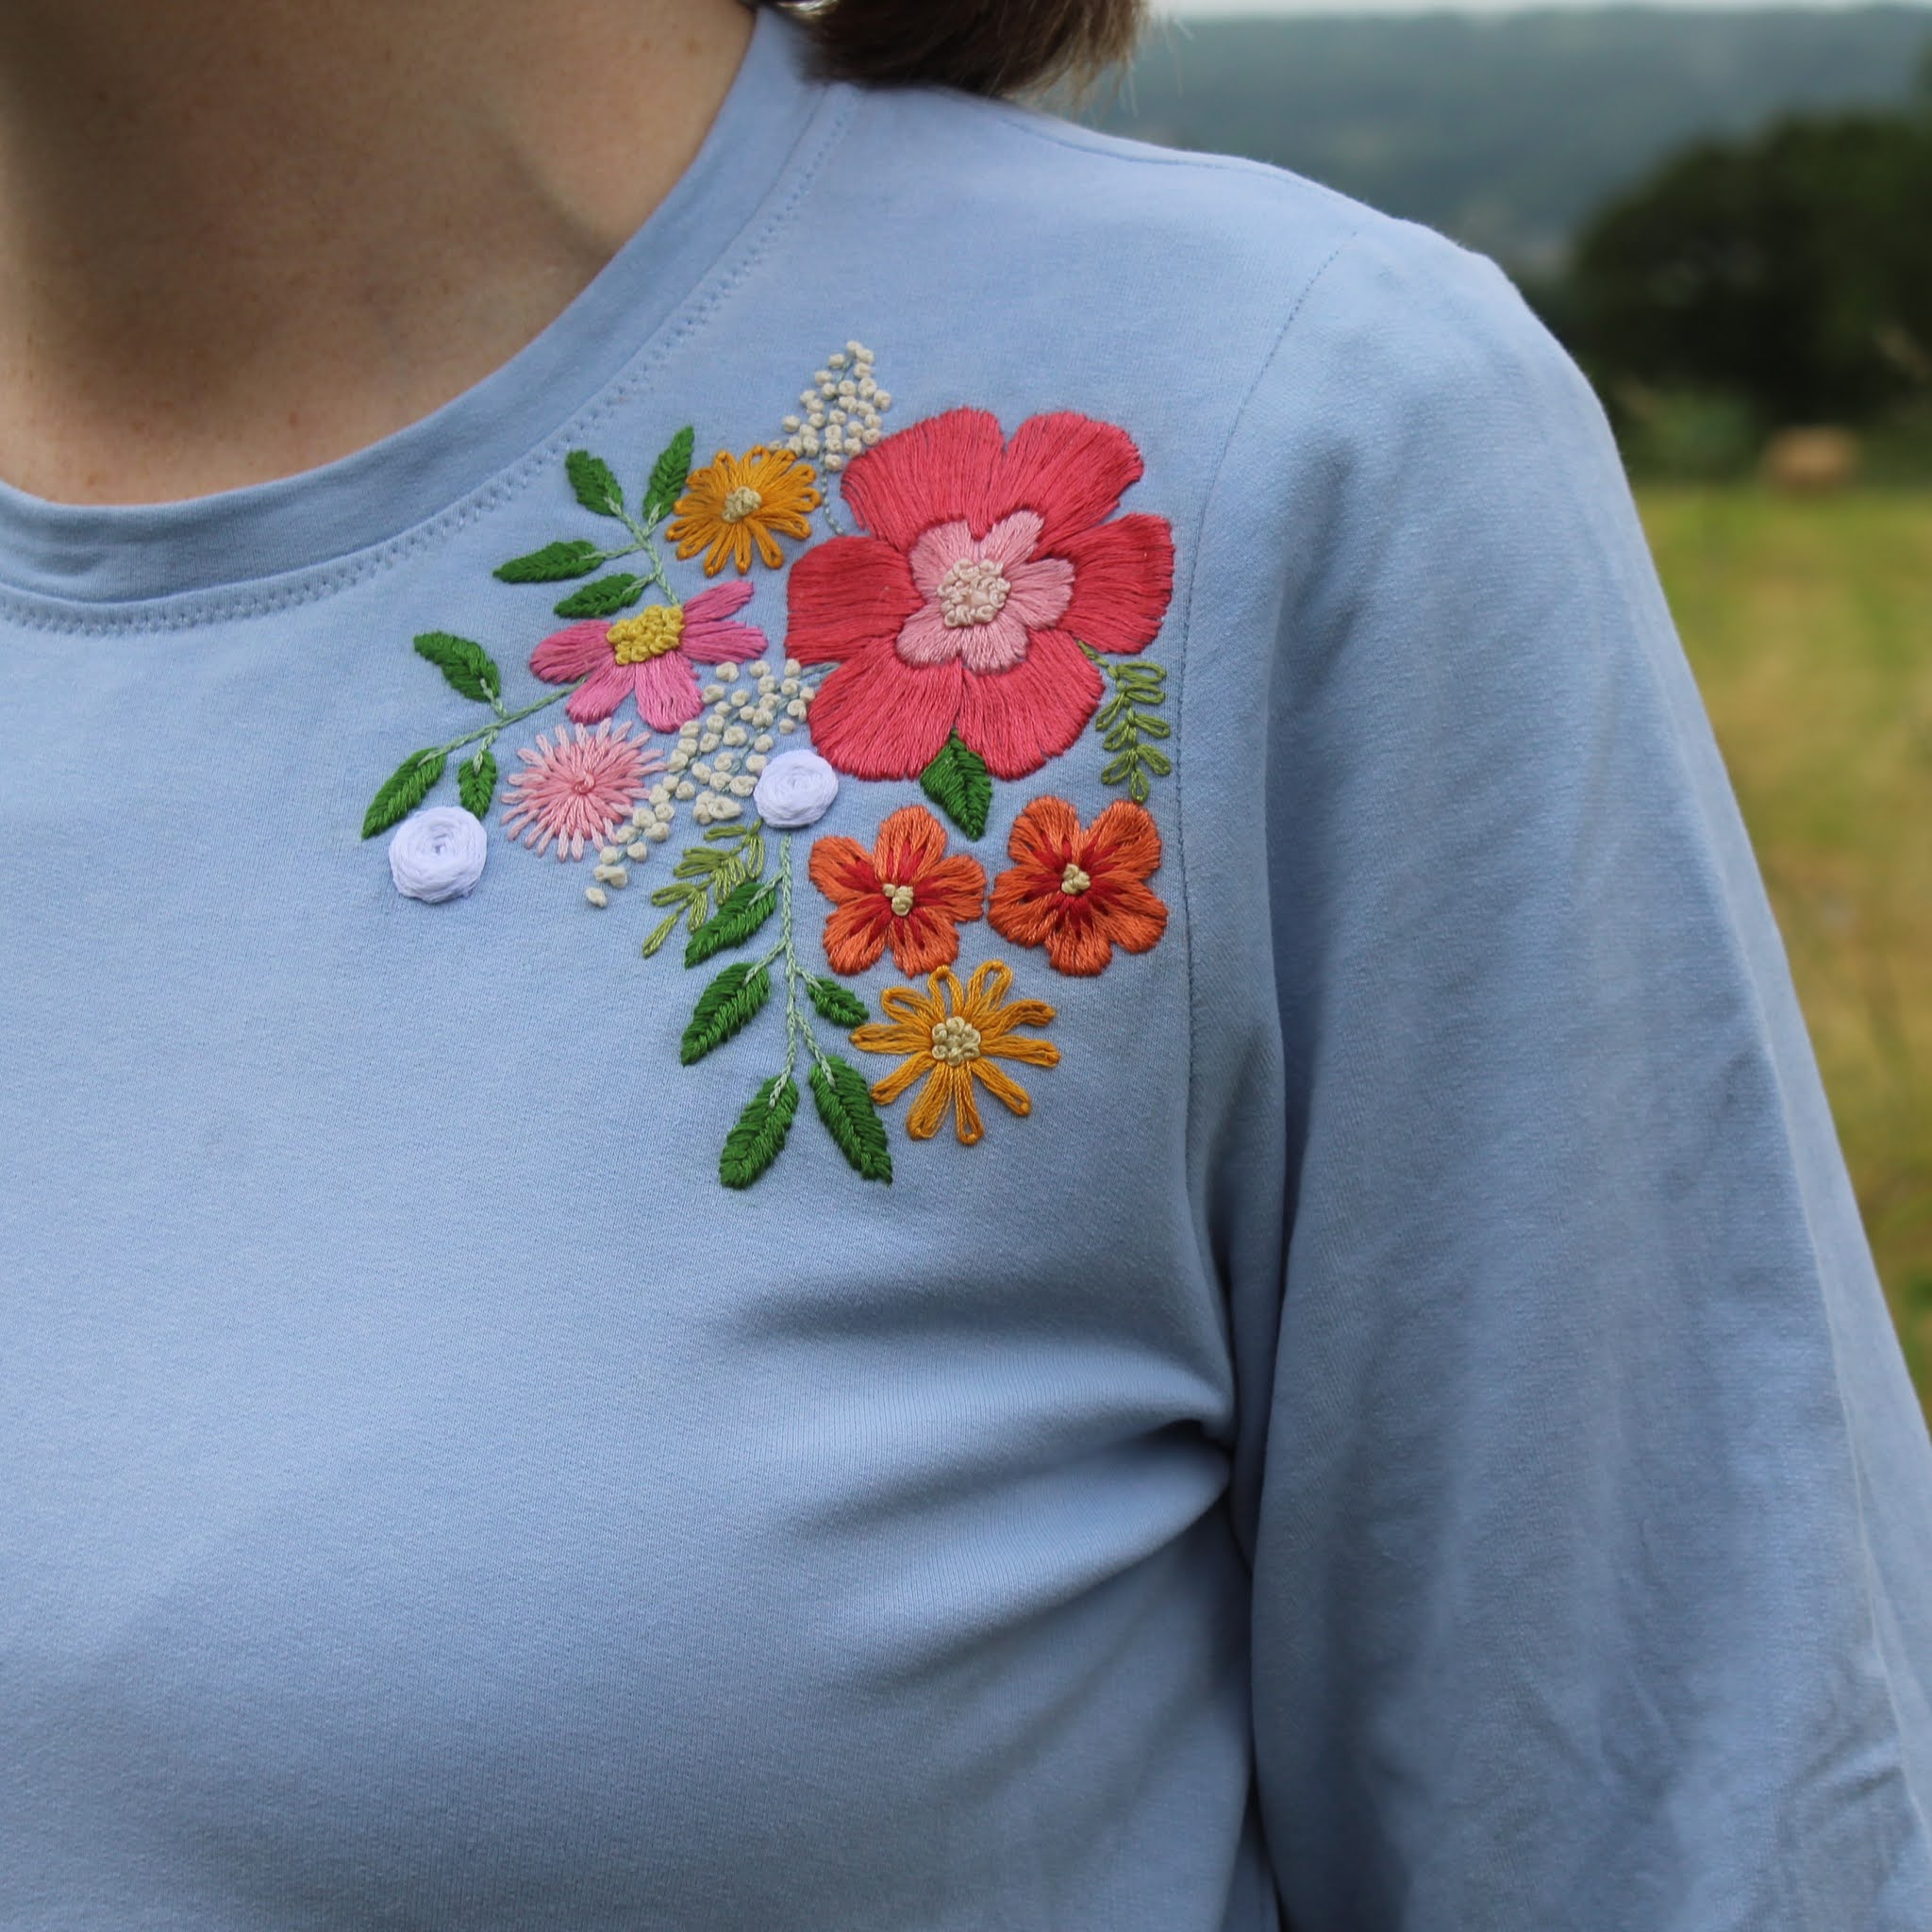
I've been considering what I could try for a while, but then Love Embroidery magazine solved the problem for me. As soon as I saw the embroidered sweatshirt on the cover of their issue 12 (available to buy here), I knew I had to give it a try. The lovely floral design by Jenny Billingham of Flynn & Mabel is just my cup of tea!

I considered whether I had anything in my wardrobe already that I could use, but I only have one or two plain sweatshirts and I wanted to keep them plain so they're more neutral. My favourite sweatshirt that I've made is the Hey June Sheridan sweater so that seemed like the best bet to use. If you're interested, you can read my review of the Sheridan sweater here.

I had a look around for some suitable fabric in a blue or turquoise colour (which seemed like the best options to complement the floral design), and in the end settled on a pale blue lightweight sweatshirt jersey from Plush Addict.

Once the sweater was finished, I then started to consider the embroidery. Having never embroidered on clothing before, I wasn't entirely sure what the best stabilisers to use would be. I then saw a recommendation for DMC Magic Paper (if you're in the UK, I got mine from Wool Warehouse) on Instagram (I can't remember who it was from now), so I decided to give that a try. 

It's really easy to use - you just draw your design onto the paper, peel off the backing and stick it straight to your garment. Once you've finished stitching, the stabiliser can be dissolved in water. Although I will say that it took longer than it was meant to for my stabiliser to dissolve, and having worn the sweatshirt I think there might still be a bit of residue there.

When I came to transfer the pattern, I realised that the space between the neckline and shoulder seams is obviously much narrower on my Sheridan sweater than on the sweatshirt used for the magazine sample so I had to adjust/omit a couple of small details on one side in order to make it fit.

As for the colours, mine aren't quite the same as recommended in the pattern. I'm lucky enough to have quite a plentiful supply of embroidery thread that used to belong to an auntie who was no longer using it so I used the closest equivalents to the pattern from what I had available.

I really enjoyed embroidering the pattern - it was fun to see the flowers and foliage gradually emerge stitch by stitch. All of the stitches were ones I've used before so it was fairly relaxing, although I did find that I had to restrict myself to short periods working on the embroidery because the weight of the sweater and the thickness of the fabric made my wrists hurt a bit if I worked on it for too long.

I'm really pleased with the finished sweater. There's room for improvement in my embroidery, but I think it looks good from a distance and most people won't inspect it in as much detail or be as critical about it as I would! I'll definitely be trying embroidering on clothes again in the future - have you ever given it a try?

Sunday, 27 October 2013

"I want to ride my bicycle" cushion

I've got some slightly different sewing to show you today. Recently I was asked by a group of friends to create a bicycle-themed cushion for another friend's birthday. After a bit of consideration of different designs, this is what I came up with...


I had a look around online to make sure that a bike was actually the shape that I thought it was, then I used a combination of appliqué and embroidery to create the bike on the background material (purchased from a local shop).

The basic frame of the bike is made from some pretty floral bias binding folded in half widthways, which I then pinned and machine stiched into the frame shape.


I then embroidered the rest of the bike around the frame. For the saddle, I used satin stitch then a double line of chain stitch for the handle bars, a single line of chain stitch for the wheels and a simple running stitch for the wheel spokes.


When I'm doing embroidery, I tend to draw out my designs on paper then when I'm happy, I go over the final design with a black felt tip. Unless your material is really thick or dark, if you put the felt tip drawing under the material you can usually see it and trace it onto the material. I use Frixion pens to trace the design onto the material as you can see here...


The lines are really clear, and once you've done all the embroidery, they'll disappear when you iron the material. This does mean that you have to be careful if you're ironing as you go along (so I don't usually iron till the end - the excuse for the massive outline of the embroidery hoop in this picture!), but I don't find that a problem.

I completed the cushion by embroidering "I want to ride my bicycle" under the bike in simple back stitch, and I think the whole thing is quite effective. Thankfully the birthday girl like it and fellow present-givers approved, so it can't be bad!


I'm now off to hide away under a blanket on the sofa until the imminent storm passes. See you next time!

Linking up to: