Tuesday, 13 October 2020

Tilly & The Buttons Lotta Dress

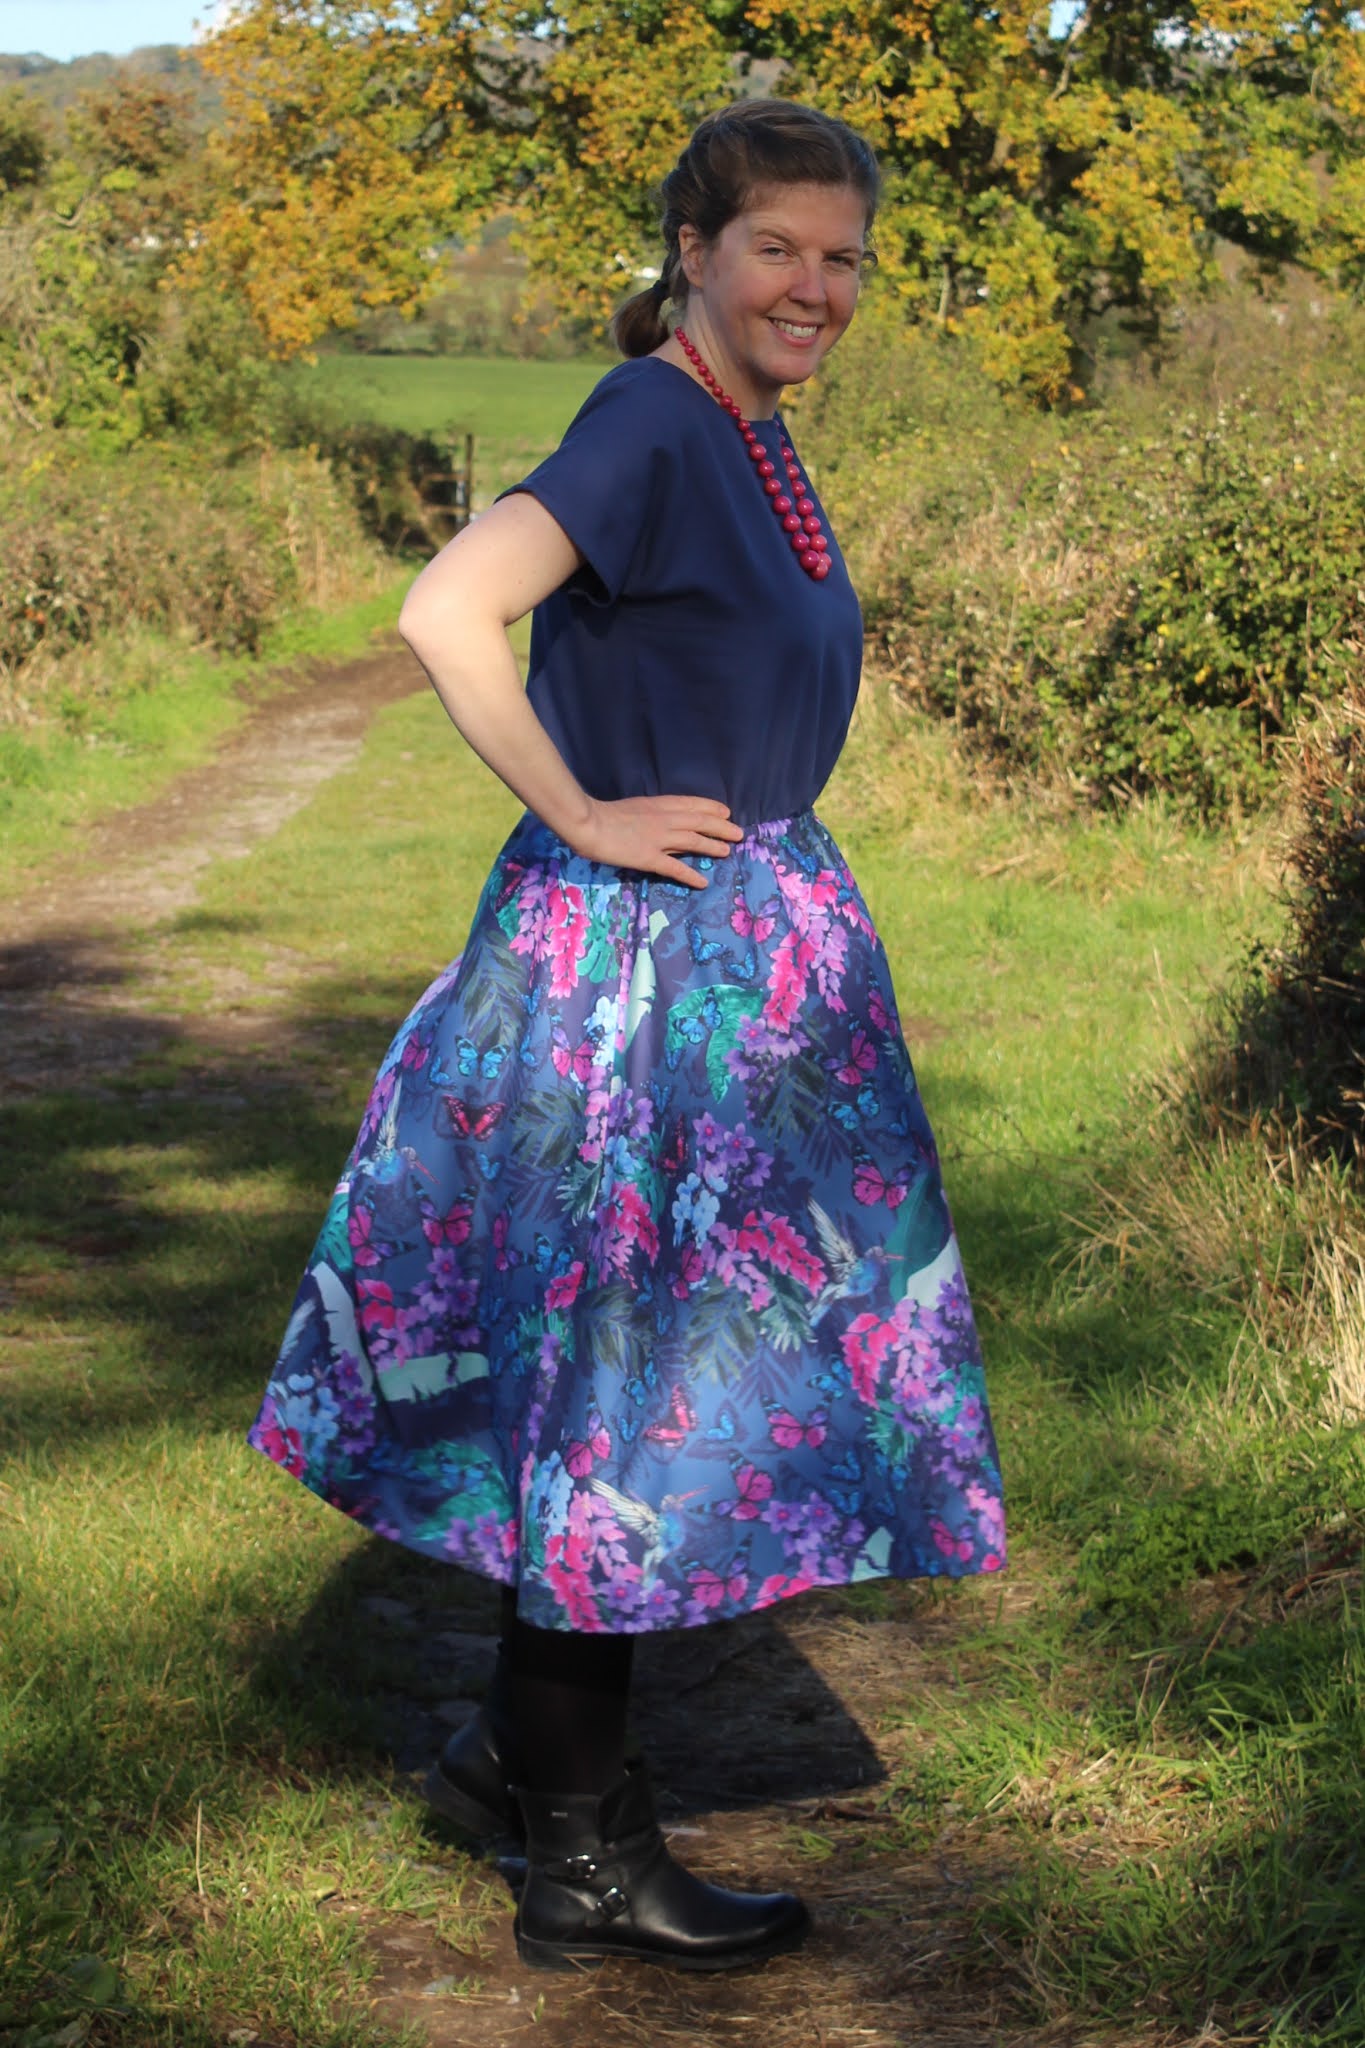
The dress I have to share with you today was one of those serendipitous projects where the fabric and pattern appear in your life at the same time and demand to be put together. A few weeks ago I bought a duvet cover in a charity shop with the intention of making a basic-but-not-boring dress to show off its pretty print. Just a couple of days later Tilly & The Buttons released the Lotta dress pattern, which was just the style I had in mind. 

Lotta is a beautifully simple dress with a blousy bodice, flared skirt and narrow elasticated waistline. It has the options of midi or knee-length skirts, grown-on short sleeves or drop-shoulder bracelet length sleeves, and deep patch pockets. As an added bonus, it can be made using either woven or knit fabrics so it's a pretty versatile pattern.

Lotta would be a really great pattern for beginners - with no fastenings or darts it's a straightforward project to sew, and the more relaxed style of the bodice would make it easier to fit than some other dresses. As is always the case with Tilly & The Buttons patterns, the instructions are really detailed so should give you any help you need and if you want more support there's the option of an online course to accompany the pattern too. 
For those of us with more experience under our belts, it's a nice relaxing project to sew and comes together quickly. It could be a nice palate cleanser after a complicated project, or a good way to boost your sewing mojo if you're currently lacking in motivation.

In terms of sizing, my measurements (B 38", W 32", H 42") basically put me in Tilly's size 5 (my hips are actually between a 5 and a 6, but hip sizing isn't crucial for Lotta because of the flared skirt) and that's the size that I made. I'd say the sizing is good - the bodice is blousy as intended, but not so loose that it's starting to look baggy. 

The only alteration I made was to lengthen the bodice by an inch, which is very standard for me (I'm about 5' 9"). For reference, I used the midi skirt length straight from the pattern.

One point I should mention is that I can *just* get the bodice over my head - I do have pretty big head (all those hats that say "one size fits all"? It definitely doesn't!) so this shouldn't be a problem for most people, but it might be worth making a toile to check that you're OK if you also have a large head!

As I mentioned above, the fabric I used is from a duvet cover that I bought in a charity shop recently. The patterned fabric of the skirt is the top side of the cover, and the navy is the back. I originally intended to use the patterned fabric for the entire dress, but when I came to cut it out I noticed a couple of small areas of damage to the fabric that I needed to avoid and that meant that I didn't have enough fabric for both the bodice and skirt. 

In hindsight I think that might have been a blessing in disguise because I really like the combination of the two fabrics together, and having the whole dress in the patterned fabric might have been a bit overwhelming.
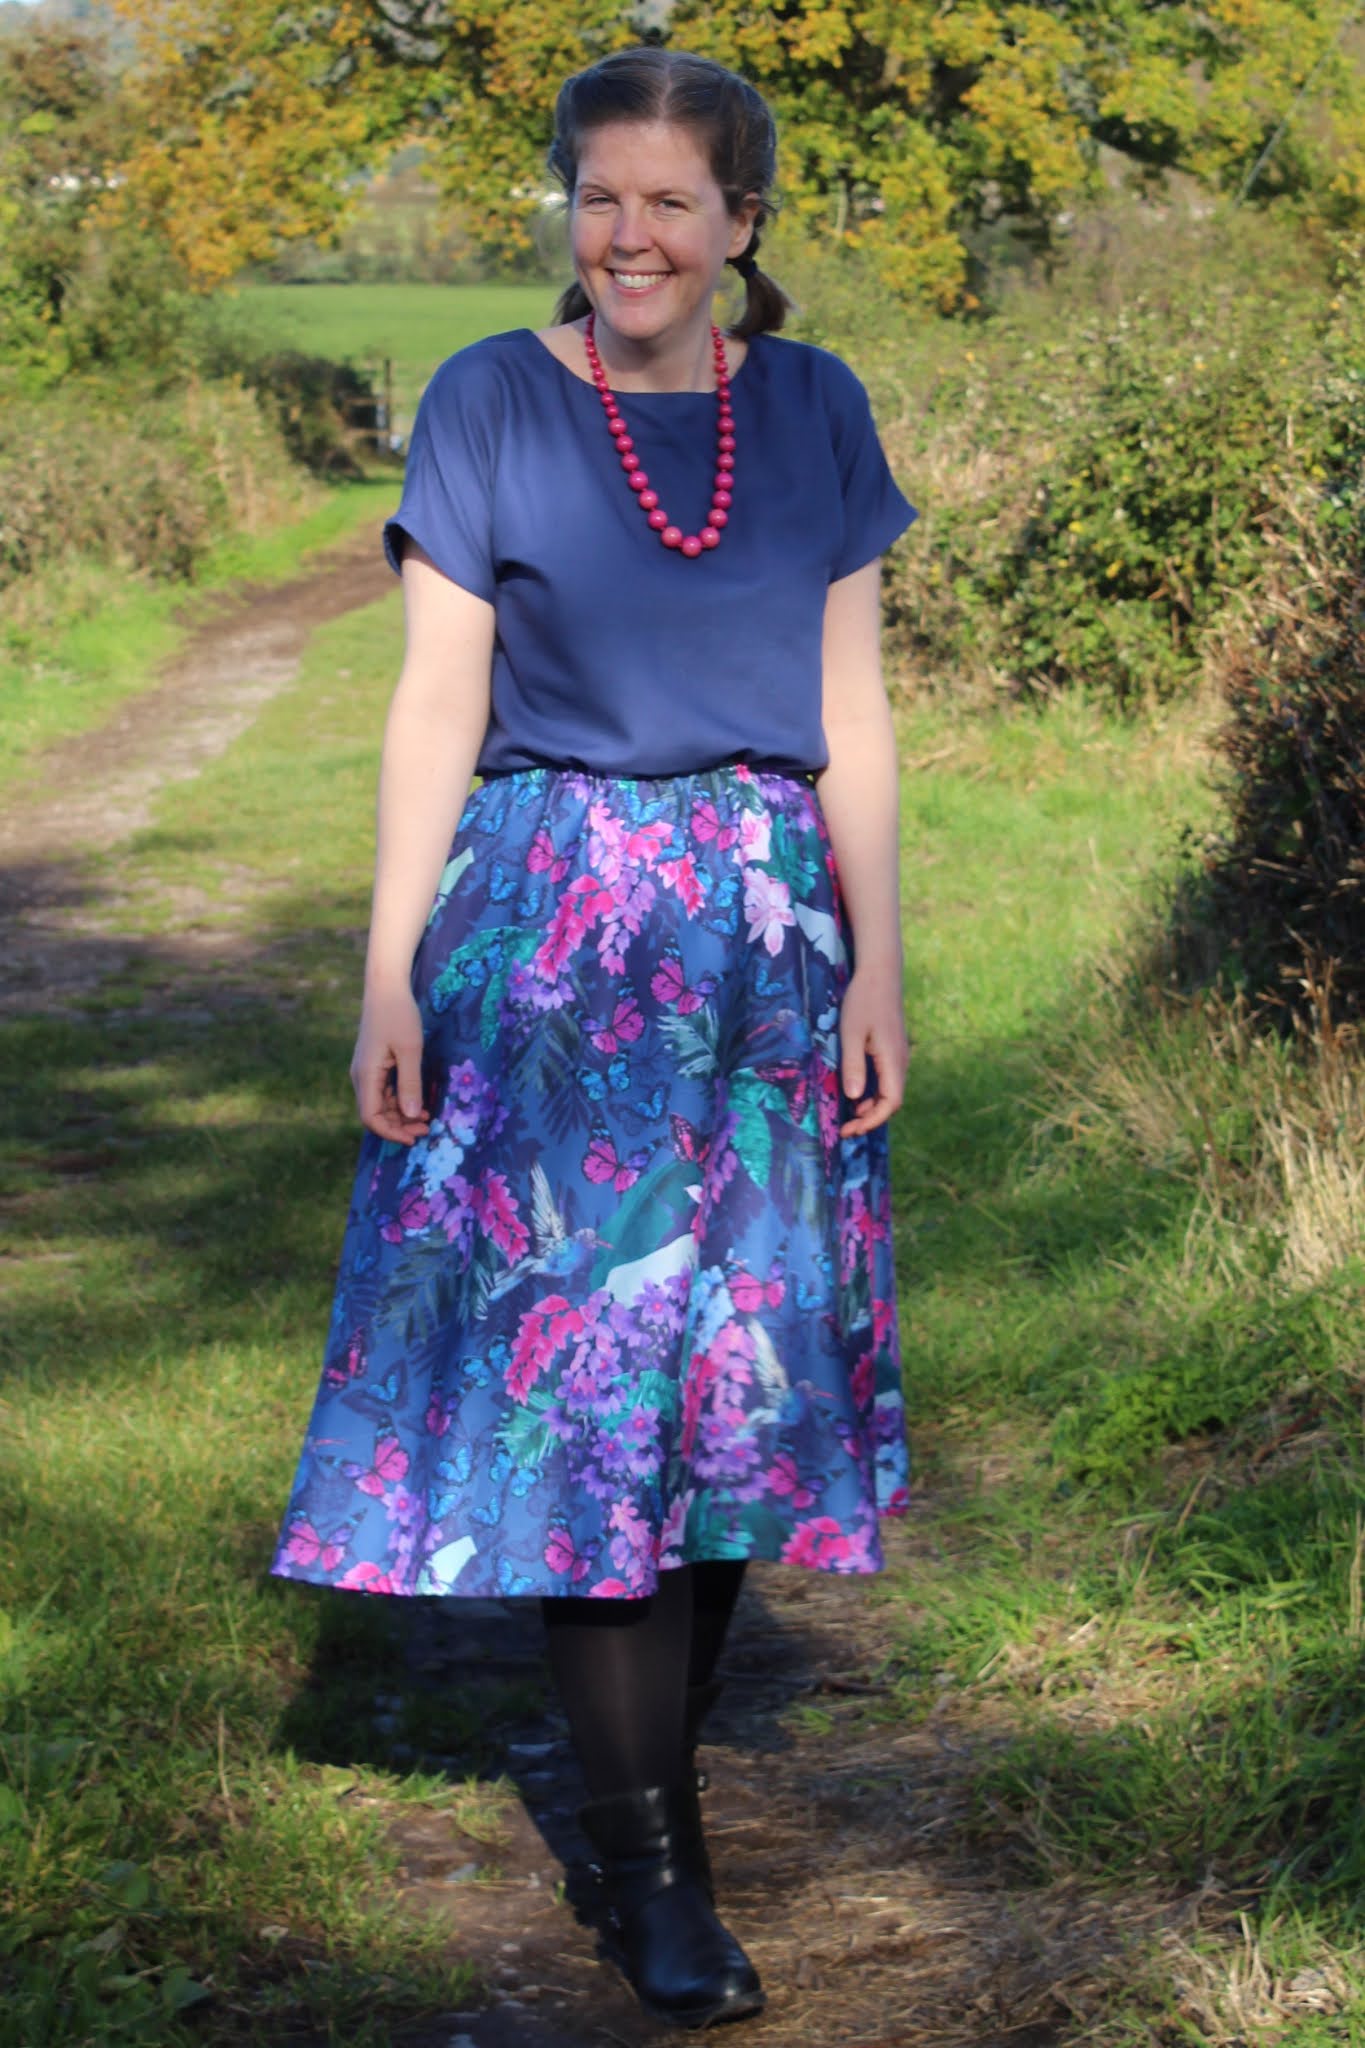
Having given my Lotta dress its inaugural outing, I'm pleased to report that it's really comfy but also makes you feel like you've made a bit of an effort. I think it will look good layered over a long-sleeved t-shirt or paired with cardigans/jumpers in the cooler weather we have coming up, but will also be great on its own for spring/summer so hopefully it should be an almost year-round dress. 

I'm really pleased with how my Lotta dress turned out, and I'll definitely be sewing more versions in the future. It's the kind of pattern that could be a really casual everyday dress, or could be dressed up to be quite smart depending on the fabric that you chose and the way you style the dress. I think my next version might have to be in a jersey to make it even more comfy and cosy for autumn/winter. What fabric would you use for Lotta?

Thursday, 24 September 2020

Helen's Closet Arden Pants

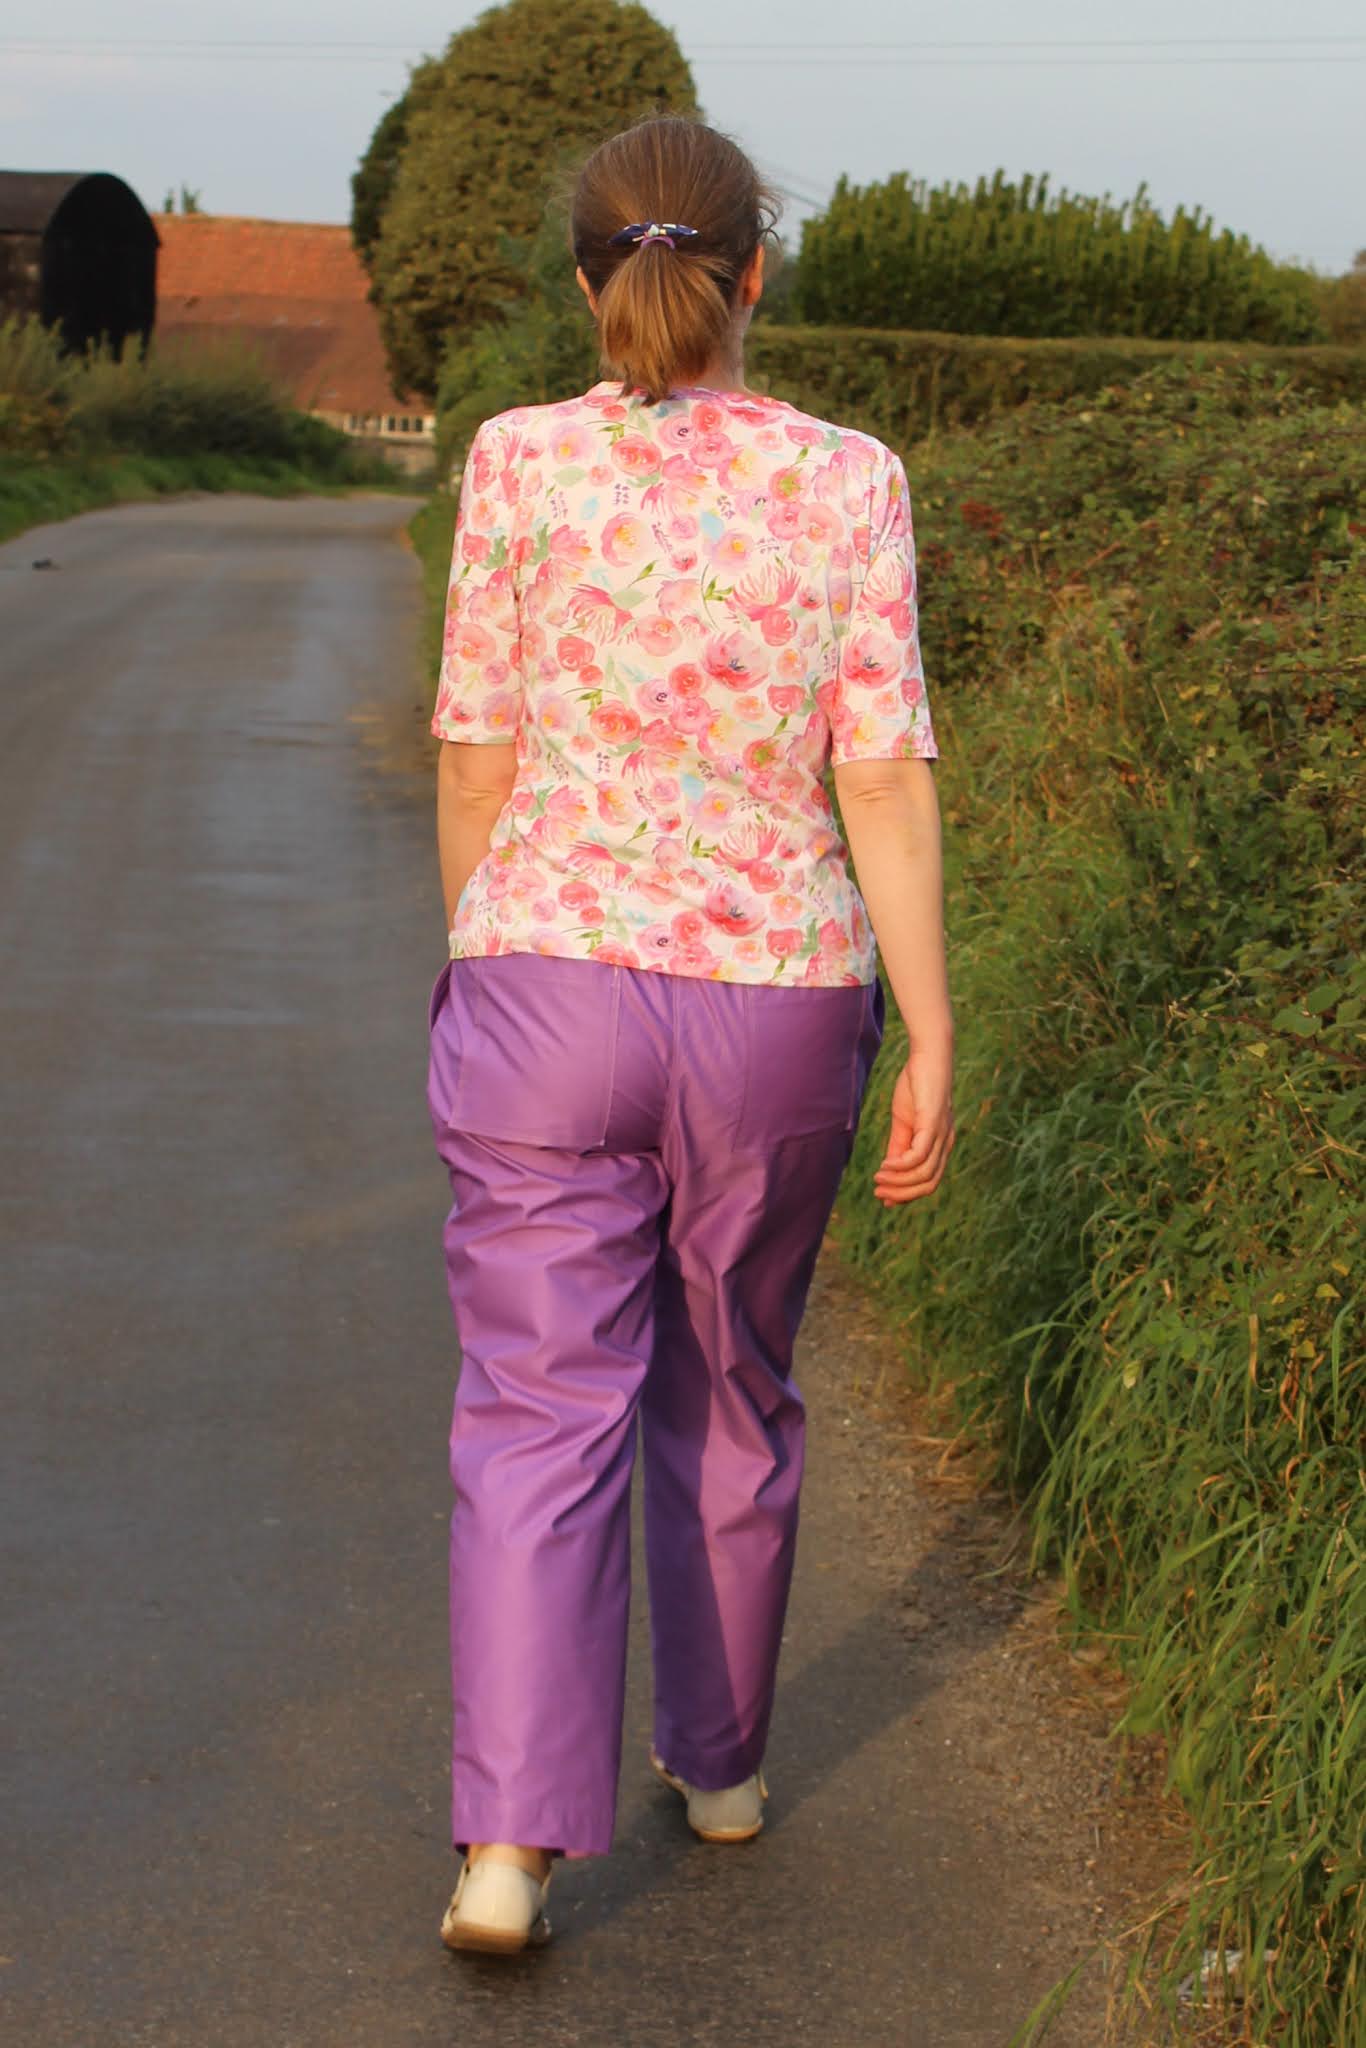
Welcome to the latest instalment in my ongoing quest to gradually add more trousers to my wardrobe! Today's project came about at least partly thanks to my mum, who saw some photos of the pattern when I was scrolling through Instagram and rather unsubtly encouraged me to buy it so I could try it out for myself and then make a version for her (I wouldn't listen to most people telling me to do that, but my mum's allowed to!). Here are my Helen's Closet Arden pants....

The Arden pants (which I will henceforth refer to as trousers because to me pants are undergarments!) are everyday high-waisted trousers with a classic elastic waist, as well as front and back pockets. The pattern also features views with an elasticated jogger style cuff in two different widths, and the option to topstitch the waistband and add a drawstring. 

I really enjoyed sewing my Arden trousers. The instructions are extremely thorough and easy to follow. They include lots of helpful tips such as pre-pressing the hems before sewing up the side seams of the legs - as the pattern itself points out, it's much easier to do this with a flat piece of fabric than a tube. 

The instructions also have you sew a double line of topstitching at the pocket opening, along the crotch seam and the inside leg, and add bar tacks at the stress points of the pockets. These are fairly simple steps, but aren't included in a lot of patterns and I think they really help to make the finished trousers look more professional.

I debated a bit about what size to use for this pattern. The instructions recommend that you pick a size based on your hip measurement - mine is slightly over 42" (a 14 for this pattern), but definitely below 44" (16). I looked at the finished garment measurements and thought that the hips might end up a bit snugger than I would like if I made a 14 so I went for the 16. I made a toile that turned out so wearable that I finished it off properly to use as pyjama shorts (above) - bonus! The only alteration I needed to make was to lengthen the legs by 2" (I'm about 5'9"). 

I'm pretty happy with how they turned out - I possibly could have them slightly slimmer through the legs, but I'm not sure that I want to. They're really comfy as they are and look nice in the flesh, although you might have to take my word for that because I don't think they photograph particularly well.

That's possibly partly due to my fabric. Don't get me wrong, there's absolutely nothing wrong with the fabric itself - it's a lovely quality cotton twill from Cloth Spot (sadly it no longer seems to be in stock) - but it has a very slight sheen in some lights that my camera seems to have emphasized. It's also on the crisper side of the recommended fabrics for this pattern so wrinkles more, and more prominently, than a drapier fabric would.

How they look in real life is more important than photos though, so that doesn't bother me. It also feels like the fabric will soften up quite a bit with wear. I'm happy with how my Arden trousers turned out, and it's just as well I enjoyed sewing them because my mum has already put in her request for a pair of her own!

Wednesday, 9 September 2020

McCall's 7131 Culottes

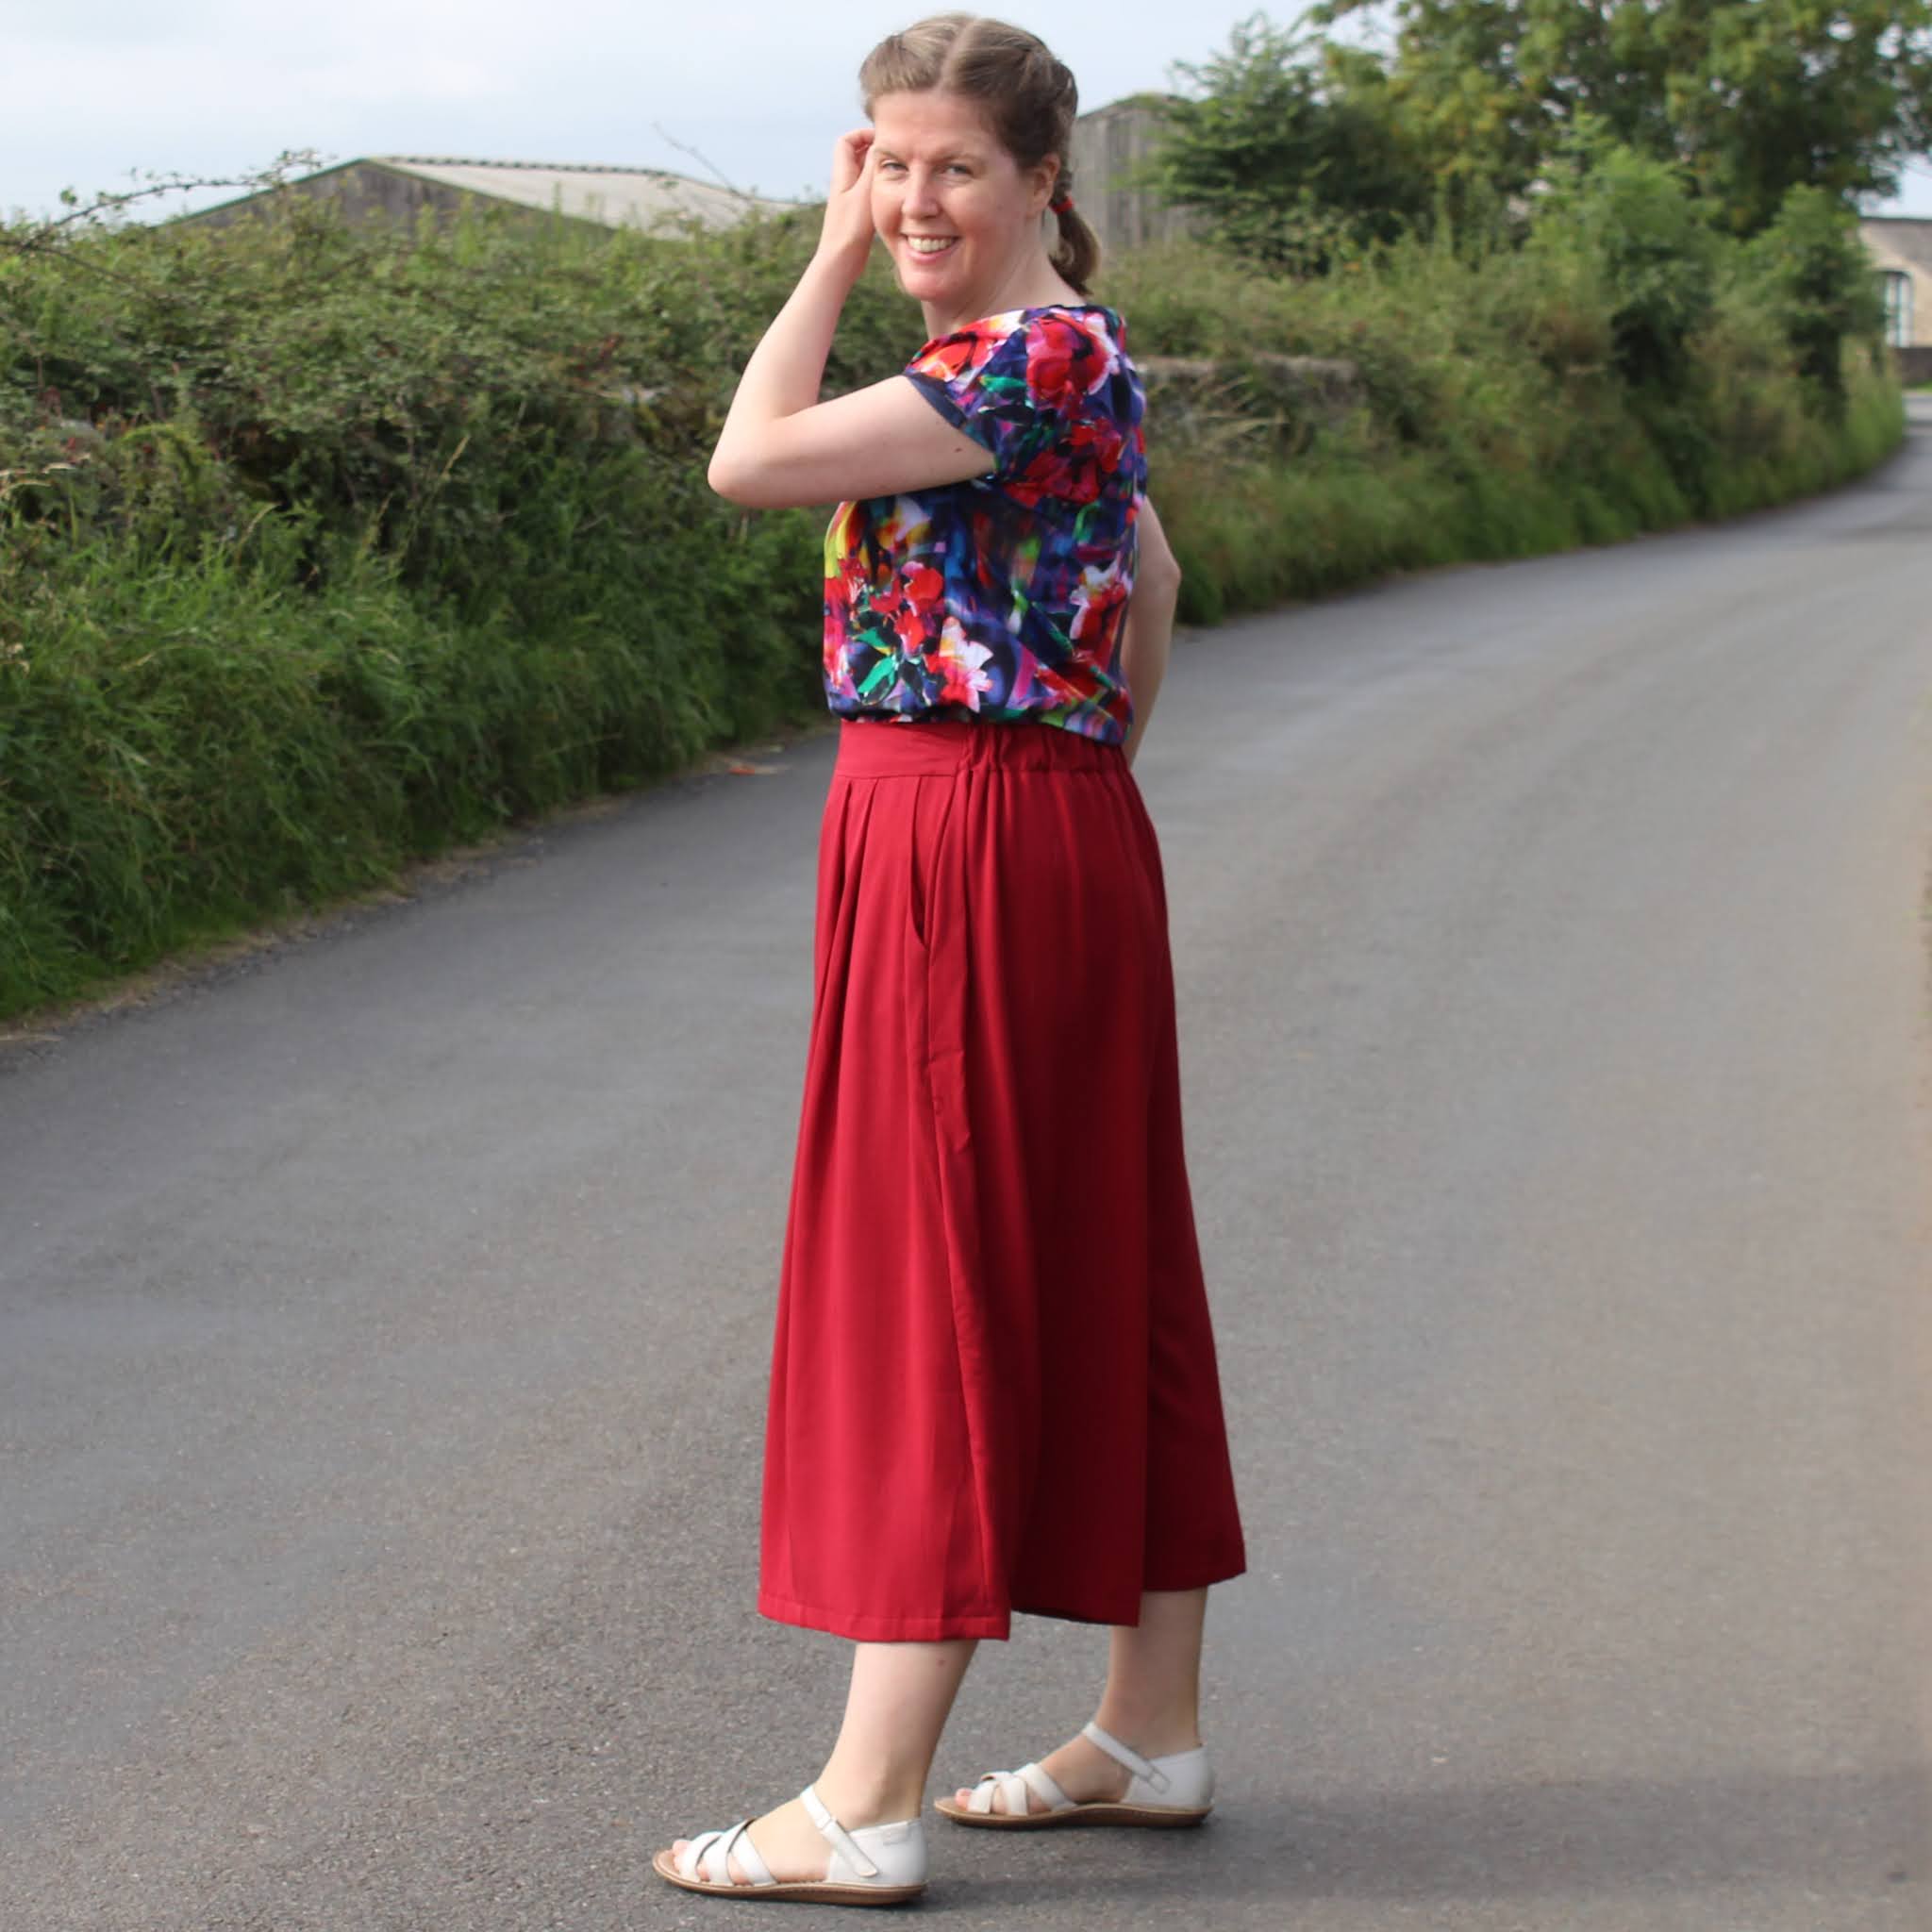
Red trousers might not immediately sound like a wardrobe essential, but recently I'd been feeling like I could do with some. Then I saw McCall's 7131 was included with last month's issue of Love Sewing magazine, and decided that if I was going to have statement red trousers then I might as well go even more dramatic and have bright red culottes instead.

McCall's 7131 is a pattern for loose fitting trousers, shorts or culottes, with side front pockets, front pleats, a flat front waistband and elasticated back waistband. It has four different length variations, as well a the option to use an overlay. I made view C, which is the second longest option.

Sewing the culottes was pretty simple. The instructions are fairly standard for a commercial sewing pattern. They're concise and not particularly hand-holdy, but I didn't have any trouble understanding them and the culottes came together easily. 

The pattern calls for you to sew channels in the back waistband and use 4 pieces of narrow elastic, but I was feeling slightly lazy and realised that some 1.5" elastic that I had in my stash was just about the right size for the casing without the channels so I decided to use that instead of the narrow elastic. Other than that I did everything else following the instructions.

If you're making this pattern, I'd definitely recommend consulting the finished garment measurements (printed on the pattern pieces themselves) when choosing what size to make. There's quite a lot of ease built into the pattern - if I remember rightly I think there's about 3" of positive ease at the waist. My measurements (waist 32", hips 42") would put me in a size 18 according to the pattern's size chart, but I actually made a 16 and also cut my elastic to be slightly shorter than the pattern calls for and that worked out well. If I'd made an 18 as recommended, they'd have been far too loose at the waist.

The fabric that I used for my M7131 is some red viscose twill from Like Sew Amazing. It's a lovely fabric with a really nice drape. Viscose twill has a little more body to it than viscose challis, and I think it's a perfect weight of fabric for this pattern. Plus at £7 a metre, it's a bit of a bargain!

I think that my idea to make some red trousers/culottes was definitely a good one. I've got lots of tops that I can wear with them, they're beautifully swishy to walk about in and the elastic back makes them really comfy. So maybe red culottes are a wardrobe essential after all - they are for me at least! How about you?

Tuesday, 1 September 2020

Megan Nielsen Olive Dress and Tops

 When a new pattern comes out, you buy it almost immediately and then make three versions within about a month of owning it, it's a fairly good sign that it's a winner, don't you think? That's what happened for me with the Megan Nielsen Olive dress/top (also available in sizes 14-30 here).

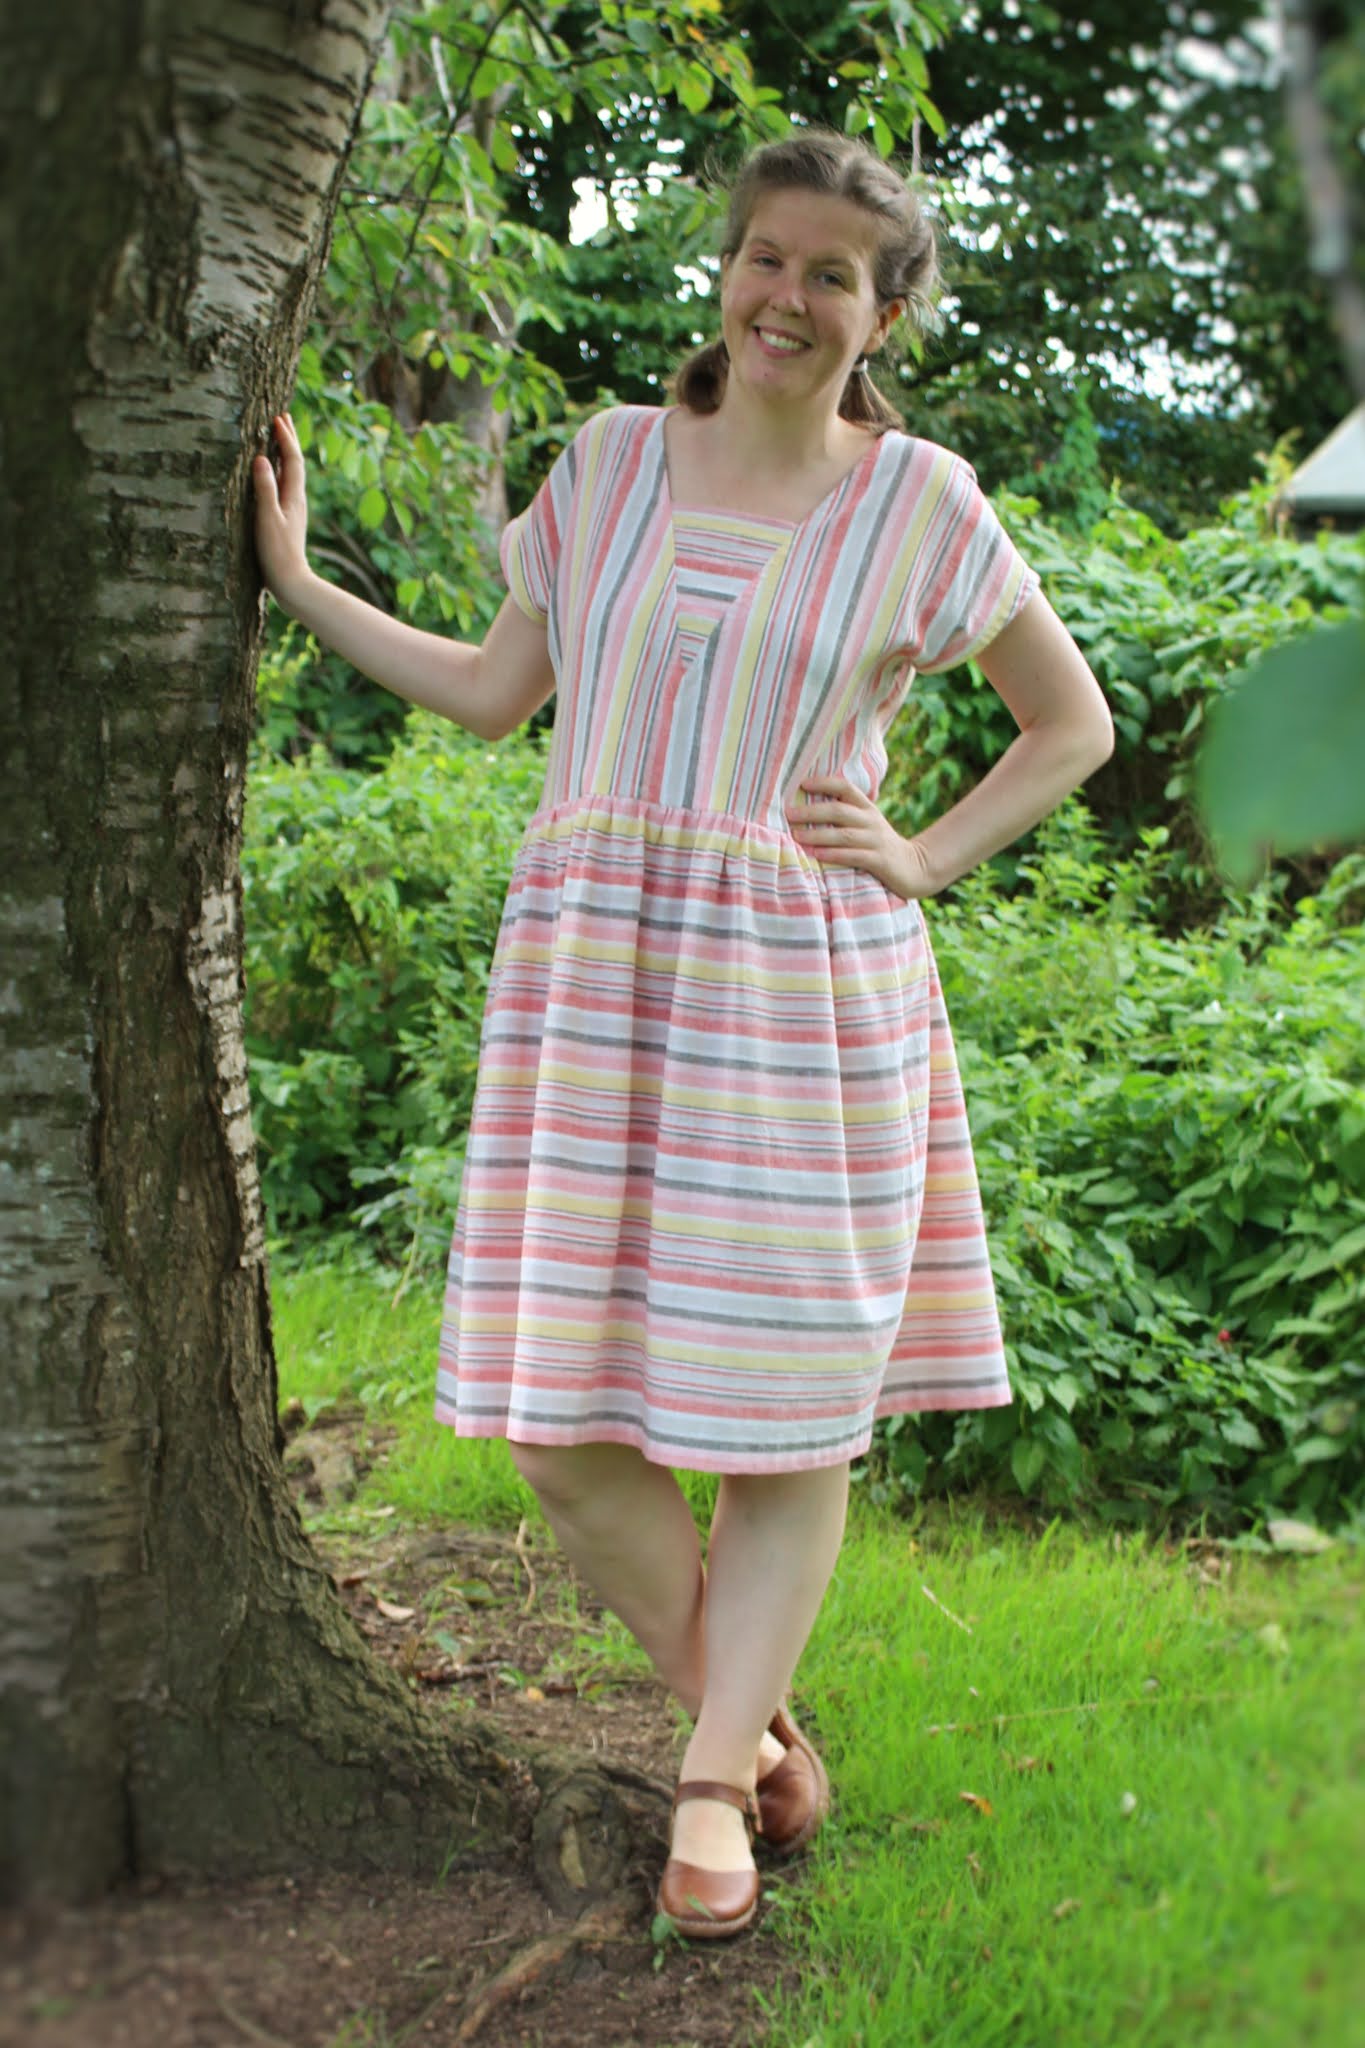
The Olive is a relaxed fit top or dress with a V-insert at the neckline. It has a drop shoulder, various sleeve finishes (bias bound (which I used for all three of my versions) or banded short sleeves, or longer sleeves), dress or top variations (with two top lengths) and an optional breast patch pocket. The dress has a gathered skirt and in-seam pockets.

I've been hankering after a looser fitting dress this summer so that was what initially attracted me to the pattern, but the first version I made was actually the shorter length top. That was mainly because already had the perfect fabric for it in the form of this super pretty floral lawn (now out of stock) from Selvedge & Bolts. I knew I wanted to make a feature of the V-insert so for that I used some white cotton lawn that I have in my stash (I tend to keep a small supply of white lawn because it's useful for bodice linings). 

I loved how my top turned out so I pretty much immediately started planning a dress version. The Olive is a great pattern for playing with stripes so I was on the lookout for some nice stripey fabric and thankfully spotted the perfect candidate in the form of this yarn-dyed linen-cotton fabric from Cloth Spot. It's an excellent quality fabric and is a great pairing for this pattern. It's got a bit of body to it, but will still be lovely to wear on hot days. This dress is so easy to wear and comfy. My only slight disappointment is that I hadn't finished it in time to enjoy it in the heatwave we had a couple of weeks ago!

Now we come onto my third version! My mum really liked both my top and dress so asked me to make an Olive for her, and I was happy to oblige. This version is the full length top. The fabric is from Cloth Spot again - although I think this one is now out of stock apart from a remnant (still available at the time of writing!). This one is a viscose and is nice and drapey. It was slightly 'interesting' to sew because my machine didn't completely love the change in texture when sewing over the woven stripes, but as long as I took it slowly it coped with it OK. And mum is happy with the end result so it's all good!

The Olive is a nice pattern to sew. You have to take a bit of care sewing the V-insert, but you do that first and once that's done it's pretty simple and fairly speedy to sew. 

The instructions are really detailed and easy to follow. They also give you two options for sewing the V-insert - one where the edges end up fully enclosed, and one that is simpler but leaves the edges of the V exposed on the inside. I used the first, apparently slightly trickier option for all of my Olives and it does give a really nice finish. It's not too difficult as long as you're willing to be quite precise. There's also a sewalong for the Olive on the Megan Nielsen blog if you're struggling with anything.

As the Olive has a relaxed silhouette, fitting isn't too complicated. For both of my versions I blended from a 12 at the bust to a 14 at the hips (my measurements are 38-32-42) and added an inch to the length of the top/bodice. For my dress, I also lengthened the skirt by 2" (I'm about 5'9"). My mum's top blends from a 12 at the bust to a 16 at the hips and is the length from the pattern (she's about 5'6").

I love how all three of these Olives turned out. It's a really satisfying pattern to sew and the finished top/dress are lovely to wear. I'm not sure I'll use the long-sleeved version, but I'll definitely be keeping my eye out for pretty fabric for another top or dress version next summer!

Thursday, 9 July 2020

Ellie & Mac Discoverer Tees

I've been on a bit of a mission recently to try to reduce the amount of fabric I have sitting around. That's been fairly successful in terms of using up the bigger cuts, but I've still got a fair amount of fabric left over from other projects that needs to be used. I struggle more with using up knit fabric than wovens, so when I came across the Ellie & Mac Discoverer Tee recently I thought it might be a good way to use up some of my jersey.


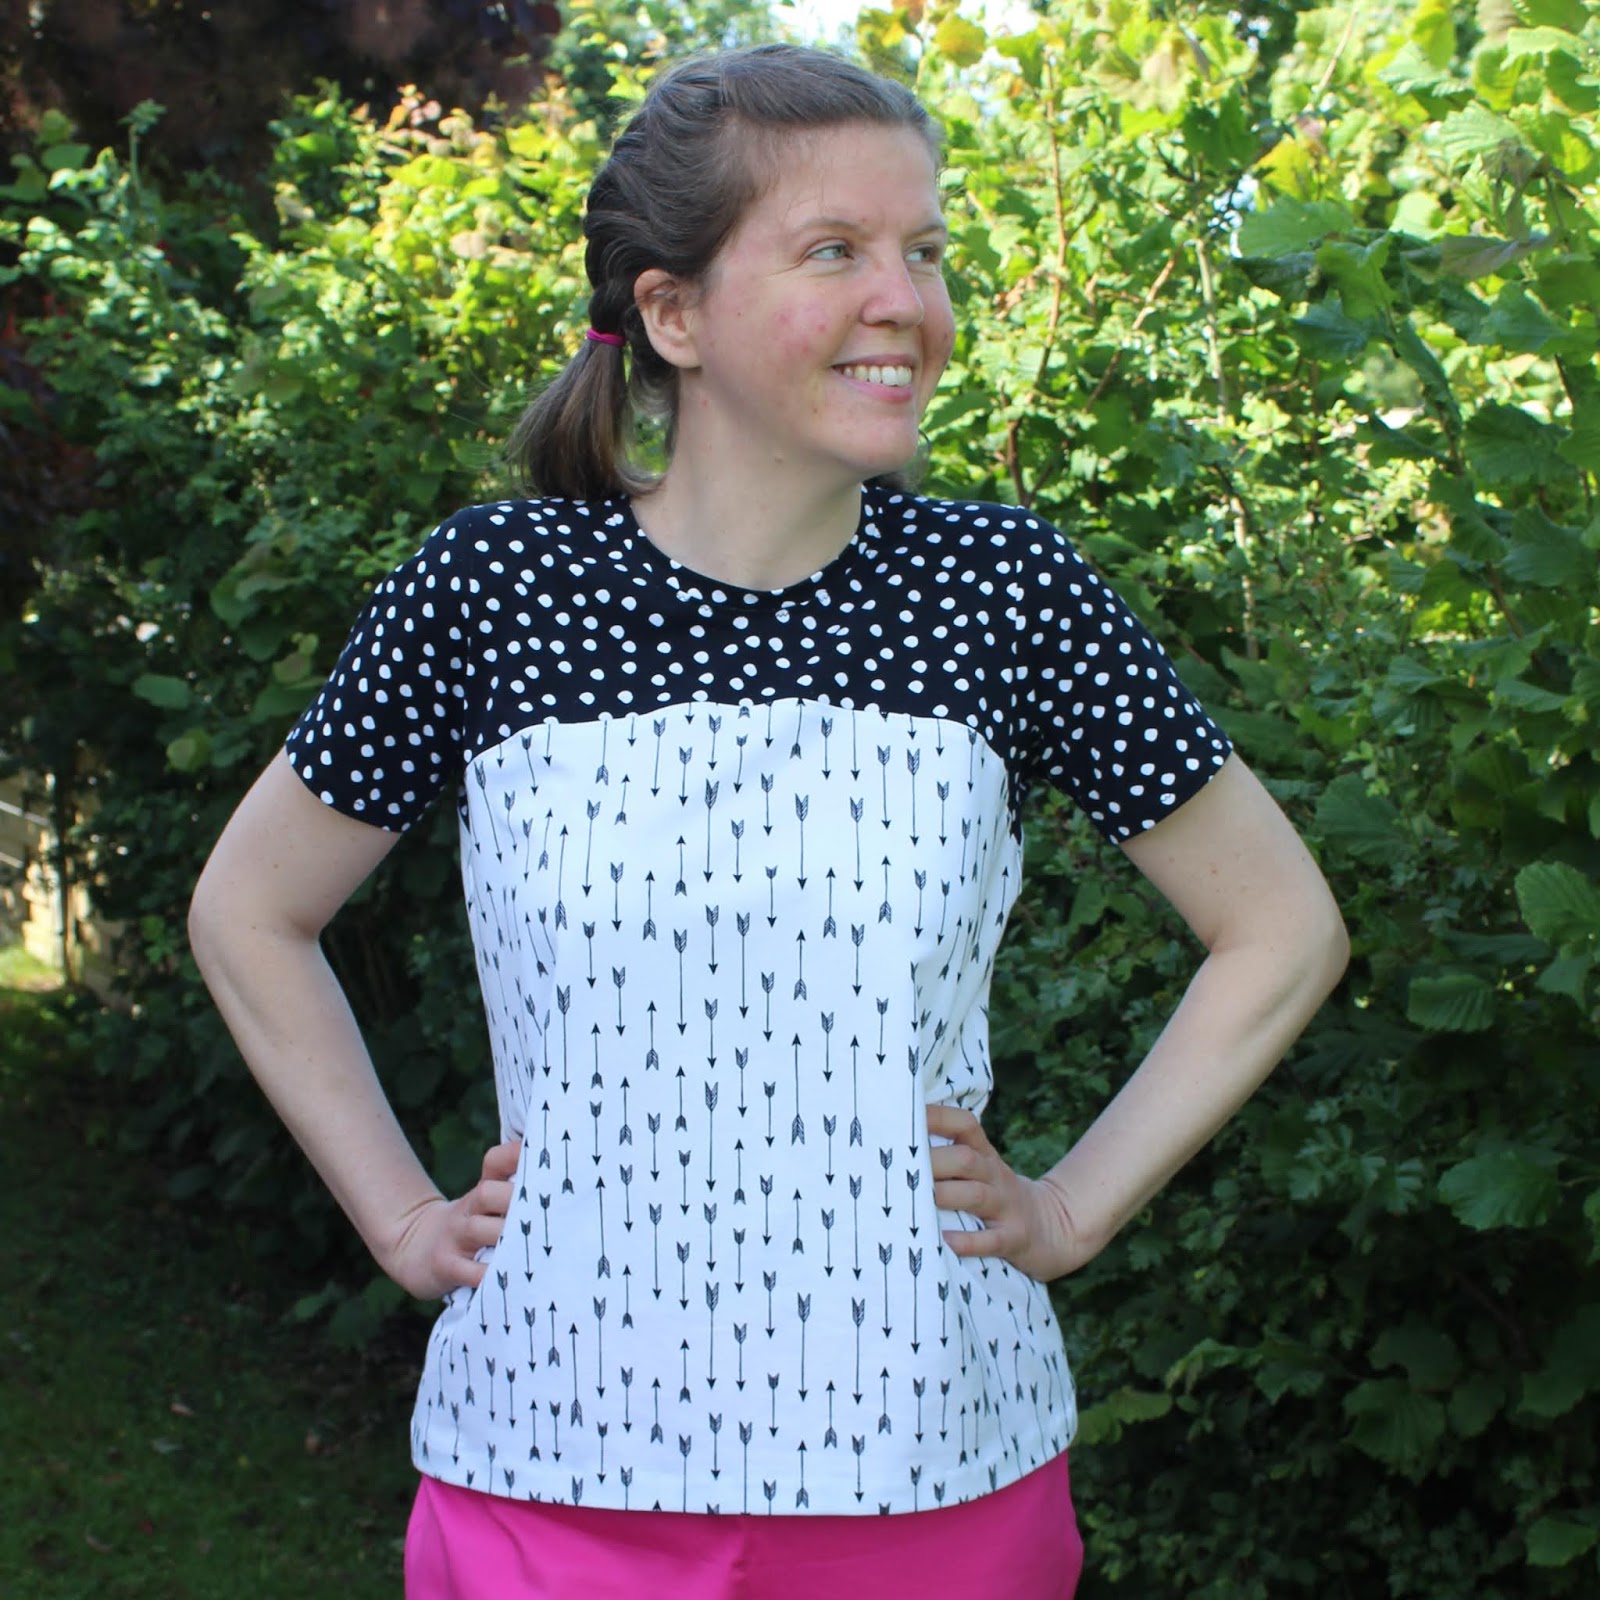
The Discoverer Tee is a basic t-shirt shape, but with the added interest of a colour block yoke and three sleeve options. I like the fact that the join between the yoke and main section is curved rather than just a straight line. You do need reasonably sized pieces of fabric for the main front and back sections, but the yoke and short sleeves that I used don't take up too much at all.


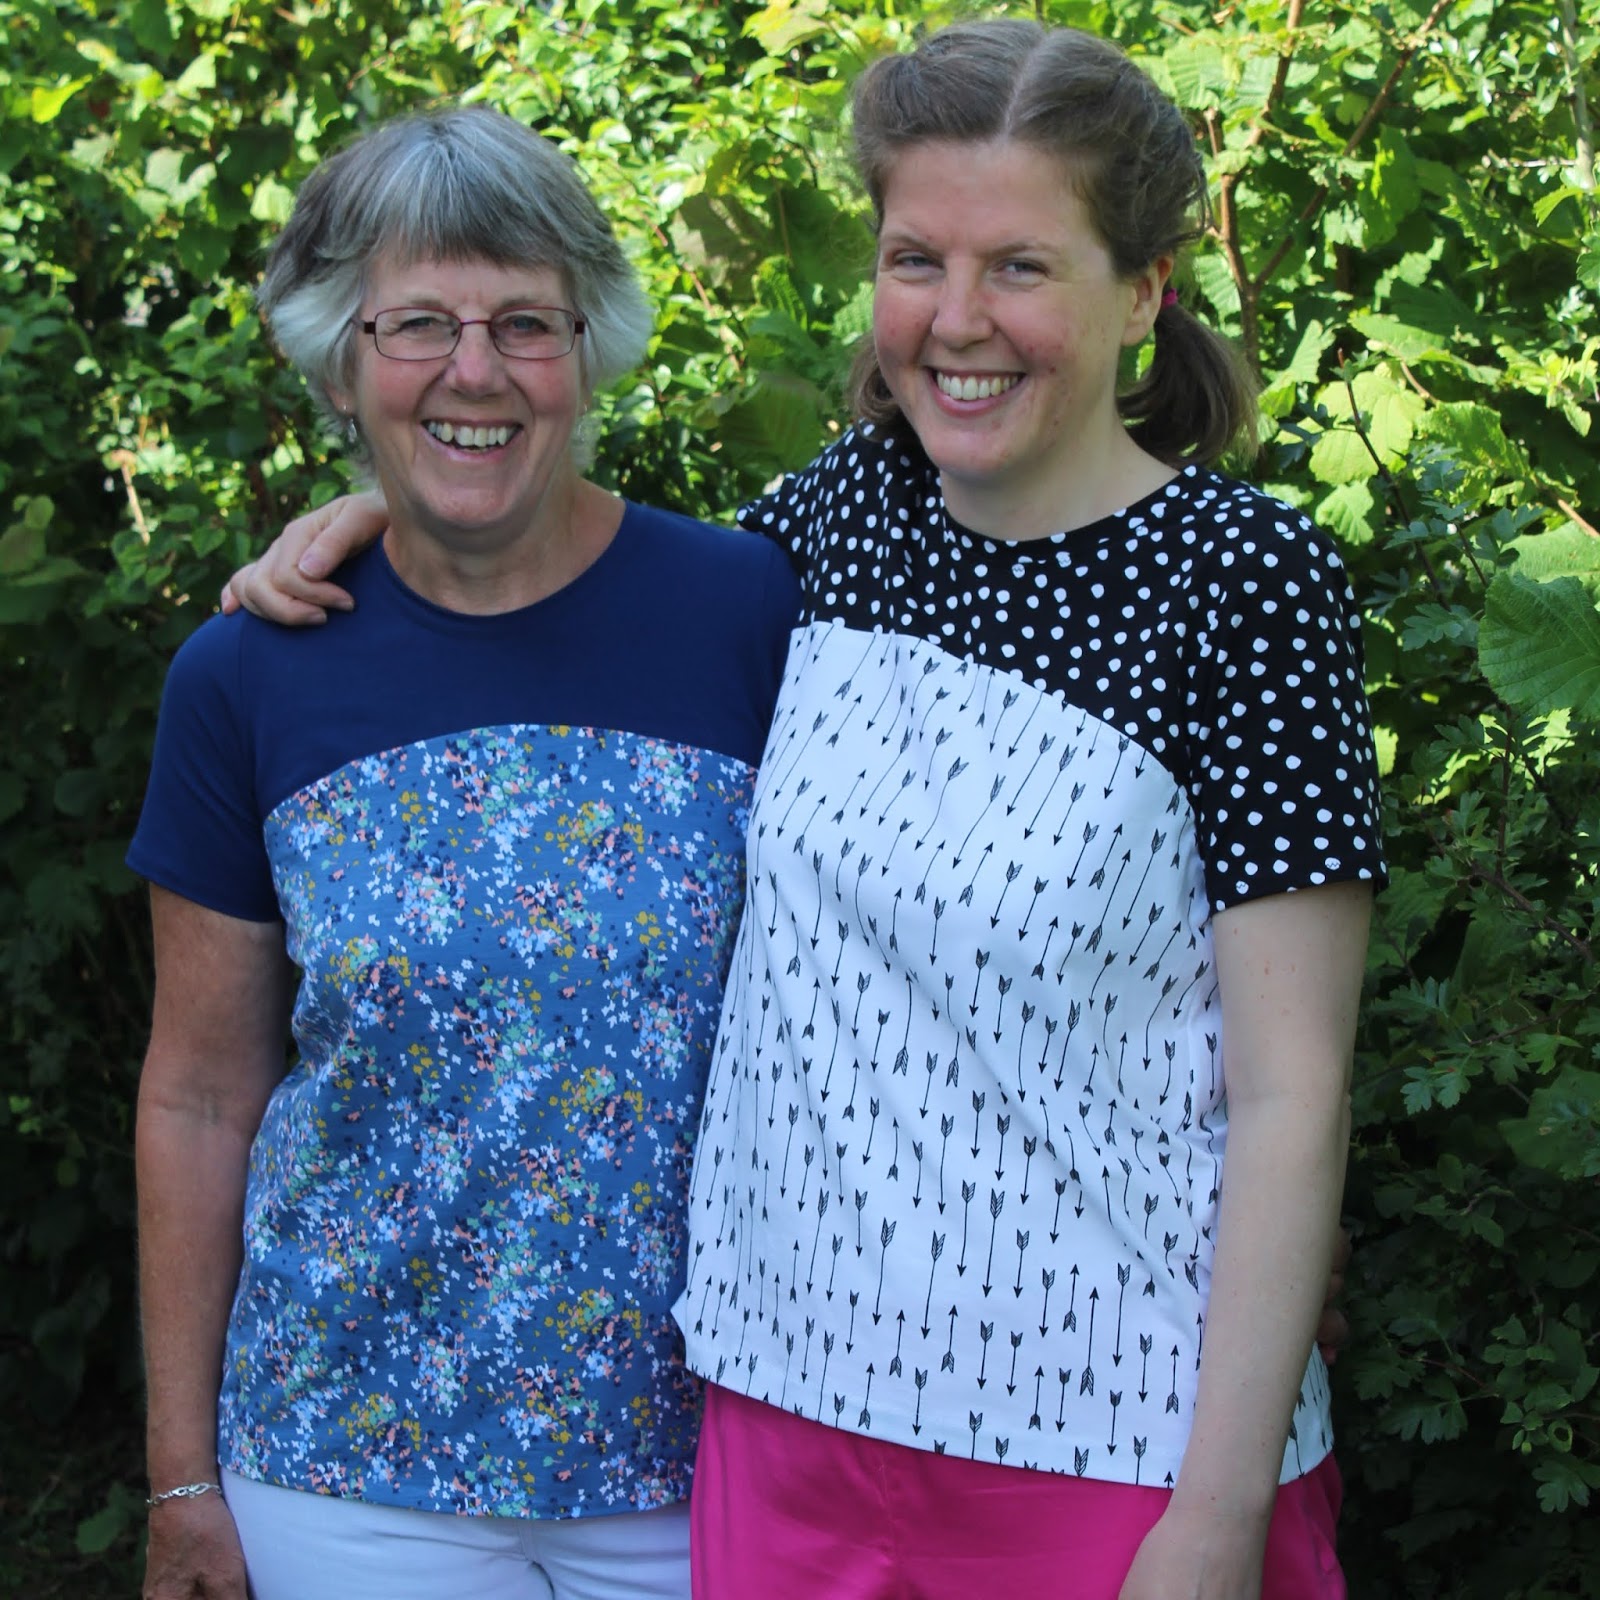
The first version I made was this one for my mum. Like many people, she had a bit of a wardrobe clearout during lockdown and gave me a couple of dresses that she was no longer wearing for me to refashion. Thankfully the skirt of one of them was just big enough for the main front and back bodice sections, and I had a piece of jersey left from another project that perfectly complemented the darker blue in the print.


The version for my mum turned out so nicely that obviously I decided that I needed one for myself so raided my stash and came up with two monochrome prints that I thought would work well together. The white with the arrows was left over from a Freya top that I made last year, and the black spotty is the remnants from a pair of pyjama trousers I made for my sister-in-law.


Sewing the tees was no problem at all. The instructions seemed good, although I have to say that I only really scanned through them because I'm fairly familiar with sewing a basic knit tee by now. I did deviate slightly from the construction order and added the neckband once I'd sewn the shoulders, instead of after adding the sleeves and sewing the side seems as instructed. I'm just more familiar with doing it that way so find it easier.


I was relieved that the t-shirts turned out well because when I was preparing to make the pattern there were a few things that made be a bit skeptical about it.

Firstly, the sizes are given in ranges rather than as one measurement. Nothing wrong with that at all, but the ranges vary quite a lot in size (e.g. the MED size is quite a small range of bust sizes 35.5-36.25", whereas others have anything up to a 3.5" range - the XXS for example is for bust sizes 29-32.5"), which seems a bit odd to me.


There's also just one piece for the main front and back pieces, and the sleeve is cut on the fold so is a symmetrical piece rather than having slightly more space in the back. I'm no pattern drafting expert by any means, but as far as I know (and having looked at a couple of my other t-shirt patterns) it is more usual for sleeves to allow for more room the back.

There are also no notches at all on the pattern pieces. I thought that was odd to start with, but then it seemed even odder because most of the steps in the instructions start by telling you to mark the centre of the pieces you're going to be joining with a pin, so to my mind it would be better to include notches at those points so you already had them marked.


Going back to the positives - the fit is pretty good for me. My measurements (bust 38", waist 32", hips 42") put me in the middle (at the bust) or just over (waist)/at the top of (hips) the LG size range so that's the size I made. The tee is nicely fitted across the shoulders but looser over the waist and hips so that worked out fine.

The pattern says to add half an inch to the length for every inch you are taller than 5'5", but I'm 5'9" and didn't lengthen the pattern at all and it's still a perfectly good length on me.


Thankfully in spite of my initial reservations about the pattern, the tees both sewed up nicely and turned out well. I'd definitely think about making more of these if I have the right fabric combinations. My mum has also said that she thinks that hers is one of the comfiest t-shirts that she's ever owned (I think she might like another of her own!), which is a fairly good review, don't you think?