Thursday, 9 April 2020

Tilly & The Buttons Bertha Cardigan

During these times of social (sewcial?!) distancing, I'm finding that being creative in various ways is one of the things that's keeping me vaguely calm and I'm making sure that I've got a couple of projects on the go or lined up in my head so that I always have something to work on that fits my mood. One of the projects that I worked on last week is the Bertha cardigan by Tilly & The Buttons.


This is one of the patterns from Tilly's latest book Make It Simple, which I treated myself to the other week as part of my own version of panic buying (can't risk running out of projects!).

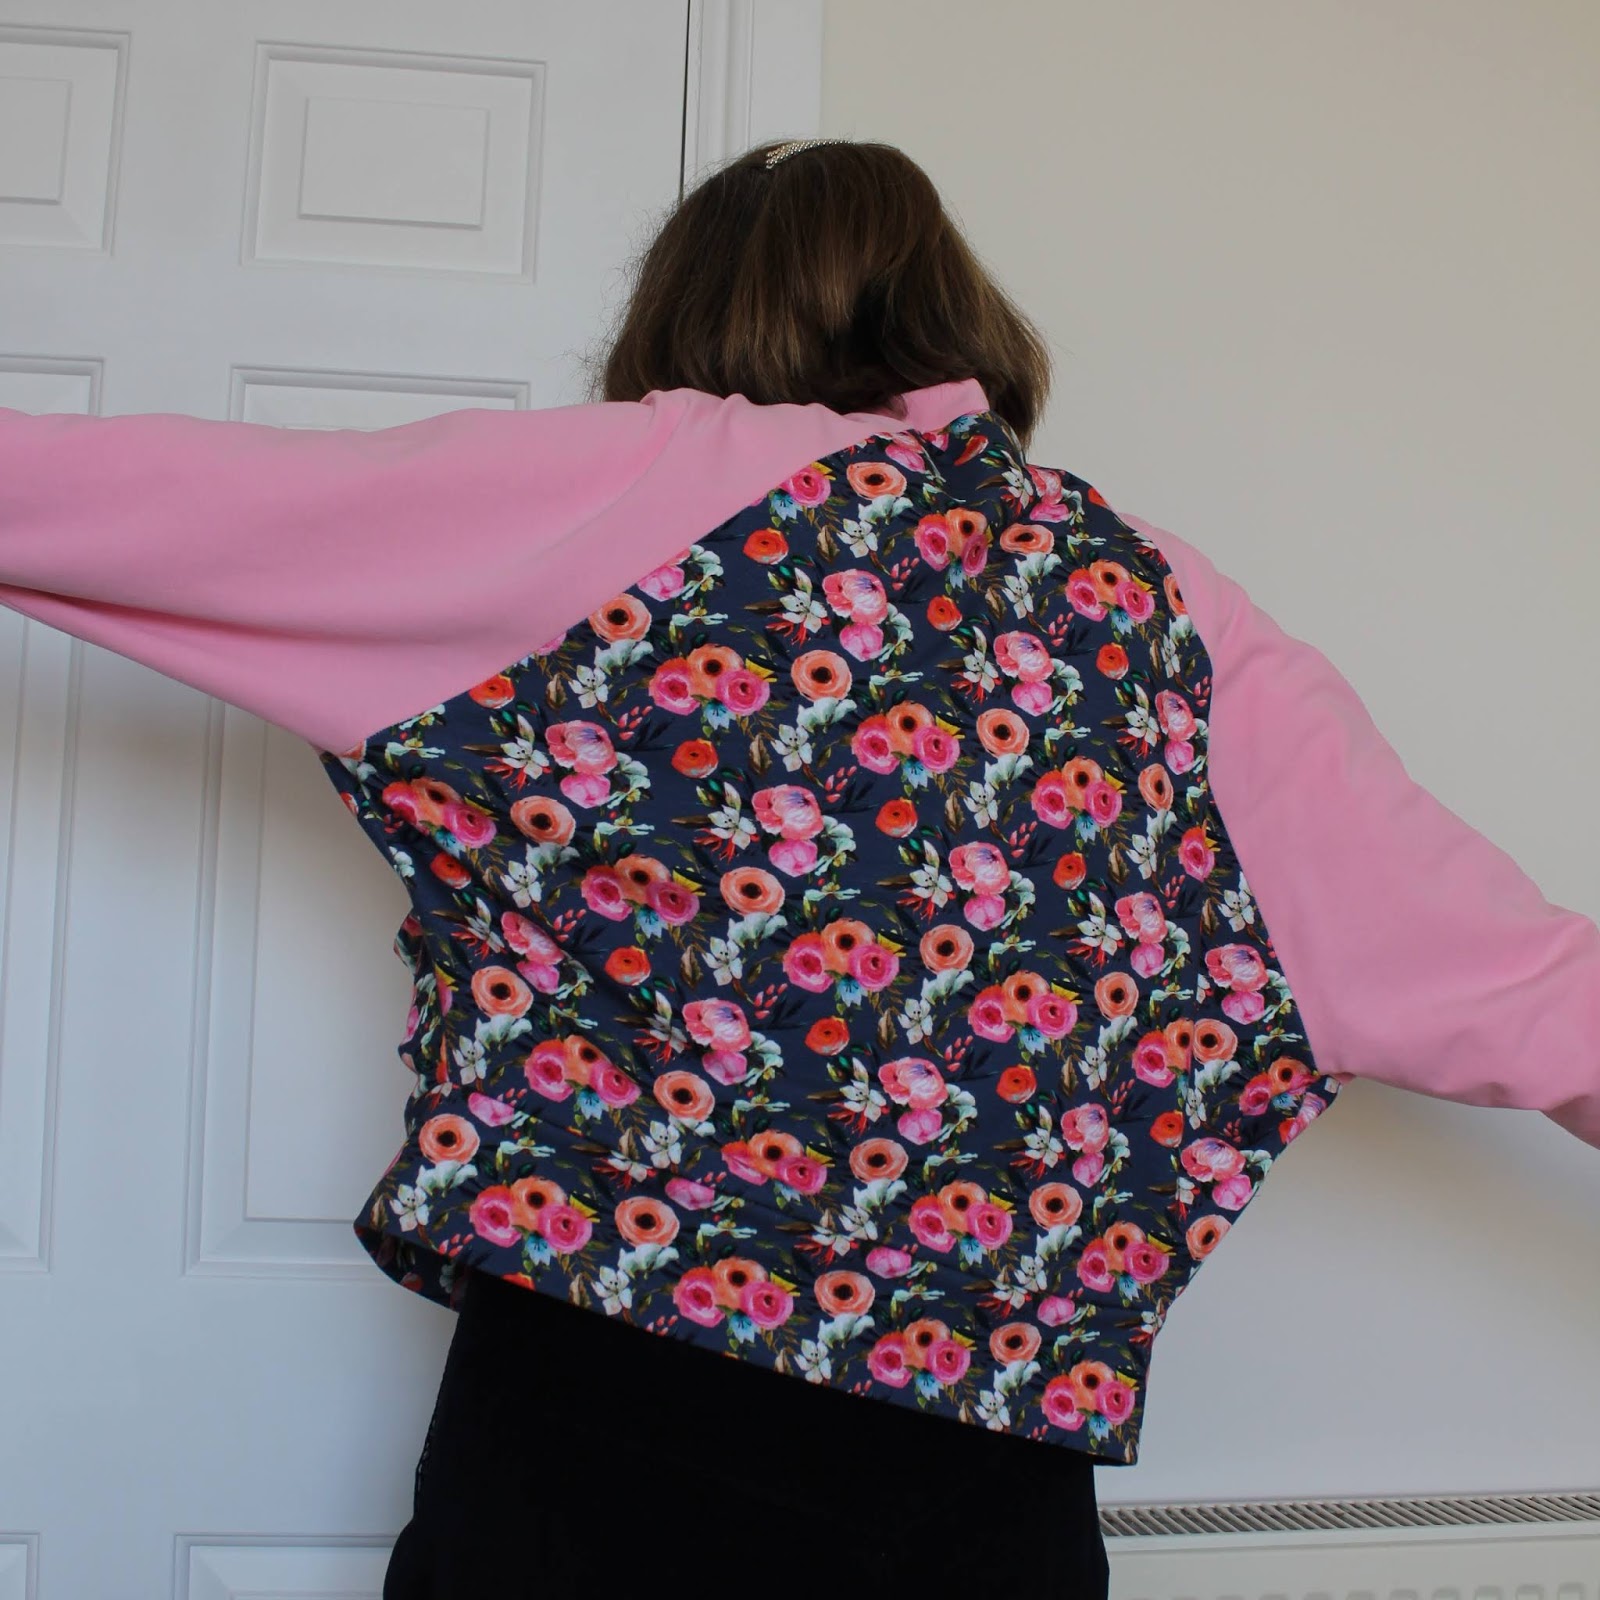
In Tilly's own words, "Bertha is a slouchy, open cardigan, cropped at the waist and with dramatic batwing sleeves. The deep cuffs and hem band add definition to the silhouette". I also added the optional pockets following the instructions in the book.


While it was initially the Safiya trousers/playsuit/dungarees that attracted me to the book, Bertha ended up being the first pattern that I made up because I wanted to use the leftover fabric from the Sheridan sweater that I made earlier this year, and this seemed like the perfect pattern to do that.

As with all of the patterns in Make It Simple, the Bertha cardigan is an easy project to sew. Even with adding the pockets, it was still a quick pattern to make and came together in just a few hours from start to finish over the course of a couple of evenings.

The instructions are very thorough, and help to make the sewing process quicker and easier by, for example, not telling you to press seams after each step but leaving pressing until you have a few things that you can press all at the same time. I found the instructions very easy to follow throughout, and the only thing I did slightly differently was to catch stitch the seam allowance of the neckband to the various other seam allowances around the neck edge. The instructions don't tell you to do that, but with my fabric (French terry) I felt like it would be a good idea to make the seam allowances sit nicely.


My measurements put me in a size 5 at the bust and between a 5 and 6 at the waist and hips. Being as Bertha has a relaxed fit and is designed to be worn open, I decided to make a straight size 5 and I'm happy with the fit that gives me.


As I already mentioned, the main floral fabric is French terry left over from my Sheridan sweater and came from Loubodu Fabrics (now sold out). I had just under a metre left, so far too much to let it go to waste but I knew whatever I used it for would need some colour-blocking and the Bertha cardigan seemed like a good project for that. I debated what colour to use as the contrast but in the end settled on a light pink, also from Loubodu Fabrics and also sold out, but they have other plain French terrys here. I'm happy with how the two fabrics look together, and thankfully they played nicely with each other while I was sewing.


All in all, I'm pretty pleased with my Bertha cardigan. The style is more slouchy than I usually go for so it might take me a while to work out exactly how to best pair it with other garments in my wardrobe, but it's super comfy and feels lovely to wear. Plus it's definitely good to have another way to wear this beautiful floral fabric - I wouldn't have wanted to leave that sitting in my stash would I?!

Thursday, 2 April 2020

Tilly & The Buttons Orla Top Sewing Pattern Review

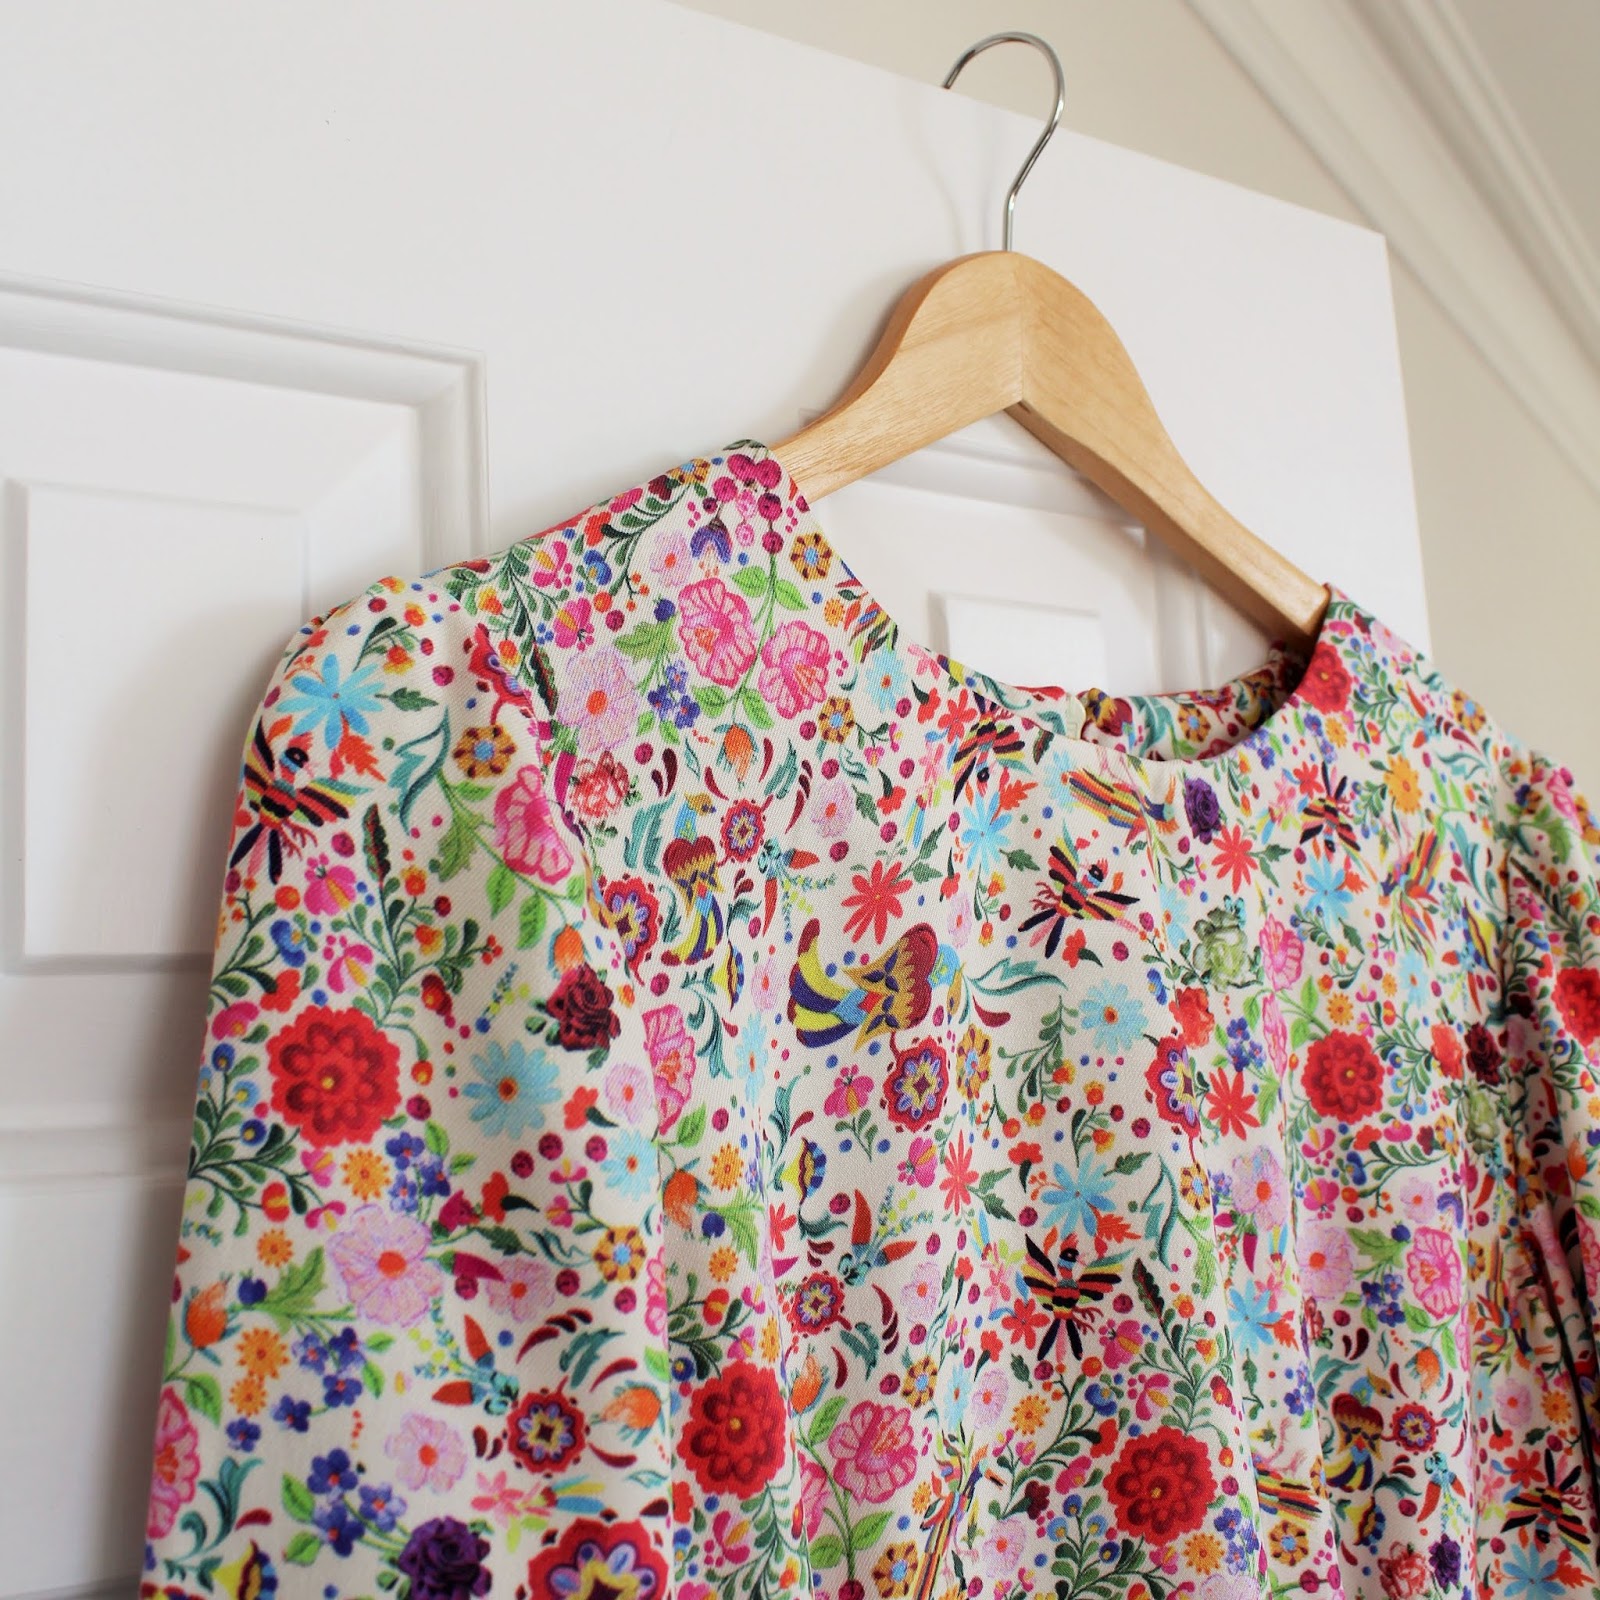
I'm back again today to share another project that I can tick off my Make Nine list for the year, namely the Tilly & The Buttons Orla top. These are also the first blog photos that I've taken in these new times of social distancing and self-isolation - I won't be seeing my mum (my usual photographer) for the foreseeable future, so you can enjoy my efforts to find places around my flat to take photos with a tripod and timer. I'm very much appreciating the fact that I have large windows that let in lots of light!


At first glance, the Orla top looks like a fairly simple shift top but that simplicity hides some interesting features such as a dipped hem finished with a facing, a pretty snowdrop collar option and an exposed back zip (more on that later!). The top also has a lovely shape, provided by curved French darts in the front and contour and shoulder darts in the back.

I've liked the look of Orla for a while, so I dropped some not very subtle hints that my parents might like to buy the pattern for me for Christmas. They kindly obliged! As my Christmas presents were sitting all around me when I picked my Make Nine projects, it was an obvious choice to include in the list.


Having said that Orla has some nice added details, I actually left most of them out for this one leaving it plain to let the fabric do the talking. 

I like the idea of the collar but I didn't think this fabric needed it, and I think I may be in the minority in this opinion but I've never been completely convinced about exposed zips. I'm not sure why really - they look nice in some garments, but I think they have a tendency to look a bit clunky on a drapey fabric like this one.


I did contemplate giving an exposed zip a try here, but I couldn't find anything that looked like a good colour match in any local shops and I didn't want to order a zip online and have that turn up and also be the wrong colour so I decided to use an invisible zip instead. As I was using an invisible zip, the easiest thing seemed to be to cut the back in two pieces (adding a seam allowance to the centre back) instead of on the fold as in the pattern. I also adjusted the back neck facings accordingly, and did my own thing (basically following the methods I've used when making other tops/dresses) in terms of attaching the facing.


Sewing the Orla top was a breeze. The instructions were clear and easy to follow as far as I could see (although it has to be said that the back neck facing and zip are probably the most complicated part of this pattern and I didn't use those instructions). I particularly like the hem facing - it's a nice touch and makes it really easy to get the nice curved hem. 


In terms of sizing - my measurements put me in a 5 at the bust blending out to a 6 at the hip, and that's the size I used. I also lengthened the top by an inch, just because I liked the length of the unhemmed top when I made a toile so I just wanted to add a little bit extra. I'm happy with the fit - it's nicely shaped but with enough ease around the hips for my liking.


The fabric I used is a viscose twill from Sewisfaction (sadly no longer in stock). It's a gorgeous riot of colour so I'll be able to pair it with lots of things in my wardrobe. It also feels just as good as it looks, which is an added bonus!


As you can probably tell, I'm really happy with my Orla top. It's a lovely style and I think that I'll get a lot of wear out of it. Putting it on makes me smile, and that's definitely very welcome at the moment!

Thursday, 26 March 2020

Knitting Round-Up 1/2020

Hello hello! How are you all? Staying safe and well I hope! In these strange times, with significant parts of the world in lockdown trying to curb the spread of COVID-19, I'm finding that all my various crafty projects are providing even more comfort than they usually do. So I thought it would be a good time to come and share some of the knitting projects that I've been working on since the start of the year.


First up is a project that I started last year, but which got put on hold for a couple of months while I was working on various Christmas presents. It's the Tank Top pattern from the book Simple Chic Knits by Karen Miller and Susan Ritchie and the yarn I used is West Yorkshire Spinners Colour Lab DK in the colour Deep Teal.


It's a really simple pattern - lots of stocking stitch knit in two pieces with ribbing at the waist, armholes and neckline. I made the medium size and followed the pattern exactly, apart from knitting 8 rows of ribbing on the neckline instead of 4 to raise the neckline up a bit. I'm glad I did that because it would have been a bit low otherwise. As it is, I'm pleased with how it turned out and it's a nice extra layer for added warmth on a chilly day!


Another project that got carried over from last year is my Siren Song socks. The pattern is by Vikki Bird and I really enjoyed knitting it! It's mostly a fairly plain sock with an interesting slipped stitch detail running in a panel along one edge of each foot. It's designed to work well with variegated yarns, and I think it does a good job of that with the gorgeous yarn that I used, which is "You Do Something To Me" by Mr B's Yarns.


Next up is my Minimania shawl. This is a project that I've been wanting to make for a while, and I'm glad that I finally got around to it! The pattern is by Lisa Hannes, and is really nice to knit. With the different sections being worked in different colours and textures, you're never doing the same thing for too long and you always have an incentive to keep going to get to the next section.


The mini skeins that I used for the middle coloured section are all by Mothy and the Squid and were part of a set that I was lucky enough to win in a giveaway a while ago. The off-white at either end is an undyed skein from Chester Wool. Happily the mix of colours are a really good match for most of my coats!


I also used a couple more of the mini skeins from my Mothy and the Squid winnings, combined with another one by Vicki Brown Designs, to make a Choose Colour Cowl by Maddie Harvey. This is a really lovely pattern designed specifically to use mini skeins or scrap yarn of varying quantities to give you various cowl size options (this is the wide single loop version, made using 3 x 20g mini skeins). You're always striping two colours together throughout the cowl, and it's interesting to see how the different colours play together.


It's a very relaxing pattern to knit, and the finished cowl sits perfectly inside my winter waterproof coat to keep my neck nice and cosy. I'm so pleased with this one that I'm already knitting a second version of the pattern using the leftovers from my Minimania shawl!


One of my Make Nine projects for this year is to try some more colourwork knitting, and I made a start on that with my first attempt at mosaic knitting. These are the Mosaic Mitts from the book Beginner's Guide to Colourwork Knitting by Ella Austin. My main yarn is Coop Knits Socks Yeah in the colour Benitoite, and the contrast is 'Taste the Rainbow' by Glendale Fibres (left over from my Kia socks). This is a fairly economical project - I only used about 25g of my main colour and just 5g of my contrast colour.


I love how they turned out, and really enjoyed watching the pattern emerge as I knitted the mosaic section.


Last but not least is another project from my Make Nine list - and another pattern by Ella Austin. This pattern is the Teign Poncho, and I included it in my Make Nine plans because I wanted to use this as an opportunity to use up the leftover yarn from my Lace Hearts cardi. It worked out perfectly on that front - I had only the tiniest scraps left when I finished!

It was another nice pattern to knit with alternating sections of stocking stitch and simple-but-effective texture. It's also already proving to be very useful at keeping my shoulders and upper back warm when I'm at my desk - they always end up cold, and this little poncho gives me a lovely bit of extra warmth just where I need it without being too bulky.


So I think we can say that my knitting has got off to a fairly successful start this year! And with extra time at home due to social distancing, I think the next couple of weeks/months will be fairly productive for knitting and crafting in general as well. Are you using creativity to keep you calm too?

Thursday, 5 March 2020

Nina Lee Camden Pinafore Sewing Pattern Review

The project I have to share with you today was much more fun to sew than it was to photograph! In case you're wondering, a plain navy garment is not that easy to capture on camera in very changeable but permanently windy February weather. So the photos in this post might not be the finest that have ever appeared here, but hopefully they'll still give you a good picture of my Nina Lee Camden pinafore.


I love a good pinafore, and wear them quite a lot for large part of the year so I've been meaning to add to my collection for a while. The Camden pinafore looked like a good option so I included it in my Make Nine challenge this year to ensure I got around to making it.

The Camden is a bit different from other pinafore patterns that I've made - it's fully lined and has a full back rather than straps, both of which will make it a bit warmer to wear in winter. The bodice is closely fitted with princess seams and a deep V-neck, and the skirt has handy patch pockets.


Sewing the Camden pinafore was a treat - it's been a while since I made a fully lined dress, and I'd forgotten how much I enjoy the clean finish that it gives you. It initially seems like quite a lot of work because you're essentially making two dresses, but it always feels worth it once the work is done. Plus it's a good opportunity to use up leftovers from other projects so you can get pretty insides!


The instructions are thorough and detailed, and I found them to be very easy to follow throughout. I didn't struggle with any anything, but there were a couple of little bits that I did that weren't mentioned in the instructions. Firstly I cut a couple of millimetres off the curved and angled edges of the pocket linings to help ensure that they'd press under fully and not peep through on the outside of the garment. I also catch stitched the waistband of the lining to the seam allowance of the outer waistband to help the lining sit nicely inside the pinafore.


In terms of sizing, I cut a 12 at the bust and blended out to a 16 at the waist and hips. The 12 is the size recommended for my current bust measurement, and my waist and hips are currently between a 14 and 16 but based on the finished garment measurements I thought I'd be happier going up to the larger size. I think I was right to do this - the pinafore is nicely fitted but still has enough space to allow me to wear any of my tops with it.


I also lengthened the pinafore quite a bit - I added 4cm to the bodice and 10cm to the skirt. I'm about 5'9", so it's fairly standard for me to have to lengthen patterns but this is more length than I usually have to add (particularly to the skirt).


The main fabric I used is a navy stretch needlecord from Textile Express. It's actually the same fabric that I used for my M7475 culottes last year so I knew it would be a pleasure to work with and make a dress that's lovely to wear. The slight stretch in the fabric gives it that bit of extra comfort.

I lined the bodice and pockets with some floral cotton left over from a project from a few years ago, and lined the skirt in some generic white lining fabric that was in my stash but I have absolutely no recollection of buying (slightly worrying!).


Photographic challenges aside (and let's face it, they don't really matter!), I'm really happy with how my Camden pinafore has turned out. It was an enjoyable project to sew, it feels lovely on and I think I'll be wearing it a lot - not least because it goes with just about any top that I could possibly want to wear with it. It's definitely a winner!

Thursday, 23 January 2020

Alice & Co Whitechapel Pyjamas Sewing Pattern Review

At this chilly time of year, you'll often find me spending the evenings at home snuggled up in my pyjamas busy working on my latest sewing, knitting or crafting project. My cosy winter pyjamas have mostly seen better days though, so I decided it was time to make myself a new pair to brighten up these winter nights. Enter my Alice & Co Whitechapel pyjamas...


I've had this pattern waiting to be used since I won it as part of a giveaway hosted by Joy of Pink Coat Club last year. I'd intended to use it before now, but better late than never!

The Whitechapel pyjamas feature a boxy style shirt with a button front and simple collar, and elasticated waist trousers with a slightly tapered leg. It's a fairly traditional pyjama style and the trousers in particular are very simple to sew.


There were lots of things that I liked during the process of sewing my pyjamas. The trousers have just one pattern piece that forms the whole leg rather than front and back legs being cut separately. This cuts down the number of seams so makes the trousers even quicker to sew than other pyjama trousers I've made. The size of the pattern pieces is somewhat alarming though! And you do have to remember to flip the pattern piece over when cutting out the second leg.


I also really liked the fact that the pattern uses French seams throughout - and don't worry if you've never sewn a French seam before; comprehensive instructions are included with the pattern. The shirt sleeves are also inserted flat, which makes that step a bit easier than having to set in a sleeve and means that you can easily use French seams there too.


However, I did have a few little issues with the pattern. As far as I could see, the instructions don't actually tell you to press the centre front to the inside to form the button/buttonhole band (they tell you to press 1cm under at the very edge, but not the rest). At one point they tell you to temporarily fold it back to the outside, but without previously telling you to fold it in. From the shape of the pattern piece, it's fairly obvious where you need to press the front under, but it could be confusing if you're a relative beginner.

I also deviated slightly from the instructions for cutting the interfacing for the button/buttonhole bands - they say to cut two strips that are 10cm wide, but that seemed to cover too much of the front to me (and seemed more than shown in the diagrams), so I cut my strips to be half that width and it worked out fine.


The instructions are written in a chatty style, which makes it seem like you have a friend telling you what to do rather than a teacher. In many ways I like that (sewing is meant to be fun after all!), but sometimes it seemed a bit odd. Mainly when it gave you an alternative way to finish the collar/neckline seam that you can use if you prefer or in case you "mess up" the first way described in the instructions. It might just be me, but it seemed a bit odd to be giving an alternative in case people mess up, instead of writing the original instructions so people don't mess up.


All that being said, those weren't major problems - I did enjoy sewing the pattern and I'm pleased with my finished PJs. The sizing is fairly accurate. Let's face it, with pyjamas you don't need a garment that's perfectly sculpted to your body, but I think that the fit gives just the right amount of ease to be comfy without you ending up drowning in fabric.


Talking of fabric, for this project I chose to use a brushed cotton twill from Calico Laine. In many ways it's a beautiful fabric - it's lovely and soft, making it cosy to snuggle up in. And the colourful hearts are really fun of course! A word of warning if you're thinking of buying some though - when I prewashed the fabric the colour from some of the red hearts did bleed a bit. It's not terrible, and definitely didn't bother me for these PJs (although I might not have wanted to use it for clothes I'd wear out of the house), but I'm going to be slightly careful the first few times I wash them.

I decided to add to all the colour of the hearts on the fabric by using bright blue glitter hearts for the buttons (bought at a local wool shop). I think they're the perfect finishing touch.


In spite of the couple of little niggles with both the fabric and pattern, I'm really pleased with how my pyjamas turned out. They're super comfy to wear, and the colours make them really jolly. I've got some pretty gingham cotton in my stash that I've earmarked for some summer PJs, so I may well be making some more Whitechapel pyjamas in a couple of months!