Showing posts with label Itch to Stitch. Show all posts

Thursday, 18 July 2024

Itch to Stich Amador Top

When I posted my Islares top a couple of months ago, I mentioned that I was planning on making another Itch to Stitch top pattern. Well, the project I'm sharing today is indeed another Itch to Stitch top, but it's not the one that I was intending to make. I recently rediscovered a couple of patterns that I'd had printed a while ago - including the Amador top, which quickly found its way onto my sewing table. 

The Amador top is a pattern for knit fabrics. It has a V-neckline and dolman sleeves. The top has upper and lower sections, which join with a simple seam at the back and in an inverted V with gathered seams under the bust at the front. My fabric doesn't make the details that easy to see, so if you're interested definitely check out the line drawings on the Itch to Stitch website.

The pattern has regular and full bust options, which between them cover bust measurements from 31⅛" (regular bust) to 63" (full bust).

I enjoyed making my Amador top. It's not the most straightforward knit top pattern to sew, as you do need to be particularly precise for some of the steps. The instructions are very clear though; they have a good level of detail and are accompanied by helpful diagrams. 

I worked through all the steps, taking my time to make sure I was doing everything accurately, and everything went fairly smoothly. If you happen to see me wearing this top in real life though, don't inspect my topstitching at the bottom of the V neckline too closely!

I made the size recommended for my measurements - I used the regular bust and made a size 10 at the bust blending out to a 14 at the hips. I did a tissue fit (not ideal for a stretch pattern, but I didn't have any fabric I could use for a toile) and on the basis of that I lengthened the upper front and back by half an inch (I do usually have to lengthen patterns). I'm glad I did that - if I hadn't, the under-bust seam wouldn't have sat in the right place.

In terms of fit, I'd say the pattern isn't closely fitted, but it does have a nice shape. If you're after a very fitted top, this might not be the pattern for you, but if you want a slightly looser style then the Amador is really pretty. It's a really comfy top to wear, but could also look quite smart depending on the jersey you use and how you style the top.

The fabric that I used is a gorgeous leopard print cotton jersey that I bought from Simple Life Fabrics. It's a really great quality and I love all the colours in the print. It's definitely very "me"!

I enjoyed sewing my Amador top - it's nice to have a little bit of a challenge every now and then. I think it turned out quite nicely too. I quite fancy making a version in a plain fabric that would show the design details off a bit better - I'll have to think about what colours might be useful in my wardrobe.

Tuesday, 21 May 2024

Itch to Stitch Islares top

I'm a fan of t-shirts with interesting details, so the sewing pattern for the Islares top instantly appealed to me when it was released by Itch to Stitch. It's taken me a little while to get round to making the pattern, but better late than never!

The Islares is a knit top with regular and full bust options. The main feature is a square front and back neckline, which I think makes it a bit more elegant than a basic t-shirt. The top also has raglan sleeves with shoulder darts that can be made in short, three-quarter or long lengths (I used the three-quarter length). The top is finished with a curved hem.

The bust sizing covers measurements from 31⅛" (regular bust) to 63" (full bust), and the hip sizes range from 33⅛" to 62".

The instructions for the Islares top are great! I thought that sewing the neckline might be a bit fiddly, but I was pleasantly surprised. Yes, it is a bit more tricky than a regular round neckband, but the instructions take you through everything very clearly with a good level of detail. Other than the neckline, the top is very straightforward to sew and I didn't have any trouble making mine. 


My top tip would be to make sure you follow the instructions about using stay tape on the neckline - I think without stay tape it would be really easy to stretch out the neckline while sewing.


I used the regular bust pattern piece and blended from a size 10 at the bust to a 12 at the hips. That's the size recommended for my measurements and I think it turned out nicely. It's not tightly fitted, but has a nice shape and definitely isn't baggy. I didn't make any adjustments to the pattern.

The fabric that I used is a fun, colourful striped cotton jersey that I bought from Lucy Locket Fabrics. It was nice and easy to sew with, and it feels lovely to wear. And I'm pretty pleased with the stripe matching that I managed down the side seams!

 All in all, I think my Islares top turned out rather nicely, and I'd happily recommend the pattern. I may well make more versions in future, but I've got Itch to Stitch's newer pattern, Venado, to try first!

Thursday, 23 June 2022

Itch to Stitch Lemont Top Sewing Pattern Review

Sewing patterns with interesting details always appeal to me, so it's no surprise that I bought and made the Itch to Stitch Lemont top not long after it was released.

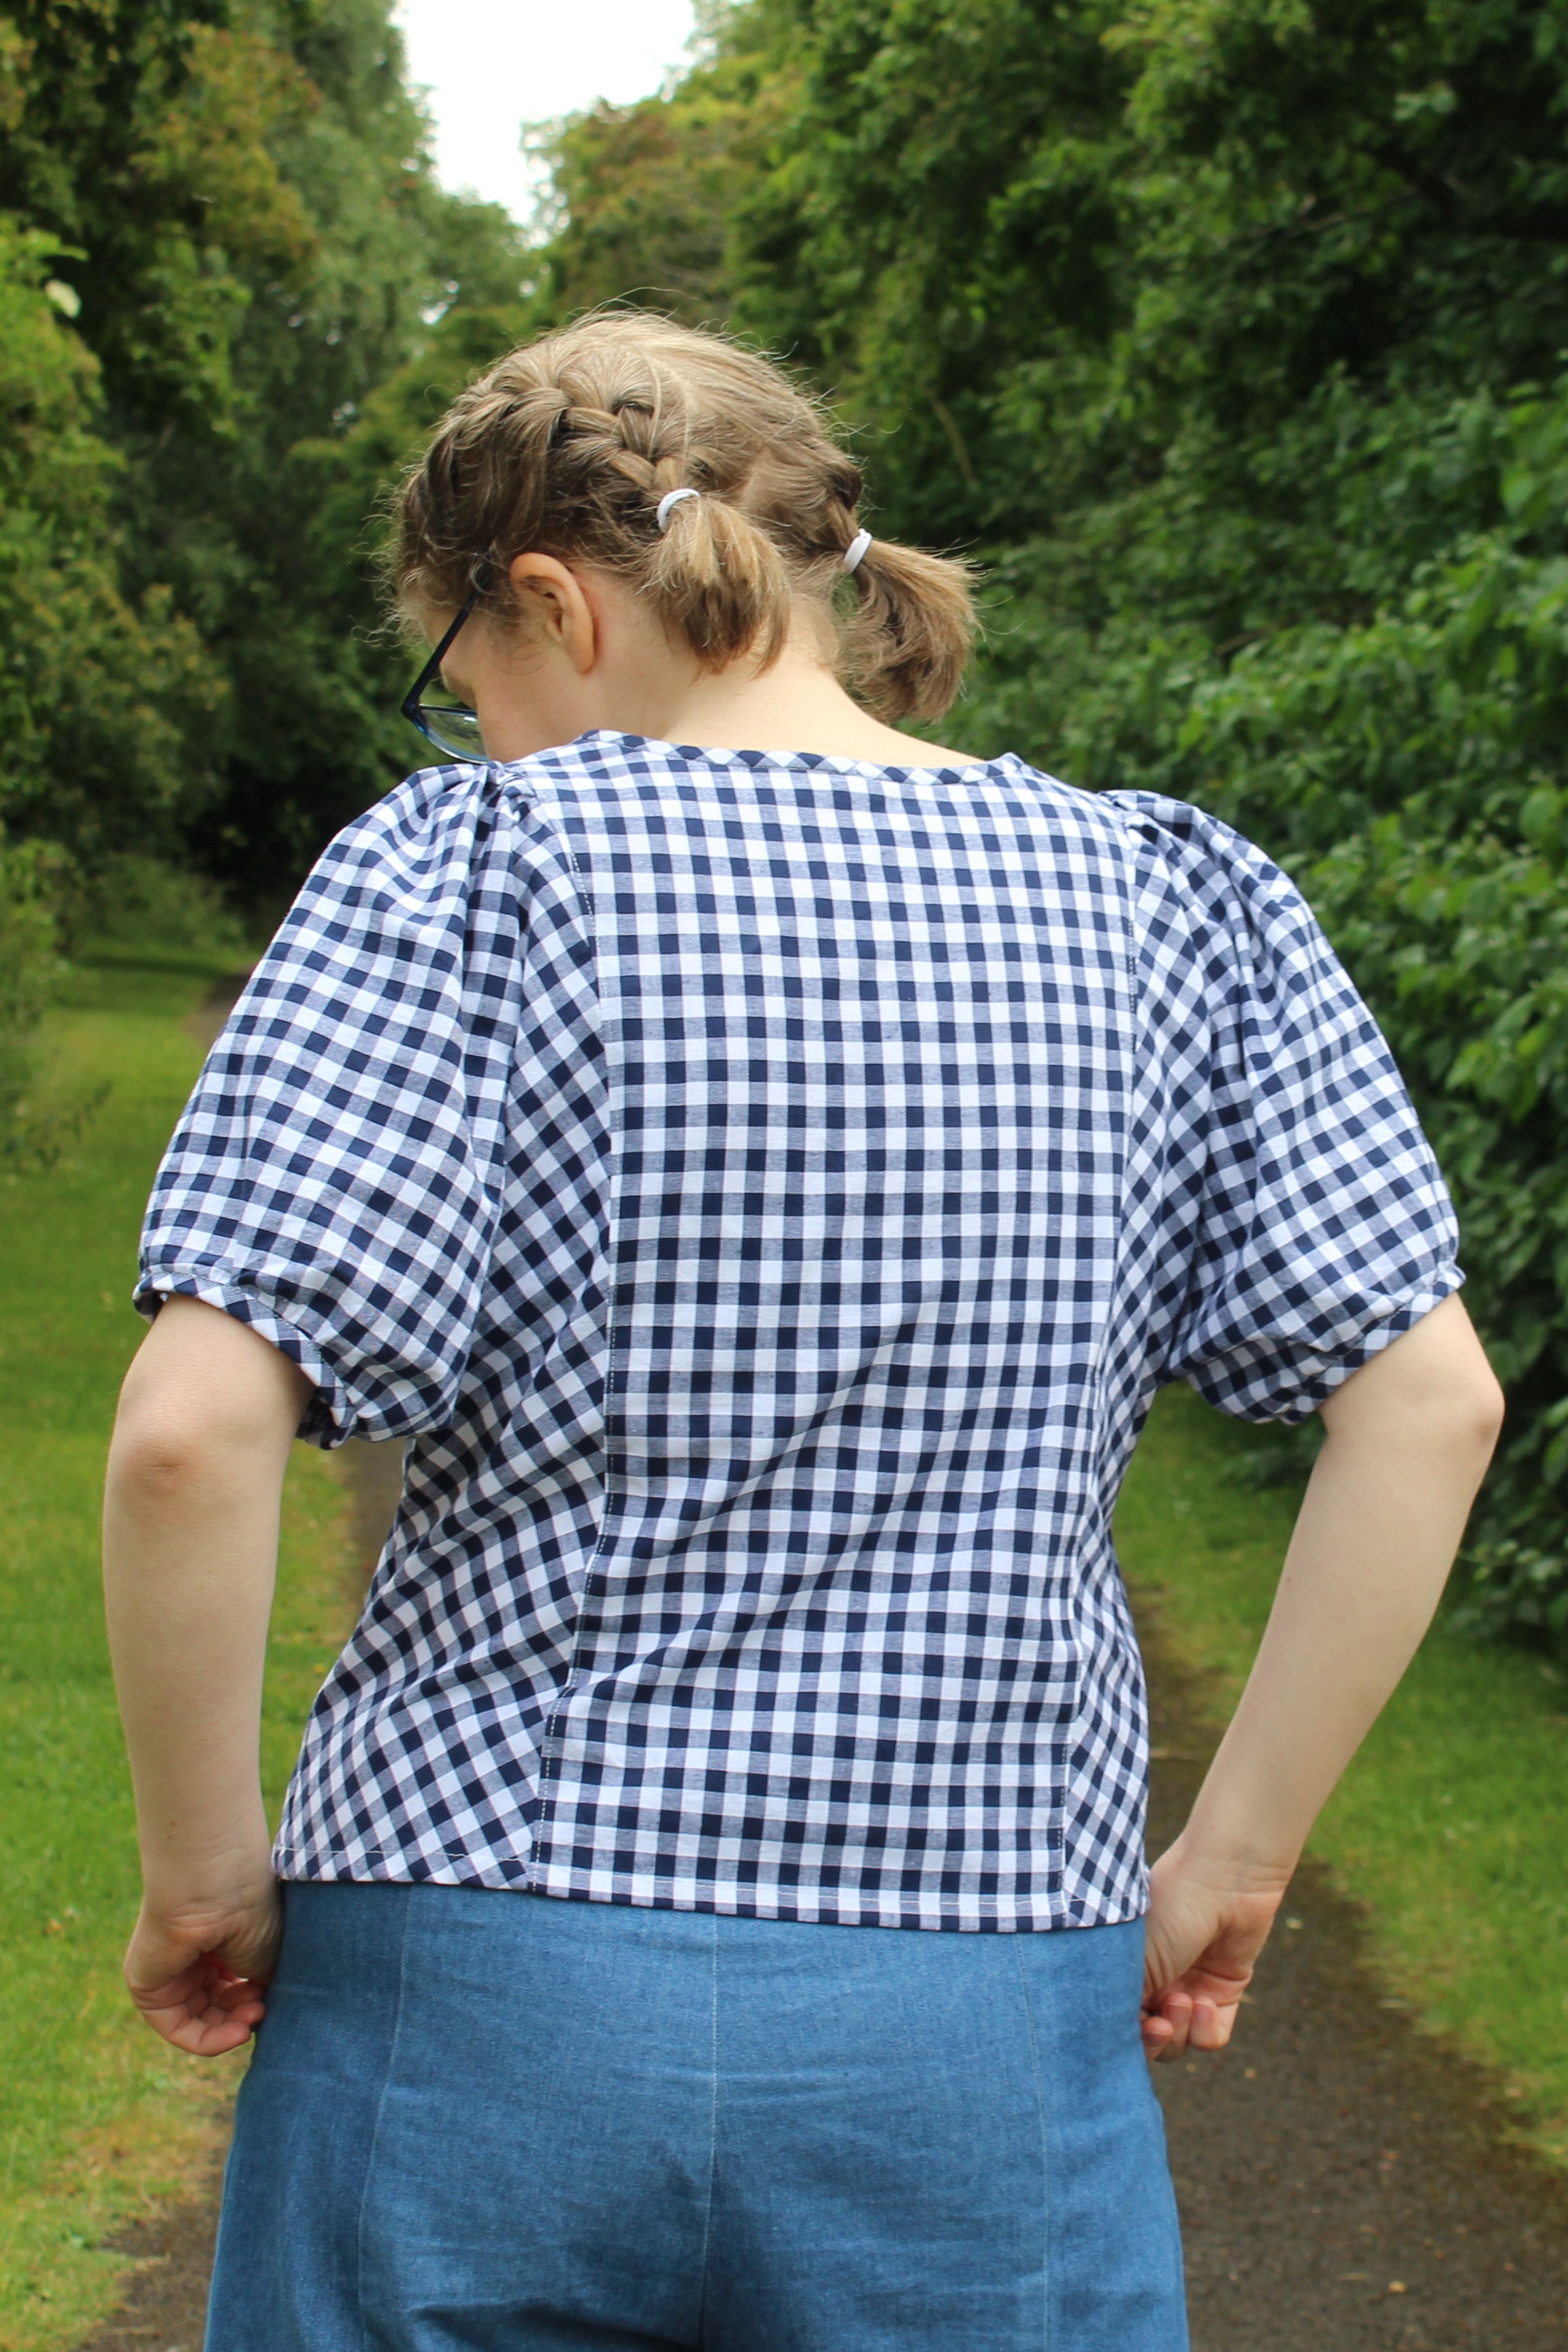
In some fabrics Lemont could look like a fairly ordinary woven top, but hopefully the gingham that I've used here helps show off some of its more interesting features. The top has princess seams and dolman sleeves, with the sides of the front and back bodice and the sleeves all being formed by one single large pattern piece. The sleeves are gently puffed - they're gathered both at the shoulder and into a little bias binding hem band. The neck is also finished with bias binding.

The pattern has regular and full bust pattern pieces, and comes in bust sizes from 3118" (smallest regular bust size) to 63" (largest full bust size).

All the binding and the slip-on style of the top means that you don't need any notions other than thread - there are no fastenings, no interfacing, and there are pattern pieces for cutting the bias binding for the sleeves and neck from the fabric. 

You would need to consider the style of the top when picking your fabric - the way the side panels/sleeves are cut means that you can't use directional prints because either the front or back side panel would end up with the print running upside down. You'd also need to have something that works well on the bias, because the side panels end up being on the bias where they meet the centre front/back panels. I think it's a style that works particularly well in ginghams/plaid/stripes to show off the style lines.

I've made a few Itch to Stitch patterns now (read my Glenelly top review here and my Kalispell dress review here) and the instructions have always been excellent. The same was true for the Lemont top - the instructions are detailed and easy to follow, with clear diagrams to accompany them. I didn't have any problems while I was sewing my top. 

It's rated as a beginner+ pattern, which I think is fair - it's not a complicated pattern, but you might want to have a couple of simple patterns under your belt before you try this because of dealing with fabric on the bias and the gathering into the sleeve hem band.

I made the size recommended for my measurements (size 10, regular bust) with my standard lengthening adjustment (I'm 5'9" and lengthened the top by 1.5"). I think it worked out nicely - the fit is comfortable without feeling oversized.

The fabric I used is a yarn-dyed cotton gingham that I bought from Simple Life Fabrics. It's a lovely quality cotton, and as I mentioned above I think that gingham works really well for this pattern.

All in all, I'm really pleased with my Lemont top - it was a breeze to sew and I think it will be lovely to wear this summer. I'd happily recommend the pattern if you're looking for a simple but interesting project!

Thursday, 23 May 2019

Itch to Stitch Kalispell Dress Sewing Pattern Review

Sometimes a sewing pattern grows on you gradually, and sometimes you know as soon as you see it that you "need" to make it. For me, the Itch to Stitch Kalispell dress definitely fell into the second category! It's been a while since I sewed a pretty dress, and the Kalispell seemed like the perfect pattern to remedy that situation.


The Kalispell dress is a slightly vintage style, with a princess seamed bodice and full skirt with inverted box pleats. The dress has a V neck and a front button closure with button band. It has options for cap or flare sleeves (I chose the cap sleeves) and in seam pockets. The pattern also has different bodices for A, B, C, D and DD cups, which is helpful for getting a good fit.


This was the first Itch to Stitch pattern that I've made, and I was really impressed with it. The PDF is fairly big given all the different bodice pieces, but there are clear directions included about which pages you need to print for which sizes/options.

The instructions are very detailed (as an example, there are 11 different instructions just about applying interfacing and stay stitching!) and easy to follow. The diagrams accompanying them are also perfectly clear. All of the notches/seams etc. matched up nicely when I was sewing, and I didn't have any trouble at all with making the dress.


The only thing that I found slightly odd was that the instructions have you hem the skirt before it's even attached to the bodice. I don't know about you, but I definitely like to try on a dress before hemming it to get the length just right as even a small change in the hem length can change a dress from dowdy to delightful.

The instruction to do this does make sense in terms of the rest of the construction because the hem needs to be finished before the button band is attached. To get round this, I left the skirt unhemmed, then when it came to attaching the button band I stopped stitching a few inches above the where the hem should be. Once I'd finished sewing the rest of the dress, I hemmed the dress as I wanted and then finished off the button band and that worked fine. Hopefully that all makes sense!


In terms of sizing I used the A cup bodice and made a size 10. That's the size recommended for my bust and hip measurements; my waist measurement is actually between an 8 and a 10, but based on the finished garment measurements I thought I'd be happier with a 10. Thankfully that worked out nicely for me! I'd say the sizing is good, with just the right amount of ease to make the dress fitted whilst still being comfortable to wear.

As for adjustments - I lengthened the bodice by an inch and a half, which is fairly standard for me. Because of the added length, I also altered the button spacing and used more buttons.

To give you an indication of skirt length - I'm about 5'9" and this is the skirt straight from the pattern with a slightly bigger hem than called for in the pattern (I think half an inch more), and it's knee length rather than the midi length intended for the Kalispell.


The fabric I used came from Seasalt last summer. It's a cotton crepe that I managed to pick up at a bargain price (yay!). It's a nice quality fabric as I've come to expect from Seasalt, but I didn't enjoy sewing with this as much as I've liked their cotton voiles and poplin. It's a very fine fabric (this dress would probably be too sheer if I wasn't wearing a slip with it), but also quite crisp, and my sewing machine had a tendency to snag it, which it has never done for any fabric before. It did cause a couple of marks in the fabric, but thankfully they seem to be fairly inconspicuous in the finished garment.


The slight issues with sewing the fabric made me feel a bit downhearted about this dress when I was making it, but I'm happy to report that I feel a lot more positive having worn it. It's a lovely dress to wear as the skirt is pleasingly swishy! I'd quite like to make another one in a fabric with a bit more body to it at some point to see what that would be like, but for now I'm more than happy with this version of the Kalispell!