Thursday, 25 May 2023
Jennifer Lauren Handmade Emmie Tee
Wednesday, 6 October 2021
Jennifer Lauren Esme Top
As I mentioned in my post about my Itch to Stich Glenelly top, I always like t-shirt patterns with a bit of a twist. It was therefore no surprise that I treated myself to the Jennifer Lauren Esme top pattern as soon as it was released!
The Esme top has gentle batwing sleeves with cuffed long or short sleeve options, and either a shawl collar or V-neckline. It also has regular and long-line bodice options. The pattern has multiple cup sizes (A to D in the original pattern, and C to F in the curve version), and the two size ranges cover hip measurements from 35.25" to 62.75".
I really like the shawl collar option and think that will be really nice for a long-sleeved top for winter, but I decided to try the V-neckline first.
The top above is the first version of the Esme that I made. It was actually intended to be for me, but when I tried it on it just didn't feel quite right. It was a little clingy around the waist, and although I really like the fabric itself, the colours didn't completely suit me when I was wearing it for some reason. I think if I'd only had one of those two issues, I'd probably have got over it fairly quickly and worn the top, but with the combination of the two I just wasn't feeling it.
Thankfully all was not lost and my sister happily agreed to adopt the top instead. She's slimmer than me so it's a little bigger on her than the pattern intends, but I think we can all agree that it's perfectly wearable and it's better for her to have it and enjoy it rather than it sitting in my drawer while I convince myself to like it!
Although my first version of the Esme didn't quite work out, I liked the overall shape so I decided to make another version of my own. For this one I blended out from a 14 at the shoulders/bust to a 16 at the hips. In contrast, my first version was a straight size 14. That's pretty much what's recommended for my measurements (my waist measurement is just fractionally above the 14, but is much closer to the 14 than the 16) and it did fit me, but it was just slightly clingy for my liking. Blending out to a 16 gives me that little bit of extra room to make me more comfortable.
Given that I've made two versions of the Esme now, I'm happy to report that it's a really nice pattern to sew! The instructions are very thorough. I'd say the only slightly tricky bit of the pattern is making sure that you get a nice neat finish on the V-neckline, but the steps are set out very clearly and I found that they made it a lot easier than I was expecting it to be.
The fabric that I used for my top is a lovely cotton jersey from Like Sew Amazing - I really like the colours and the combination of stripes and florals!
The fabric for what is now my sister's top was from the Sew Hayley Jane outlet shop last year. It's a viscose jersey and so is a bit lighter weight - I think it still works OK for this pattern, but on balance the cotton jersey was better when sewing the V-neckline in particular.
I really like the Esme pattern, and I'm glad that I persevered and got the second version that works for me. In a funny way I'm also glad that the first one didn't work out quite right for me because I think it looks really nice on my sister. I'd happily recommend the pattern if you're in the market for an interesting jersey top, and I'll definitely be making a shawl collar version at some point soon!
Thursday, 9 July 2020
Ellie & Mac Discoverer Tees
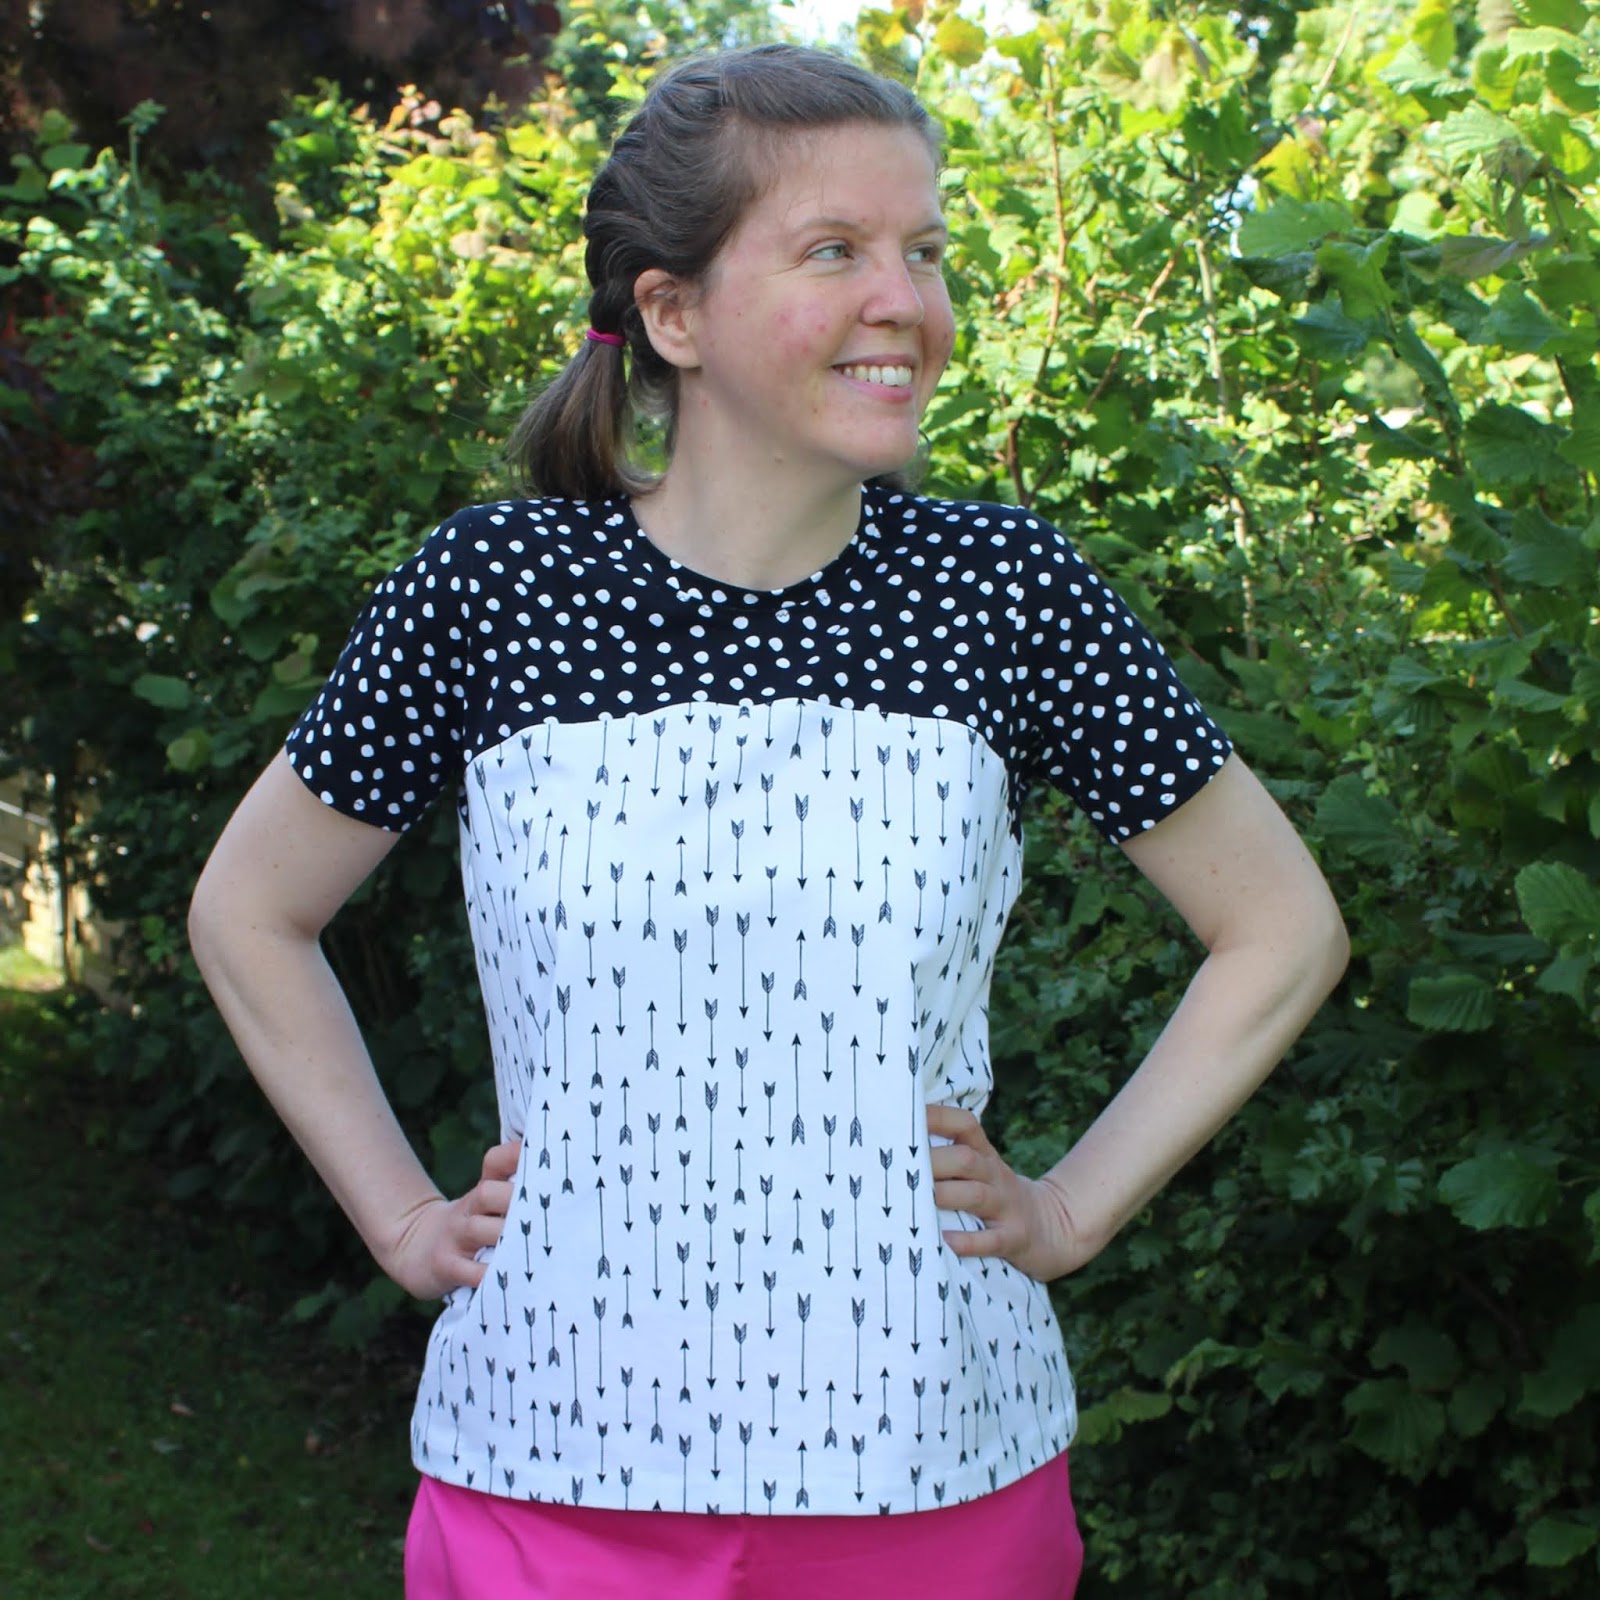
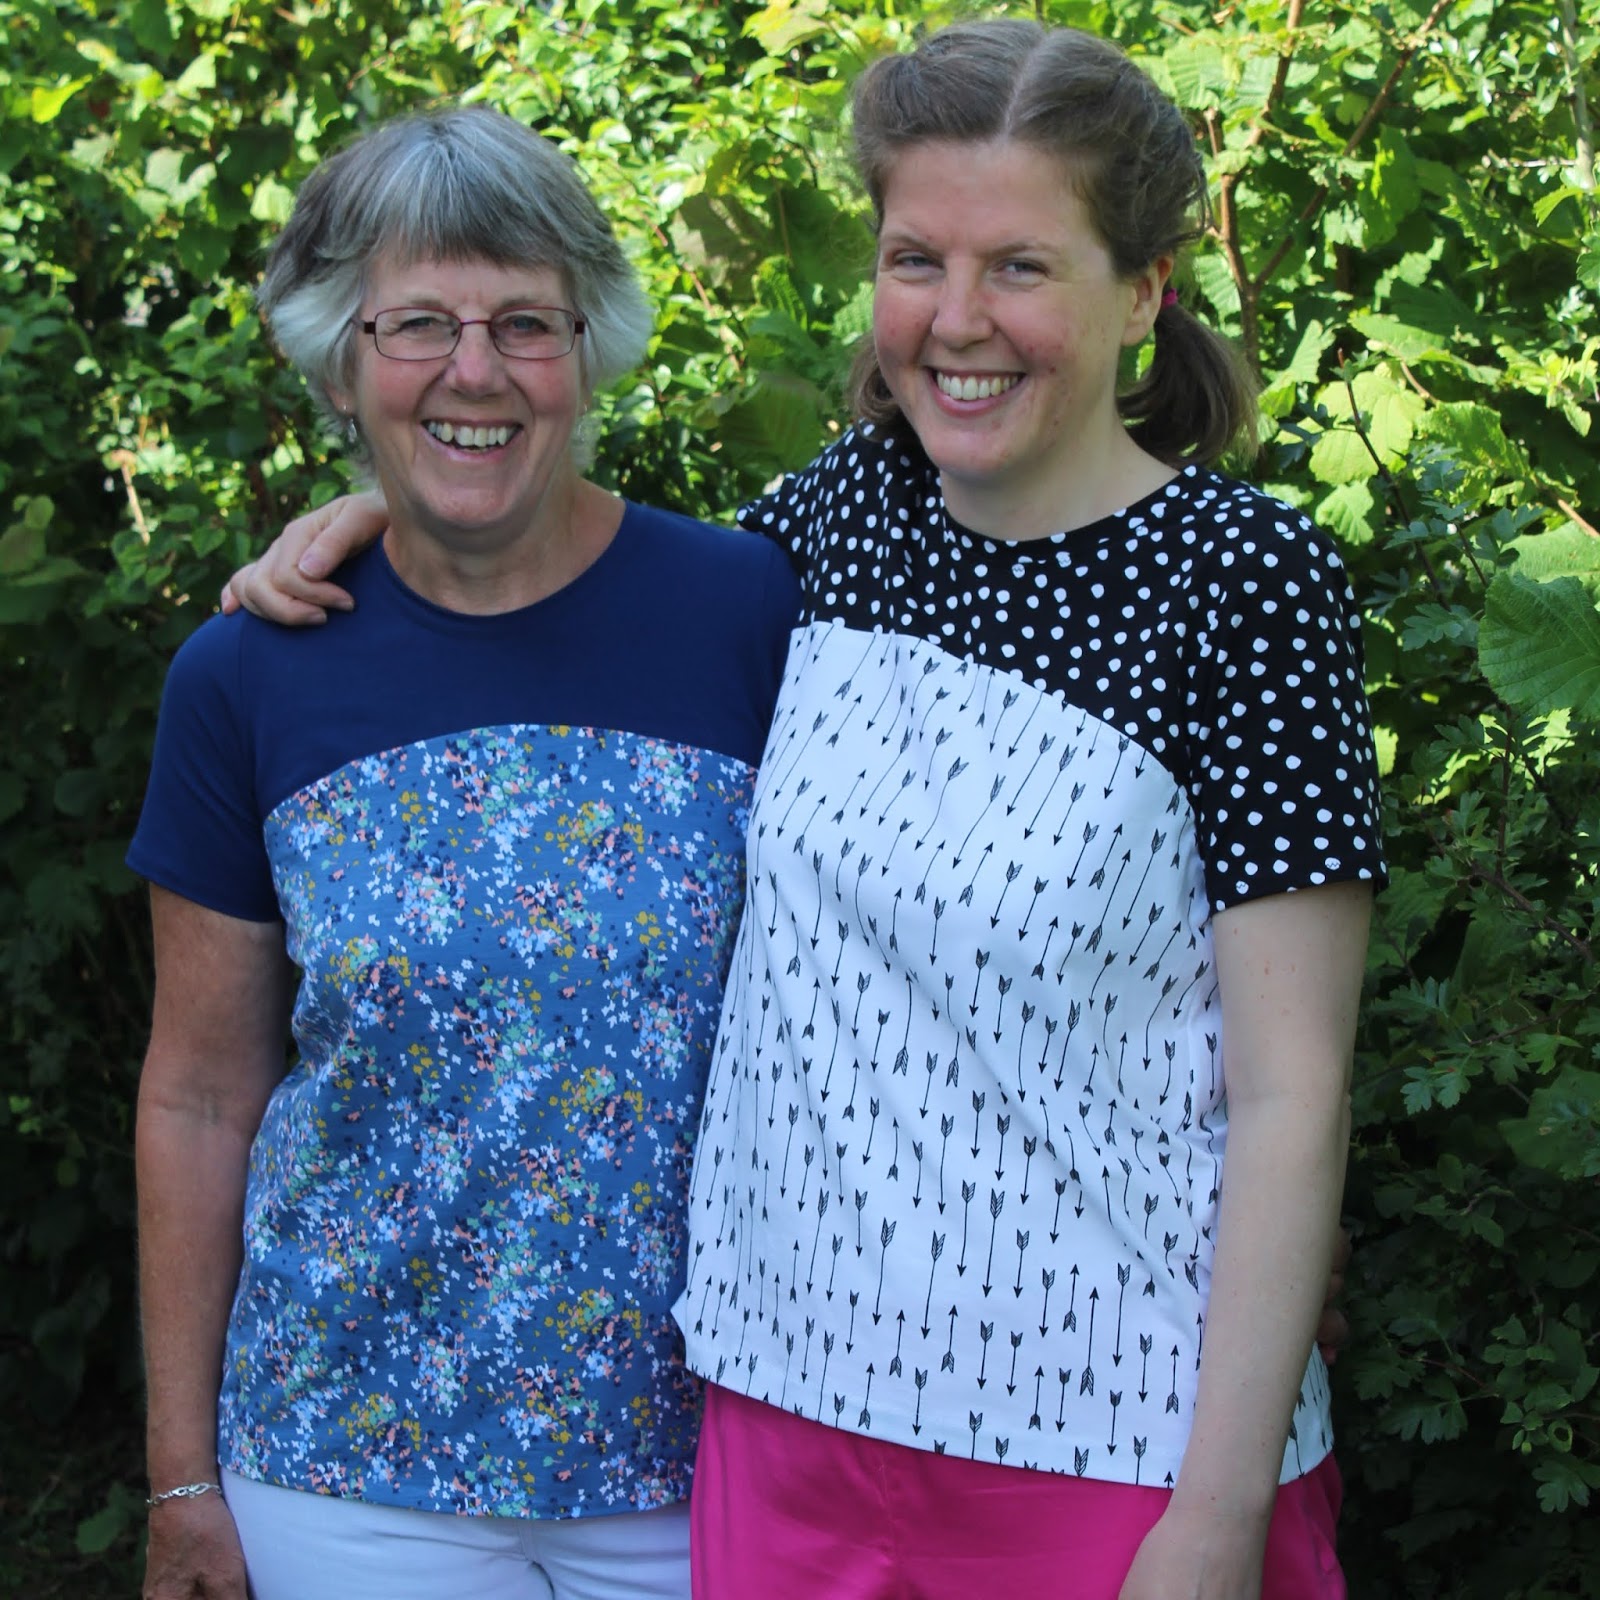
The Discoverer Tee is a basic t-shirt shape, but with the added interest of a colour block yoke and three sleeve options. I like the fact that the join between the yoke and main section is curved rather than just a straight line. You do need reasonably sized pieces of fabric for the main front and back sections, but the yoke and short sleeves that I used don't take up too much at all.
The first version I made was this one for my mum. Like many people, she had a bit of a wardrobe clearout during lockdown and gave me a couple of dresses that she was no longer wearing for me to refashion. Thankfully the skirt of one of them was just big enough for the main front and back bodice sections, and I had a piece of jersey left from another project that perfectly complemented the darker blue in the print.
The version for my mum turned out so nicely that obviously I decided that I needed one for myself so raided my stash and came up with two monochrome prints that I thought would work well together. The white with the arrows was left over from a Freya top that I made last year, and the black spotty is the remnants from a pair of pyjama trousers I made for my sister-in-law.
Sewing the tees was no problem at all. The instructions seemed good, although I have to say that I only really scanned through them because I'm fairly familiar with sewing a basic knit tee by now. I did deviate slightly from the construction order and added the neckband once I'd sewn the shoulders, instead of after adding the sleeves and sewing the side seems as instructed. I'm just more familiar with doing it that way so find it easier.
I was relieved that the t-shirts turned out well because when I was preparing to make the pattern there were a few things that made be a bit skeptical about it.
Firstly, the sizes are given in ranges rather than as one measurement. Nothing wrong with that at all, but the ranges vary quite a lot in size (e.g. the MED size is quite a small range of bust sizes 35.5-36.25", whereas others have anything up to a 3.5" range - the XXS for example is for bust sizes 29-32.5"), which seems a bit odd to me.
There's also just one piece for the main front and back pieces, and the sleeve is cut on the fold so is a symmetrical piece rather than having slightly more space in the back. I'm no pattern drafting expert by any means, but as far as I know (and having looked at a couple of my other t-shirt patterns) it is more usual for sleeves to allow for more room the back.
There are also no notches at all on the pattern pieces. I thought that was odd to start with, but then it seemed even odder because most of the steps in the instructions start by telling you to mark the centre of the pieces you're going to be joining with a pin, so to my mind it would be better to include notches at those points so you already had them marked.
Going back to the positives - the fit is pretty good for me. My measurements (bust 38", waist 32", hips 42") put me in the middle (at the bust) or just over (waist)/at the top of (hips) the LG size range so that's the size I made. The tee is nicely fitted across the shoulders but looser over the waist and hips so that worked out fine.
The pattern says to add half an inch to the length for every inch you are taller than 5'5", but I'm 5'9" and didn't lengthen the pattern at all and it's still a perfectly good length on me.
Thankfully in spite of my initial reservations about the pattern, the tees both sewed up nicely and turned out well. I'd definitely think about making more of these if I have the right fabric combinations. My mum has also said that she thinks that hers is one of the comfiest t-shirts that she's ever owned (I think she might like another of her own!), which is a fairly good review, don't you think?
Wednesday, 15 January 2020
Hey June Handmade Sheridan Sweater Sewing Pattern Review
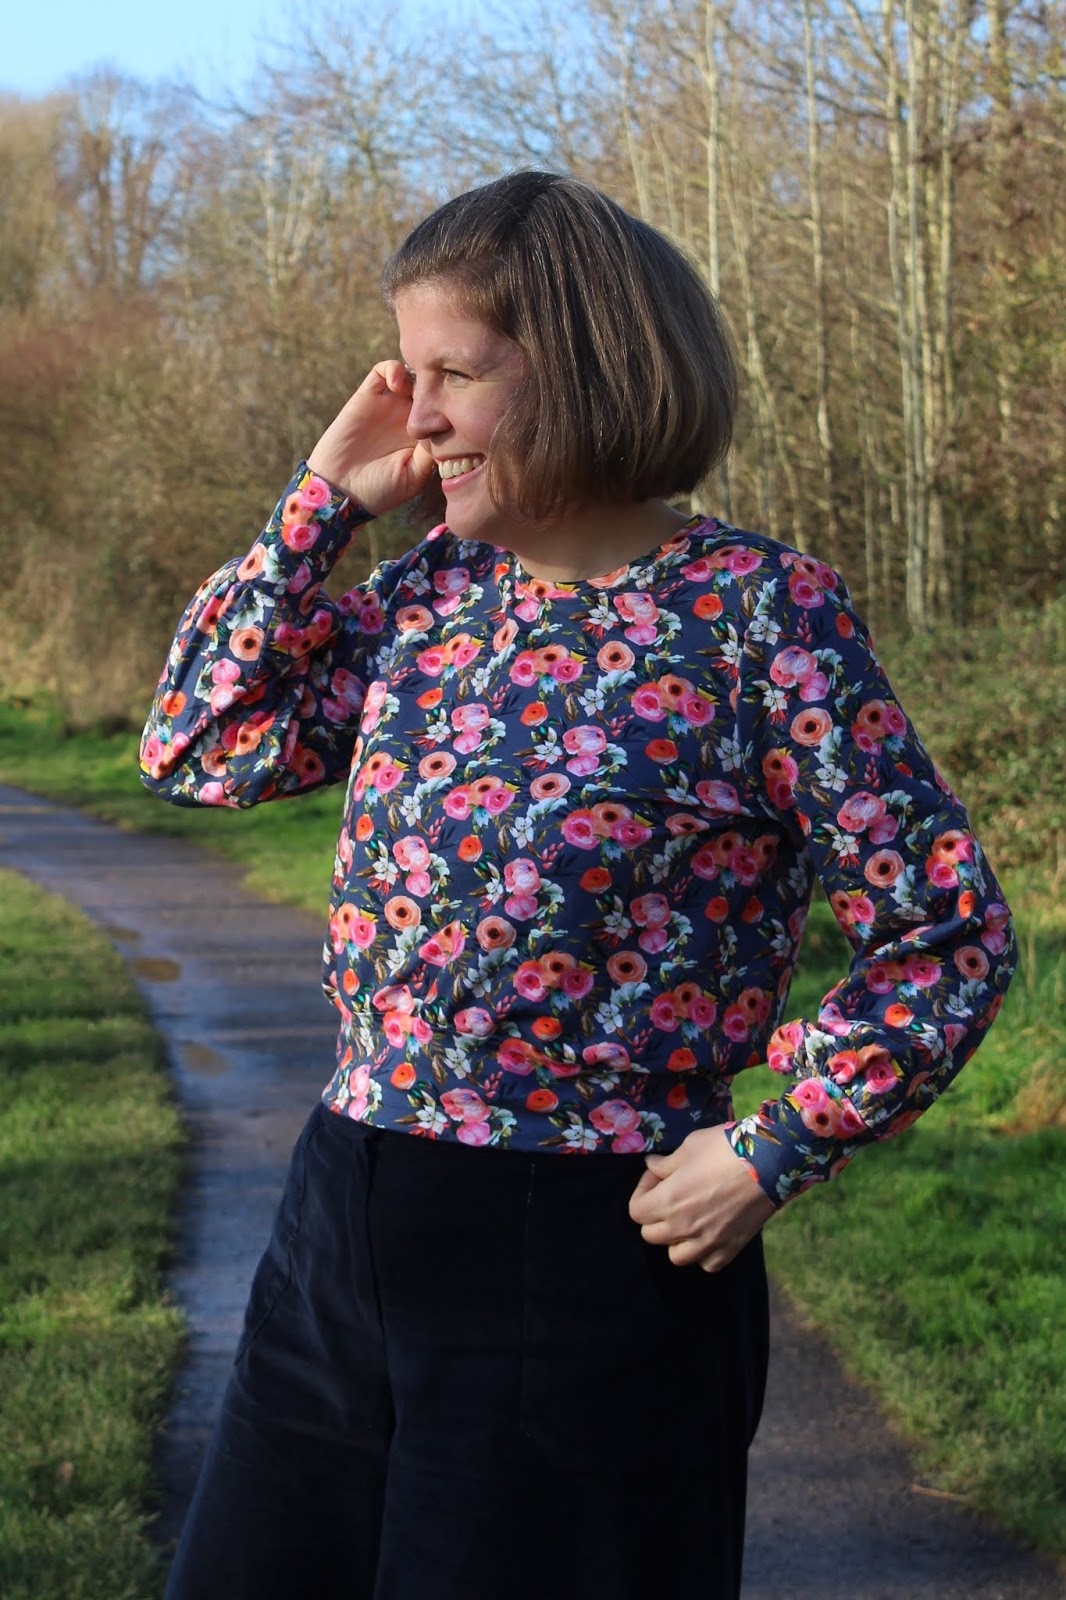
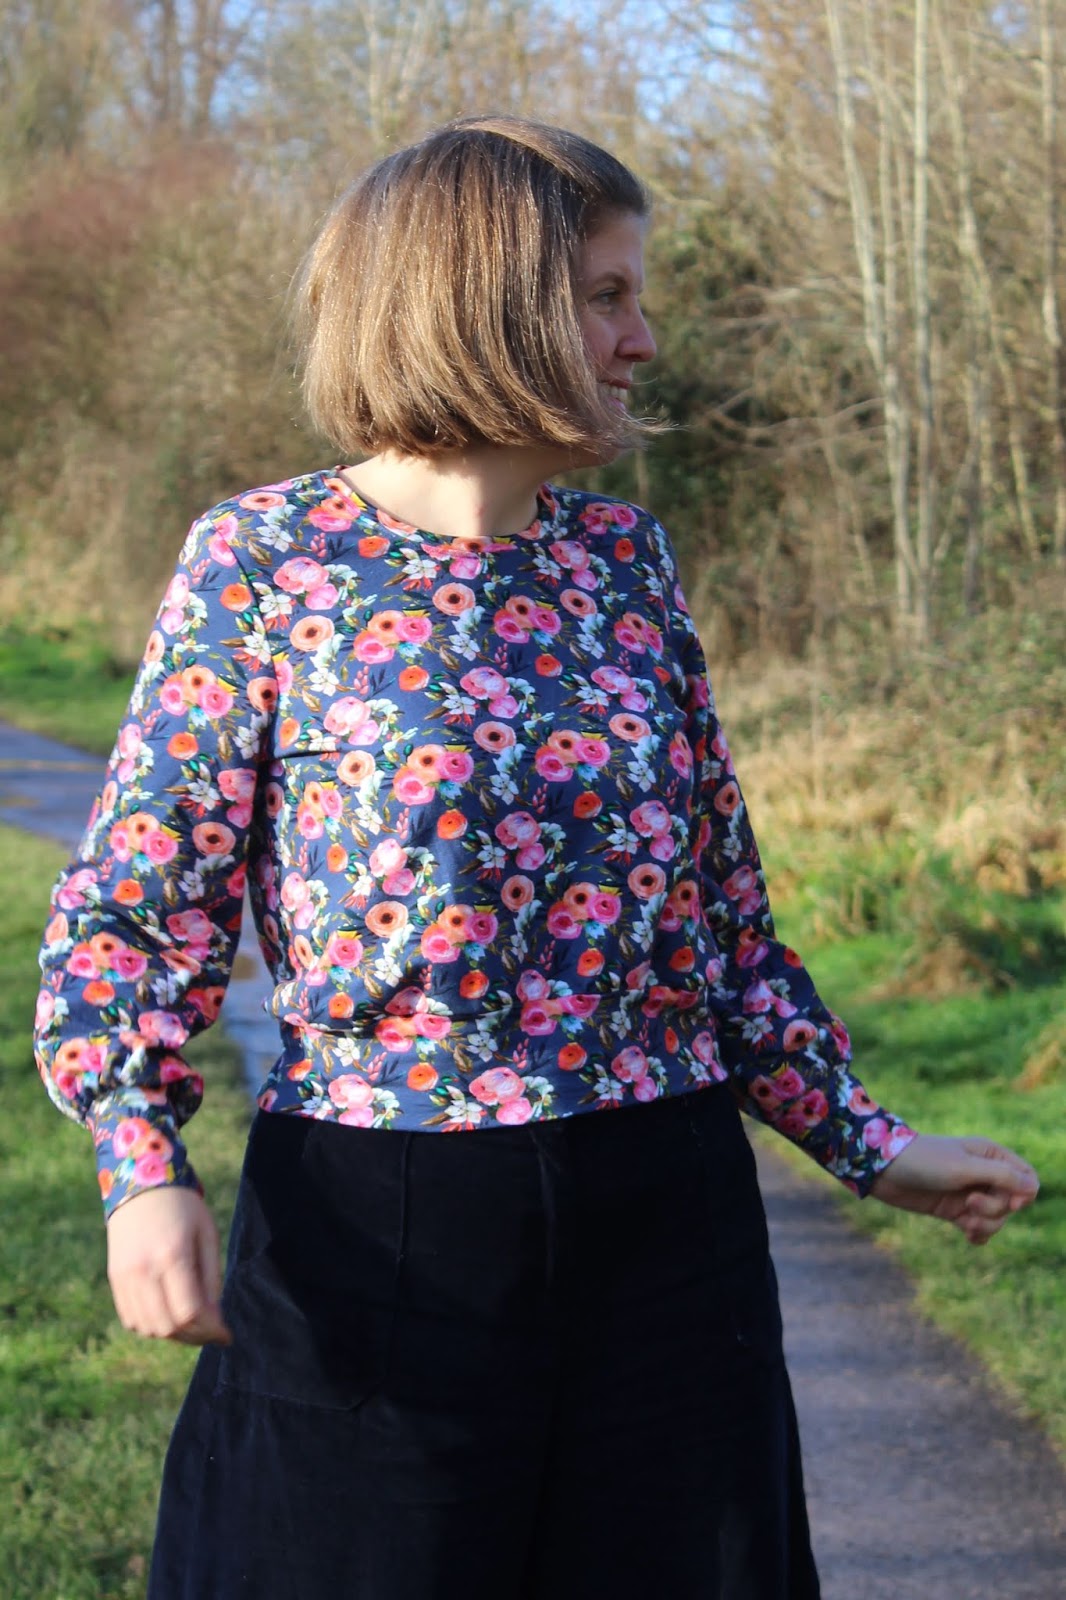
On the face of it the Sheridan sweater is a simple pattern, but it comes with a number of interesting options. There are two necklines (the crew neck that I used and a built-up bateau neckline), three sleeve options (my cuffed bishop sleeves, an elasticated bishop sleeve or wide bell sleeve) and also three hem variations (a cropped hem, regular banded hem or the cropped banded hem that I chose). As you can interchange the various options, that means you could get quite a few different sweaters out of this one sewing pattern so it's fairly good value for money!
The Sheridan sweater pattern was released towards the end of last year and I was instantly drawn to the cuffed bishop sleeves. They're a bit different from anything in patterns I already own, and I thought they looked like a good sleeve style for me. I'm always drawn to the drama of bishop sleeves, but then the practical side of my mind kicks in and I think that they'd just get in my way when I was wearing them or I'd end up accidentally dipping them in my food! The deep cuffs of the Sheridan sweater seemed like a great way of getting sleeve volume but keeping all the extra fabric away from my hands and therefore hopefully out of trouble.
The sweater was fairly easy to sew as you'd expect from a relatively simple knit garment. The instructions were detailed and seemed to be easy to follow - although I have to admit that I only really skimmed through them to check what order to sew everything in as I've made similar tops before so it's not an unfamiliar process for me.
The only slightly tricky part was gathering the bottom of the sleeve into the cuff - there's quite a lot of fabric there that has to fit into a relatively small space. It wasn't difficult exactly, just a bit fiddly.
I top stitched around the neckline, which wasn't mentioned in the instructions but I thought it was worth doing to stop the neckline seam allowance flipping up, which would have annoyed me. If I make the cropped Sheridan with the hem band again, I'd possibly use gathering stitches around the hem of the sweater body to gather it into the hem band rather than stretching the band to fit. Stretching the band worked OK this time, but I did have to stretch it quite a lot and I think with some fabrics you might end up stretching them out accidentally.
In terms of sizing, I cut a size 12 at the bust and blended out to a 14 at the waist and hips. Those are the sizes recommended for my measurements, and they worked out nicely. The sweater seems true to size - it's not a tight fitting sweater, but is fitted enough to give it a good shape (if that makes any sense?).
The fabric that I used is a gorgeous French terry from Loubodu Fabrics - it's such a pretty print and a lovely quality fabric. As I type, it's sold out unfortunately, but Loubodu have lots of other beauties and have 30% off this week if you fancy picking up a bargain.
I think the Sheridan sweater has been an excellent start to my sewing in 2020. It was a fun pattern to sew, there are lots more options that I could use in future projects, I love the fabric that I used and I know I'll wear this sweater a lot. What more could you want?! How's your sewing year started off?
Thursday, 8 August 2019
Agnes/Molly tops
The only question then was what pattern to make with it. While I really like my Rory top, I wanted this to be more of a "normal" t-shirt. I considered the patterns that I've already made and, while none of them seemed to be quite right, they weren't far enough from being right to justify buying another pattern so I decided to do a bit of low key pattern hacking to make something to my exact specifications.
The Tilly & The Buttons Agnes top is very close to what I wanted, the only problem was that I wanted the neckline to be a little bit higher. While I like the Agnes neckline in general, on me I think t-shirts with slightly higher necklines look better when I wear them with pinafores. Thankfully I have the Sew Over It Molly top (I think I got it free with a magazine), which has a neckline more like what I was looking for, so I simply redrew the neckline on my Agnes pattern pieces using my Molly pattern, and also used the neckband from the Molly top.
While this was a fairly simple pattern hack, I didn't want to cut straight into my pretty floral jersey without being sure that it would be what I wanted so I dug out this bird print jersey for a trial run. While it's Art Gallery jersey, so it's not exactly cheap fabric in itself, it's the leftovers of a piece that I won in a giveaway a couple of years ago (therefore it didn't cost me anything) and I'd already used part of it to make my first Gable top (therefore I'd already got a very successful and much worn garment out of it) so it felt like it was fairly low risk fabric to experiment with.
As you can probably already guess, my plan worked out nicely so I went ahead and made a second version of the top in the floral jersey and had a lovely Sunday afternoon sewing it up at a leisurely pace. While I enjoy tackling more complicated projects sometimes, often my favourite sewing sessions are ones spent working on simple projects where you can relax a bit without too much risk of having to reach for the seam ripper!
I'm really happy to be able to add these two into my t-shirt drawer. They're great basics so they'll definitely be worn a lot, the floral version is super pretty and the trial run version has put another piece of leftover fabric to good use. What more could you want?
Wednesday, 31 July 2019
Seamwork Bobby Dress Pattern Review
Bobby is an easy-to-wear knit dress with a lined bodice, nicely shaped V-neck, A-line skirt and wide elastic casing at the waistband. And pockets - hooray for pockets!
This previously problematic jersey is a Robert Kaufman Laguna jersey, which I bought a couple of years ago from a shop that has since closed. It's a lovely quality, but it is slightly lighter weight than most other cotton jerseys I've used. I knew I wanted to use it for a dress, but the jersey dress patterns that I like tend to have fitted bodices and the Laguna jersey seemed like it would be too thin for them. The fact that the bodice of the Bobby is lined and therefore you have a double layer of the fabric meant that it would be reinforced so it would be a much better weight for a mostly fitted bodice.
The instructions are generally good. I did find the directions for the burrito method for sewing together the outer bodice and lining a little confusing, but Seamwork have a great video tutorial which explains the process nice and clearly. Other than that, I didn't have any problems at all and really enjoyed the process of sewing my Bobby dress.
In terms of sizing, I made a 10 at the bust blending out to a 12 at the waist as recommended for my measurements. I also lengthened the bodice by an inch, which is a standard adjustment for me. I think it fits just right!
I did wonder about shortening the skirt to knee length, but in the end decided to keep the midi length intended by the pattern to make it a bit different from my other dresses. In case you're wondering about skirt length - this is the length as in the pattern, it's midi length on me and I'm about 5'9". If you're shorter, you may well want to shorten the skirt. And in case it's of any help, I worked out that I'd need to shorten the skirt by about 5 inches if I wanted to make it knee length.
I'm really pleased with my Seamwork Bobby dress - it's obviously incredibly comfy, and the midi length feels a bit special and means that the skirt swishes about beautifully as I walk. I can definitely see myself making another Bobby dress or two - potentially shortened to knee length in a slightly heavier weight jersey to wear as a pinafore in autumn/winter. I also think it would be fun to try hacking the bodice into a top because I really like the shape of the V-neck. All in all, this one is definitely a winner for me!
Thursday, 30 May 2019
Seamwork Rory top sewing pattern review
Wednesday, 5 April 2017
Pauline Alice Aldaia Dress
The Aldaia pattern is for knit dresses and offers three options each for the bodice, sleeves and skirt which can all be mixed together giving a total of 27 possible combinations. Just to prove how well the different options work together, for this dress I used the bodice from view B (wrap style bodice), sleeves from view A (elbow length with bands) and skirt from view C (6 gore skirt).
I decided to make a size 44 - my bust should actually put me in a 42, but there's only an inch between the bust sizes for 44 and 42 and the 44 still gives me negative ease so I thought it would be fine. I made a toile of the bodice in some leftover jersey from my Christmas pyjama making marathon just to check, and it fitted nicely.
As usual, I had to lengthen the bodice by an inch - fairly standard for me. I also had to lengthen the skirt a lot to get the length I wanted, and in the end I added 5 inches (for reference, I'm somewhere around 5' 8"). Because I was lengthening it quite so much, I added the extra length to the bottom of the skirt pieces and continued the outward flare rather than using the lengthen/shorten line, because I think if I'd done that then I'd have lost a lot of the fullness (and you probably know by now that I love a twirly skirt).
Sewing the dress was a really enjoyable process. The instructions are perfectly clear, but aren't too hand-holdy. Obviously I had to skip around between the instructions for the three different views, but that was no problem. Part of me is still apprehensive about sewing knits in a way that I'm not with wovens, but there was no need to worry about sewing the Aldaia. Even my twin needle behaved perfectly (redeeming itself for playing up the other week).
My only slight quibble about how the dress turned out is that it seems to sit slightly oddly at the seam between the centre front piece and the front side piece where the lower layer of the 'wrap' is under the top one. I wonder whether that's because both the upper and bottom wrap pieces are pleated at the side, and whether it might be better to try to eliminate the pleats from the bottom wrap to reduce bulk a bit.
The fabric I used is a turquoise marl cotton/Lycra jersey from Maud's Fabric Finds - unfortunately it no longer seems to be in stock but there are lots of other lovely (non-marl) colours available. It's a really nice quality, was great to work with and I think is just the right weight to give the skirt enough body to twirl nicely without being too heavy.
Overall, I'm really happy with how my Aldaia dress turned out - it was a pleasure to sew and it's a joy to wear. I'll definitely be making more versions in the future, after all I have to try out some of the different combinations, don't I?!