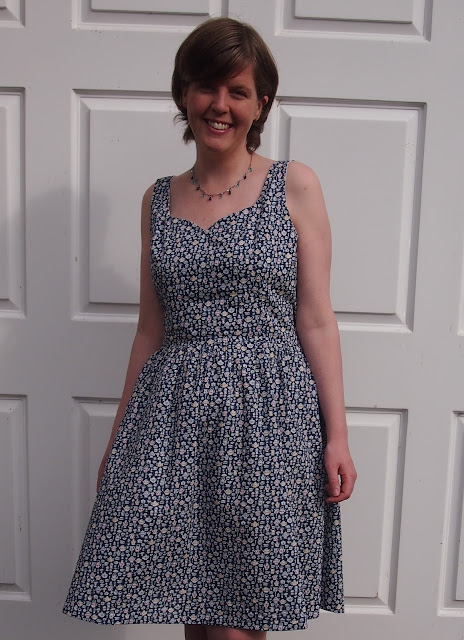
Thursday, 31 December 2015

Crochet poncho

Hello everyone! I thought I'd use the last afternoon of the year to write a quick post to share my final completed project of 2015, and some particularly windswept photos of me wearing it.


The pattern for this snuggly poncho came from issue 71 of Inside Crochet, and I managed to hook it up pretty quickly alongside all the Christmas-related making over the last few weeks. I love how speedy projects using chunky yarn are to make!

Strangely for me, I actually used not only the recommended yarn (James C Brett Amazon Super Chunky), but also the exact colour used in the magazine (teal) - usually I'll like a pattern but think it would suit me better in a different colour, but this time the pattern and colour both seemed right up my street. Although it must be said that the colour in the magazine looks much more turquoise than the yarn does in real life, and I'm not sure I would describe it as teal either, maybe more sea green. It's nice though -  that's the main thing!


The pattern was easy and perfect for those times when you need something to keep you busy without requiring too much brain power. You just crochet a large rectangle, and then the asymmetric shape is produced by the way it's sewn together - it's really simple. The only change I made was to go up a hook size, which is fairly common for me because I have a tendency to take any stress out on my crochet and everything ends up really tight.

Possibly my favourite thing about this poncho is the fact that it's finally given me an opportunity to use what may be some of the best buttons ever...


I bought this set from Miss Beatrix on Etsy ages ago and have been waiting for the perfect occasion to use them, so I'm glad they've finally found their purpose in life! And it amuses me that I have tea running down my side in button form, as you can see here...


I'm mostly pretty pleased with the poncho. The only thing I don't like is that the asymmetric shape doesn't hang that well on me and I have to spend a bit of time adjusting it to make it look right when I put it on, but that's not a big thing. And actually, I originally made the poncho for wearing at my desk when I'm working from home (which might seem extreme, but it's in the coldest spot in my flat and for some reason my upper back always gets particularly cold) so it doesn't really matter if it hangs a bit weirdly when nobody apart from me and maybe the postman will see it. With the unseasonably mild weather we've had so far this winter though, there hasn't been a need for it at my desk yet. I'm not complaining about that though!


Overall, this was a fun project to make and I'm pleased with the end result - what more can you ask for? I'm now off to prepare for tonight's celebrations. I hope you have a Happy New Year and I'll see you again in 2016!

Tuesday, 15 December 2015

Vintage Pledge - McCall's 5863 dress

Do you like vintage sewing patterns? I certainly love all the pretty envelope illustrations, but I try to be picky when it comes to actually buying them (they have to be in my size and a style that I can imagine myself making) - even when they are crazily cheap in charity shops! Even so, I now have a small-but-growing collection of vintage patterns, so this year I decided to join in with #vintagepledge. I pledged to make just one item because I didn't want to put any pressure on myself (sewing is meant to be fun after all!), but somehow it's still taken me to the end of the year to actually follow through on my pledge. Here's my dress...


This is made using McCall's 5863 from 1961 - a shirtwaist dress with a deep oval neckline, Peter Pan style collar and straight or full skirt options. It will probably surprise nobody who has been reading my blog for any length of time that I went with the full skirted option!


The pattern was just right for my bust size, but the waist was slightly on the small side. Thankfully enlarging it was easy - I just took 1 cm out of the two centre front pleats (they're still plenty big enough) and added 1 cm to the centre back of the skirt. Rather than having waist darts, the bodice gathers into the skirt to create a bloused effect, so to account for the extra width I'd added into the skirt, I just gathered the bodice waistline slightly less. This reduces the blousing in the bodice somewhat, but that's fine by me.


Other than that, I made my standard adjustment of adding length to the bodice (an inch in this case), and I also massively shortened the skirt. Straight out of the envelope, the skirt would have been hitting well past my mid-calf so I removed 6 inches, and also made the hem slightly deeper than called for.


I deliberated about what fabric to use for the dress, and was ultimately swayed by the envelope illustration (I told you I love them!) and decided to go with a plain blue dress with a contrast collar, but switch the white collar for pink. The navy is a poplin from Minerva Crafts, and the pink is a quilting cotton with a slightly mottled effect that I found in a local shop.


I love the way the colours look together, and I love the idea of the dress, but unfortunately I just feel a bit underwhelmed with the dress itself (as indicated by the fact it's taken me about a fortnight since taking these photos to actually write this post!). I don't hate it, but usually when I put a new dress on I feel all excited about wearing it and this time I just felt a bit 'meh'.

I think a large part of that is probably because it's quite a plain dress, and I'm used to fun and pretty prints, but I think some of it may also be the collar. I love the way contrast collars look on other people, but when I wear them myself I feel like I've got some odd kind of bib on or something!


I wouldn't go as far as saying this is a failure - I'm definitely going to try wearing the dress, and hopefully I'll grow to like it a bit more as I do - but it's not quite as great as I'd hoped it would be. That's OK though, the sewing process was still fun, and not every dress can be your favourite dress, can it?

Tuesday, 1 December 2015

Knitting: vintage cardigan

Earlier this year, my Uncle passed down all my Granny's old knitting patterns to me. There are some that are definitely very dated (part of me is very tempted to knit a particularly ugly "helmet" to embarrass my nephew when he's older, but realistically I think it would be a waste of both time and wool), but there are also plenty that are very wearable still. The first one I decided to knit was actually one of the plainest, this round neck cardigan...


It's from a Patons & Baldwins raglan twin sets pattern booklet. I'm not interested in the full twin set with the jumper, but a waist-length cardigan is something that is always going to get a lot of use in my wardrobe, so I set to work.


Unsurprisingly, the yarn used in the pattern has long-since been discontinued, but I rarely use the precise recommended yarn for a pattern anyway so that didn't bother me. I chose to use West Yorkshire Spinners Signature 4 ply in Blueberry Bonbon from the Sweet Shop range. It was a lovely yarn to work with and, now that I've worn the cardigan a couple of times, I'm pleased to report that it's nice and warm without being at all scratchy or irritating to my skin.


This is the cardigan knit exactly according to the pattern. I did originally intend to borrow a stitch pattern from one of my Granny's other patterns to make it slightly more interesting than a load of stocking stitch, but there's dart shaping coming up from the waist in the front and back panels and keeping the pattern correct across the darts was going to cause me a headache so I abandoned that plan. Keeping it simple made this a really good mindless knitting project for working on in front of the TV, and I think plainer cardigans are totally fine because most of the time I'm wearing them with a highly patterned dress!


You may have noticed that I haven't done the buttons the whole way up the cardigan in any of these photos. That's partly because of the collar of my dress getting in the way, but even more than that, it's because doing all the buttons up would involve strangling myself! The neck does look high on the pattern photo, but it turned out even higher and tighter than that on me. It doesn't really bother me because the cardigan works fine with only the lower buttons done up anyway.

Neck aside, I'm pretty happy with the fit of the cardigan. When I first put the cardigan on, I thought the sleeves might be a touch short, but having worn it now I think they're actually fine. It's a great length for wearing with all my full-skirted dresses, and I think the amount of ease is just right - it's nicely fitted without being too tight and putting strain on the buttonband.


Speaking of buttons, finding them was a bit of a saga! I wanted to get coordinating buttons because, as there are a lot of them, I thought contrasting buttons would dominate the cardigan a bit too much. Unfortunately, much though I love the colour of the yarn, it appears that button manufacturers don't agree with me because I couldn't find any that matched. In the end, I opted for these little clear ones that have just a hint of greeny blue in them, so work well with the yarn colour without taking over.


All in all, I really like how this cardigan turned out and I think it'll do a good job of keeping me cosy. I'd definitely be tempted to use this pattern and yarn again (I love pretty much all of the Sweet Shop shades), but now I have some Christmas-related knitting I need to get on with first. Are you making any presents this year?

Friday, 20 November 2015

Mortmain + Stripes

You know those times when fabric is such a bargain that you just HAVE to buy it? This dress is entirely down to one of those occasions.

I'd seen this fabric online ages ago - I really liked it, but it didn't fit in with my plans at the time and it wasn't the cheapest in the world so, after a bit of dithering, I decided to be good and leave it behind. Fast-forward several months, and I saw a link to a fabric sale where it was reduced to half price. I was sold, and instantly snapped up enough for a dress.


I was very tempted to make yet another Emery, but the fabric kept telling me that it would prefer to become a Gather Mortmain dress instead. As you can see, in the end I had to agree because I thought that it would be good to have the option of playing with the stripe direction on the waistband.

It had also been a while since I made a Mortmain (previous versions here and here) and, much though I love the Emery, it's also always nice to have a little bit of variety.


So the fabric...we already know it was a bargain, but what else do I have to say about it? I picked it up from Patch Fabrics; they don't seem to have this exact one anymore but they do have the green colourway. It's a peppered cotton, the stripes are woven and there's a slightly irridescent effect from the different coloured warp and weft threads, which you can maybe see a bit better in this close-up...


Excuse the slightly crumpled look (this was mid-sewing) and let's focus instead on the fabric -isn't it lovely? And I hope you'll excuse me if I pat myself on the back for that stripe matching. I love striped and check fabric, but I always hate it slightly when I'm cutting it out and giving myself a headache trying to get the pattern matching right. The extra effort is always worth it in the end though!

Thinking about pattern matching in sewing has made me really critical of print placement and matching in RTW clothing. I don't buy much RTW anymore (mainly because it's more fun to sew my own), but whenever I am in shops I find myself picking things to pieces! Does anyone else do the same?


Anyway, back to the dress...I'm pretty sure that it does fit me through the back in spite of what it looks like in the photo above. I'm going to blame those extra wrinkles on moving about pretending to be climbing the rocks and on the fact that, while it is lovely, the fabric does crease really easily.


Once I'd got past the hurdle of cutting it all out, the dress was a nice and simple sewing project. In addition to the fitting changes I'd made before (adding an inch to the bodice), for this version I also added two inches to the skirt. Although my first two Mortmains are an OK length, I do find that they've ended up slightly shorter than my other dresses. It's a small difference, but it's one that I do notice so I decided to do something about it.

I also omitted the sleeve cuffs for this version. This may at least partially have been to avoid more stripe matching! I just did a simple hem on the sleeves instead, but added a couple of inches to them first so that I didn't lose any length.


I'm pretty happy with this dress. I don't think I love it as much as some others, but I do like it and I can see it being worn regularly. I definitely prefer it when I'm wearing it with a cardigan like this to pick out one of the colours - I think it helps the fabric come to life a bit more. And I love it with this cute little bow brooch I found in a charity shop recently! From the 50% off fabric and charity shop jewellery, can anyone tell that I love a bargain?!

Monday, 9 November 2015

An Emery Dress for a Rainy Day

I was finishing off sewing a dress this weekend when I realised that I still hadn't got round to showing you the last dress that I made. As my semi-bare legs in the photos may hint, I've had the photos ready to go for about a month but they've been neglected waiting for the writing to accompany them. I blame a slightly stressful month in terms of work. It wasn't anything major, and stress levels in my job are definitely nothing compared to many professions, but it was enough to make sitting at a computer again the last thing I wanted to do at the end of the day. Thankfully that's all over now, so here's my (kind of) new dress!


As you may have guessed (or read in the title), this is my latest iteration of the Christine Haynes Emery dress (previous versions: 1, 2, 3, 4, 5, 6). I made no changes other than my standard fit adjustments that I've mentioned in my other Emery posts.


This time, I chose to make it in a fun umbrella print from the Dashwood Studio Rain or Shine collection. I bought the fabric about 6 months ago because I found it with a great discount, but always intended to leave it until early autumn to sew up when umbrellas would probably be more weather-appropriate. Not that I didn't need my umbrella during the summer, but I always like to be optimistic!


I also always knew that this fabric would become an Emery dress because I think it's a great pattern for showing off a fun print. It's also undoubtedly my favourite pattern, mainly because I know that I'm always going to end up with a dress I love. If ever my motivation to sew is slightly lacking, or I've been left disappointed by a project, I know that making an Emery will put everything right again. Do you have a magic pattern that does the same for you?


Having extolled the virtues of the Emery, I have to sightly contradict myself and say that this one almost didn't have a happy ending. I was trying the almost-finished dress on when I got the bodice lining stuck in the zip. Completely, totally and utterly stuck. And I was stuck in the dress too. I momentarily debated which would be the less bad option between cutting and ruining the dress to get it off, or going round to one of my neighbours (who I don't know very well) to ask for help, but finally I managed to find some contortionist skills to free myself, and that made releasing the lining much easier. Please tell me I'm not the only one who's done that?!


Anyway, thankfully I can put that little crisis behind me and get on with enjoying my pretty new Emery! I've got a couple of other finished and nearly-finished projects ready to show you, and work has now returned to normal so hopefully I'll be back to enjoying blogging again instead of hiding away from the computer. See you soon!

Friday, 16 October 2015

Tipi!

Today, I interrupt my usual stream of girly pretty things to bring you something a little different - a tipi!


It was my nephew's first birthday the other weekend, so obviously I needed to make something suitably fun for him.

The idea to make a tipi first came to me by chance when I was mistakenly sent the checked fabric you see here instead of what I'd actually ordered. The problem was quickly sorted, but the company said that I could keep the fabric they'd originally sent as well as the right stuff. To me, it seemed to be begging to be made into something for children, and I had masses of it so it might as well be something big; enter the tipi!


I decided that having all of the sides in the check might be a bit too overwhelming though, so wanted to get something plain to go with it. The canvas that I ended up using also came from a slightly unusual source, namely an army surplus shop. It's a really good quality fabric, and I picked up a massive piece for just £10. So combine that with the check fabric, which was effectively free, and bamboo canes which I stole (with permission!) from my parents, and it turned out to be a fairly cost-effective present.


To make the tipi, I basically followed this tutorial but calculated my own measurements based on the canes that I was using, although they ended up being not all that far away from the ones in the tutorial anyway.

I left off the extra embellishments used in the tutorial - I thought that with the busy check fabric it didn't really need anything extra and it possibly looks a bit more boyish plain anyway.


The only other slight difference is that I used buttons for fastening the tie backs on the front "door" sections instead of velcro, mainly because the velcro that I could have sworn I had seems to have disappeared. Rather appropriately though, the two buttons that I used were actually left over from a pack of buttons I got to use on a little coat I made for my nephew last Christmas which now fits him just right!

The tipi was pretty simple to make, after all it does just involve sewing a lot of straight lines. The only slight difficulty was manoeuvering the large amounts of fabric through my machine, but even that wasn't much of a hassle.


As you can see here, my nephew was very excited at the arrival of the tipi - although at first he did seem to think that it was just there for him to pull down! I think he has now realised it's quite fun to leave it standing and have a place to play too.

I really like making presents for people (well, people who I know will appreciate them anyway!) and, even though it seems ages away at the moment, I've already started making a list of present ideas for a certain day in December. Where do you stand on making presents?

In the meantime, I've got a finished dress that needs to be blogged so normal girly-pretty-things service will resume soon! See you then!

Friday, 2 October 2015

Anyone for tea? New Look 6723

I warn you now, today's post may contain excessive gushing about fabric. Why? Because this dress, my second version of New Look 6723, is made of what may be some of my favourite material I've ever used.


I'm also likely to spend more time talking about the fabric because, in terms of construction, this dress is exactly the same as my first New Look 6723, so there's not a lot new to say!

As a quick recap, I made view D and used a size 14 at the shoulders and graded out to a 16 from the bust downwards. I also elminated the centre front bodice seam, added pockets (from the Emery dress) and used an invisible zip instead of the lapped zip used in the pattern.


So that fabric...it's a Liberty lawn from the Alice in Wonderland themed Spring Summer 2015 collection, and the print is called Suzy Elizabeth. Like many Liberty lawns, the small-scale print means that from a distance it looks like a bit of a random pattern, but look at it closer and its true fantasticness is revealed.


Hopefully this close-up lets you see the host of teapots, teacups and general tea party paraphernalia - it's really fun!

I loved the whimsical print as soon as I saw it online but, let's face it, Liberty don't produce the cheapest of fabrics around and my sewing budget is unfirtunately not limitless. Some things are worth paying for though, and the combination of what I know is a beautiful base fabric and a print that I adore seemed like it would be one of those things.


So, I decided to be a bit of a geek and save up for it. I had a little piggy bank that I'd been given with some chocolate in it at Christmas, which I put on my mantelpiece and every time I ended up with a few pound coins in my purse, I'd put one in the piggy bank. It's amazing how quickly the fund builds up without you even noticing! Has anyone else ever done that or am I just weird?!


Luckily for me, the saving process was cut short by Liberty putting the fabric in their sale, making it cheaper than any of the other sources of Liberty online, so I snapped up enough for a dress, and then I just needed to decide what pattern would be the lucky recipient of this beauty. As it's undoubtedly my favourite pattern, the Emery dress would have seemed like the obvious candidate, but I think that it's better with a slightly larger print so I decided not to use it this time. I was really happy with my first 6723 though, so that's the option I went for - and I'm really happy with the results!


I love both of my versions of New Look 6723, but what I think I appreciate most of all is the fact that the different scales and colours of the fabrics that I used makes them look like totally different dresses. The floral fabric of my first version is definitely a medium-weight cotton too, so feels very different to wear from this floaty lawn. Isn't that one of the lovely things about sewing? There are so many variables that can create such different garments.


It might seem like a strange time of year to be making a sleeveless dress in England, but there are lots of colours hidden in the the details in this print, which to me means plenty of cardigan options for warmth. I also think the dress will work paired with tights, so I'll still be wearing it for a while more this year. And the best thing? I just made a teapot necklace so now I have the perfecct accessory for my handmade dress! What have you been making recently?

Tuesday, 22 September 2015

Crochet: Amazing Technicolour Dream Shawl

This is the blog post that didn't want to be written. Don't ask me why - I love the shawl that I have to show you today, and I enjoyed making it, so it's not down to any lack of enthusiasm. It's been finished for over a month, and I've had the photos ready to go for more than a fortnight, but for some reason whenever I sat down to talk to you about it I wasn't sure what to say. Writer's block is a bit of a melodramatic term to use for this little blog of mine, but that's what it felt like. Has anyone else had that problem?

Anyway, I decided that I needed to just get on and write something, so here's my amazing technicolour dream shawl...


The pattern is the Flower Mosaic shawl which appeared in issue 64 of Inside Crochet. I saw it on the cover when I was browsing the craft/sewing magazines, and instantly loved the riot of colour. I didn't have a crochet project on the go at the time, so I ordered the yarn and got started.


The shawl started off life back in April as this pile of balls of Scheepjeswol Cotton 8. The original pattern uses more colours, but there were some in there that I wasn't so keen on so I decided to limit it to 12. That's the minimum number that the pattern recommends, and I'd agree with that - you wouldn't want to have less than this if you want to not have 2 flowers of the same colour too close together. For reference, the colours I used were turquoise, light blue/green, fuchsia, purple, pink, white, grey/blue, cobalt, petrol, canary, orange and red.


The shawl is made up of 1,035 little flowers, which are joined together as you go. Joining as you go is definitely the best way for me to make projects made up of lots of individual motifs - I have a pile of various crochet squares that were destined to become a blanket which are testament to the fact that I get bored of projects that are going to involve lots of seaming at the end!


1,035 seemed like quite a daunting number at the start of the project, but it was surprising how quickly the shawl grew. I mainly worked on it in my lunch breaks, so lots of fairly small chunks of time, which were perfect for this because it was easy to pick up and put down and each flower was finished pretty quickly.


I had a self-imposed rule that I had to weave in the ends from each day's flowers before I could start doing more flowers the next day, because if I'd finished crocheting and then had to weave in 2,070 ends then the shawl would have been left neglected in a corner with the offending ends staring at me in an accusatory manner whilst refusing to weave themselves in.


I had to go up from a 3mm hook to a 4mm one to get the gauge used in the pattern, but I think my gauge might have decreased as the project went on because my finished shawl is still smaller than the dimensions stated. That's no surprise though - I obviously take all my stress out on crochet and make it super tight. When I did my crochet course, everything I made turned out smaller than it did for everyone else in the class! Hey well, better to transfer the stress to the crochet than having it fester inside of me!


I just have one problem with this project - I need to work out how to wear shawls more elegantly! Whenever I put it on, it just looks a bit of a mess. I need get better at that though, because I seem to be drawn to shawl patterns much more than scarves for both knitting and crochet. Has anyone got any tips for me?

Wednesday, 9 September 2015

Made Up Initiative: shirt dress refashion

I'm sure that by now most of you will have heard of the Made Up Initiative launched by Karen of Did You Make That, and that your blog readers and social media feeds are filling up with completed challenges. Are you taking part? Here's my contribution!

I'm always happy to get behind a good cause like the National Literacy Trust, even more so if supporting it also involves some sewing community fun. As I was going to be away for part of the fundraising month, I didn't want to set myself too big a challenge and instead pledged to tackle a project that I knew I wanted to do, but otherwise might have been pushed aside - refashioning a denim shirt dress that I picked up in a charity shop. Here are the before and after photos...


I feel slightly like I've done what magazines always do when they're doing makeovers - the before shot was taken in a rush on a gloomy day, whereas the after were taken in lovely sun and with pretty accessories. This wasn't intentional though, and was more due to the fact that I needed to take the before photos so I could get on with the actual refashioning so didn't have the luxury of waiting for better lighting.


As I said, the dress came from a charity shop and cost me the princely sum of £3. I knew when I bought it that it would need some alteration because it was 3 sizes too big for me, but the denim was so gorgeously soft that I thought it would be worth the work.

It seemed like a good candidate for my Made Up pledge because I always have good intentions when it comes to refashioning, but tend to get distracted by new patterns or fabric and the refashioning gets neglected and forgotten about. This would give me the incentive to actually get it done!


Here's a brief summary of the changes I made:

- Added 1 inch tucks at each of the 4 waist darts
- Removed the arms
- Took in the side seams of the bodice
- Trimmed away excess fabric from the shoulder, tapering to nothing towards the underarm
- Finished the armholes with bias binding
- Chopped 3 inches off the bottom and re-hemmed the dress
- Replaced the dark metal buttons with rainbow beauties (these ones!)
- Added backwards buttons at the waist to prevent gaping


I'll admit that this was largely done based on guesswork! The tucks at the waist were inspired by the ones on the Sew Over It Vintage Shirt Dress; I really like the shape that they give (my version's here), and I thought that doing something similar would be a good and, more importantly, easy way of taking the excess width out of the waist. I basted them first just to check I wasn't being completely insane, and thankfully for me it worked brilliantly.


The sleeves/shoulders definitely needed work, and I decided that the easiest thing would be just to get rid of the sleeves entirely. Plus that gives me the option of wearing it on its own in the summer or layering it with t-shirts pinafore-style when it's colder.

I judged how much to take out of the side seam by putting the dress on inside out and pinning where I wanted the stitching to be on one side and then mirroring that over on the other side. Possibly not the most scientific way of doing it but it worked!


Sewing all the new buttons on was probably the most time-consuming part of the whole process but I'm glad that I did it. There wasn't anything wrong with the original buttons, but with them and the denim both being quite dark it wasn't exactly an exciting combination. The rainbow buttons are much more fun! They're refusing to be photographed close-up, but hopefully you can see them a bit in the photo above.


All in all, I'm glad I chose this as my Made Up pledge so that I had the incentive to actually get on and sort out the dress. It feels lovely to wear, and I have a sneaky suspicion that it'll become a real favourite in my wardrobe. Maybe I should take that as encouragement to get some more refashioning done!