Showing posts with label Crochet. Show all posts

Thursday, 7 September 2017

Granny square crochet blanket

This little (well, quite big actually!) crochet project has been a long time in the making. The date on my first work-in progress photo of it tells me that I started it in February 2016. I haven't exactly been working on it flat out, and I know quite a few months went by last year without me picking it up at all, but I decided that finishing it would be one of my #2017makenine projects - and now I can tick it off my list!


This colourful beauty was made using a pattern from the book Granny Squares by Susan Pinner - it's actually the project featured on the cover of the book and is listed as the 'Double-bed or sofa blanket'. Looking back at the book as I write this, I'm cheered by the fact that the intro to the pattern says it "is a big project, one to be picked up and put down often. But by making a few squares at a time you will eventually create a fabulous family heirloom." So that obviously justifies the fact that it took me over 18 months to make this!


The blanket is made up of 196 individual granny squares joined together in 14 x 14 rows, and finished with a border of 3 rounds of granny shells (although I actually did 2 rounds in the dark blue rather than 1, so I have 4 in total). The squares aren't the traditional granny square, but instead have colourful circular centres which are turned into squares in the white outer round.


The book gives instructions for making the blanket up either using the join as you go method or sewing the squares together. I chose (without much hesitation) to use the join as you go method; I've got a pile of granny squares sitting in a drawer somewhere which are testament to the fact that I get bored of a blanket if it's sitting in piles of squares rather than looking like a blanket. And why spend the time sewing squares together if you can join them as you go? I made up batches of 14 squares at a time and then joined them on to the blanket so that it gradually grew as the months went by.


Now, let's talk about all of that colour! The squares are all different colour combinations - well, some of them use the same three colours in the centre but in a different order (if that makes sense). I used 14 different colours, so I decided half way through making the blanket that I wanted each horizontal and vertical row of the blanket to have each of the 14 colours used in the outer circles of the granny squares like some sort of giant crochet Sudoku. I think that would have been possible if I'd thought about it and planned it from the start, but it didn't quite work out without the planning. Never mind, I think the random arrangement works nicely!


The yarn I used is Stylecraft Special DK. While 100% acrylic yarn may detract slightly from the heirloom status that the book claims for its 100% wool version, it did make this a much more affordable project and means that I can use the blanket without being too protective of it.

The colours I used are Pomegranate, Royal, Turquoise, Sherbet, Wisteria, Sunshine, Lipstick, Fondant, Emperor, Kelly Green, Aspen, Spice, Cloud Blue and Magenta, with White for the joining rounds and border (I did find that I needed quite a bit more white than the book suggests - I used over 400g), and Midnight for the contrast row in the border. I really enjoyed putting together different combinations of colours as I worked up the squares, and it make me rethink some of my ideas on colour - I'd never realised before quite how nice pink and green can look together!


This project may have taken a fair while to complete, but I'm really glad that I put in all that work and that I now have a lovely snuggly blanket ready to use once autumn arrives!

Thursday, 31 December 2015

Crochet poncho

Hello everyone! I thought I'd use the last afternoon of the year to write a quick post to share my final completed project of 2015, and some particularly windswept photos of me wearing it.


The pattern for this snuggly poncho came from issue 71 of Inside Crochet, and I managed to hook it up pretty quickly alongside all the Christmas-related making over the last few weeks. I love how speedy projects using chunky yarn are to make!

Strangely for me, I actually used not only the recommended yarn (James C Brett Amazon Super Chunky), but also the exact colour used in the magazine (teal) - usually I'll like a pattern but think it would suit me better in a different colour, but this time the pattern and colour both seemed right up my street. Although it must be said that the colour in the magazine looks much more turquoise than the yarn does in real life, and I'm not sure I would describe it as teal either, maybe more sea green. It's nice though -  that's the main thing!


The pattern was easy and perfect for those times when you need something to keep you busy without requiring too much brain power. You just crochet a large rectangle, and then the asymmetric shape is produced by the way it's sewn together - it's really simple. The only change I made was to go up a hook size, which is fairly common for me because I have a tendency to take any stress out on my crochet and everything ends up really tight.

Possibly my favourite thing about this poncho is the fact that it's finally given me an opportunity to use what may be some of the best buttons ever...


I bought this set from Miss Beatrix on Etsy ages ago and have been waiting for the perfect occasion to use them, so I'm glad they've finally found their purpose in life! And it amuses me that I have tea running down my side in button form, as you can see here...


I'm mostly pretty pleased with the poncho. The only thing I don't like is that the asymmetric shape doesn't hang that well on me and I have to spend a bit of time adjusting it to make it look right when I put it on, but that's not a big thing. And actually, I originally made the poncho for wearing at my desk when I'm working from home (which might seem extreme, but it's in the coldest spot in my flat and for some reason my upper back always gets particularly cold) so it doesn't really matter if it hangs a bit weirdly when nobody apart from me and maybe the postman will see it. With the unseasonably mild weather we've had so far this winter though, there hasn't been a need for it at my desk yet. I'm not complaining about that though!


Overall, this was a fun project to make and I'm pleased with the end result - what more can you ask for? I'm now off to prepare for tonight's celebrations. I hope you have a Happy New Year and I'll see you again in 2016!

Tuesday, 22 September 2015

Crochet: Amazing Technicolour Dream Shawl

This is the blog post that didn't want to be written. Don't ask me why - I love the shawl that I have to show you today, and I enjoyed making it, so it's not down to any lack of enthusiasm. It's been finished for over a month, and I've had the photos ready to go for more than a fortnight, but for some reason whenever I sat down to talk to you about it I wasn't sure what to say. Writer's block is a bit of a melodramatic term to use for this little blog of mine, but that's what it felt like. Has anyone else had that problem?

Anyway, I decided that I needed to just get on and write something, so here's my amazing technicolour dream shawl...


The pattern is the Flower Mosaic shawl which appeared in issue 64 of Inside Crochet. I saw it on the cover when I was browsing the craft/sewing magazines, and instantly loved the riot of colour. I didn't have a crochet project on the go at the time, so I ordered the yarn and got started.


The shawl started off life back in April as this pile of balls of Scheepjeswol Cotton 8. The original pattern uses more colours, but there were some in there that I wasn't so keen on so I decided to limit it to 12. That's the minimum number that the pattern recommends, and I'd agree with that - you wouldn't want to have less than this if you want to not have 2 flowers of the same colour too close together. For reference, the colours I used were turquoise, light blue/green, fuchsia, purple, pink, white, grey/blue, cobalt, petrol, canary, orange and red.


The shawl is made up of 1,035 little flowers, which are joined together as you go. Joining as you go is definitely the best way for me to make projects made up of lots of individual motifs - I have a pile of various crochet squares that were destined to become a blanket which are testament to the fact that I get bored of projects that are going to involve lots of seaming at the end!


1,035 seemed like quite a daunting number at the start of the project, but it was surprising how quickly the shawl grew. I mainly worked on it in my lunch breaks, so lots of fairly small chunks of time, which were perfect for this because it was easy to pick up and put down and each flower was finished pretty quickly.


I had a self-imposed rule that I had to weave in the ends from each day's flowers before I could start doing more flowers the next day, because if I'd finished crocheting and then had to weave in 2,070 ends then the shawl would have been left neglected in a corner with the offending ends staring at me in an accusatory manner whilst refusing to weave themselves in.


I had to go up from a 3mm hook to a 4mm one to get the gauge used in the pattern, but I think my gauge might have decreased as the project went on because my finished shawl is still smaller than the dimensions stated. That's no surprise though - I obviously take all my stress out on crochet and make it super tight. When I did my crochet course, everything I made turned out smaller than it did for everyone else in the class! Hey well, better to transfer the stress to the crochet than having it fester inside of me!


I just have one problem with this project - I need to work out how to wear shawls more elegantly! Whenever I put it on, it just looks a bit of a mess. I need get better at that though, because I seem to be drawn to shawl patterns much more than scarves for both knitting and crochet. Has anyone got any tips for me?

Tuesday, 6 January 2015

Homemade Christmas Gifts

Yes, I know, it's well into January now and Christmas has been and gone but, as it's still (just about) Twelfth Night, I'm going to go ahead and talk about some of the gifts that I made this year, if nothing else because I like to have a record of what I've been making on the blog, but hopefully it might also give someone else an idea of gifts to make in the future.


I went a bit crazy on the crochet front this year, mainly due to the book Hook, Stitch & Give by Kat Goldin. I spied the book online when it was released a couple of months ago and instantly knew that the bobble hat on the front cover would be a perfect gift for my sister. Combine that with lots of other pretty patterns that I liked the look of for me or knew I could make for other people, and buying the book was a pretty easy decision.


I had a slight initial false start involving me trying to run before I could walk with a new stitch (foundation trebles, in case you're interested), but after I read through the instructions in the book again I conquered the problem, and then everything else went swimmingly. The yarn I used is Stylecraft Special Aran in navy and raspberry. I think if I'd used the recommended yarns, I might have achieved the slightly more slouchy effect shown in the photos in the book but I'm happy with how the hat turned out (and more importantly so is my sister), so it's all good.


I then moved on to making the Knitterly hat from the book for my Dad. Now, either the book is really generous with its yarn amounts or I somehow managed to make the hat with way less yarn than I was meant to. So much so that when I was nearly finished the hat intended for my Dad, I realised that I'd easily have enough to make a matching hat for my little nephew. Then I decided that it would be an even better idea to make the mini hat for my nephew, but give the hat I'd intended for my Dad to my brother-in-law, and make a third hat for my Dad. But then that would leave my brother as the only man in my immediate family without a hat, so clearly that meant that I'd need to make a fourth hat. I only decided this about 10 days before Christmas, which might not have been my smartest move, but here's the evidence that I did get it all finished....


Thankfully for me, the hat is a simple but effective pattern and worked up fairly quickly. I managed to get my nephew's done in the time it took to watch Love Actually, most of my Dad's hat done on a return coach journey to London (on that point, I'm totally converted to the joys of public crafting. I've never really knitted on public transport because I worry I'll annoy whoever's sitting next to me with the needles, but crochet hooks are so much smaller that that's not a problem. And the journey went so much quicker with something to occupy me!), and my brother's done during every lunch break that I had between deciding to make it and Christmas!


The hats for my brother-in-law and nephew were made using Wendy Mode Chunky in denim, and for the ones for my Dad and brother I used Stylecraft Life Chunky in Blue Haze and Grey. The hats seem to have gone down well with their recipients, so I'm glad that I made the effort to make them all.


Of course, I had to fit some sewing into all of my Christmas crafting as well, and here the inspiration came from the book Sew Cute to Cuddle, which I first heard about when Charlie of This Blog is Not For You reviewed it. The book caught my attention because my brother's girlfriend likes hippos so I thought Mary the hippo from the book would be a good present for her, and it was very well received so I think I made a good choice!

The book includes full-size patterns for all of the projects to trace off, and the instructions were nice and clear. The only slight problem I had with Mary was that I failed to realise that the patterns don't include seam allowances before I cut my fabric out. Ooops! I managed to make it work though, and the only difference is that poor Mary's legs have ended up being a little shorter than they're meant to be.


Obviously I also had to sew a toy for my nephew too, and I chose Gronk the monster. In the book, he's made up in faux fur, but I thought that cotton would be better when it's highly likely that he'll get chewed. I ended up using scraps that I had left over from a couple of fat quarter bundles that have been used for many and varying purposes over the last couple of years, and I really like the effect of the multi-coloured legs and arms. 

The patterns in this book would all be pretty good for using up scraps actually - I think Mary the hippo probably uses the most material, and even for her I think I used under half a metre. The patterns were both fairly simple as well, although obviously the smaller pieces can get a bit fiddly. Other than sewing up openings for stuffing though, the only place where I had to resort to hand sewing was attaching the bottom of Mary's feet to her legs - so not too painful!


Gronk seemed to get on well with his new owner!

I mostly enjoyed making all my presents, although it did get a bit stressful towards the end - next year I need to either start earlier or not suddenly decide to give myself masses of extra work to do at the last minute (please tell me I'm not the only one who does that?!)! Now I'm looking forward to getting back to making for myself again - all I need to do now is to decide which of my pile of pre-washed fabrics to cut first. Not a bad problem to have!

Sunday, 2 February 2014

Crochet Giant Granny Scarf

After I posted about the headband that I knitted my sister for Christmas, Sheila, who I bought the pattern from, very kindly got in touch with me and asked if I'd like to try one of her other patterns. Sheila has lots of lovely knitting and crochet patterns in her Etsy shop, so I jumped at the chance and, after a bit of deliberation, chose the Giant Fall Granny Scarf  crochet pattern. Here's my version...


You may have noticed from this that I've also already knit myself the same headband that I made for my sister (albeit in a different colour) and I'm just as pleased with it second time around, possibly even more so because this time I get to keep it! 

Anyway, back to the scarf! As the name suggests it is a bit of a giant, but in a very good way. Chunky, oversized scarves are lovely and cosy, and working with thick yarn and a large hook (or needles when knitting) obviously means that projects grow satisfyingly quickly. 


The cosy factor is definitely the most important thing for me at the moment though. I may have managed to find one of the rare moments of sun that we've had in the UK recently to take these photos, but (as you can probably tell from the state of my hair - thank goodness the headband is keeping it at least vaguely under control!) it was crazily windy and freezing cold so a huge snuggly scarf was definitely a very welcome companion on this walk.


The pattern was simple and easy to follow and I'm really pleased with the results. The scarf is intended to be worked in stripes of 6 different colours, which looks great, but for once I decided to be a tiny bit sensible when it came to picking what yarn to use and stuck to one lovely colour which should hopefully go with any of the coats/jackets I might want to wear it with.

I'm also pleased that I've started 2014 off with a crochet project under my belt because one of my aims this year is to keep building on my very limited crochet skills, so this is a good start to getting that going.

And another fun thing about this scarf? If you can bear to unwrap it from around your neck in the cold, it looks nice and dramatic blowing in the wind...


What more could you want?!


Monday, 25 November 2013

Easy autumnal headbands

After last week's knitted headband tutorial, this week I thought I'd write a quick post to share a couple of other ideas for easy headbands that I've made recently. Personally, I think that headbands are great for this time of year when your ears can end up feeling a bit chilly but it's not quite cold enough for it to be proper hat weather yet. Plus, they're usually quick and easy projects which can be good for a bit of a break when you're in the middle of working on bigger things!

I made the first of the headbands using the 1950s pin up head scarf pattern which is available as a free download from Bluegingerdoll. It's super simple and a great way of using up material left over from other projects.


I used a vintage Laura Ashley brushed cotton, which makes it nice and warm! You can wear the head scarf knotted on top of your head, but I prefer it knotted at the back, like this...


My second headband is a crochet turban headband from the book Geek Chic Crochet (which has quite a few nice patterns if anyone is looking for some new crochet projects by the way!).


This is another really simple pattern - I only learnt to crochet earlier this year and I would still definitely classify myself as a beginner but I managed it no trouble. 


They've both been getting quite a lot of wear in the last couple of weeks as the temperatures have dropped.

I've got a couple of bigger WIPs which I'm close to finishing so I'll be back to share those soon!


Monday, 14 October 2013

Rainbow Granny Square Crochet Cushion

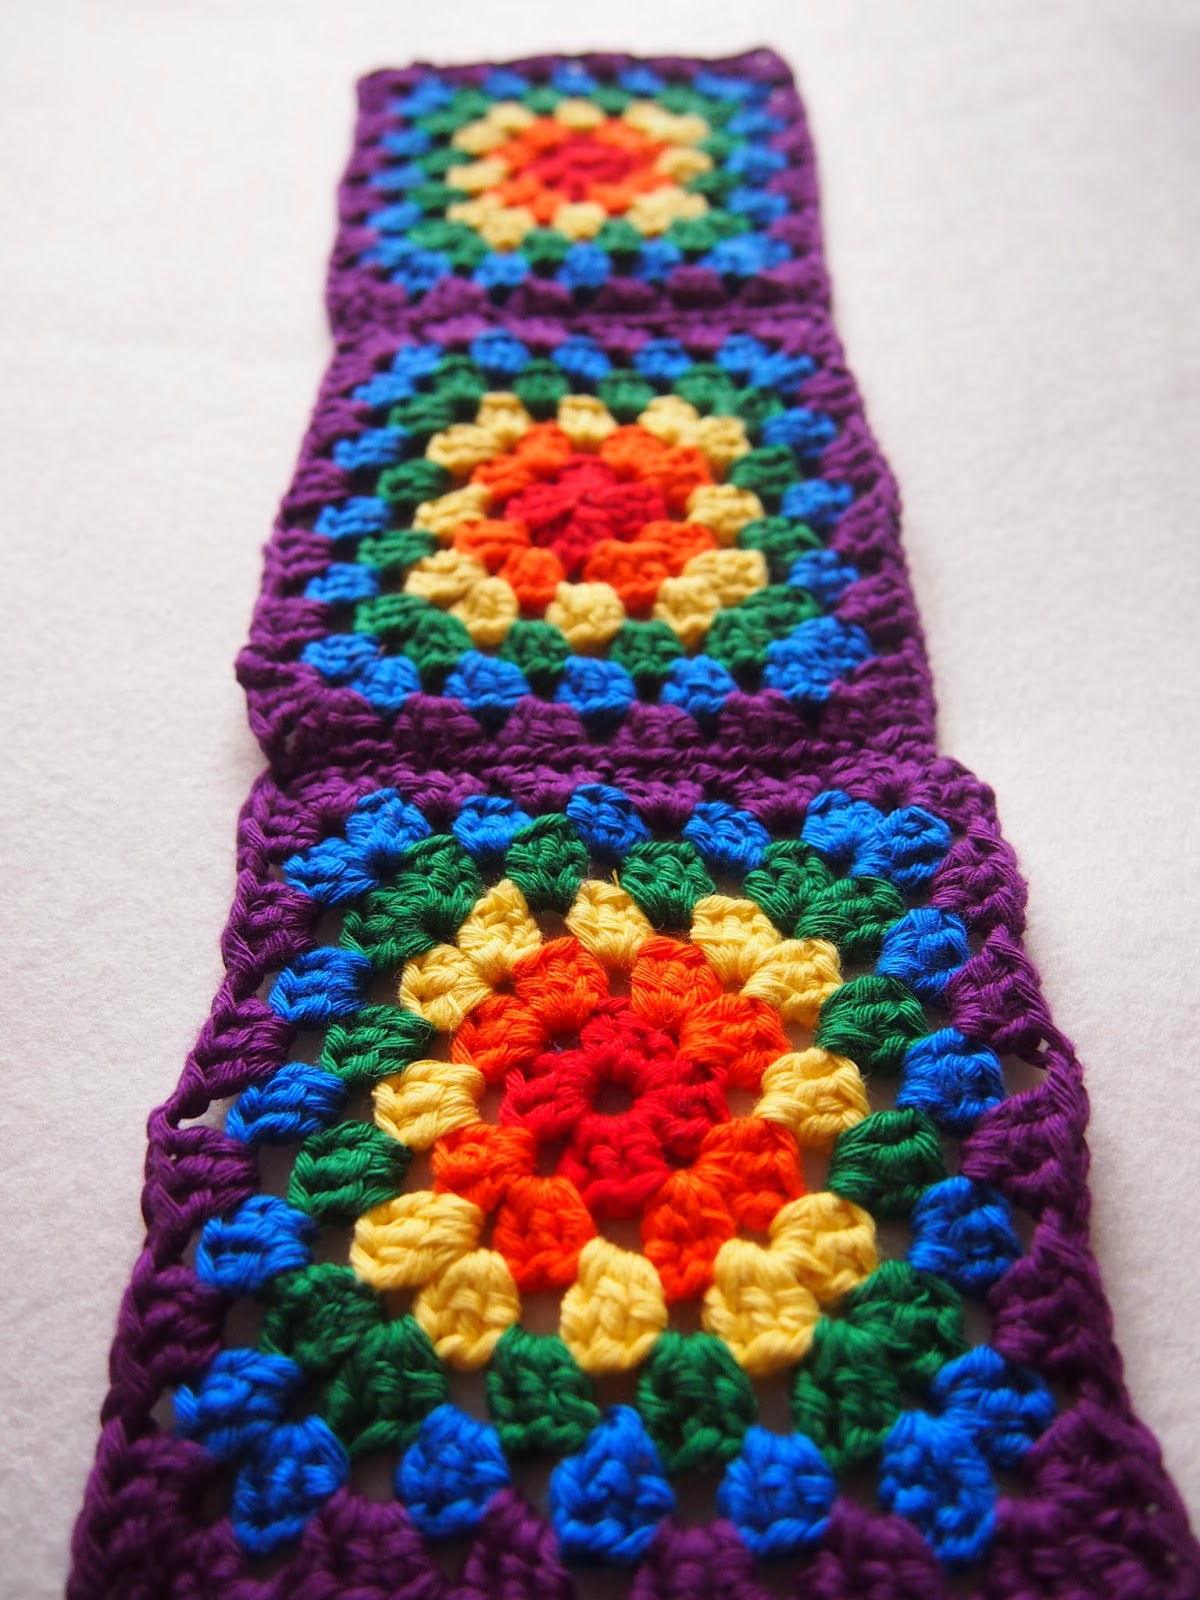
I had an enforced break from my current dressmaking craze last week while I was waiting for a new pattern to arrive, so I turned my attentions to some crochet instead and finally finished my rainbow-coloured granny square cushion. I first blogged about this project back in August, when it was just one lonely little square. That has now multiplied into 18, which have come together to create this little beauty that is now brightening up my living room...


I made up the 18 squares first (I used Rico Creative Cotton Aran), then spent a very dull evening fastening in all the ends. Lesson learned: for future projects like this, I will sort all the ends out as I go along to spread the boring job out a bit!

I then joined them up into six lines of three...


Then I joined three lines up to make a nine by nine square for the front...


For the back, I joined two lines together to form a two by three rectangle, attached this to bottom of the front and attached the last line of three separately to the top of the front to leave an opening a third of the way down the back of the cover. I popped the cushion pad inside, and threaded ribbon through the holes in the squares to fasten them together...


I finished it just at the right time as well, because the rainbow colours brightened up a very gloomy and rainy Sunday, and it's a lovely snuggly cushion because of it being crocheted. I've got a load of dressmaking plans that I want to put into action at some point, but I think there will be some more knitting and crochet going on too - it's nice to be able to snuggle up on the sofa with some wool now that it's getting a bit colder! I'll leave you with one last blast of colour, and I'll see you again soon...


Sunday, 18 August 2013

Rainbow colours

I've been working on a couple of simple small things this week, and both have been inspired by lovely cheerful rainbow colours - I love colour in general so it's hardly surprising that rainbows creep into my crafting every now and then.

The first rainbow gem that I've made this week is actually the first step towards a bigger goal, my first independent crochet project since I finished my beginners' course. Here it is...


Nothing fancy, just a rainbow coloured Granny square. My original plan was to make loads of these and make a whole rainbow coloured blanket, but I've seen some lovely blankets where the squares all have white borders and a whole variety of colours in the middle, so I'm tempted to make the rainbow squares into a cushion instead and then start a blanket with white-edged squares instead. Opinions on what would be best are most welcome!

And my second rainbow themed make is this...


A pretty little card for my Auntie - quite a simple idea but I'm pleased with how it's turned out.

I've also started work on my second Sewaholic Hollyburn skirt as well, so hopefully that'll be ready to share with you soon - watch this space!


Wednesday, 31 July 2013

Crochet for beginners

I said in my first blog post that crochet was the next item on my list of crafts to try out. I've been thinking of doing this for a while now but I never got round to it, partly because of all the other things I already have to keep me busy and partly because I've been slightly put off by some of the old fashioned, oddly coloured crochet items that I've seen in the past. Then I read about a learn to crochet course at Paper Village, which isn't far from me in Bristol, so I decided to give it a go - and I'm really glad that I did! There definitely wasn't any old fashioned crochet going on, and I feel like I learned quite a lot over the 6 weeks. In week 1 we covered the basics of getting started, then in week 2 we moved on to Granny squares...


Week 3's challenge was triangles for making bunting...


In week 4, possibly my favourite week I think, we made flowers...


This was followed by crocheting in the round in week 5, after which I had my first adventure into the world of amigurumi and made this little owl...


And last but not least, in week 6 we made stars...


And now I'm left with the challenge of deciding what my next proper crochet project will be - I'm a bit spoilt for choice but I'm thinking of starting with a rainbow blanket, watch this space!