Thursday, 23 January 2020

Alice & Co Whitechapel Pyjamas Sewing Pattern Review

At this chilly time of year, you'll often find me spending the evenings at home snuggled up in my pyjamas busy working on my latest sewing, knitting or crafting project. My cosy winter pyjamas have mostly seen better days though, so I decided it was time to make myself a new pair to brighten up these winter nights. Enter my Alice & Co Whitechapel pyjamas...


I've had this pattern waiting to be used since I won it as part of a giveaway hosted by Joy of Pink Coat Club last year. I'd intended to use it before now, but better late than never!

The Whitechapel pyjamas feature a boxy style shirt with a button front and simple collar, and elasticated waist trousers with a slightly tapered leg. It's a fairly traditional pyjama style and the trousers in particular are very simple to sew.


There were lots of things that I liked during the process of sewing my pyjamas. The trousers have just one pattern piece that forms the whole leg rather than front and back legs being cut separately. This cuts down the number of seams so makes the trousers even quicker to sew than other pyjama trousers I've made. The size of the pattern pieces is somewhat alarming though! And you do have to remember to flip the pattern piece over when cutting out the second leg.


I also really liked the fact that the pattern uses French seams throughout - and don't worry if you've never sewn a French seam before; comprehensive instructions are included with the pattern. The shirt sleeves are also inserted flat, which makes that step a bit easier than having to set in a sleeve and means that you can easily use French seams there too.


However, I did have a few little issues with the pattern. As far as I could see, the instructions don't actually tell you to press the centre front to the inside to form the button/buttonhole band (they tell you to press 1cm under at the very edge, but not the rest). At one point they tell you to temporarily fold it back to the outside, but without previously telling you to fold it in. From the shape of the pattern piece, it's fairly obvious where you need to press the front under, but it could be confusing if you're a relative beginner.

I also deviated slightly from the instructions for cutting the interfacing for the button/buttonhole bands - they say to cut two strips that are 10cm wide, but that seemed to cover too much of the front to me (and seemed more than shown in the diagrams), so I cut my strips to be half that width and it worked out fine.


The instructions are written in a chatty style, which makes it seem like you have a friend telling you what to do rather than a teacher. In many ways I like that (sewing is meant to be fun after all!), but sometimes it seemed a bit odd. Mainly when it gave you an alternative way to finish the collar/neckline seam that you can use if you prefer or in case you "mess up" the first way described in the instructions. It might just be me, but it seemed a bit odd to be giving an alternative in case people mess up, instead of writing the original instructions so people don't mess up.


All that being said, those weren't major problems - I did enjoy sewing the pattern and I'm pleased with my finished PJs. The sizing is fairly accurate. Let's face it, with pyjamas you don't need a garment that's perfectly sculpted to your body, but I think that the fit gives just the right amount of ease to be comfy without you ending up drowning in fabric.


Talking of fabric, for this project I chose to use a brushed cotton twill from Calico Laine. In many ways it's a beautiful fabric - it's lovely and soft, making it cosy to snuggle up in. And the colourful hearts are really fun of course! A word of warning if you're thinking of buying some though - when I prewashed the fabric the colour from some of the red hearts did bleed a bit. It's not terrible, and definitely didn't bother me for these PJs (although I might not have wanted to use it for clothes I'd wear out of the house), but I'm going to be slightly careful the first few times I wash them.

I decided to add to all the colour of the hearts on the fabric by using bright blue glitter hearts for the buttons (bought at a local wool shop). I think they're the perfect finishing touch.


In spite of the couple of little niggles with both the fabric and pattern, I'm really pleased with how my pyjamas turned out. They're super comfy to wear, and the colours make them really jolly. I've got some pretty gingham cotton in my stash that I've earmarked for some summer PJs, so I may well be making some more Whitechapel pyjamas in a couple of months!

Wednesday, 15 January 2020

Hey June Handmade Sheridan Sweater Sewing Pattern Review

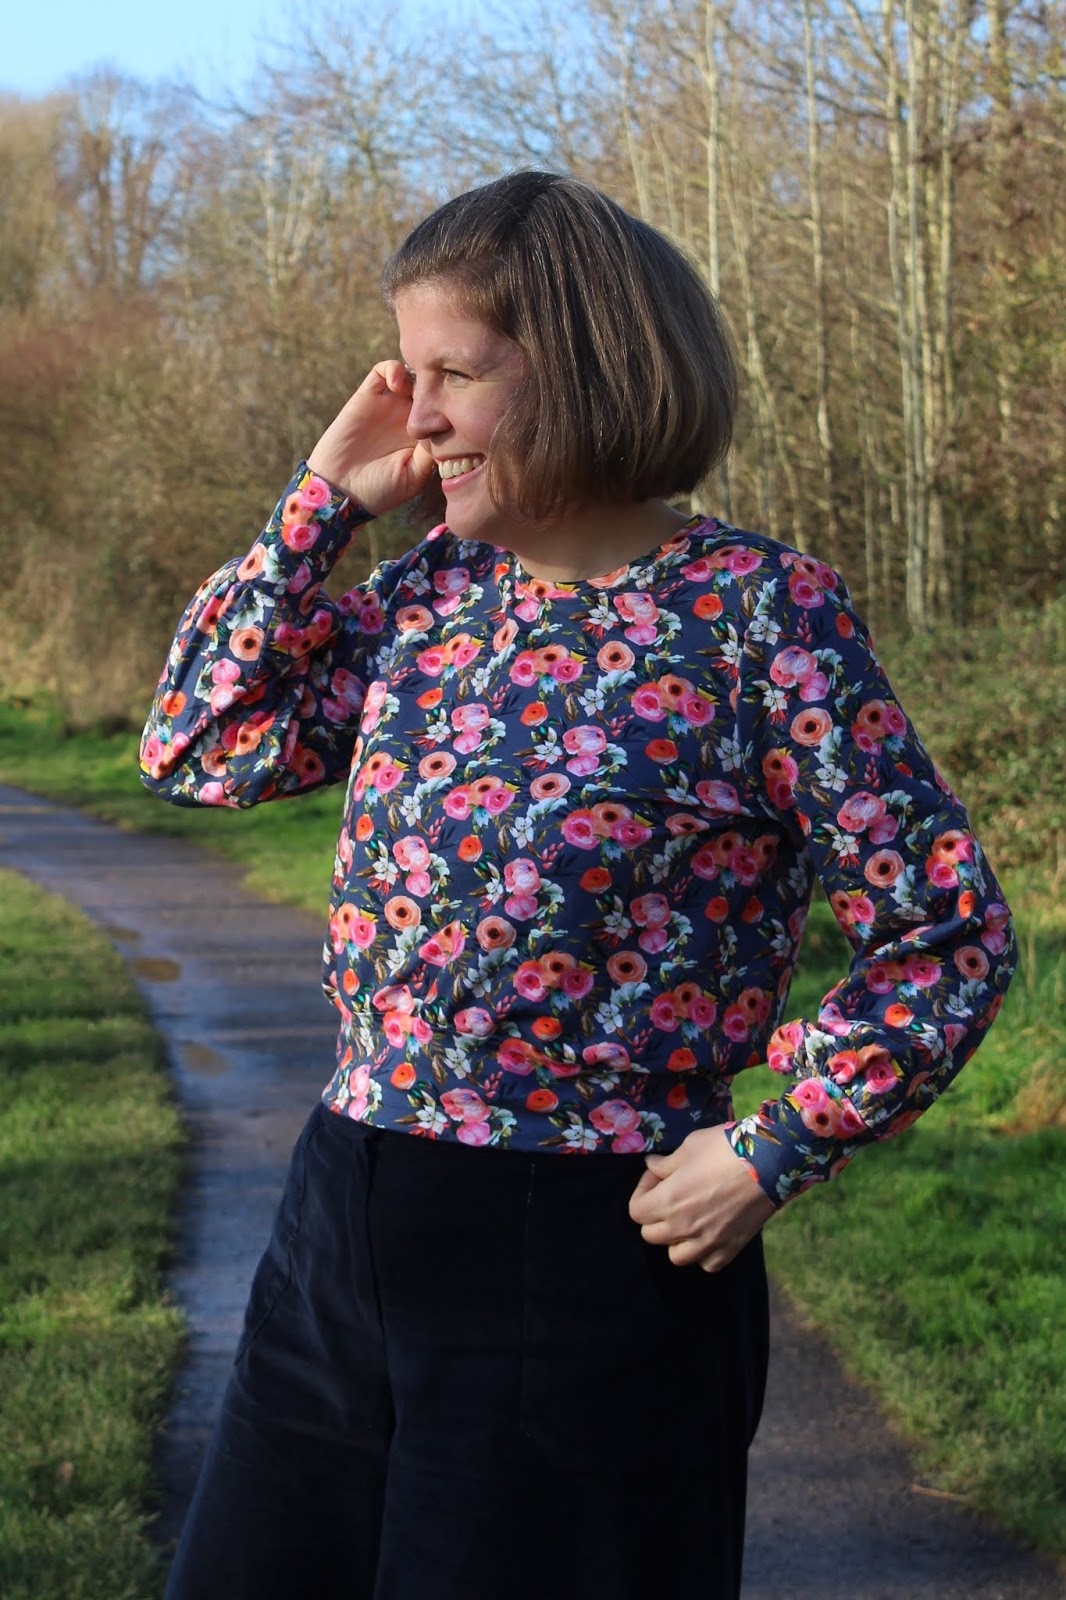
For my first sewing project of 2020, I felt like making something nice and simple to get me back into the swing of things after Christmas. I also fancied trying a new pattern, and wanted to go for something that will be comfy and cosy to wear for the rest of the winter. Thankfully, the Hey June Handmade Sheridan sweater ticks all of those boxes!


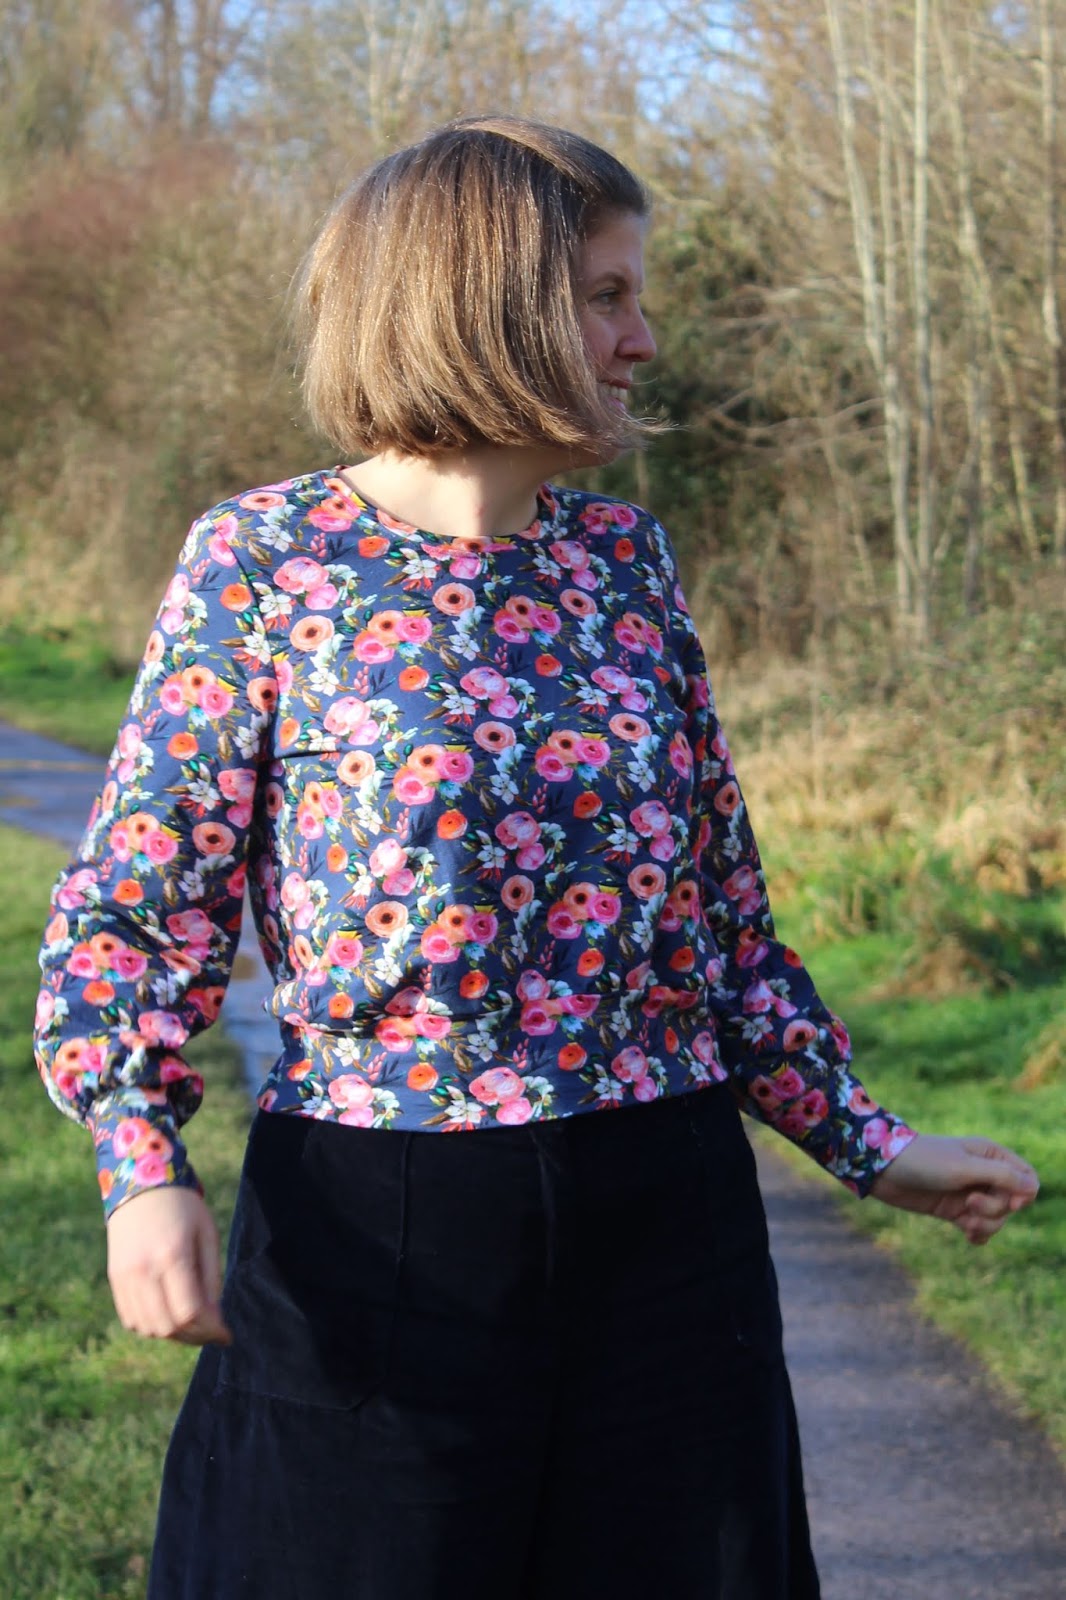
On the face of it the Sheridan sweater is a simple pattern, but it comes with a number of interesting options. There are two necklines (the crew neck that I used and a built-up bateau neckline), three sleeve options (my cuffed bishop sleeves, an elasticated bishop sleeve or wide bell sleeve) and also three hem variations (a cropped hem, regular banded hem or the cropped banded hem that I chose). As you can interchange the various options, that means you could get quite a few different sweaters out of this one sewing pattern so it's fairly good value for money!


The Sheridan sweater pattern was released towards the end of last year and I was instantly drawn to the cuffed bishop sleeves. They're a bit different from anything in patterns I already own, and I thought they looked like a good sleeve style for me. I'm always drawn to the drama of bishop sleeves, but then the practical side of my mind kicks in and I think that they'd just get in my way when I was wearing them or I'd end up accidentally dipping them in my food! The deep cuffs of the Sheridan sweater seemed like a great way of getting sleeve volume but keeping all the extra fabric away from my hands and therefore hopefully out of trouble.


The sweater was fairly easy to sew as you'd expect from a relatively simple knit garment. The instructions were detailed and seemed to be easy to follow - although I have to admit that I only really skimmed through them to check what order to sew everything in as I've made similar tops before so it's not an unfamiliar process for me.


The only slightly tricky part was gathering the bottom of the sleeve into the cuff - there's quite a lot of fabric there that has to fit into a relatively small space. It wasn't difficult exactly, just a bit fiddly.

I top stitched around the neckline, which wasn't mentioned in the instructions but I thought it was worth doing to stop the neckline seam allowance flipping up, which would have annoyed me. If I make the cropped Sheridan with the hem band again, I'd possibly use gathering stitches around the hem of the sweater body to gather it into the hem band rather than stretching the band to fit. Stretching the band worked OK this time, but I did have to stretch it quite a lot and I think with some fabrics you might end up stretching them out accidentally.


In terms of sizing, I cut a size 12 at the bust and blended out to a 14 at the waist and hips. Those are the sizes recommended for my measurements, and they worked out nicely. The sweater seems true to size - it's not a tight fitting sweater, but is fitted enough to give it a good shape (if that makes any sense?).


The fabric that I used is a gorgeous French terry from Loubodu Fabrics - it's such a pretty print and a lovely quality fabric. As I type, it's sold out unfortunately, but Loubodu have lots of other beauties and have 30% off this week if you fancy picking up a bargain.


I think the Sheridan sweater has been an excellent start to my sewing in 2020. It was a fun pattern to sew, there are lots more options that I could use in future projects, I love the fabric that I used and I know I'll wear this sweater a lot. What more could you want?! How's your sewing year started off?


Thursday, 9 January 2020

Final 2019 knitting (& a little crochet)

Hello hello! It's been a little while since my last post, hasn't it?! Most of my creative time at the end of last year was spent making Christmas presents for my family that needed to be kept secret so I didn't have anything to share here. I'm back to making for myself again now, so expect normal blogging service to resume too! My first projects of the year are almost done, but for now I thought I'd pop in to share some of the things that I knitted in the last four months of 2019.


Having said that, this first project is actually crocheted! This is the first crochet that I've done for quite a while - I decided to give it a try again it give my hands something a bit different to do as a break from knitting. I do like crochet every now and then, but I don't enjoy it as much as knitting and also my tension is slightly crazy so everything turns out smaller than it's meant to be no matter what I do. That makes it a bit limiting because it means that I tend to stick to projects where final size isn't too critical.

Thankfully this shawl falls into that category, and was a nice way to put a pretty skein of yarn (from Woolly Mama Yarns) that had been in my stash for a while to good use. The pattern is the Movie Night Shawl by Purple Iguana Designs. It was easy to work up and it's nice light shawl to wear - what more could you want?!


Next up is a Blooming Bandana Cowl - a pattern by Molly Klein Design. This is a really great pattern for using up leftovers from sock projects as the pattern only calls for about 35 grams of each colourway (I think I may have used even less than that). I have plenty of yarn left over from my sock projects so I can definitely see myself making more of these.


It was another easy pattern to knit (that's a bit of a theme with most of these projects, partly because they have been my easy knitting that I've been working on alongside a more complicated sweater/jumper that's still a work in progress), and I've enjoyed wearing it. I always used to stay away from cowls because I didn't think they'd be as cosy as a shawl/scarf because you can't wrap them as snugly round your neck, but I've found that this is nice to wear when I'm at my desk and my shoulders/neck feel a bit chilly. Another winner!


Now we have some socks, specifically the Kia socks. This is a pattern by Dawn Henderson/dawn.landix, and deserves to be appreciated because it was inspired by the important conversations within the knitting community surrounding race, diversity, inclusion and representation.

It's a lovely relaxing pattern to knit. I used a slightly different toe (just my personal preference - I've found that the rounded toe from Helen Stewart's Magnolia Socks fits my feet really well so I tend to use that on all my socks now), but other than that followed the pattern and they knit up beautifully. This would be a good pattern to use for presents because it's speedy but more interesting than plain vanilla socks. The yarn I used is 'Taste the rainbow' by Glendale Fibres - it's lovely and colourful!


My next project was a Rayon de Soleil shawl. This is a pattern by Francoise Danoy/Aroha Knits. It's a simple shawlette made up of alternating sections of stocking stitch and garter eyelet rows - a simple but effective pattern that was enjoyable to knit.


I made this using more sock yarn leftovers - the variegated colour is 'Hendriks' by Vicki Brown Designs, and the pink is 'Orchid' by Lamington Lass. I love how these two yarns work together - pink and green is such a nice colour combination, which I didn't really appreciate until a couple of years ago.


Now we move on to a few presents that I knitted towards the end of the year. First, a super simple and speedy baby knit - a Tegan hat with top knot that I made for a friend who had a baby in early December. It's DK weight so knits up nice and quickly, and felt lovely and cosy in the yarn that I used - a mini skein of John Arbon Knit by Numbers DK in colourway 17. I'd happily knit more of these for future baby gifts!


There was a new addition to my family just before Christmas and I gained a new nephew, so obviously he needed an auntie-made present too! This time I chose to knit a little cardi - specifically 'The Gift' by kiddiwinksknits. This is a lovely pattern (and it's free!) -  the only change I made was to use normal  1x1 rib on the cuffs and waistband instead of the eyelet rib in the pattern - mainly because I knit most of it not knowing whether I'd be gaining a niece or a nephew and plain rib seemed a bit more unisex than the pretty eyelet rib.


I don't often knit garments seamlessly as the one time I tried it made my wrists really sore, but I want to give it another go and this was a nice way to experiment and see how it went. Thankfully no wrist pain this time, although it has to be said that obviously a baby cardi is a lot smaller and lighter than a garment for me would be!


I also knitted up a quick hat for my brother. It's the Violet Waffles hat by Halldora J - another freebie (I do pay for knitting patterns most of the time I assure you - I like to support knitting designers!) and another easy peasy project, and excellent gift knit. This project was mainly determined by the yarn (Blue Sky Alpacas Eco-Cashmere in the colour Black Rose), which I was lucky enough to win in a giveaway earlier in 2019. It's beautiful yarn and felt lovely, but it really isn't my colour so I knew all along that it would be used for a gift. Thankfully my brother wears much darker colours than I do so it suited him perfectly!


Once Christmas was over, I switched back to knitting for me - yay! My first completed project was a very practical one - dishcloths. I've been wanting to give knitted dishcloths a try for a while now, and knitting this super simple pattern (Gramma's Dishcloth by PJ Allen) was a good way to spend car journeys visiting family members over the Christmas period. I used Lily Sugar n Cream in the colour Psychedelic Ombre, which has given me possibly the most colourful dishcloths in the world! I've been using them for about a week now and they're doing well so far so I may be making some more so that I can have some in use while others are in the wash.


And last but not least, a hat for me! It's the Trellis Beret by Woolly Wormhead. I've had this pattern in my Ravelry queue for a while and chose to knit it now because I realised I already had the perfect yarn for it already waiting in my stash in the form of the leftovers from a top I made about two years ago (the yarn is Tivoli New Celtic Aran in shade 981). I really enjoyed knitting this pattern - it's well written, and I particularly like how the eyelet sections taper with the crown decreases.


Congratulations if you've made it through all of that! I think that's about all I have to share for now. I've got a sewing project almost finished though, so I'll hopefully be back again to share that soon - I definitely won't be leaving it as long between posts as I did last time anyway. See you soon!

Thursday, 21 November 2019

Vogue 8772 Shirt

I've been enjoying wearing shirts recently, but only have two long-sleeved ones in my wardrobe so I decided it was time to add another to my collection. I fancied trying a new pattern, and after a bit of browsing I opted for Vogue 8772.


I've previously made the Sewaholic Granville shirt (my original version from a few years ago is here) and been pleased with it, but while the back princess seams and yoke give the shirt a nice shape I feel like they're not great if you want to make a shirt in a fabric with a large print because they break things up too much (or mean that you have to spend a lot of time on pattern matching!). If you've been reading this blog for a while, you may have noticed that I like a large print so I thought it would be worth giving another shirt pattern a go.


Vogue 8772 caught my eye because it has similar shaping to the Granville, but that shaping is provided by French darts rather than princess seams. OK, so darts break a print up too, but I don't mind that as much for some reason. The pattern is also pretty versatile as it comes with pointed collar and pussy bow options, as well as sleeve variations, a sleeveless option and two different hem lengths. It also helped that Vogue patterns were on sale when I bought it!

I made view D of the pattern - the pointed collar, long cuffed sleeves and the shorter hem length.


Having made a couple of shirts and shirt dresses now, I'm fairly familiar with the process of constructing a shirt so I didn't have any trouble with this pattern. The instructions were fairly brief but always clear as far as I was concerned.

That said, I did go a little off piste when it came to the finishing of the centre front. The pattern doesn't include a separate button placket, and instead the centre front is double-folded back on itself to create a facing. I added a strip of interfacing to one layer of the fold, as I always find my machine stitches buttonholes better on interfaced fabric. I also topstitched the facing down to make it look more like a button placket. Neither of these are particularly major changes from the instructions, but I'm glad I made them all the same.


In terms of sizing, according to the pattern I should have made a 16 at the bust, blending out to an 18 at the waist and hips. I consulted the finished garment measurements and decided that I'd actually be fine making a straight size 16. I'm pleased with the fit - it's nicely shaped without being so fitted that I'm risking gaping buttons!

One point to note is that the arms come up quite long - they're just about OK on me and I'm 5'9" with relatively long arms, so if you're shorter or have proportionately small arms then you may need to shorten them.


The fabric I used is some pretty cotton (or I assume it's cotton anyway!) that was part of a large bag of fabrics that my auntie gave me when she was clearing out her parents' house. As soon as I saw it, I thought it would make a lovely shirt and I think I've proved myself right (even if I do say so myself!).


I briefly considered pattern matching across the centre front, but then I realised that the pattern repeat on the fabric was fairly huge so matching the flowers exactly would have meant wasting a fair bit of fabric. Instead, I just made sure that the stripes continued evenly on either side of the front. I also made sure that I had a stripe running around the collar and across the middle of each cuff, just because I like how that looks.


I'd originally intended to have a stripe running down the centre front, but if I'd done that then the print placement would have meant that the stripes to either side of the centre would have disappeared because they'd have been eaten up by the front darts, which would have looked weird. As it turns out, I think having to change my original plan was a blessing in disguise because the purple buttons that I found perfectly match the stripes and look great running down the centre front through the flowers.


I'm really pleased with the shirt and have already treated myself to some more fabric to make a second version. My mum has also requested one for her Christmas present, so I'll be making that in the not-too-distant future too. All in all, I'm very glad I gave Vogue 8772 a try, and I think I'll definitely be getting my money's worth out of this pattern!

Thursday, 14 November 2019

McCalls 7475 culottes sewing pattern review & a bonus Freya

Regular readers of this blog will not be surprised to hear that I generally think life is better in pretty dresses (or occasionally skirts) and I'm not going to entirely abandon that philosophy any time soon, but in the last couple of years since moving to a rather windy coastal town I have been forced to admit that trousers can be very useful too! The latest addition to that area of my wardrobe is today's project - culottes using the McCalls 7475 pattern.


McCalls 7475 is a pattern for semi-fitted skirts, shorts and culottes with a mock fly front, back yoke, two different front pocket styles, the option of back pockets and length variations. I got the pattern when it was included with issue 72 of Love Sewing magazine.

I basically made view F - the longer culottes, but I omitted the back pockets and used the front pockets from view E.


My measurements put me in an 18 for this pattern, but based on the finished garment measurements I was pretty sure that an 18 would be too big. I made a toile of a 16 and they did fit, but were just a little too fitted to be comfortable around the waist. I let out the side seams just a touch (literally just a couple of millimetres at each seam) and that was all it took to make sure I'll be able to wear the culottes happily.


The culottes are a fairly simple project to sew and I was surprised by how quickly they came together. The mock fly front is really easy (I've never actually sewn a proper fly front, but the way people talk about them, I assume they're more complicated than this was!) but still looks nice and neat. The instructions were what you'd expect from a commercial pattern - they're fairly succinct, but I found them completely clear and didn't have any problems.


Part of me was tempted to get a patterned fabric because I'm always naturally drawn to prints rather than solid colours, but in the end the sensible side of me won out and I decided to opt for some navy needlecord from Textile Express. It's a lovely fabric and while patterned culottes would have been fun, these will go with pretty much any top that I own so will get much more wear. The needlecord that I used has some slight stretch to it as well, which makes them super comfy, so I'm more likely to want to wear them!


I decided to give these culottes pretty insides and used some prized scraps of possibly my favourite ever fabric (it's a Liberty tana lawn - the print's called Suzy Elizabeth) as the waistband facing and to line the pockets. The pattern doesn't call for you to line the pockets and just has you turn the seam allowances under before stitching them down (they're patch pockets), but I prefer to line pockets if I've got some suitable fabric. In this case both the waistband and the pockets would have been a bit bulky if I'd faced/lined them with the needlecord, but the cotton lawn works nicely.


I'm wearing the culottes here with a Tilly & The Buttons Freya cowl neck top that I made recently. The fabric is a lovely jersey from Loubodu Fabrics - sadly it doesn't seem to be available any more though. I have a steadily growing collection of Freya tops, and find them really useful at this time of year so I'm going to be using them to take part in this year's One Week One Pattern challenge hosted by Sewisfaction. Is anyone else planning to join in?


Anyway, back to the culottes! I was fairly sure before making them that they'd be useful, but I'm actually quite surprised by just how much I like them. I've worn them quite a few times already, and I'm sure I'll be wearing them much more this autumn/winter. I'd still quite like a patterned pair though; I just need to find some suitable fabric - any suggestions?!