Friday, 12 September 2014

OWOP: My Week With Lilou

I had a good think about what pattern to choose for OWOP (One Week, One Pattern) - my Emery dresses and Hollyburn skirts were both strong candidates, but in the end I opted for my Lilou dresses from Love At First Stitch because I thought they might provide more different styling options so be a little more interesting to look at together. Here's what I've been wearing for the last week....


Day 1: Berry print Lilou with soon-to-be-blogged Cria cardigan (carefully not showing you the trainers I'm wearing at this point - a bit ugly but much better for walking through a muddy wood than pretty shoes!). This was meant to be my outfit for the Outfit Along this summer but I didn't get my knitting finished in time. I got there in the end though, and I'm really pleased with how the two of them look together.


Day 2: Floral Lilou with RTW cardigan (which I didn't need for a large part of the day because it was so lovely and sunny!) and pretty beads. I love this dress - just putting it on makes me feel good! It features some of my favourite colours, so it's no surprise that when I made it I already had a couple of things in my wardrobe that look like they were made to go with it. I wore this for a day out with a friend, and it felt great all day.


Day 3: Denim Lilou with RTW t-shirt and me-made belt (tutorial here). Today was a work day, but I don't need to be smart for work and comfort it much more important! This outfit is so comfy, but still looks nice and presentable. I've worn my denim Lilou a couple of times already, and I like the fact that it's a bit of a blank canvas for combining with different colours and accessories.


Day 4: Berry print Lilou with RTW cardigan. I've had this cardi for ages but don't wear it very much. I dug it out of the back of my wardrobe because I thought it would work well with this Lilou and I'm really like how they look together so the cardigan might be getting more wear now!


Day 5: Denim Lilou worn under my Capital Chic Bellini Blouse in a (not very) cunning attempt to mix things up a bit and make it look like I'm actually wearing a top and skirt instead of variations on the same dress all week.


Day 6: Floral Lilou with RTW cardigan and leggings. As I said above, the number of cardigans in my wardrobe that I could wear with this Lilou is probably a good indication of how much I like all the colours in this fabric! This outfit felt a bit dressy for a day sat in front of the computer, but it's still really comfy and it's nice to be a bit smarter every now and then so it's all good!


Day 7 (today!): Denim Lilou with RTW t-shirt & leggings and me-made belt. Possibly my favourite outfit of the week! The more I wear my denim Lilou, the more I love it - the weight of the denim gives the skirt a lovely swish when I walk, which is always fun. I also really like wearing my fabric belts with this dress, and the t-shirt was a charity shop bargain the other week - it looks like it's never been worn, is great quality material and was only £1. So this outfit is a bit of a winner as far as I'm concerned.

I've really enjoyed wearing my different Lilou dresses this week for OWOP, so a big thank you to Jane for organising it! Although I won't miss taking the daily photos - I usually take blog photos in places where there aren't many people around, but I can't really do that on a daily basis and I've been getting some very odd looks from my neighbours as I've been prancing around the car park this week! Has anyone else had the same problem?!

Tuesday, 9 September 2014

Scrap stash busting: fabric-covered elastic waspie belt tutorial

Much as I love sewing, it's causing me an increasing problem: scraps! I have an ever-growing fabric stash, but it's pretty much all scraps of many and varying sizes. I decided that it was time to do something about them before they actually take over my entire flat, and with that in mind I'm starting an occasional series of scrap stash busting posts using patterns and tutorials that I've found, or ideas I've come up with myself - mainly to make myself put at least some of that lovely fabric to good use, but if I manage to give anyone else some ideas along the way then that would be great! I'm kicking off the series today with a tutorial I've come up with for this fabric-covered elastic waspie belt (you might have caught a sneak peek of it in my post on my denim Lilou!).


There are many great belt tutorials out there already (such as Tilly's bow belt and A Beautiful Mess's fabric belts), but I have a RTW belt (you can see it in my post about my Winifred dress) that I wanted to recreate and I couldn't find any tutorials that were quite what I wanted, so I decided to make my own. This is a great project for using up long, thin pieces of material (as a guide, the piece I used was 105 cm long x 12 cm wide), and the finished belts are a brilliant way to jazz up a plain outfit.


To make the belt, you'll need basic sewing kit, your material, a belt buckle and elastic the same width as your belt buckle. I got both my buckle and elastic from Tailor Mouse (belt buckle here and elastic here), but there are plenty of other places you can find them.

First, you need to cut your elastic and fabric to size. The best way to do this is to put your elastic round your waist so that it fits snugly but is still comfortable - cut it at this point and measure.

For the fabric, you'll need 1.5 times the length of your fabric (this creates the slightly gathered effect and allows the fabric to move when the elastic stretches), and the width will need to be twice the width of the elastic plus twice the seam allowance you want to use. For example, I cut my elastic at 70 cm, it was 5 cm wide, and I used a 1 cm seam allowance, so my fabric was 105 cm (70 x 1.5) long by 12 cm wide ((5 x 2) + (1 x 2)). If that all sounds a bit complicated, don't worry - it's very simple from here on in!


Once you've cut your fabric, fold it in half, right sides together, so that the two long edges match up and pin in place.


Sew along the long edge using your chosen seam allowance, remembering to back stitch at either end to secure.


Turn the fabric tube right sides out. You might find using a chop stick helpful here.


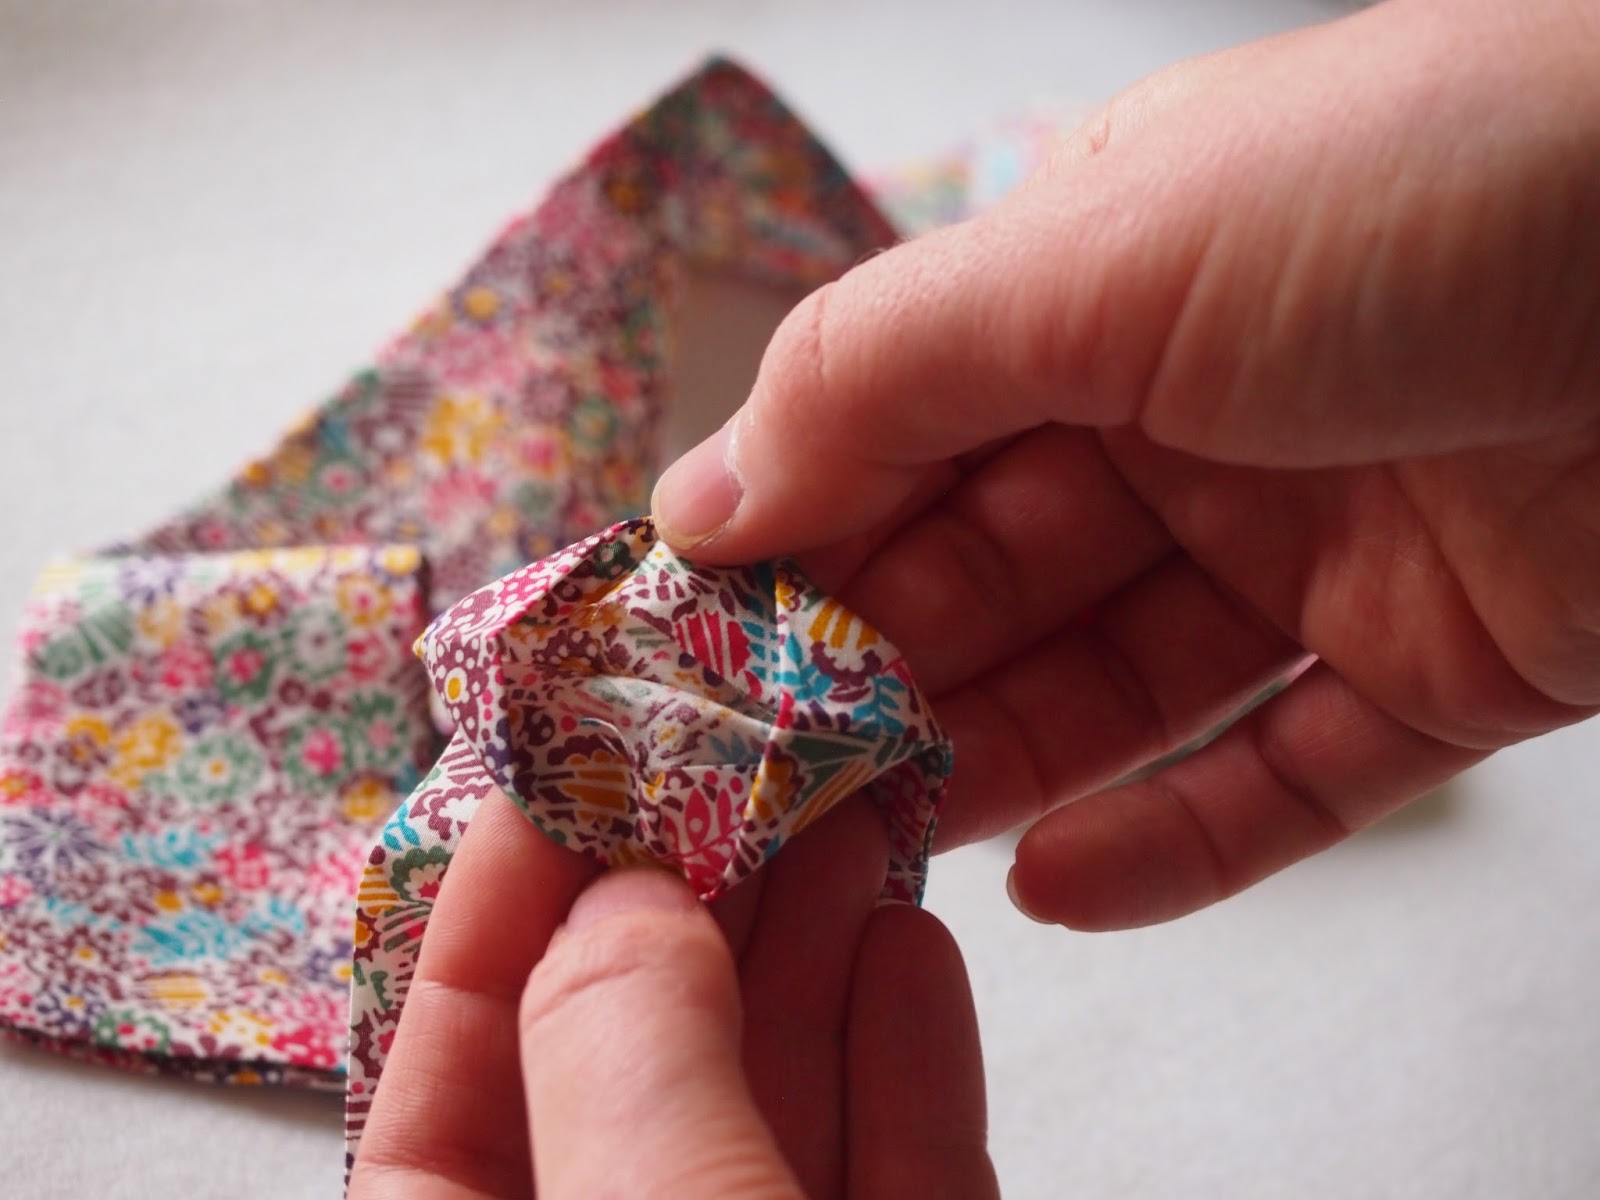
Press the fabric tube, and at the same time press about 1 cm at either open end under to the inside of the tube.


Put one end of the elastic into the middle of the fabric tube at one open end, and start pushing it through.


When the other end of the elastic reaches the start of the fabric, use a pin to secure it in place underneath the pressed-under edge of the fabric. Then continue pulling the elastic through the tube until it reaches the other end and secure that in the same way.


Take one half of the belt clasp. Pass one end of the fabric/elastic tube through the front of the clasp...


...fold it back on itself to enclose the clasp, then pin to the fabric on the side of the back of the clasp. Making sure that the fabric/elastic isn't twisted, repeat these steps using the other half of the belt clasp and the other end of the fabric/elastic.


Sew the two ends in place - use a zig zag or lightning bolt stitch, and sew a couple of lines close together to secure.


And you're done!

If you've got any questions about making the belt, or anything in the tutorial isn't clear, just ask and I'll try to help. And if you make a belt, I'd love to see it! How's your fabric scrap collection? Have you got any recommendations for my scrap busting project?

Thursday, 4 September 2014

Autumn-ready Lilou & OWOP

It may not be quite autumn yet, but I thought it was time to get thinking about sewing some clothes that can be worn at the moment, but will also still work once summer has definitely come to an end, instead of disappearing for a few days and then returning again as it seems to be at the moment. My Love At First Stitch Lilou dresses have been definite favourites this summer, so I decided to make another version that I could layer up and wear as the weather gets colder. Here's what I came up with...


Denim might not be an instantly obvious choice for a dress, but this is soft-washed denim (from Fabric Godmother) and it feels lovely and hangs really nicely. It also holds the pleats in the Lilou skirt well - you can see those pleats much better in this plain fabric than you can in my other Lilous where the pleats get a bit lost in the prints. The other advantage of denim is that it'll go with pretty much anything in my wardrobe. Also, as I don't really wear trousers, denim skirts play the same role for me as jeans do for many people, and I think this Lilou will get worn just as much as my denim skirts do.


A sleeveless dress might also seem like a bit of an odd choice for autumn, but one of the good things about the shape of the Lilou bodice is that it can easily be worn pinafore-style over a top or a blouse as I've worn it here, and there are also no sleeves to get caught up under cardigans or jumpers so that'll make it good once autumn hits as well. This dress is a little warm to wear on the nicer days we're having still at the moment, and it does look a bit odd if I try to wear it on its own without any layers, but I have worn it a couple of times already and it's super comfy, and is casual whilst still looking nice if that makes any sense?!


I used a regular centred zip for this version of Lilou instead of an invisible zip - partly because I wasn't sure if the denim, being a slightly heavier weight fabric, would work that well with an invisible zip, but mainly because when I went to buy the zip my local haberdashery only had white invisible zips, which I knew definitely wouldn't work and I was being impatient and didn't want to wait to find a different zip. It's a pretty good haberdashery, and they have a decent range of colours and sizes in normal zips, but only ever seem to have white or black invisible zips for some reason. I suppose they must find that's what sells but it seems a bit odd to me that they don't have more colours.

Other than that, I used the same size and length changes that I've used for my other Lilous (size 6 at the bust and hips, and a 5 at the waist, 1.5 inches added to the bodice and 2.5 added to the skirt) but didn't make any other changes. Part of me thinks maybe I should have tried adding pockets to this version, because I do love pockets and they are useful sometimes, but that part of me isn't arguing too strongly with the part of me that likes it how it is, so I think this one will stay pocket-less and I'll maybe try adding them next time I make the pattern.


Oooh, look - another contrast lining! I particularly love the pretty print compared with the plain outer fabric on this Lilou, and as I've probably mentioned before it's a good way of using up off cuts from other projects. This time I used the remains of the fabric that I used for my Mortmain dress, and it reminded me that I really should make another Mortmain soon - another project to add to the list!


As this is now my third Lilou (fourth if you count the one I made for my Mum!), there's not much else new to say about this one - but I'm really happy with it. It came out exactly as I imagined it in my head and I know it will get worn a LOT! I've also decided that I'm going to use my Lilou dresses for OWOP, which is being organised by Handmade Jane and is kicking off this Saturday. Is anyone else joining in? What pattern have you picked?

Friday, 29 August 2014

Simple Sew Ruby Dress

Two finished garment posts within a few days isn't normal for me, but I had a weekend recently when I did very little other than sew (a good weekend!), so I got through a couple of projects quite quickly, including the dress I have to show you today. This dress wasn't planned. Not that I have a particularly detailed sewing plan, but I had told myself that I'd probably made enough summer dresses already this year. Then this month's copy of Love Sewing magazine arrived through my door with the pattern for the Ruby dress from Simple Sew on the cover. It was just my style, and then I spotted some fabric on ebay that I thought would make a nice Ruby, so really it would have been silly not to put the two together and create a pretty dress wouldn't it? So that's what I did!


In my defence (not that I necessarily need one!), I have been thinking recently that I haven't made nearly enough polka dot items. I love polka dots, and I always tend to be drawn to them when I'm looking for sewing inspiration, but for some reason they seem to have not featured too highly on the list of things I've actually made. And blue and white is always a good combination for me, and fits in well with my cardigan collection so it's all good!


The Ruby dress has a fitted bodice with a bateau neckline and low V-shaped back, and a lovely full skirt. So this may be another fit and flare dress to add to my growing handmade collection, but it had some interesting details to make it different from the others that I've made before.

The pattern is described as being for an adventurous beginner, which I think is probably fairly accurate as it's all pretty simple (as the name of the pattern company would suggest!), as long as you're OK with inserting invisible zips. The instructions are clear and well-illustrated, although there are a couple of details missing that might confuse a complete beginner - the envelope doesn't tell you what type or length of zip you should be using (I used a 16" invisible zip), and I don't think it tells you what seam allowance to use (I used the standard 5/8" which worked fine for me) but maybe I just overlooked that bit! The envelope does promise full email support though, so that should sort out any queries.


The neckline and armholes are finished together with one facing, which I prefer to having a separate neckline facing and armhole binding as it means there's no risk of the facing popping out at the neckline. If I make another Ruby dress though, I might try lining the bodice instead of using the facings, as I really like the lined bodices of my Lilou dresses.

I made a size 14, but added quite a lot of length. From the photos in the magazine, you can tell that this dress has been designed to be quite short, but I always think that dresses this shape look better if they're around knee length. If they're much shorter than that on me, I always feel like they look like they've been shrunk, but maybe that's just me being weird! I added 1.5 inches to the bodice, and 4.5 inches to the skirt. Lengthening the bodice is a standard adjustment for me, and I am probably on the taller side of average at 5 ft 8, but the skirt would have been really short on me without the extra length. I'm fairly happy with it as it is, but I might add an extra inch or two to the skirt next time.


Have any of you read Love Sewing magazine? I always get sucked in by the pretty covers of magazines, so I had to check this one out when it was first released a few months ago. It's a nice magazine, with plenty of modern sewing projects for accessories, home decor and simple clothes. I haven't actually made anything from the magazine itself yet, but I've enjoyed reading it. Plus there's the bonus of having a free pattern every month. If you're only interested in dressmaking, then it might not be the one for you but it's definitely worth keeping an eye out for it just to see if you want the pattern - this month's issue with the Ruby pattern should theoretically still be available, and next month there'll be a trouser pattern on offer.


I'm pretty happy with how this turned out, and even happier now that I've heard that there could be some more heat coming our way next week so I might get more of a chance to show it off. And if the sun doesn't appear again, well then that's what cardigans were made for! But maybe I should think about planning some more autumn-appropriate sewing. Are you sewing for summer still, or planning for autumn already?

Tuesday, 26 August 2014

Jennifer Lauren Bronte Top - Repurpose, Reuse, Refashion

At the start of this year, the one sewing target that I set myself was to get to grip with knit fabrics. I started off quite well by making my Plantain top, but I hadn't done anything else about it since then. Not due to fear or anything, more just because I kept getting distracted by woven fabrics and patterns! Then Jennifer Lauren released the Bronte top, and it reminded me of an old favourite RTW t-shirt of mine so I knew I wanted to make one. It's taken me a couple of months since the release, but better late than never!


I was given the kick start to get sewing the Bronte when I saw that Amy of Sew Amy Sew was hosting Repurpose, Reuse, Refashion month this August. You see, a month or two ago I'd found this jersey maxi dress in one of my local charity shops for the princely sum of £1.75...


When I bought it, I knew I would never wear it as it was - I'm not a massive fan of strapless and Empire line isn't the most flattering shape on me. However, it was in good condition and didn't look like it had been worn much, I loved the colour, the jersey felt nice and soft and the advantage of the Empire line was that I knew the skirt pieces would be big enough for me to put the dress to good use somehow.

I was considering refashioning the dress by adding some straps and possibly extending the shirring round the bust down to waist level to make it more flattering for my shape, but the existing shirring went a bit saggy when I washed the dress so I decided just to cut that off and treat the skirt as a piece of material. There was just enough material for Bronte, so I took that as a sign that it was meant to be!


Anyway, back to Bronte! I really, really like this pattern. Like any knit top, it's obviously really comfy and easy to wear, but the 1940s-inspired shrug style shoulder detail makes it stand out from the crowd and be a little bit different. You might think this would make it more complicated to sew, but it's really not that difficult. The only difference from a normal knit top is that the front and back pieces are connected in a slightly different way, as the back wraps over the front, but although it is different I don't think it's any more complicated.


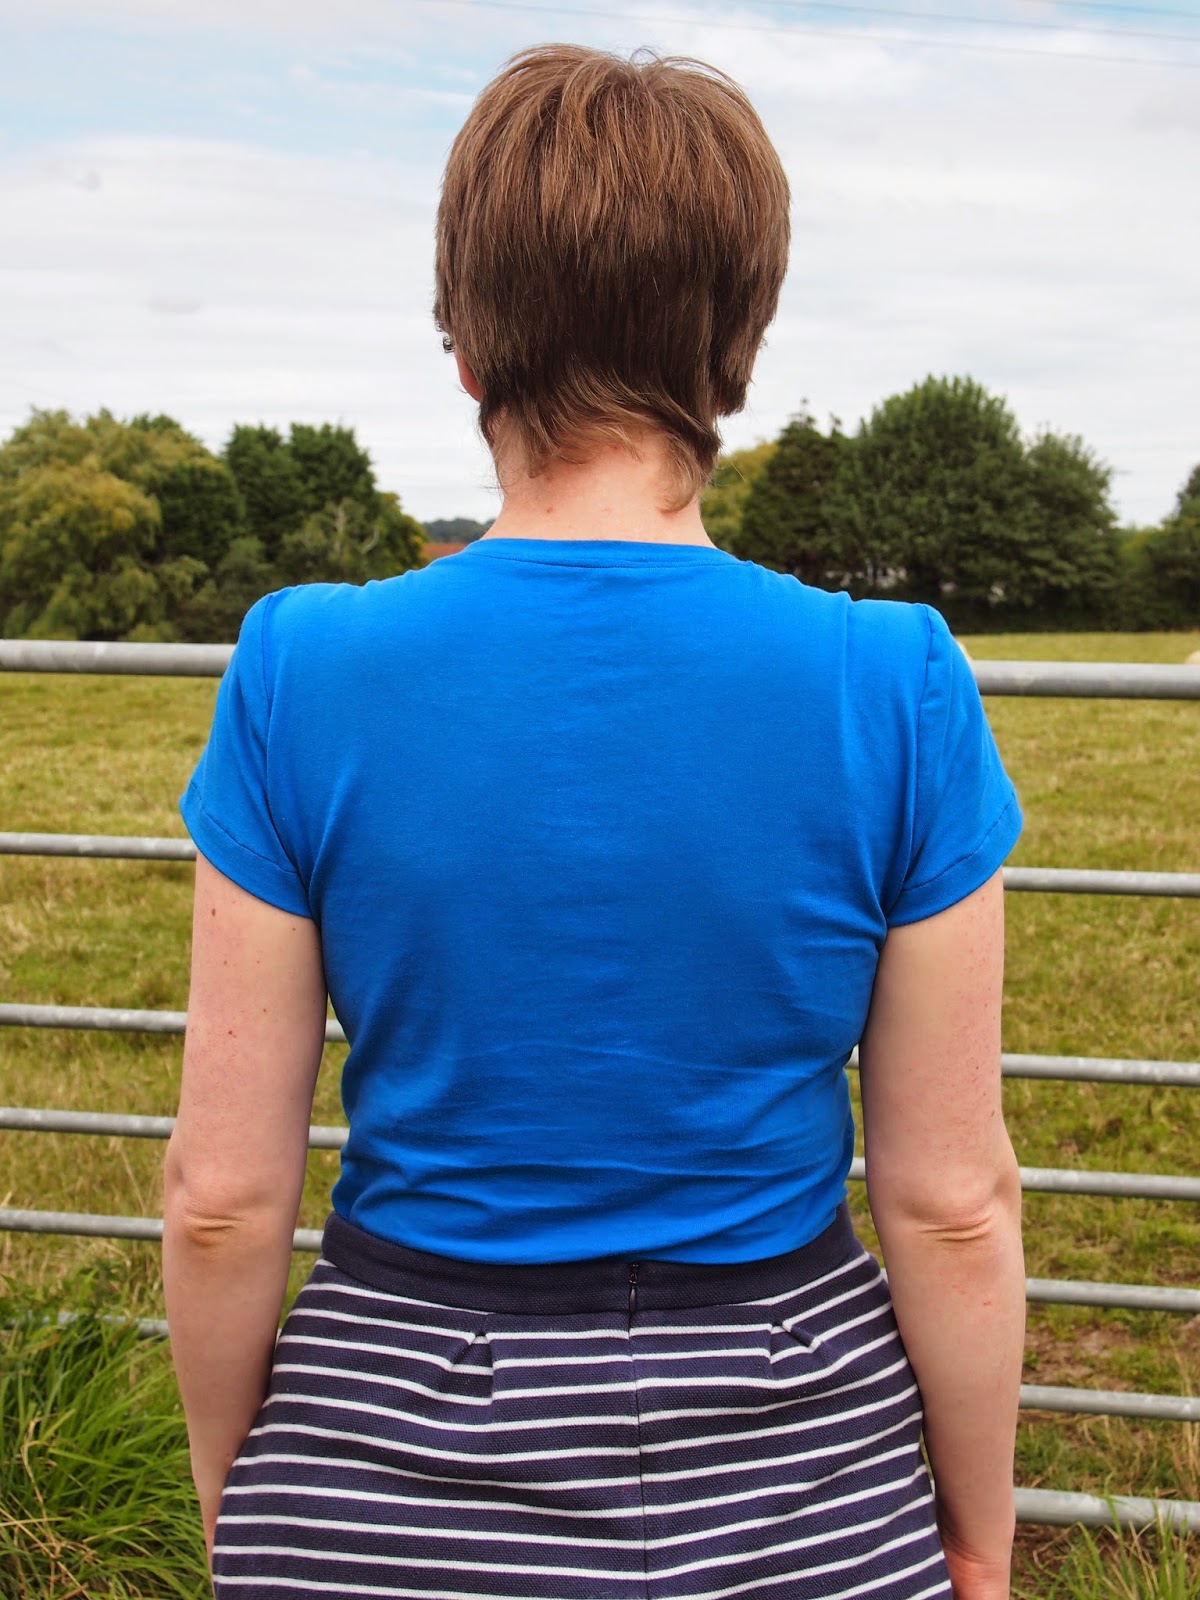
The neckline also gives you the opportunity to add a bit of extra interest by using a contrast binding or some pretty buttons to secure the shoulders. In my case, I had some star shaped buttons which I was planning to use, but when I tipped out the contents of my button jar this pack of bright buttons that I'd been given for my birthday fell out and I loved the way they looked with the blue so I changed my plans!

I made a straight size 14 with no adjustments. I was sort of treating this version as a (very!) wearable muslin, as given that the material cost me £1.75, I wasn't going to worry too much if it didn't turn out totally perfectly. As it is, I'm pretty happy with the fit so it's all good! I might consider trying to lower the neckline a little bit in a future version to make it even more like my old top, but I like it as it is.


If, like me, you're a bit of a newbie when it comes to sewing with knits, I'd definitely recommend giving the Bronte top a go. As I said above, it probably looks more complicated than it is, but it is actually fairly simple to sew. It's only the second time I've sewn with knits, and the only problem that I had was my twin needle deciding to break for no apparent reason! The instructions are nice and clear, and also include some really helpful tips on choosing your fabric, as well as hints about sewing with knits in general. Also, I don't have a serger/overlocker, so this is proof that you definitely can sew the Bronte using just a normal sewing machine.

As I mentioned in my last post about my Bellini, I do prefer paper patterns to PDFs (not least because my printer sometimes has a mind of its own and decides to print multiple copies of one page instead of printing the page range I'd asked it to, as it did in this case!), but this was another PDF that was no trouble to put together. I really like the fact that the individual pattern pieces are printed on separate groups of pages so you're dealing with manageable numbers of pages to stick together instead of covering the entire floor!


Sewing Bronte went really well and I'm definitely planning on doing more about my aim of sewing with knits now. There'll be more Brontes at some point in the future, and I've also got the Coco and Lady Skater ready to try - I just need to make my mind up about what fabric to use! Has anyone got any favourite sources of knits in the UK? It's always good to have recommendations!