Thursday 21 November 2019

Vogue 8772 Shirt

I've been enjoying wearing shirts recently, but only have two long-sleeved ones in my wardrobe so I decided it was time to add another to my collection. I fancied trying a new pattern, and after a bit of browsing I opted for Vogue 8772.


I've previously made the Sewaholic Granville shirt (my original version from a few years ago is here) and been pleased with it, but while the back princess seams and yoke give the shirt a nice shape I feel like they're not great if you want to make a shirt in a fabric with a large print because they break things up too much (or mean that you have to spend a lot of time on pattern matching!). If you've been reading this blog for a while, you may have noticed that I like a large print so I thought it would be worth giving another shirt pattern a go.


Vogue 8772 caught my eye because it has similar shaping to the Granville, but that shaping is provided by French darts rather than princess seams. OK, so darts break a print up too, but I don't mind that as much for some reason. The pattern is also pretty versatile as it comes with pointed collar and pussy bow options, as well as sleeve variations, a sleeveless option and two different hem lengths. It also helped that Vogue patterns were on sale when I bought it!

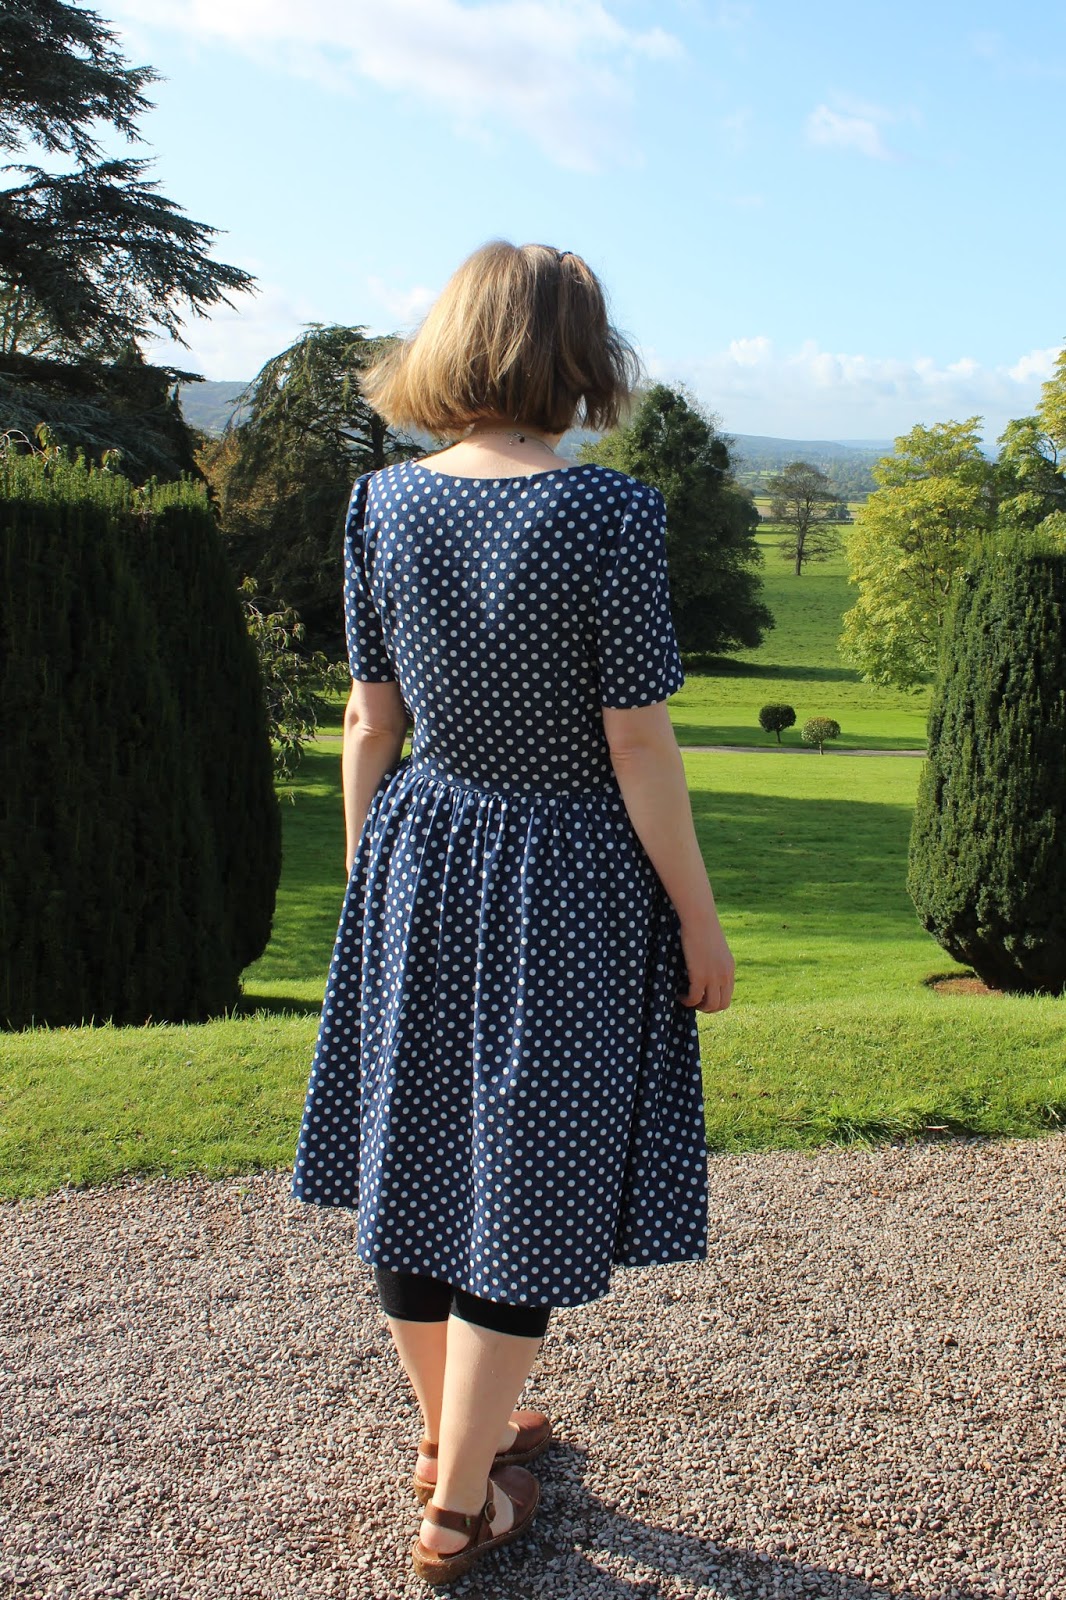
I made view D of the pattern - the pointed collar, long cuffed sleeves and the shorter hem length.


Having made a couple of shirts and shirt dresses now, I'm fairly familiar with the process of constructing a shirt so I didn't have any trouble with this pattern. The instructions were fairly brief but always clear as far as I was concerned.

That said, I did go a little off piste when it came to the finishing of the centre front. The pattern doesn't include a separate button placket, and instead the centre front is double-folded back on itself to create a facing. I added a strip of interfacing to one layer of the fold, as I always find my machine stitches buttonholes better on interfaced fabric. I also topstitched the facing down to make it look more like a button placket. Neither of these are particularly major changes from the instructions, but I'm glad I made them all the same.


In terms of sizing, according to the pattern I should have made a 16 at the bust, blending out to an 18 at the waist and hips. I consulted the finished garment measurements and decided that I'd actually be fine making a straight size 16. I'm pleased with the fit - it's nicely shaped without being so fitted that I'm risking gaping buttons!

One point to note is that the arms come up quite long - they're just about OK on me and I'm 5'9" with relatively long arms, so if you're shorter or have proportionately small arms then you may need to shorten them.


The fabric I used is some pretty cotton (or I assume it's cotton anyway!) that was part of a large bag of fabrics that my auntie gave me when she was clearing out her parents' house. As soon as I saw it, I thought it would make a lovely shirt and I think I've proved myself right (even if I do say so myself!).


I briefly considered pattern matching across the centre front, but then I realised that the pattern repeat on the fabric was fairly huge so matching the flowers exactly would have meant wasting a fair bit of fabric. Instead, I just made sure that the stripes continued evenly on either side of the front. I also made sure that I had a stripe running around the collar and across the middle of each cuff, just because I like how that looks.


I'd originally intended to have a stripe running down the centre front, but if I'd done that then the print placement would have meant that the stripes to either side of the centre would have disappeared because they'd have been eaten up by the front darts, which would have looked weird. As it turns out, I think having to change my original plan was a blessing in disguise because the purple buttons that I found perfectly match the stripes and look great running down the centre front through the flowers.


I'm really pleased with the shirt and have already treated myself to some more fabric to make a second version. My mum has also requested one for her Christmas present, so I'll be making that in the not-too-distant future too. All in all, I'm very glad I gave Vogue 8772 a try, and I think I'll definitely be getting my money's worth out of this pattern!

Thursday 14 November 2019

McCalls 7475 culottes sewing pattern review & a bonus Freya

Regular readers of this blog will not be surprised to hear that I generally think life is better in pretty dresses (or occasionally skirts) and I'm not going to entirely abandon that philosophy any time soon, but in the last couple of years since moving to a rather windy coastal town I have been forced to admit that trousers can be very useful too! The latest addition to that area of my wardrobe is today's project - culottes using the McCalls 7475 pattern.


McCalls 7475 is a pattern for semi-fitted skirts, shorts and culottes with a mock fly front, back yoke, two different front pocket styles, the option of back pockets and length variations. I got the pattern when it was included with issue 72 of Love Sewing magazine.

I basically made view F - the longer culottes, but I omitted the back pockets and used the front pockets from view E.


My measurements put me in an 18 for this pattern, but based on the finished garment measurements I was pretty sure that an 18 would be too big. I made a toile of a 16 and they did fit, but were just a little too fitted to be comfortable around the waist. I let out the side seams just a touch (literally just a couple of millimetres at each seam) and that was all it took to make sure I'll be able to wear the culottes happily.


The culottes are a fairly simple project to sew and I was surprised by how quickly they came together. The mock fly front is really easy (I've never actually sewn a proper fly front, but the way people talk about them, I assume they're more complicated than this was!) but still looks nice and neat. The instructions were what you'd expect from a commercial pattern - they're fairly succinct, but I found them completely clear and didn't have any problems.


Part of me was tempted to get a patterned fabric because I'm always naturally drawn to prints rather than solid colours, but in the end the sensible side of me won out and I decided to opt for some navy needlecord from Textile Express. It's a lovely fabric and while patterned culottes would have been fun, these will go with pretty much any top that I own so will get much more wear. The needlecord that I used has some slight stretch to it as well, which makes them super comfy, so I'm more likely to want to wear them!


I decided to give these culottes pretty insides and used some prized scraps of possibly my favourite ever fabric (it's a Liberty tana lawn - the print's called Suzy Elizabeth) as the waistband facing and to line the pockets. The pattern doesn't call for you to line the pockets and just has you turn the seam allowances under before stitching them down (they're patch pockets), but I prefer to line pockets if I've got some suitable fabric. In this case both the waistband and the pockets would have been a bit bulky if I'd faced/lined them with the needlecord, but the cotton lawn works nicely.


I'm wearing the culottes here with a Tilly & The Buttons Freya cowl neck top that I made recently. The fabric is a lovely jersey from Loubodu Fabrics - sadly it doesn't seem to be available any more though. I have a steadily growing collection of Freya tops, and find them really useful at this time of year so I'm going to be using them to take part in this year's One Week One Pattern challenge hosted by Sewisfaction. Is anyone else planning to join in?


Anyway, back to the culottes! I was fairly sure before making them that they'd be useful, but I'm actually quite surprised by just how much I like them. I've worn them quite a few times already, and I'm sure I'll be wearing them much more this autumn/winter. I'd still quite like a patterned pair though; I just need to find some suitable fabric - any suggestions?!

Wednesday 30 October 2019

Empty Hanger Patterns Strasbourg Bag

I'm going to go ahead and say right from the start of this post that the project I have to share with you today may be one of the most practical things I've ever made. Don't worry though, in this case practical doesn't mean boring! Let me introduce you to my Strasbourg bag...


The Strasbourg bag is a pattern from Empty Hanger Patterns. I came across this company when Zoe of "So Zo" fame included them in a list of companies offering discounts at the end of Me Made May this year. They have some interesting looking garment patterns, but it was the Strasbourg bag that really appealed to me. 'Why's that?', I hear you ask. It's a convertible bag, so you can use the one bag as two different styles of backpack, a shoulder bag or a crossbody bag. How useful is that?!


In addition to having multiple strap options, the bag also has a plethora of handy pockets. There's a large pocket on the outer front, and inside there's a large zip pocket that also acts as a divider to provide a section for a small laptop/tablet, an elasticated pocket, small side zip pocket, pen pocket and a key chain. The bag is also a good size - I can easily fit in my DSLR camera in its case, and all the other essentials I need for a day out.


As with lots of bag projects, it always seems like the hard work starts with trying to source all of the hardware in the right sizes! Is it just me that can never seem to get everything I need from one place?! In this case, the best option seemed to be to order some of it from WeaverDee and the rest from Sew Essential (sorry, I can't quite remember what I got from which shop!).


The fabric was an easier matter! After seeing this backpack in M&S, I decided that jumbo cord would be a nice option to use - the texture makes it a bit more interesting than other plain fabrics, whilst the solid colour makes it easier to wear with lots of things than a print might be (which is good for a bag I think). Dark denim was the obvious choice to use for the contrast base and straps for me. I got both of my outer fabrics from Fabric Godmother - the denim's here, and this is the cord. The lining fabric was a lucky charity shop find a while ago.


While I'm really happy with my finished bag, I don't think the instructions for this pattern were quite as good as other bag patterns I've used. There weren't any major errors, but there were a couple of places where I felt the pattern could have been better. For example, the pattern just gives you dimensions of rectangles to cut out (relatively standard - that doesn't bother me), but at one point you need to create a curve on a pattern piece and it tells you to draw around a glass whereas other patterns I've used provide pattern pieces for non-rectangular pieces.


It's also not very helpful about interfacing (FYI - I used a medium/heavy weight interfacing on my base fabric), which can really affect the final outcome of a bag project and can be a bit confusing if you haven't made bags before. It also suddenly mentions the option of using a button or a snap on the outer front pocket when you're in the middle of sewing the bag - it would be more helpful if this were included and marked as optional in the supplies list. I also felt like some of the interior pockets weren't constructed in the best way and did my own thing on a couple of occasions.


As I said, they weren't major problems - just little niggles here and there. I basically got the impression that the pattern was written by someone who knows what they're talking about in terms of sewing but is possibly more used to making garments, in comparison with other bag patterns that I've used which were written by people who specialise in bags. All that said, I didn't struggle with making the bag myself - I'm just not sure I'd recommend the pattern to a beginner.


Having used the bag a fair few times already, I can confirm that it's definitely very useful. It's pretty quick to switch between the different bag styles - you just have to unclip the swivel clasps and reattach them to different D-rings. Easy peasy!

I would say that when I've used the bag as the "simple" backpack (in the top left photo below), the straps seem a bit long and have a tendency to slip off my shoulders. I wouldn't want to shorten the straps much though (the pattern does give you instructions on finding the right strap length for you), because they're just the right length for the other bag styles. I think that the gathered top backpack style and the shoulder bag (the two bottom photos below) are probably the styles that I'll use most often - partly because you can switch between them without altering the swivel clasps, and partly because I find them the comfiest styles to wear.


I've made a few bags before, and I always enjoy it as something a bit different in between garment sewing projects. Making the Strasbourg bag was no exception! I'll be getting a lot of use out of this bag, and it looks like I'll be making the pattern again because my sister told me that she would happily receive one as a Christmas or birthday present. Requests from other people are always a good sign that a project has been successful, don't you think?

Wednesday 16 October 2019

Nina Lee Kew Dress: Sewing Pattern Review

It's been a busy couple of weeks around these parts and blogging has fallen slightly by the wayside. I've still been finding time for sewing though so I'm developing a little backlog of projects to talk about. Most of them are still waiting to be photographed, so I've just got one to share today. It is a good one though, so I hope you won't be too disappointed! Here's my Nina Lee Kew dress...


The Kew dress is a pattern that's been in my stash waiting to be made for a while, but for some reason it kept getting neglected and not quite making it to my sewing table. When Nina Lee released the expansion pack for the pattern recently, the gathered skirt option really appealed to me and gave me the push that I needed to finally sew up the pattern.


For this first one, I combined the gathered skirt from the expansion pack with version one of the bodice from the original Kew pattern. This bodice has a touch of the 1940s tea dress about it with the front bodice gathered into a yoke at the shoulders and ruched sleeves (more on those later!).


The instructions for the pattern are really detailed and easy to follow. There's nothing too tricky about sewing the Kew dress, and if you're a little uncertain about anything then I'm sure the instructions would explain everything. The pattern is recommended for confident beginners, and I'd say that's an appropriate rating, and it's a nice straightforward-but-not-boring project if you have a bit more sewing experience.


In terms of sizing, my measurements put me between a 12 and 14 at the bust and between a 14 and 16 at the waist and hips. I looked at the finished garment measurements and decided to make a toile in a 14 at the bust blending out to a 16 at the waist. For button-up dresses, I prefer to have just a little more ease so that the dress is nicely fitted but without the danger of having inter-button gaping issues.


While I was making the toile I decided to test out the sleeves as I was a bit concerned that they might be awkward to wear under cardigans. On my toile, I added the ruching on one sleeve and left the other one plain. My suspicions proved to be correct and, while I think the ruching is really pretty, that sleeve did seem a bit bulky under a cardi and I also found that the ruching restricted my arm movement a bit. That made it easy to decide to just leave the sleeves plain.

The only other alteration that I made to the pattern was to lengthen the bodice by 2 inches. Lengthening a bodice is standard for me, but 2 inches is a bit more than I'd usually have to add.


The fabric that I used for this one is a spotty chambray from Minerva Crafts - I can't see it on their website at the moment, but they do have lots of other chambray options. It was a lovely fabric to work with - as it's a cotton it behaves nicely, but it has enough drape to handle the gathers on the bodice and the skirt of this dress.


As blue and white spots are pretty much a neutral in my book, I decided to use this dress as the opportunity to try out something I've been wanting to do for a while - rainbow buttons! I got these from ebay (again the ones I bought don't seem to be available, sorry!). I love how the buttons look - I think they're the perfect finishing touch for this dress.


All in all, I'm really glad that I finally got around to making a Kew dress. This one is the perfect everyday dress for me, and the combination of the blue and white spots and rainbow buttons will make it very wearable I think. I'm planning to make the strappy bodice of the Kew dress as a pinafore at some point, and I'd like to try out the other skirt options some time too. Have you made a Kew dress? What options did you use?

Thursday 19 September 2019

Recent Repeats

For today's post you're getting two dresses for the price of one! Although don't get too excited, because they're both repeat versions of recent projects (my Butterick 6556 and Seamwork Bobby dresses) so there I haven't got much revolutionary new information to share about them.


First up, here's my second version of Butterick 6556. I did always intend that my original version would be something of a test run to see how much I enjoyed wearing the dress - while I like the striped cotton that I used, it had been in my stash for ages and didn't cost that much originally so it was a fairly 'low risk' kind of fabric. Thankfully the stripey version proved very successful, so I was happy to cut into slightly more precious fabric.


In this case it's a cotton voile from Seasalt (no longer available, but they do have lots of new autumnal fabric beauties). I do enjoy sewing with Seasalt fabric, but there's a part of me that always feels compelled to sew something that's noticeably different from the garments Seasalt made with the same fabric - if nothing else because it entertains me to confuse their shop assistants when they recognise the fabric, but then not the actual garment (small things amuse me!). The dress Seasalt had made with this fabric was lovely, but definitely different from this square necked beauty so Butterick 6556 got my seal of approval for this fabric.

There's really not a lot more to say about this, because I didn't do anything at all that was different from my first version!


In contrast, my second Bobby dress has a couple of little changes, one which will be obvious if you compare it with my original one, and one which is slightly more subtle.

The obvious difference is that I shortened this one to be knee length. While I love the midi style of my turquoise blue Bobby, it seems like quite a summery length that's best to be worn with sandals. As there probably won't be too much more sandal-wearing weather this year, I thought for this version I'd try it at knee length. I shortened the skirt pattern by about 4.5", and used a one inch hem and it turned out just how I wanted.


The more subtle difference is that I used 1.5" elastic for the waist instead of the 2" called for in the pattern - for no reason other than the fact that I had some 1.5" elastic in my stash and I thought I might as well use it rather than going out to buy 2". For Bobby, you create the elastic casing by stitching a line parallel to waistline so it's easy to alter where you stitch the casing to accommodate narrower elastic.


The fabric that I used for this second version of Bobby is a great quality cotton jersey from Like Sew Amazing that I picked up at Sarah's Bristol shop at her recent summer party. It's a lovely pink - nice and bright, and the kind of colour I'll wear year-round.


On the face of it, making a couple of sleeveless dresses as summer is coming to an end might seem like a slightly odd choice but I fully intend to carry on wearing both of these dresses with cardigans and tights as the temperatures drop. I'll probably also try layering them with long-sleeved shirts/t-shirts underneath, because any dress without sleeves is fair game for use as a pinafore as far as I'm concerned! So making dresses like this is actually a good way of transitioning gradually from summer to autumn sewing for me. Have you switched seasons in your sewing already?

Thursday 29 August 2019

Paper Theory Zadie Jumpsuit

If you've been paying even the slightest attention to the online sewing community in recent months, you'll have seen a fair few versions of the pattern that I have to share today. The Paper Theory Zadie jumpsuit has been somewhat ubiquitous recently - as proven by the plethora of gorgeous projects shared on Instagrm under #zadiejumpsuit.


When things become so popular, it often puts me off them. Sometimes the popularity is justified though, and everyone who makes the Zadie jumpsuit seems to love it, and it genuinely looks good on all shapes and size so I thought this was one bandwagon that it was worth hopping on board. Boy, am I glad that I did!


The Zadie (just in case it needs any introduction!) is a relaxed easy-to-wear jumpsuit, with a wrap bodice, tie belt, wide cut legs and the option of wide three-quarter sleeves or the sleeveless, dropped shoulder version that I made. There are no fastenings, so it's a fairly simple project with the neckline binding probably being the most 'complicated' step.


Due to the fact that it's intended to have a relaxed fit, the Zadie jumpsuit has fairly generous proportions. According to the size chart, my body measurements put me in a 14 at the bust and between a 14 and 16 at the waist and hips. After consulting the finished garment measurements and some online reviews, I decided to size down and made a 12 at the bust blending out to a 14 at the waist and hips. I didn't make any sizing alterations (hooray for not having to lengthen anything!), and I'm pleased with how it turned out. There's no gaping at the neckline, and I think it gives me just the right level of looseness without verging into sack-like territory.

In case it helps for reference, my measurements are bust 38", waist 38", hips 42" and I'm about 5'9".


One thing I did like is that the instructions clearly state the height and cup size that the pattern is drafted for (often I end up searching around trying to find out the height that a pattern company uses!), and there are lengthen/shorten lines on both the bodice and trouser pieces. The pattern also lists the finished bicep measurements, which will be useful if (when!) I make a sleeved version.


The instructions are clear and easy to follow. They give you all the help you need, without being too wordy. It's a fairly simple pattern to construct so there aren't any particularly tricky steps - I would have thought that a confident beginner would be able to make a Zadie without too much difficulty.


I did stray a little bit from the instructions. I used stay tape on the neckline instead of staystitching, and I applied the tape before I started sewing the bodice. I thought it was a bit odd that the instructions didn't tell you to staystitch the neckline until the bodice was fully constructed - I think with my fabric I might have managed to stretch the neckline before then just by handling the pieces.


Also, instead of using double-fold bias binding to enclose the neckline as per the instructions, I used single-fold bias binding. I sewed it to the outside of the neckline using a small seam allowance, then flipped it to the inside and topstitched it down from the outside. I think that gives a cleaner finish with a patterned fabric in particular. And from a practical perspective, I'd have really struggled to get my fabric to press nicely into double-fold binding!


Talking of the fabric, it's a viscose twill from WeaverDee. I think it's a really nice weight for a Zadie jumpsuit - it's got a good drape, whilst still having a little bit more body to it than some viscose challis fabrics. It was fairly easy to use, although it does fray quite easily at the cut edges.

One thing to note about this pattern is that it doesn't overestimate the fabric required in the way that some patterns do. I had the exact amount of fabric required, and I had almost nothing left over.


All in all, I love how my Zadie jumpsuit turned out, and can definitely understand why this pattern has been getting so much love in the sewing community. It was an enjoyable project to sew, and it's a really comfortable garment to wear and I feel fantastic in it. What more could you want?!

Thursday 22 August 2019

Butterick 6556 Dress Sewing Pattern Review

The Butterick 6556 dress has been on my radar of patterns I'd probably like to sew for some time now, so when it was included with issue 70 of Love Sewing magazine I took it as a sign that it was meant to be and snapped up a copy. I had some perfectly suited fabric in my stash, so it quickly hopped to the top of my sewing list!


Butterick 6556 is one of the Patterns by Gertie series, and so unsurprisingly has a bit of a vintage feel about it. The pattern is for a close-fitting dress with lined bodice, square front and back neckine, sleeveless or short sleeved options, a very full pleated skirt, pockets (yay for pockets!), and a centre back lapped zip.

While I have myriad patterns with a fitted bodice and full skirt, the square neckline on B6556 is something a bit different and really appealed to me.


Based on the finished garment measurements, I chose to make a size smaller than recommended for my measurements and cut a 14 at the shoulders/bust, blending out to a 16 at the waist. That worked out nicely and my toile fitted well - it was just a tad snug at the waist (fine when I was standing up but a little tight sitting down and considering that I would want to be able to eat when wearing the dress!). In my actual version I used a fractionally smaller seam allowance at the waist (probably about 1.2 instead of 1.5 cm), and that was enough to give me a bit of breathing space.


I also chose to sew the neckline with a 1 cm seam instead of 1.5 cm just to raise it ever so slightly and bring the shoulders in a touch. I'm gradually coming to the realisation that I probably have proportionately narrow shoulders, and that extra half centimetre on each side helps the shoulder straps to stay in place.

As you may have noticed, I also removed the cut-out/notch/whatever-you-want-to-call-it from the centre front neckline. This was possibly slight laziness on my part because I thought that it would take a bit of effort to get that looking crisp and perfectly symmetrical, and I didn't think it necessarily added much to the dress. I think I actually prefer the unadulterated square neckline.


I also lengthened the bodice by 2.5 cm as is standard for me. Another note on length - the skirt in the pattern is probably a bit longer than most. I often have to lengthen skirts by a couple of inches, but this is the skirt length straight out of the packet and it's bottom-of-the-knee length on me (I'm about 5'9").


The instructions were typical commercial pattern instructions - clear but brief. I did think it was a bit odd that they had you leave a gap at the shoulders when sewing the outer bodice to the lining. That's presumably to make turning the bodice/lining the right way out easier, but I managed to turn mine out perfectly well without leaving a gap and that meant that I then didn't have to hand sew the gap closed.


The fabric I used is one of the longer-term residents in my stash. It's a cotton shirting that I bought a couple of years ago, I'm fairly sure from Fabworks. It was the victim of my over-ambitious seasonal sewing plans and didn't get sewn up before the end of one summer, then got put away and has only just found its way to my sewing table. I think this pattern works quite well with the stripes. Obviously making sure they all matched up nicely took a little bit of time and patience, but I'm happy with how it turned out - especially across that centre back seam and lapped zip.

The only thing I'm not too crazy about is that the fabric creases and wrinkles as soon as you look at it, and it seemed to conspire with my camera to make the dress look a bit ill-fitting in places even though in real life it looks great. I can deal with a few creases though, and let's face it what it looks like in real life is more important than photos.


I'm really pleased with how this dress turned out. The ultimate sign that a project has been successful is when you immediately start dreaming up future versions of the pattern, and I've definitely got a few more Butterick 6556 dresses in my head already. They may not all come to fruition, but a second version is already waiting to be made using some beautiful Seasalt cotton voile - watch this space for that one!