The project I have to share with you today was much more fun to sew than it was to photograph! In case you're wondering, a plain navy garment is not that easy to capture on camera in very changeable but permanently windy February weather. So the photos in this post might not be the finest that have ever appeared here, but hopefully they'll still give you a good picture of my Nina Lee Camden pinafore.
I love a good pinafore, and wear them quite a lot for large part of the year so I've been meaning to add to my collection for a while. The Camden pinafore looked like a good option so I included it in my Make Nine challenge this year to ensure I got around to making it.
The Camden is a bit different from other pinafore patterns that I've made - it's fully lined and has a full back rather than straps, both of which will make it a bit warmer to wear in winter. The bodice is closely fitted with princess seams and a deep V-neck, and the skirt has handy patch pockets.
Sewing the Camden pinafore was a treat - it's been a while since I made a fully lined dress, and I'd forgotten how much I enjoy the clean finish that it gives you. It initially seems like quite a lot of work because you're essentially making two dresses, but it always feels worth it once the work is done. Plus it's a good opportunity to use up leftovers from other projects so you can get pretty insides!
The instructions are thorough and detailed, and I found them to be very easy to follow throughout. I didn't struggle with any anything, but there were a couple of little bits that I did that weren't mentioned in the instructions. Firstly I cut a couple of millimetres off the curved and angled edges of the pocket linings to help ensure that they'd press under fully and not peep through on the outside of the garment. I also catch stitched the waistband of the lining to the seam allowance of the outer waistband to help the lining sit nicely inside the pinafore.
In terms of sizing, I cut a 12 at the bust and blended out to a 16 at the waist and hips. The 12 is the size recommended for my current bust measurement, and my waist and hips are currently between a 14 and 16 but based on the finished garment measurements I thought I'd be happier going up to the larger size. I think I was right to do this - the pinafore is nicely fitted but still has enough space to allow me to wear any of my tops with it.
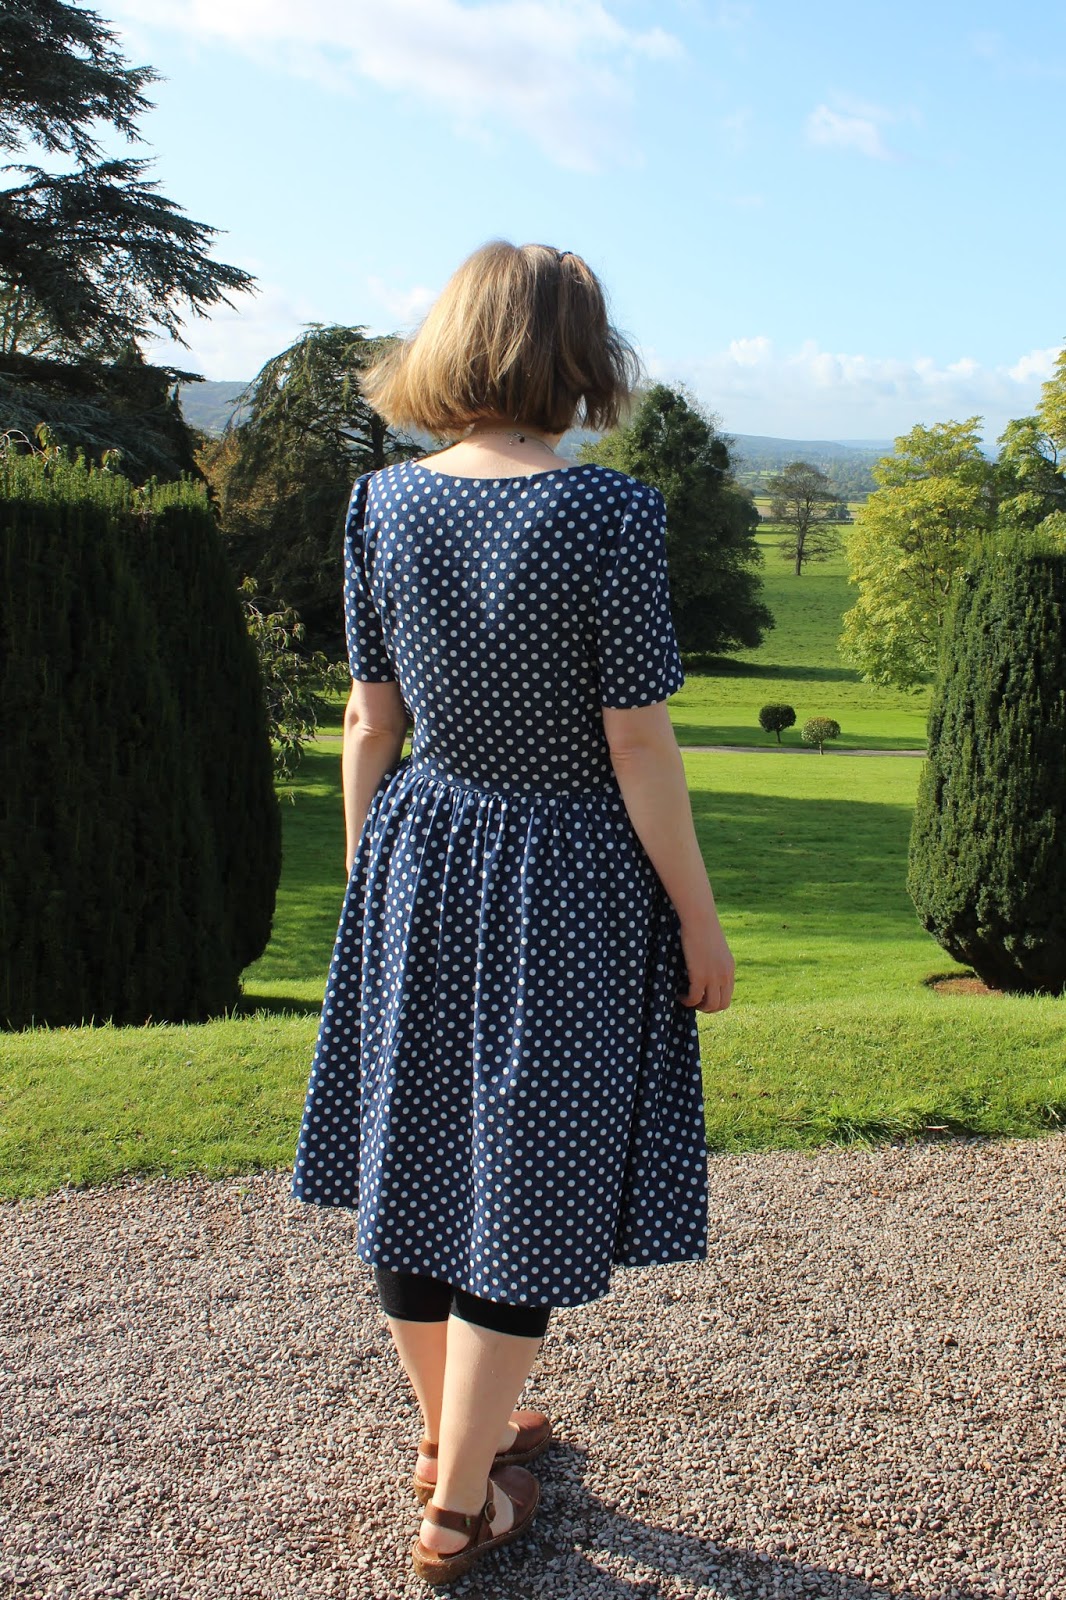
I also lengthened the pinafore quite a bit - I added 4cm to the bodice and 10cm to the skirt. I'm about 5'9", so it's fairly standard for me to have to lengthen patterns but this is more length than I usually have to add (particularly to the skirt).
The main fabric I used is a navy stretch needlecord from Textile Express. It's actually the same fabric that I used for my M7475 culottes last year so I knew it would be a pleasure to work with and make a dress that's lovely to wear. The slight stretch in the fabric gives it that bit of extra comfort.
I lined the bodice and pockets with some floral cotton left over from a project from a few years ago, and lined the skirt in some generic white lining fabric that was in my stash but I have absolutely no recollection of buying (slightly worrying!).
Photographic challenges aside (and let's face it, they don't really matter!), I'm really happy with how my Camden pinafore has turned out. It was an enjoyable project to sew, it feels lovely on and I think I'll be wearing it a lot - not least because it goes with just about any top that I could possibly want to wear with it. It's definitely a winner!
Showing posts with label Nina Lee. Show all posts
Thursday, 5 March 2020
Wednesday, 16 October 2019
Nina Lee Kew Dress: Sewing Pattern Review
It's been a busy couple of weeks around these parts and blogging has fallen slightly by the wayside. I've still been finding time for sewing though so I'm developing a little backlog of projects to talk about. Most of them are still waiting to be photographed, so I've just got one to share today. It is a good one though, so I hope you won't be too disappointed! Here's my Nina Lee Kew dress...
The Kew dress is a pattern that's been in my stash waiting to be made for a while, but for some reason it kept getting neglected and not quite making it to my sewing table. When Nina Lee released the expansion pack for the pattern recently, the gathered skirt option really appealed to me and gave me the push that I needed to finally sew up the pattern.
For this first one, I combined the gathered skirt from the expansion pack with version one of the bodice from the original Kew pattern. This bodice has a touch of the 1940s tea dress about it with the front bodice gathered into a yoke at the shoulders and ruched sleeves (more on those later!).
The instructions for the pattern are really detailed and easy to follow. There's nothing too tricky about sewing the Kew dress, and if you're a little uncertain about anything then I'm sure the instructions would explain everything. The pattern is recommended for confident beginners, and I'd say that's an appropriate rating, and it's a nice straightforward-but-not-boring project if you have a bit more sewing experience.
In terms of sizing, my measurements put me between a 12 and 14 at the bust and between a 14 and 16 at the waist and hips. I looked at the finished garment measurements and decided to make a toile in a 14 at the bust blending out to a 16 at the waist. For button-up dresses, I prefer to have just a little more ease so that the dress is nicely fitted but without the danger of having inter-button gaping issues.
While I was making the toile I decided to test out the sleeves as I was a bit concerned that they might be awkward to wear under cardigans. On my toile, I added the ruching on one sleeve and left the other one plain. My suspicions proved to be correct and, while I think the ruching is really pretty, that sleeve did seem a bit bulky under a cardi and I also found that the ruching restricted my arm movement a bit. That made it easy to decide to just leave the sleeves plain.
The only other alteration that I made to the pattern was to lengthen the bodice by 2 inches. Lengthening a bodice is standard for me, but 2 inches is a bit more than I'd usually have to add.
The fabric that I used for this one is a spotty chambray from Minerva Crafts - I can't see it on their website at the moment, but they do have lots of other chambray options. It was a lovely fabric to work with - as it's a cotton it behaves nicely, but it has enough drape to handle the gathers on the bodice and the skirt of this dress.
As blue and white spots are pretty much a neutral in my book, I decided to use this dress as the opportunity to try out something I've been wanting to do for a while - rainbow buttons! I got these from ebay (again the ones I bought don't seem to be available, sorry!). I love how the buttons look - I think they're the perfect finishing touch for this dress.
All in all, I'm really glad that I finally got around to making a Kew dress. This one is the perfect everyday dress for me, and the combination of the blue and white spots and rainbow buttons will make it very wearable I think. I'm planning to make the strappy bodice of the Kew dress as a pinafore at some point, and I'd like to try out the other skirt options some time too. Have you made a Kew dress? What options did you use?
Thursday, 31 May 2018
Nina Lee Piccadilly Pyjamas
I'm on a bit of a mission at the moment to sew through some stash fabrics. After all, it's a waste to leave pretty prints sitting on my shelves when they could be in my wardrobe, isn't it? Today's fabric has been waiting for its turn to be cut into for a couple of years while I dithered about what it should become. A couple of weeks ago, I finally made up my mind that I'd use it to make some Nina Lee Piccadilly pyjamas.
Because all sewists need sewing machine pyjamas, don't they?! I'm certainly glad to have added them to my life anyway!
The fabric is a fun cotton poplin that I picked up from Sewn back when Marie had a shop in Bristol. I think I did see it for sale elsewhere online at around the same time, but that was a couple of years ago and I haven't seen any recently - sorry.
Anyway, back to my pyjamas...
The Piccadilly pyjamas are described as "a chic sleepwear set with oriental accents - a soft and open Mandarin collar and gently curving hems". I made view one - a cap-sleeved shirt and shorts. The shorts have a flat front waistband with ribbon tie, and an elasticated back. All of the hems are finished with exposed bias binding. The pattern also features patch pockets on the bottom of the shirt, but I chose not to use them this time.
This was my first time using a Nina Lee pattern, and I was really impressed with it. The instructions were very detailed, with good, clear diagrams, and everything matched up nicely when I was sewing. I bought the printed pattern and, in my humble opinion, it was definitely worth the extra money compared to a PDF. The pattern itself is printed on normal paper rather than tissue (much less risk of tearing), and the instruction booklet and pattern envelope feel like really good quality. I love the little illustrations on the pattern envelope too!
In terms of sizing, in this pattern my measurements put me in a 12 at the bust, between 12 and 14 at the waist and in a 14 at the hips. I made a straight size 12 for the shirt, and a straight size 14 for the shorts. The fit is pretty good as it is, although I'd possibly blend out to a 14 at the bottom of the shirt for a future version just to give a little bit of extra room.
In some ways, the trickiest part of making these pyjamas was deciding which colour from the print to pick out with the bias binding and then, once I'd decided on that (which was mainly determined by the limited choice of bias binding available in local shops, or suitable plain fabric to make my own), finding buttons that also coordinated. Apparently this is a particularly hard shade of pink to match (it's photographing almost as red, but it is definitely a deep pink in real life), but I got there in the end - and actually ended up using the pink version of the red buttons I used for my Carolyn pyjamas.
The actual sewing process itself was no problem at all. The skill level for the pattern is stated as advanced beginner, and I'd say that's pretty accurate. There are a couple of techniques that beginners might not have tried before, but the instructions are really thorough and they'll help you through if you take things slowly.
I'm really pleased with my Piccadilly PJs - they were a really fun pattern to sew, and I'm glad that this fabric has finally fulfilled its destiny and turned into something I can wear. This may have been the first Nina Lee pattern that I've made, but it definitely won't be the last. At the moment I've got my eye on the Kew dress to use with another long-term fabric stash resident - let's hope that I get time to sew it soon!
Subscribe to:
Posts (Atom)