Showing posts with label beginner sewing pattern. Show all posts

Tuesday, 13 October 2020

Tilly & The Buttons Lotta Dress

The dress I have to share with you today was one of those serendipitous projects where the fabric and pattern appear in your life at the same time and demand to be put together. A few weeks ago I bought a duvet cover in a charity shop with the intention of making a basic-but-not-boring dress to show off its pretty print. Just a couple of days later Tilly & The Buttons released the Lotta dress pattern, which was just the style I had in mind. 

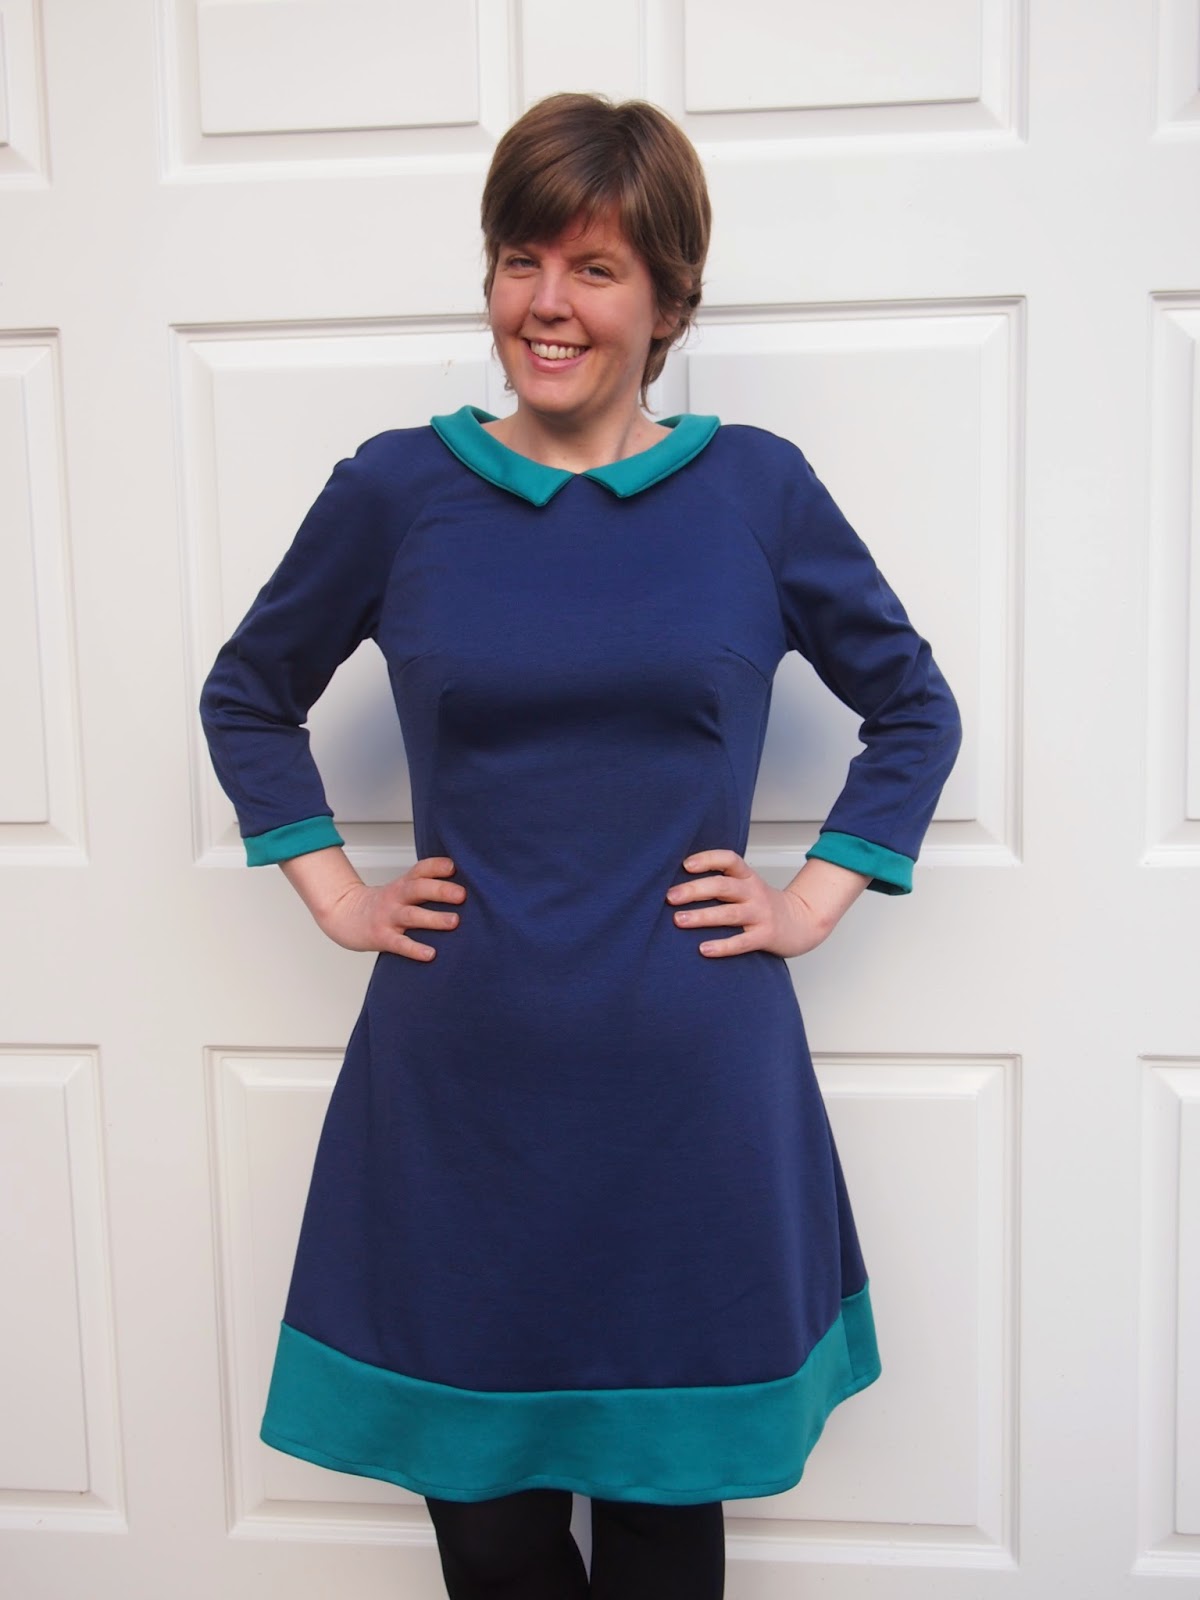
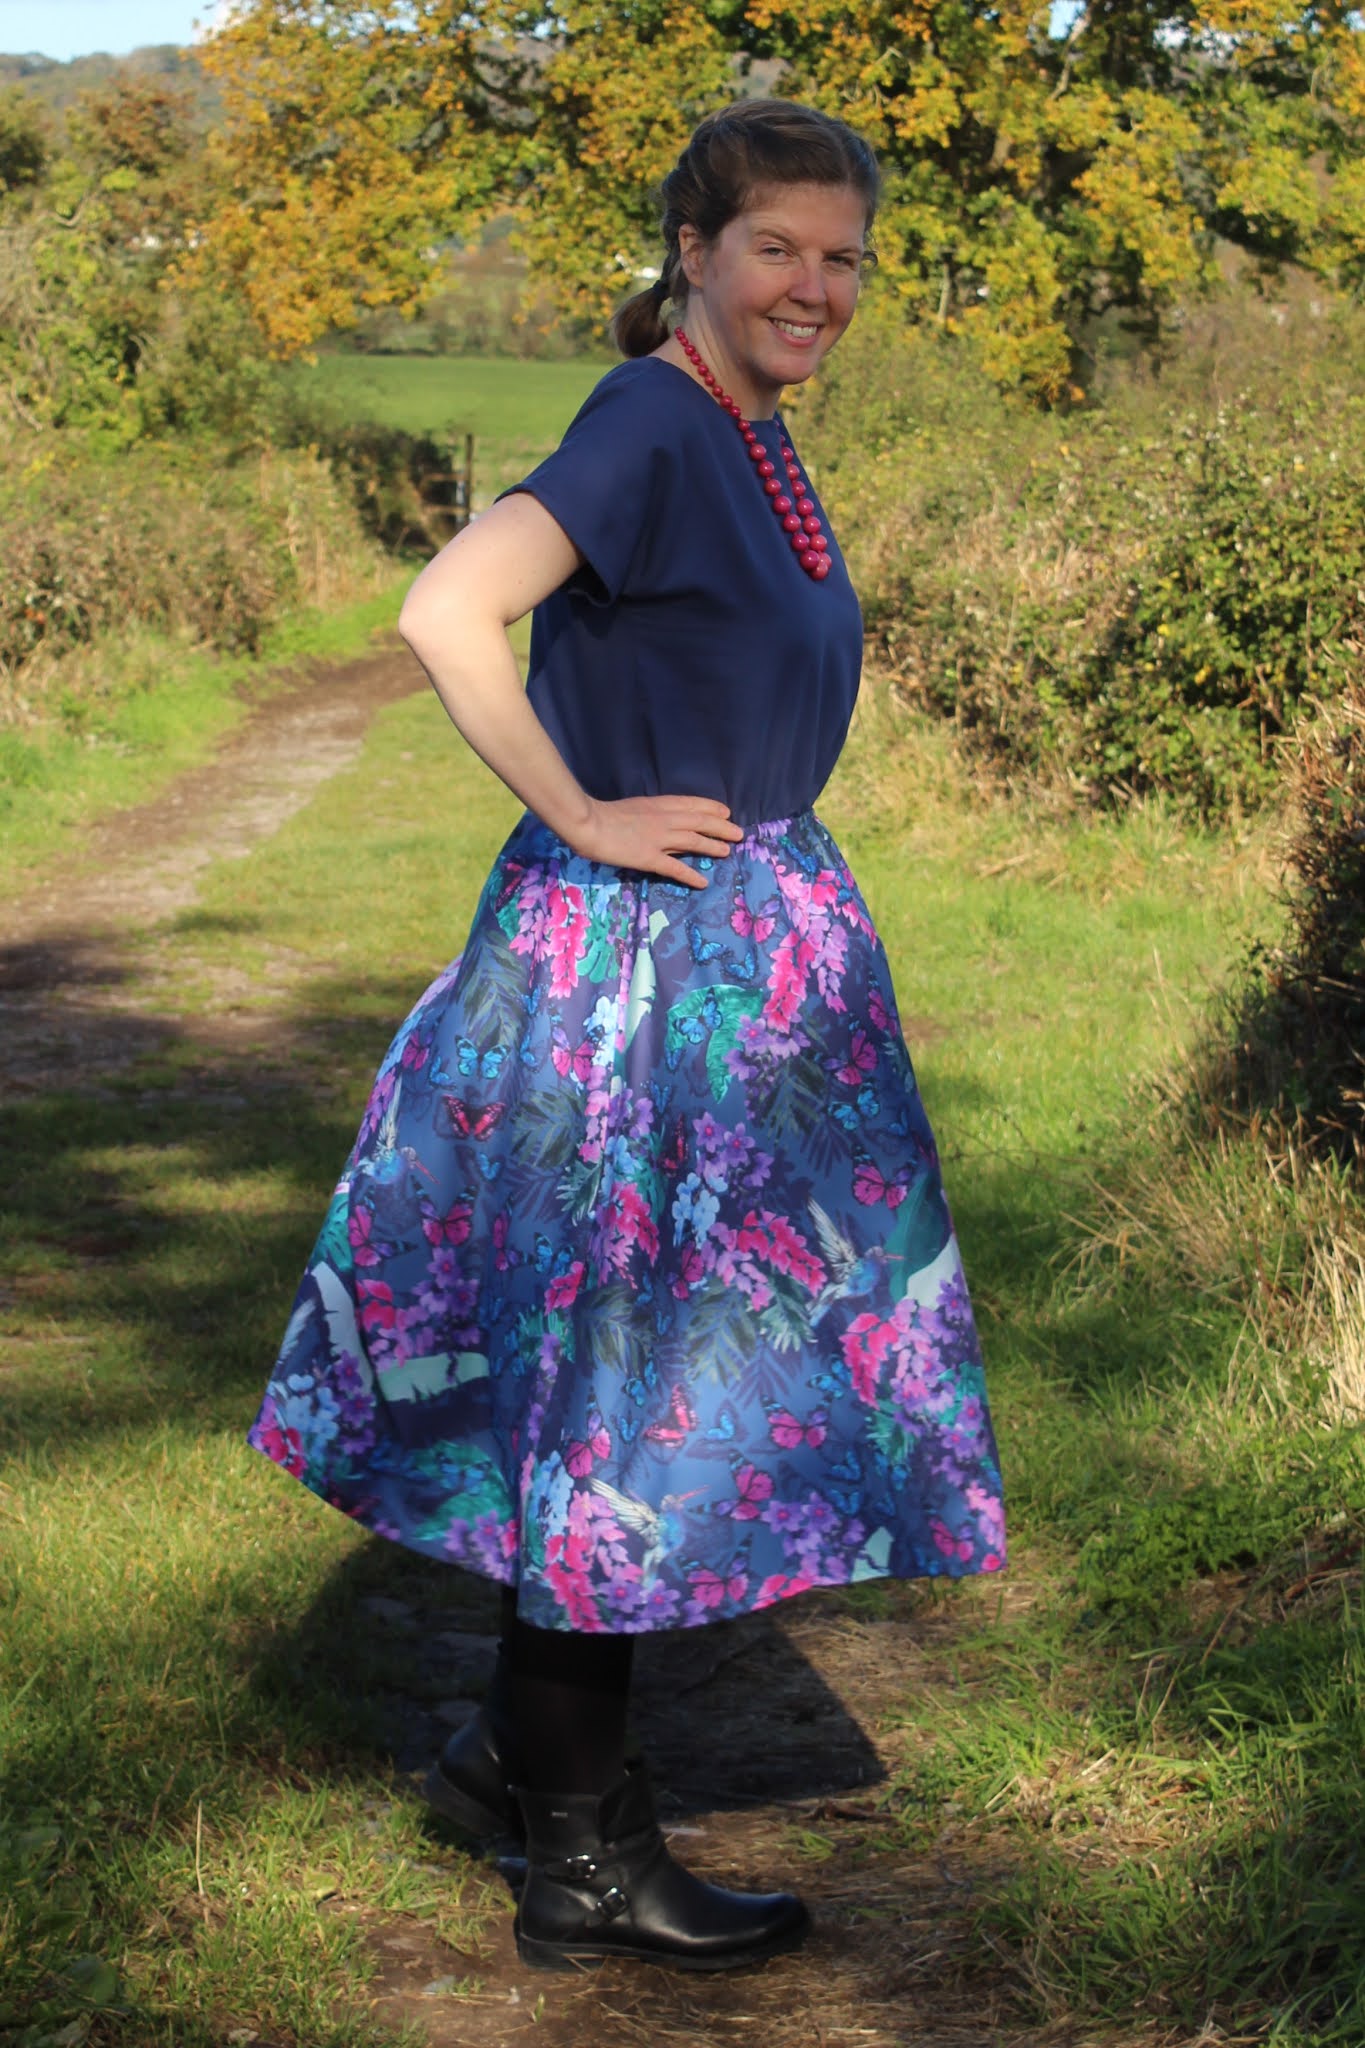
Lotta is a beautifully simple dress with a blousy bodice, flared skirt and narrow elasticated waistline. It has the options of midi or knee-length skirts, grown-on short sleeves or drop-shoulder bracelet length sleeves, and deep patch pockets. As an added bonus, it can be made using either woven or knit fabrics so it's a pretty versatile pattern.

Lotta would be a really great pattern for beginners - with no fastenings or darts it's a straightforward project to sew, and the more relaxed style of the bodice would make it easier to fit than some other dresses. As is always the case with Tilly & The Buttons patterns, the instructions are really detailed so should give you any help you need and if you want more support there's the option of an online course to accompany the pattern too. 

For those of us with more experience under our belts, it's a nice relaxing project to sew and comes together quickly. It could be a nice palate cleanser after a complicated project, or a good way to boost your sewing mojo if you're currently lacking in motivation.

In terms of sizing, my measurements (B 38", W 32", H 42") basically put me in Tilly's size 5 (my hips are actually between a 5 and a 6, but hip sizing isn't crucial for Lotta because of the flared skirt) and that's the size that I made. I'd say the sizing is good - the bodice is blousy as intended, but not so loose that it's starting to look baggy. 

The only alteration I made was to lengthen the bodice by an inch, which is very standard for me (I'm about 5' 9"). For reference, I used the midi skirt length straight from the pattern.

One point I should mention is that I can *just* get the bodice over my head - I do have pretty big head (all those hats that say "one size fits all"? It definitely doesn't!) so this shouldn't be a problem for most people, but it might be worth making a toile to check that you're OK if you also have a large head!

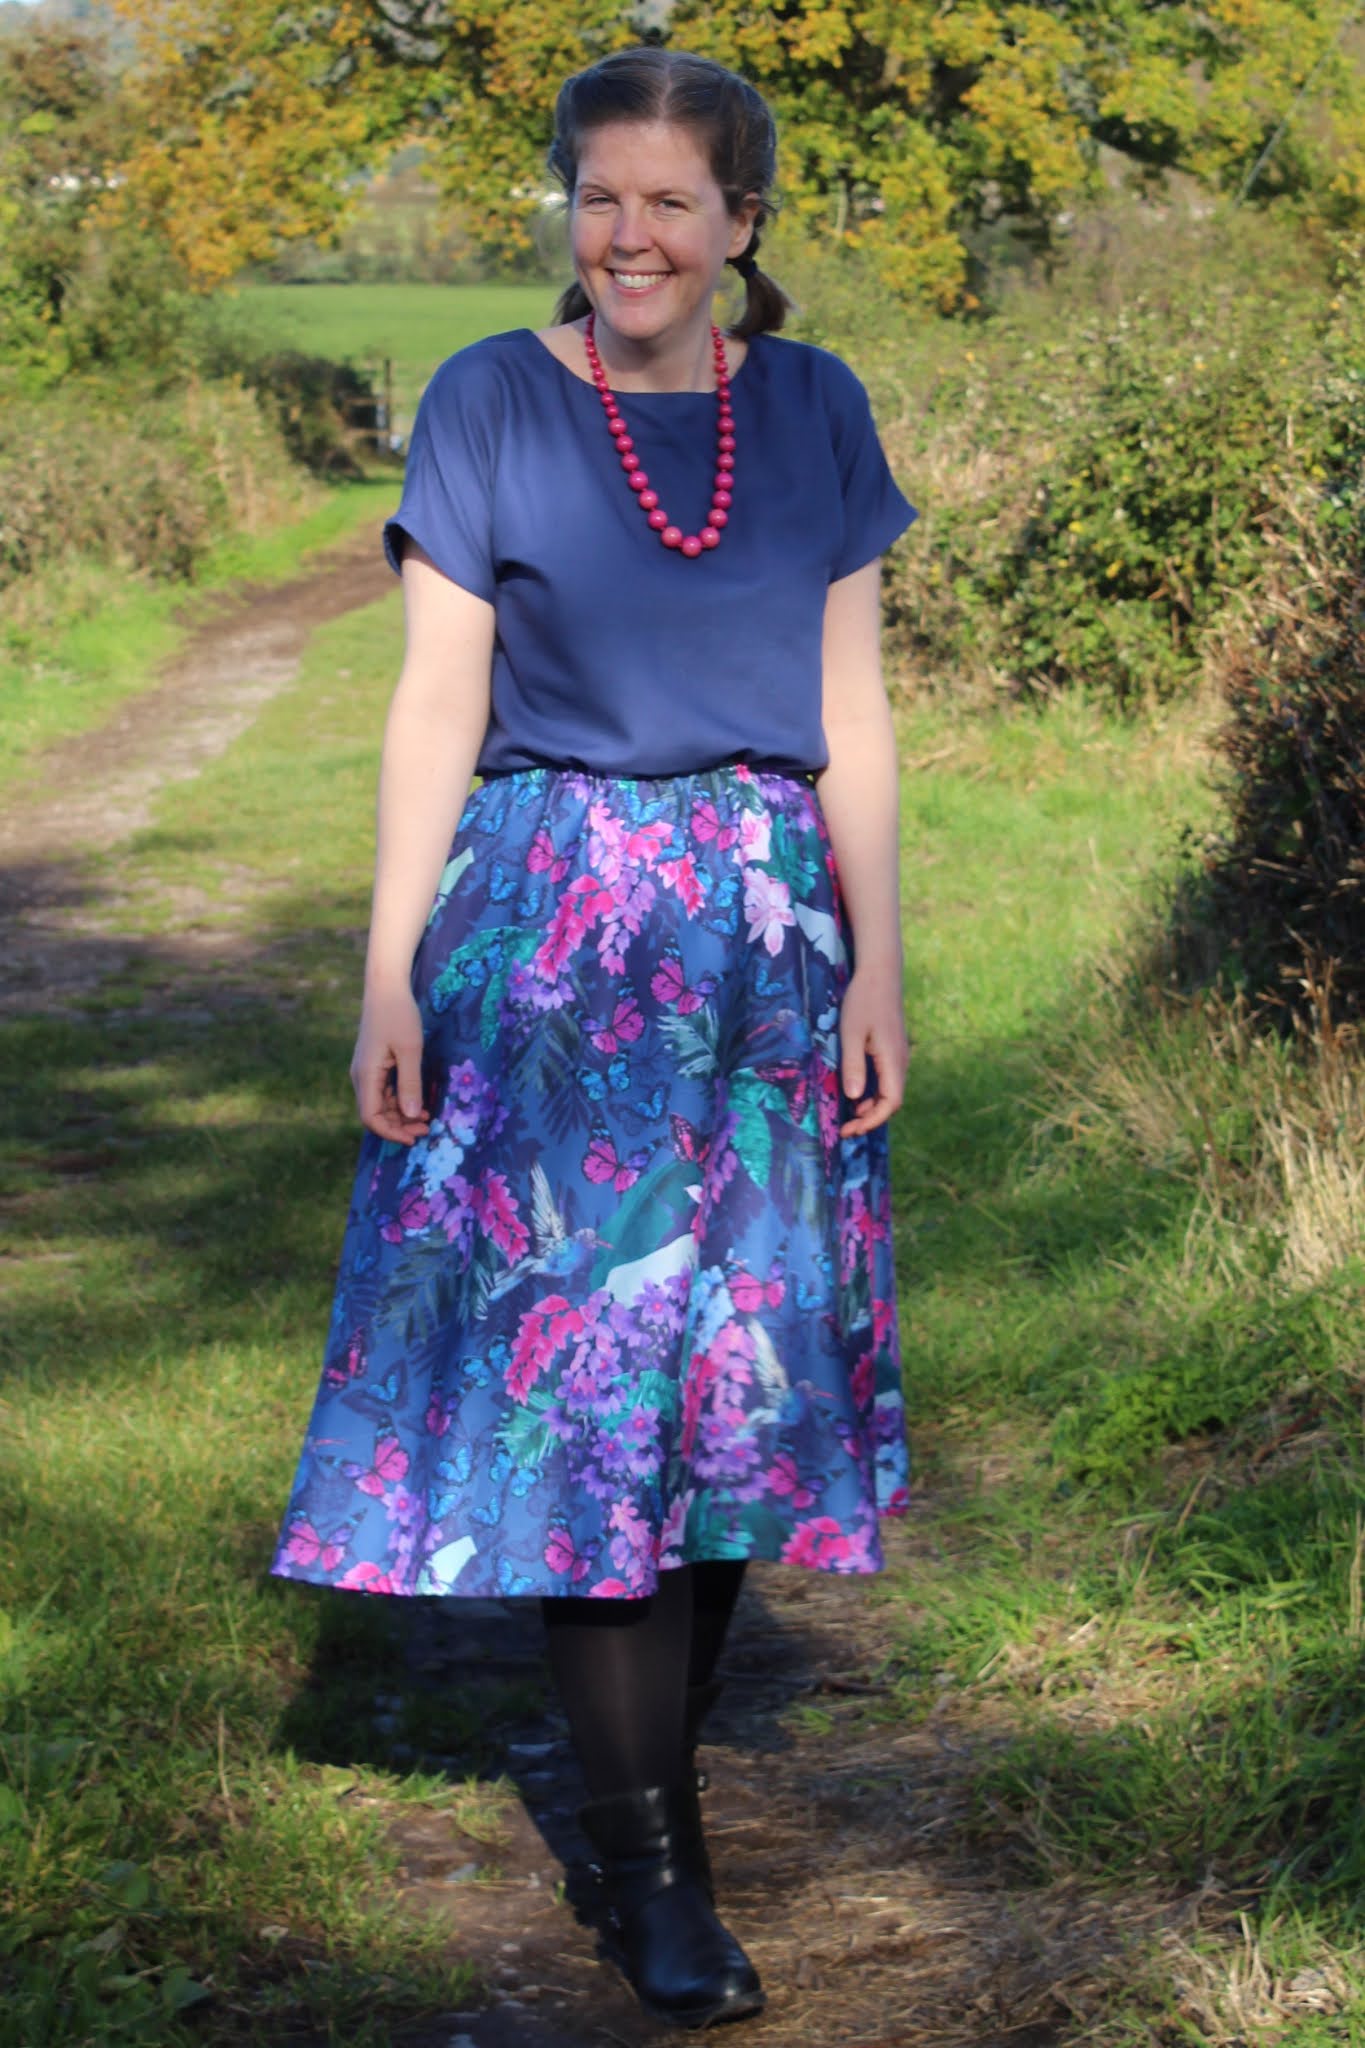
As I mentioned above, the fabric I used is from a duvet cover that I bought in a charity shop recently. The patterned fabric of the skirt is the top side of the cover, and the navy is the back. I originally intended to use the patterned fabric for the entire dress, but when I came to cut it out I noticed a couple of small areas of damage to the fabric that I needed to avoid and that meant that I didn't have enough fabric for both the bodice and skirt. 

In hindsight I think that might have been a blessing in disguise because I really like the combination of the two fabrics together, and having the whole dress in the patterned fabric might have been a bit overwhelming.

Having given my Lotta dress its inaugural outing, I'm pleased to report that it's really comfy but also makes you feel like you've made a bit of an effort. I think it will look good layered over a long-sleeved t-shirt or paired with cardigans/jumpers in the cooler weather we have coming up, but will also be great on its own for spring/summer so hopefully it should be an almost year-round dress. 

I'm really pleased with how my Lotta dress turned out, and I'll definitely be sewing more versions in the future. It's the kind of pattern that could be a really casual everyday dress, or could be dressed up to be quite smart depending on the fabric that you chose and the way you style the dress. I think my next version might have to be in a jersey to make it even more comfy and cosy for autumn/winter. What fabric would you use for Lotta?

Monday, 6 April 2015

Colette Moneta Dress

I don't know about you, but personally I think that weekends like Easter, which generally revolve around large amounts of not-especially-healthy food, are best enjoyed wearing clothes of the secret pyjama variety. Luckily for me, I finished this dress, my first Colette Moneta, just in time for this year's chocolate feast!


I've been meaning to make a Moneta since the pattern was first released, and I'm really glad that I finally got around to it. It was a great, and fairly speedy, project to make and the finished dress is so lovely and comfy to wear. 

As many people have said before me, the pattern is really well drafted and the instructions are excellent. When I first started sewing with knits, I thought I'd play it safe and stick to t-shirts before I branched out into dresses, but I think that I should have given Moneta a go before. The instructions are so detailed that I think it'd be totally achievable for a knit newbie - and a dress does seem more impressive than a t-shirt doesn't it?


I sewed the dress up exactly according to the instructions and everything worked nicely. I've read some people saying that they don't like the fact that the neckline is just turned under and stitched, but I think it's fine and I always think that anything stitched with a twin needle looks quite professional anyway. I might try following one of the methods in the recent Colette tutorial on binding knit edges for a future Moneta (you know there'll be more of them!) though, just for a bit of variation if nothing else.


The only part of the sewing process that I had any trouble with was gathering the skirt, and that was just because it was physically difficult to get my clear elastic to stretch far enough rather than being anything to do with the actual sewing. I did manage it though, and it got easier as I went round the skirt, so it wouldn't be anything to put me off making another Moneta. 


In terms of size, I used a medium at the bust and graded out to a large at the waist and hips. I also added 1.5 inches to the bodice length (a standard adjustment for me), and another 1.5 inches to the skirt - which has left it just slightly above knee length on me (I'm about 5 ft 9"). 

I'm pretty happy with the fit. It did initially gape slightly at the front neckline, but I think I might have just stretched it slightly when I was top-stitching the neckline down because a good steam seems to have made a big difference. Steaming also made a massive improvement to the hem - it was really wavy when I'd just sewn it, but it's nice and neat now.


I should probably have apologised before now for the fabric and the fact that all the tiny dots may be doing weird things to your eyes. Everything looks fine on my computer screen at the moment, but if the photos are slightly smaller the pattern does stop looking like dots and starts just looking like one big distorted mess. So sorry if that's what you're seeing!

The fabric is a cotton and spandex jersey from my fabrics. I got it when it was half price and they don't seem to have any now, but they do have lots of other pretty spotty jerseys. As I'd got the jersey for a good price, I was happy to use this as a test version because I knew I wouldn't be heartbroken if it didn't work out quite right. Luckily for me, that's not a problem I have to worry about, and I'm really happy with my Moneta.


I'll leave you with this picture of me trying, and failing, to look all nonchalant and model-like whilst sitting on a gate. In reality, I was really just desperately trying not to fall off backwards. One of these days I'll get better at posing for photos....

I'm now off to enjoy the tail end of my long weekend with chocolate and plotting of future Monetas. I hope you've had a Happy Easter!

Wednesday, 10 December 2014

Colour-blocked Françoise dress

I mentioned in my last post that I'd been trying to stick to my own sewing plan instead of getting distracted by challenges and sewalongs, well here I am again failing to do that and jumping on the sewing bandwagon of a shiny new pattern! Here's my Tilly & The Buttons Françoise dress...


I'll be the first to admit that I wasn't instantly convinced that Françoise would be for me when Tilly released it - I generally prefer fit and flare styles and I'm never really sure whether shift dresses particularly suit me and my pear-shaped frame. But then I saw versions start to pop up around the blogosphere and I realised that the French darts gave the dress a flattering shape around the waist that would probably work for me, and it's always good to step out of your comfort zone every now and then (and, let's face it, Tilly's contest was also quite a good incentive!) so I decided to give it a go. Spoiler alert: I'm really glad I did!

In terms of size, I used a size 5 for the bust and waist, and graded out to a 6 at the hips. I also added quite a bit of length - about 1.5 inches in the bodice section (a standard adjustment for me) and 4 inches in the skirt because I don't feel massively comfortable in mini dresses and prefer skirts to hit nearer to knee length.


There's also the obvious slight change I made of adding the colour-blocked sections at the hem and cuffs. For the skirt hem, I just decided how big I wanted the contrast section to be (4 inches plus the hem allowance in case you're wondering) and marked that onto my pattern piece, cut the main colour at this length and used the bottom section of the pattern piece to draw out the piece for the contrast hem (with seam allowances added to both the main and contrast colour sections).

For the cuffs, I drafted pieces that extended from the sleeve, cut 2 for each sleeve which I then joined together along the bottom edge to form the bottom of the cuff, before joining the cuffs on to the sleeve. I'm probably not doing a very good job of explaining that am I? It's essentially the same method that I was familiar with from making my Cami dress, which you can see in a tutorial here, but omitting the extra opening on the cuff. Hopefully that makes more sense now, if not let me know!


In terms of fabric, as one of Tilly's suggestions was double knit, I decided to use two different colours (navy and turquoise) of Romanit jersey (which I'm pretty sure is also known as ponte) from myfabrics. I think it was a good choice to make, as it's given me a dress that's super comfy and nice and cosy for this time of year, and there's the added bonus that you might have noticed in the photo above that I didn't need to put the zip in because it pulls on easily as it is - never a bad thing! And that helped to make this a pretty speedy dress to put together.


The fabric feels nice to wear and was generally OK to sew with, but it doesn't press that well so it did cause a couple of problems in some areas, mainly in the collar. I originally intended to swap the collar for a Peter Pan one (just because I love Peter Pan collars), but the fact that the fabric didn't press well meant that it just came out looking a mess. Thankfully the pointed collar from the pattern turned out much nicer!

All the layers of fabric that I ended up with around the neckline after adding the collar and facings were also quite bulky and the facing didn't want to turn in and lie flat even after understitching - I should possibly have used a thinner fabric for the facing really but I didn't have anything suitable. Steaming solved some of the problem, and after I'd done that, I secured the facing in place by stitching in the ditch down the sleeve and shoulder seams for a centimetre or two under the collar. Possibly not technically the right solution, but it worked so it's fine by me.


Overall, Françoise is a really great little dress. As you'd expect from Tilly's patterns, the instructions seem really clear and thorough (I say seem, because I mainly used the photos to see what I should be doing and just skim read the instructions), so it would be a good option for beginners but is still a fun pattern if you've got a bit more experience. I'm really pleased I chose to make it in a knit, because I feel like it looks quite smart but at the same time it's SO comfy. Being honest, it's never going to completely cure me of my love for fitted bodies and twirly skirts, but I can definitely see myself making more versions of the Françoise in the future. I'm on the lookout for a pretty patterned double knit for my next version - has anyone seen any? Although that will have to wait until after I've finished quite a few secret projects - is anyone else up to their elbows in making Christmas presents at the moment or it is just me?!

Thursday, 13 November 2014

Bronte & Delphine: saved by the buttons

Things have been a bit quiet around here recently - I've been busy making presents for family birthdays and then forgetting to get decent pictures of them, or being too distracted by reading other people's blog posts to actually get round to writing posts of my own. I'm putting that right today though and have a whole handmade outfit to share with you - a Jennifer Lauren Bronte top and a Love at First Stitch Delphine Skirt.


This may be a whole me-made outfit, but both Bronte and Delphine are fairly simple patterns so I finished both projects pretty quickly. I think they took me about one evening each, and I'm not a particularly speedy sewer.


I didn't necessarily intend for them to be worn as an outfit - Delphine was the answer to my yearning for a red skirt to wear with my first Bellini blouse, and I decided to sew the Bronte to boost up the numbers of long-sleeved tops in my wardrobe ready for the cooler weather - but they work well together and I figured that as they're both fairly simple projects I might not have too much to say about them so I might as well put them together in one post.


So, Bronte...I really like the short-sleeved Bronte that I made in the summer, so it was the obvious pattern to choose when I wanted to make a long-sleeved t-shirt. As I'd already made the pattern before, this time it was a nice and speedy project. I made a size 14, with no alterations at all. I mentioned in my post about my first Bronte that I might lower the neckline on future versions, but having worn the top more I actually like the neckline as it is so no changes needed.

The fabric is a cotton/spandex jersey from myfabrics. It's lovely and soft, and I'm definitely tempted to order more jersey from there - they have so many prints! It's the kind of jersey where the print is applied to a white base, so the colour does fade slightly if the material is overstretched but it really has to be stretched a LOT to do that, and it isn't a problem at all for me.


Confession time! I came very close to ruining this project. It was all nicely sewn up, and all I had left to do was stitch down the shoulder overlap. I was trimming the neckband seam allowance and somehow managed to cut a hole into the main fabric of the top - aaaargh! Usually this would send me into a fit of melodrama, but for some reason I was remarkably calm about the situation this time. The hole wasn't that big so I stitched it up, leaving it hardly visible but still far too visible for my liking. Inspiration for a solution suddenly came in the form of my button jar. I had been planning to leave the shoulders plain for this version instead of adding buttons, but I had these oversized buttons that were just the right colour and the perfect size to cover the sewn-up hole. Problem solved, disaster averted, happy Ruth!


Now, Delphine. As this point I should point out that this post could also have been entitled "Red is really difficult to photograph". No matter what I tried, the skirt came out looking almost like a luminous block, but I promise it's not like that in real life. It's actually a nice red corduroy from Calico Lane, and it's lovely to wear.

Delphine is one of the earlier projects in Love at First Stitch, and is a nice simple pattern aimed at beginners, so makes a speedy but very wearable project if you've got a bit of sewing experience. As I'll mainly be wearing this with tights I added a lining using the method in Tilly's tutorial, but even with the extra steps which that involved, this was still finished really quickly. It would have been even quicker if I hadn't, for some inexplicable reason, initially traced and cut the waistband two sizes smaller than I intended to!

As with the other projects I've made from Love at First Stitch, the instructions were all really clear and super easy to follow. I made a size 5 at the waist, grading to a 6 at the hips. Other than that, I made no changes to the pattern - there's no need to!


All in all, I'm pleased with how both of these turned out and they're both really great wearable basics. I've realised I've got some material in my stash that could make a fantastic second Delphine (you only need 1 metre if you've got wide fabric - always good!) so keep an eye out for that at some point this winter, and I'll be making more incarnations of Bronte in the future for sure - but hopefully without nearly destroying them next time. Have you averted any sewing disasters recently?

Thursday, 2 October 2014

Mortmain dress & an ode to chambray

I mentioned in my post about my denim Lilou that using the remains of my first Mortmain dress for the lining had reminded me that I should make another version of this pattern. I'm not sure why it's taken me so long to be honest as I really like my first version and I had definite plans for making a sleeveless version this summer but they never quite became reality, but I've now got a second sleeved version at least - better late than never!


There are a couple of differences between this version and my first one. Firstly, I decided to reverse the pleats in the skirt - this is one of the suggestions included in the pattern instructions and there's also a really helpful tutorial on the Gather website if you're not familiar with sewing pleats. I'm pleased that I reversed the pleats on this one, in some ways it's a small change but I think it makes a surprisingly big difference to how the dress looks and, much though I like Mortmain no. 1, I think I prefer the pleats in this one.


I also used a regular centred zip this time instead of using an exposed zip as the pattern suggests. I quite like the exposed zip on my first version because it's a bit of a contrast with the extreme girliness of the rest of the dress, but as a general rule I'm not a massive fan of exposed zips. Plus, in places where I've seen them for sale anyway, they cost about five times as much as regular zips!


My first version uses ribbon ties on the sleeves, and I really do love this feature, but it's not massively practical for wearing under cardigans, so this time I used buttons on the sleeve cuffs instead. The pattern has instructions for adding a small elastic loop to one end of the cuff to secure the button, but I found that I had enough space in the cuff to sew in a buttonhole, and I thought that would be more secure, so that's what I did.


OK, so the material. It's a gorgeous dot chambray by Robert Kaufmann that I got from Dragonfly Fabrics and I LOVE it. As you may have guessed from the title of this post, if I had any poetic talent I might even be inclined to start writing sonnets about it, that's how much I love it. The only thing I don't love about it is that it seems to be some kind of shy wallflower and doesn't want to show off how lovely it is to you because it doesn't photograph brilliantly so you might not appreciate it in all its glory, but trust me that the glory is there. I do love spots and dots, so that definitely helps, but aside from that the colour is gorgeous, it was lovely to sew and it feels so nice to wear. I'm seriously tempted to get some of the indigo for another dress. And as a bonus, the material came so beautifully wrapped that it felt like Christmas had come early!

Sorry if I sound like I'm going a bit over the top there, I possibly may be getting a bit carried away with myself, but it really is lovely fabric. I've also become aware recently that the difference between me just liking a finished garment or really loving it tends to be the fabric that I've used, and not so much the obvious aspects like the colour or the print, but the the quality of the fabric, the way it sews up and how it feels to wear. Does anyone else find that? It's not a particularly earth-shattering realisation, and probably one that that I have been a bit slow to arrive at, but I'm glad I got there all the same.


On a not-particularly-related subject, the photos for this post were taken in the grounds of the American Museum in Bath. My Mum and I popped over there last Saturday mainly because they have a Kaffe Fassett exhibition on at the moment, which was so inspiring. It's on until 2 November, so if you're in the area and you're a fan of colour I'd definitely recommend it. The only problem was that I came away from it wanting to buy huge amounts of rainbow-coloured material and yarn to make massive quilts and blankets to brighten up my flat (which is rented, therefore entirely painted in magnolia). I'd always been intimidated about quilting, and not really sure if I wanted to give it a go, but after seeing some of his work, I definitely feel like I should try it some time. I'm still slightly intimidated by the idea though! Any tips on how to get started?


Even once the Kaffe Fassett exhibition is over, the museum would still be worth a visit if you're interested in quilting at all, because they have a lovely collection of quilts and textiles. Plus, as you can see from these photos, the grounds are beautiful. Although I don't think there'll always be yarn-bombed lampposts to greet you, I think they're in honour of the exhibition!


To cut a long story short, I love this dress and I had a great day wearing it for its first outing. I still really like the idea of a colour-blocked Mortmain, so number 3 may be appearing at some point this autumn/winter. And there will probably have to be some more dot chambray in my life - it's OK to use the same fabric multiple times, isn't it?!

Thursday, 4 September 2014

Autumn-ready Lilou & OWOP

It may not be quite autumn yet, but I thought it was time to get thinking about sewing some clothes that can be worn at the moment, but will also still work once summer has definitely come to an end, instead of disappearing for a few days and then returning again as it seems to be at the moment. My Love At First Stitch Lilou dresses have been definite favourites this summer, so I decided to make another version that I could layer up and wear as the weather gets colder. Here's what I came up with...


Denim might not be an instantly obvious choice for a dress, but this is soft-washed denim (from Fabric Godmother) and it feels lovely and hangs really nicely. It also holds the pleats in the Lilou skirt well - you can see those pleats much better in this plain fabric than you can in my other Lilous where the pleats get a bit lost in the prints. The other advantage of denim is that it'll go with pretty much anything in my wardrobe. Also, as I don't really wear trousers, denim skirts play the same role for me as jeans do for many people, and I think this Lilou will get worn just as much as my denim skirts do.


A sleeveless dress might also seem like a bit of an odd choice for autumn, but one of the good things about the shape of the Lilou bodice is that it can easily be worn pinafore-style over a top or a blouse as I've worn it here, and there are also no sleeves to get caught up under cardigans or jumpers so that'll make it good once autumn hits as well. This dress is a little warm to wear on the nicer days we're having still at the moment, and it does look a bit odd if I try to wear it on its own without any layers, but I have worn it a couple of times already and it's super comfy, and is casual whilst still looking nice if that makes any sense?!


I used a regular centred zip for this version of Lilou instead of an invisible zip - partly because I wasn't sure if the denim, being a slightly heavier weight fabric, would work that well with an invisible zip, but mainly because when I went to buy the zip my local haberdashery only had white invisible zips, which I knew definitely wouldn't work and I was being impatient and didn't want to wait to find a different zip. It's a pretty good haberdashery, and they have a decent range of colours and sizes in normal zips, but only ever seem to have white or black invisible zips for some reason. I suppose they must find that's what sells but it seems a bit odd to me that they don't have more colours.

Other than that, I used the same size and length changes that I've used for my other Lilous (size 6 at the bust and hips, and a 5 at the waist, 1.5 inches added to the bodice and 2.5 added to the skirt) but didn't make any other changes. Part of me thinks maybe I should have tried adding pockets to this version, because I do love pockets and they are useful sometimes, but that part of me isn't arguing too strongly with the part of me that likes it how it is, so I think this one will stay pocket-less and I'll maybe try adding them next time I make the pattern.


Oooh, look - another contrast lining! I particularly love the pretty print compared with the plain outer fabric on this Lilou, and as I've probably mentioned before it's a good way of using up off cuts from other projects. This time I used the remains of the fabric that I used for my Mortmain dress, and it reminded me that I really should make another Mortmain soon - another project to add to the list!


As this is now my third Lilou (fourth if you count the one I made for my Mum!), there's not much else new to say about this one - but I'm really happy with it. It came out exactly as I imagined it in my head and I know it will get worn a LOT! I've also decided that I'm going to use my Lilou dresses for OWOP, which is being organised by Handmade Jane and is kicking off this Saturday. Is anyone else joining in? What pattern have you picked?

Friday, 29 August 2014

Simple Sew Ruby Dress

Two finished garment posts within a few days isn't normal for me, but I had a weekend recently when I did very little other than sew (a good weekend!), so I got through a couple of projects quite quickly, including the dress I have to show you today. This dress wasn't planned. Not that I have a particularly detailed sewing plan, but I had told myself that I'd probably made enough summer dresses already this year. Then this month's copy of Love Sewing magazine arrived through my door with the pattern for the Ruby dress from Simple Sew on the cover. It was just my style, and then I spotted some fabric on ebay that I thought would make a nice Ruby, so really it would have been silly not to put the two together and create a pretty dress wouldn't it? So that's what I did!


In my defence (not that I necessarily need one!), I have been thinking recently that I haven't made nearly enough polka dot items. I love polka dots, and I always tend to be drawn to them when I'm looking for sewing inspiration, but for some reason they seem to have not featured too highly on the list of things I've actually made. And blue and white is always a good combination for me, and fits in well with my cardigan collection so it's all good!


The Ruby dress has a fitted bodice with a bateau neckline and low V-shaped back, and a lovely full skirt. So this may be another fit and flare dress to add to my growing handmade collection, but it had some interesting details to make it different from the others that I've made before.

The pattern is described as being for an adventurous beginner, which I think is probably fairly accurate as it's all pretty simple (as the name of the pattern company would suggest!), as long as you're OK with inserting invisible zips. The instructions are clear and well-illustrated, although there are a couple of details missing that might confuse a complete beginner - the envelope doesn't tell you what type or length of zip you should be using (I used a 16" invisible zip), and I don't think it tells you what seam allowance to use (I used the standard 5/8" which worked fine for me) but maybe I just overlooked that bit! The envelope does promise full email support though, so that should sort out any queries.


The neckline and armholes are finished together with one facing, which I prefer to having a separate neckline facing and armhole binding as it means there's no risk of the facing popping out at the neckline. If I make another Ruby dress though, I might try lining the bodice instead of using the facings, as I really like the lined bodices of my Lilou dresses.

I made a size 14, but added quite a lot of length. From the photos in the magazine, you can tell that this dress has been designed to be quite short, but I always think that dresses this shape look better if they're around knee length. If they're much shorter than that on me, I always feel like they look like they've been shrunk, but maybe that's just me being weird! I added 1.5 inches to the bodice, and 4.5 inches to the skirt. Lengthening the bodice is a standard adjustment for me, and I am probably on the taller side of average at 5 ft 8, but the skirt would have been really short on me without the extra length. I'm fairly happy with it as it is, but I might add an extra inch or two to the skirt next time.


Have any of you read Love Sewing magazine? I always get sucked in by the pretty covers of magazines, so I had to check this one out when it was first released a few months ago. It's a nice magazine, with plenty of modern sewing projects for accessories, home decor and simple clothes. I haven't actually made anything from the magazine itself yet, but I've enjoyed reading it. Plus there's the bonus of having a free pattern every month. If you're only interested in dressmaking, then it might not be the one for you but it's definitely worth keeping an eye out for it just to see if you want the pattern - this month's issue with the Ruby pattern should theoretically still be available, and next month there'll be a trouser pattern on offer.


I'm pretty happy with how this turned out, and even happier now that I've heard that there could be some more heat coming our way next week so I might get more of a chance to show it off. And if the sun doesn't appear again, well then that's what cardigans were made for! But maybe I should think about planning some more autumn-appropriate sewing. Are you sewing for summer still, or planning for autumn already?

Tuesday, 26 August 2014

Jennifer Lauren Bronte Top - Repurpose, Reuse, Refashion

At the start of this year, the one sewing target that I set myself was to get to grip with knit fabrics. I started off quite well by making my Plantain top, but I hadn't done anything else about it since then. Not due to fear or anything, more just because I kept getting distracted by woven fabrics and patterns! Then Jennifer Lauren released the Bronte top, and it reminded me of an old favourite RTW t-shirt of mine so I knew I wanted to make one. It's taken me a couple of months since the release, but better late than never!


I was given the kick start to get sewing the Bronte when I saw that Amy of Sew Amy Sew was hosting Repurpose, Reuse, Refashion month this August. You see, a month or two ago I'd found this jersey maxi dress in one of my local charity shops for the princely sum of £1.75...


When I bought it, I knew I would never wear it as it was - I'm not a massive fan of strapless and Empire line isn't the most flattering shape on me. However, it was in good condition and didn't look like it had been worn much, I loved the colour, the jersey felt nice and soft and the advantage of the Empire line was that I knew the skirt pieces would be big enough for me to put the dress to good use somehow.

I was considering refashioning the dress by adding some straps and possibly extending the shirring round the bust down to waist level to make it more flattering for my shape, but the existing shirring went a bit saggy when I washed the dress so I decided just to cut that off and treat the skirt as a piece of material. There was just enough material for Bronte, so I took that as a sign that it was meant to be!


Anyway, back to Bronte! I really, really like this pattern. Like any knit top, it's obviously really comfy and easy to wear, but the 1940s-inspired shrug style shoulder detail makes it stand out from the crowd and be a little bit different. You might think this would make it more complicated to sew, but it's really not that difficult. The only difference from a normal knit top is that the front and back pieces are connected in a slightly different way, as the back wraps over the front, but although it is different I don't think it's any more complicated.


The neckline also gives you the opportunity to add a bit of extra interest by using a contrast binding or some pretty buttons to secure the shoulders. In my case, I had some star shaped buttons which I was planning to use, but when I tipped out the contents of my button jar this pack of bright buttons that I'd been given for my birthday fell out and I loved the way they looked with the blue so I changed my plans!

I made a straight size 14 with no adjustments. I was sort of treating this version as a (very!) wearable muslin, as given that the material cost me £1.75, I wasn't going to worry too much if it didn't turn out totally perfectly. As it is, I'm pretty happy with the fit so it's all good! I might consider trying to lower the neckline a little bit in a future version to make it even more like my old top, but I like it as it is.


If, like me, you're a bit of a newbie when it comes to sewing with knits, I'd definitely recommend giving the Bronte top a go. As I said above, it probably looks more complicated than it is, but it is actually fairly simple to sew. It's only the second time I've sewn with knits, and the only problem that I had was my twin needle deciding to break for no apparent reason! The instructions are nice and clear, and also include some really helpful tips on choosing your fabric, as well as hints about sewing with knits in general. Also, I don't have a serger/overlocker, so this is proof that you definitely can sew the Bronte using just a normal sewing machine.

As I mentioned in my last post about my Bellini, I do prefer paper patterns to PDFs (not least because my printer sometimes has a mind of its own and decides to print multiple copies of one page instead of printing the page range I'd asked it to, as it did in this case!), but this was another PDF that was no trouble to put together. I really like the fact that the individual pattern pieces are printed on separate groups of pages so you're dealing with manageable numbers of pages to stick together instead of covering the entire floor!


Sewing Bronte went really well and I'm definitely planning on doing more about my aim of sewing with knits now. There'll be more Brontes at some point in the future, and I've also got the Coco and Lady Skater ready to try - I just need to make my mind up about what fabric to use! Has anyone got any favourite sources of knits in the UK? It's always good to have recommendations!

Thursday, 14 August 2014

Two Lilou Dresses for the Price of One!

The glorious warm weather we were enjoying a couple of weeks ago may have been replaced with unpredictableness and dramatic rain showers lately, but today I'm going to try to tempt the sun to come back on a slightly more reliable basis by showing you another pretty sundress (you can't have too many of them, right?!). I mentioned in my post about my first Lilou dress that version 2 was already cut out, well now it's all sewn up and here it is!


Excuse the slightly wrinkled look here! I'd already been wearing it for most of a day at this point, but then came across a practically deserted little park which seemed like a good place to use as a background for some photos - I'm not the greatest person at posing for photos so the smaller the audience I have the better, but pretty places with not many people in them are few and far between.


I'm sticking by the glowing praise I gave this pattern, and Love At First Stitch in general, in my post on my first Lilou. It's a really lovely dress, and feels great to wear. While in this version it's the perfect dress for a summer day, it could work for lots of different occasions depending on what material you use and how you accessorise it. Without wanting to wish summer away, I have already been hatching plans for a version that I could wear on into the autumn and winter. 


For this version, I used the same adjustments as in my first one - size 6 at the bust, grading down to a 5 at the waist and back out to a 6 at the hips, and with 1.5 inches added to the length of the bodice and 2.5 inches added to the skirt. As I said before, I do have a little bit of extra space in the bodice, but it's only a teeny bit and I'm totally happy with the fit. Plus, you know, it's always good to have some space to breath!


The main fabric is a pretty berry print cotton poplin that I got from Abakhan. They have it listed in their craft section rather than dressmaking, but I think it works fine for the Lilou dress. It has less drape than the cotton sateen I used for my first version, which gives the skirt a little bit more body. I really like the colours in the print - I've always thought that yellow is such a happy colour but it just doesn't really suit my colouring (trust me, I tried it in my teenage technicolour phase!), but the small amounts of it in this print combined with blues, reds and pinks are perfect for the summer.

I'm a big fan of the contrast lining in my first version, so I thought I'd do the same for this dress. Plus, it's a great way to use up bits of the stash that aren't big enough for a whole garment. Or that are too see-through to be used on their own as is the case here! This one is a cute white and blue heart print, I suspect polycotton, that has been hanging around on my shelves for a while so I'm glad it's now been put to good use.


And here's the third Lilou that I've made! This one's for my Mum though. She really liked my first version so asked me to make her one as well. Thankfully we're pretty much the same size so I could just use the same pattern pieces as for my own version and didn't need to worry about fitting.

The cotton that I used here is from John Lewis (I think it's part of their 150 year anniversary collection). At £18 per metre, it's definitely on the pricey side for a cotton but it's great quality and was really nice to sew. I'm also assured that it's lovely to wear! I lined this one in some of the voile I had left over from lining my Cambie dress

It was really nice to do some unselfish sewing for a change, and I'm please with the final result - particularly the pattern matching that I managed to pull off down the centre front! My mum really likes it too, which is the main thing.


So yes, Lilou is a great dress - I'd definitely recommend it! 

According to my vague sewing plan, this was meant to be my last "summer" dress this year, but then at the weekend the new issue of Love Sewing magazine arrived, which comes with a pattern for a particularly pretty looking dress - I think it should be out in shops today so keep an eye out if you're a fan of fit and flare dresses! Surely leaving the pattern unloved on the shelf without trying it out would just be rude wouldn't it? So, in spite the questionable weather we've been "enjoying" this week, there will probably be another pretty summer dress on these pages in the not too distant future! And for now, I'll leave you with a twirling shot! See you soon!