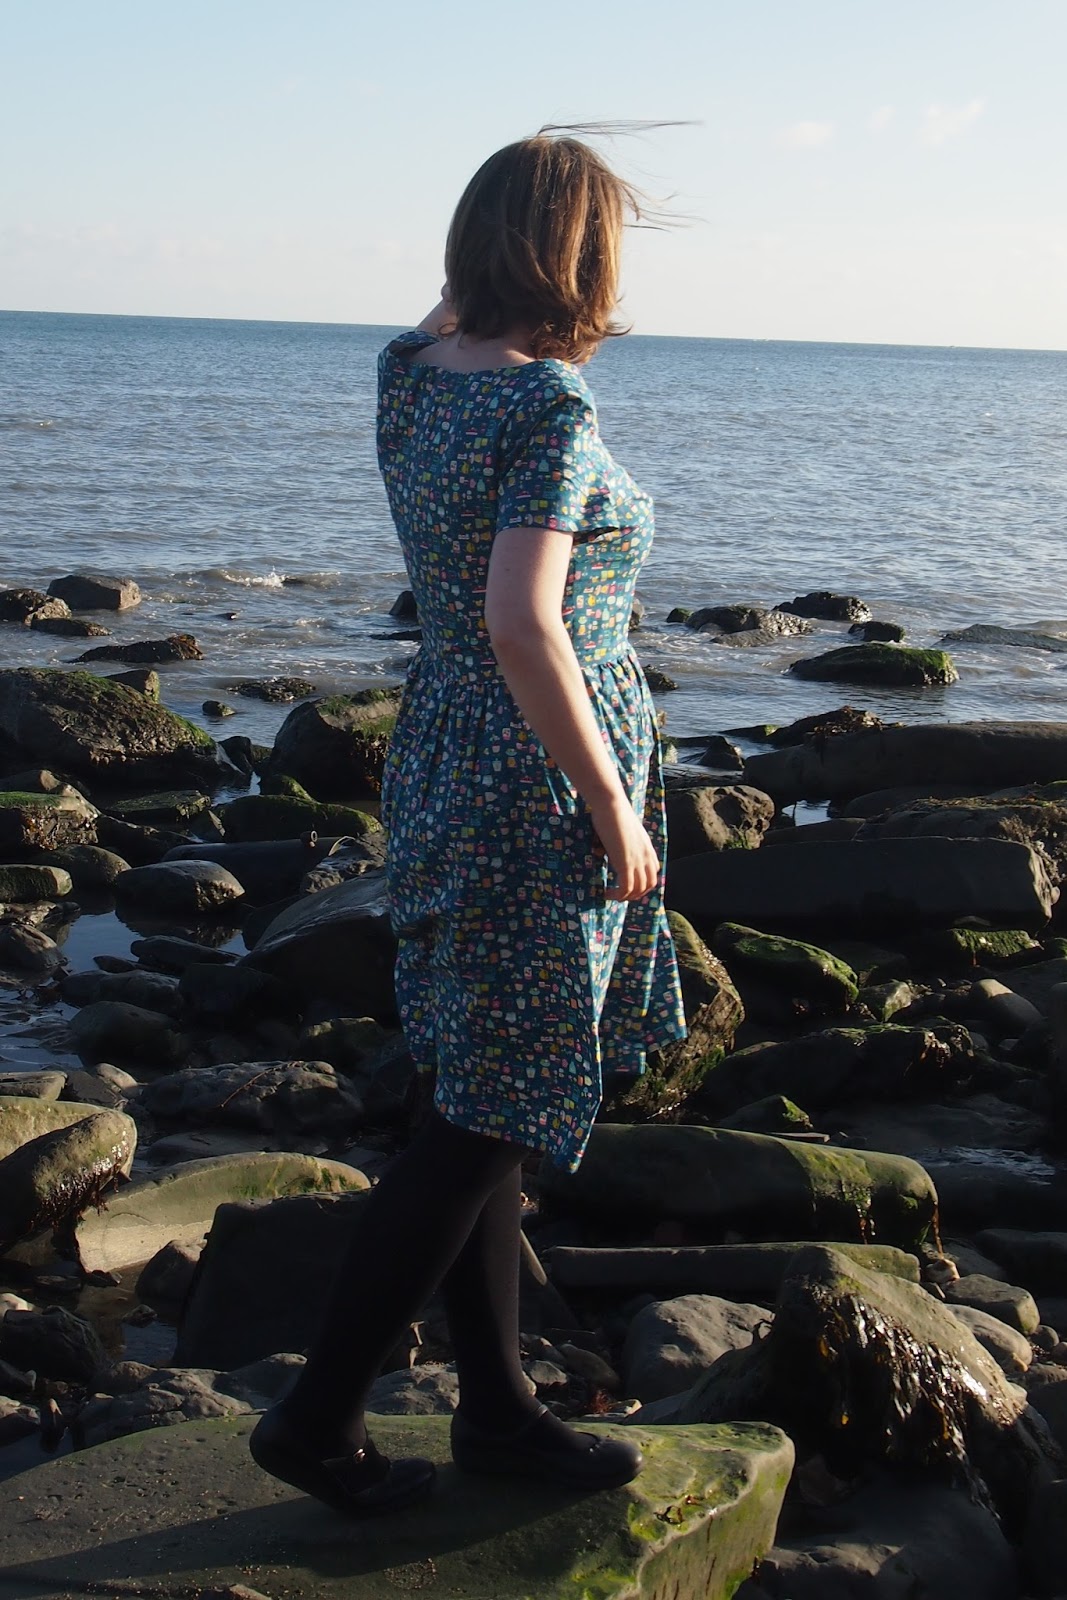
Thursday, 27 October 2016

The comfort of the familiar

When the seasons turn, particularly from summer into autumn, my sewing tends to slow down for a while. For some reason, even though I carry on wearing a lot of my cotton dresses all year round and just add extra layers accordingly, it always seems to take my brain a little while to adjust to the fall in temperatures.


It's probably in no small part due to the fact that I'm always over ambitious in my sewing plans and when September arrived, and then quickly rolled into October, there were still a fair few patterns and fabrics on my summer sewing list that I slowly admitted to myself would really be best put on hold until spring.

Realising that and switching to thinking about cosier clothes always takes me a little while though. I don't know why really, because I'm not someone who mourns the end of summer. I do love it while it's here, but I also like the fact that we have different seasons. I'd always rather have sun than a dismal day, but I'm not too bothered about the fact that the sun comes with cooler temperatures at this time of year. After all, as long as you've got the right clothes on then you can cope with the cold. And it's not like it ever gets that cold in southern England anyway.


Over the past couple of years that I've been sewing, my main response to get me through the seasonal shift is to reach for my tried and tested favourite, and it will come to no surprise to anyone who's been reading my blog for more than about 5 minutes that the pattern in question is the Emery dress.

As far a I'm concerned, it's a pattern that's always going to produce winning results. It's also a pattern that, in the right print at least, definitely gets year-round wear in my wardrobe so is a nice transition - not so summery that it won't see the light of day for the next 6 months, but not so autumnal that it's a shock to my (evidently fragile!) system.

Usually just one version of the dress will be enough to help me bridge the gap, but this year I made two.


The first is in a Japanese import cotton that I got from Frumble a few months ago. It's a teal/blue background with a fun small-scale print featuring a whole load of different kitchen items. They only seem to have a remnant of this colourway available now, but they also have it on a natural background if you're interested. The thing I love about prints like this is that they just look like a random pattern from a distance, and it's only when you look up close that you realise my dress is actually covered with scales, mixing bowls, oven gloves and all manner of other paraphernalia.


The second is using the fruit gum blue print from the Cotton and Steel Fruit Dots collection. I picked it up in the sale from The Village Haberdashery, but they don't seem to have it in stock any more. It's one of those excellent prints that feature lots of colours so can be combined with a range of different cardigans and things. I mean, it practically makes it sensible for me to be walking round covered in chewing gum wrappers!


There's not much to say about the making of these dresses that I haven't already said in my posts about my previous Emery dresses (most recently here). The only thing that I've started doing differently is to lengthen the skirt by an inch. The length of the skirt as drafted is absolutely fine on me when I first make dresses, but I've noticed with some of my older dresses that have now been washed infinite times that they gradually shrink just a little bit and start to feel a touch on the short side. Either that or I'm growing, which I doubt because I've been the same height since I was about 12!


So there we go, my mental conversion to sewing for autumn is now complete and I've drawn up a little list of things I'd like to make over the coming months. How do you feel about sewing for different seasons?

Wednesday, 19 October 2016

Puperita Hearts Hoodie

Where do you stand on sewing for other people? I'm quite a fan of it, but I am selective and only sew for people who I know will appreciate the effort that's gone into it. Or in this case, a person who is still a bit young to grasp the concept of sewing but whose parents will appreciate the effort. This is a little jacket that I made for my nephew's birthday present a couple of weeks ago.


The pattern is the Hearts hoodie from Puperita - a hooded jacket, with a fairly relaxed fit (relaxed enough that one can easily play football in it, as demonstrated below - he's just kicked a ball, it's not the start of a weird new dance craze!), designed to finish just above the knee. The description claims that it's the easiest coat or jacket pattern you'll find, and I have to say I'd probably agree with that.


I've actually made the jacket for him already (unblogged) when he was much younger and I remember being surprised at how quickly it came together, so I was more than happy to make another now that he's grown. I cut the jacket out one evening and easily did all the sewing, minus the buttonholes and buttons, the next evening so you can see that it isn't a complicated pattern.


The instructions are thorough and well illustrated with photographs. There was one point where I remember that I found the written instructions a bit confusing the first time around, but the photos cleared up what I was meant to be doing.

There are nine sizes ranging from newborn to five years, and as my nephew's still only 2 I can see that I might be making another one or two of these over the coming years. I'll definitely be getting my money's worth out of the pattern.


I considered a whole range of different fabric combinations, but in the end decided to use some royal blue polar fleece from Tia Knight for the outer fabric, and a fun tractor print cotton (my nephew's a big fan of tractors!) from Fabrics Galore for the lining. The buttons came from a local wool shop and are a really good match for the red of the tractors.

As the background of the lining is white, the blue of the fleece would have showed through slightly and dulled the colour, so I decided to underline it. As a happy coincidence, my Dad was getting rid of some shirts around the time that I was planning this project, and one of them was a really nice quality white one which was a bit worn on the collar but fine elsewhere, so that was cut up to use as underlining.


I'm really happy with how the jacket turned out. While my nephew may not necessarily understand the sewing, he definitely liked the tractors and wanted to try the jacket on straightaway. And my sister has already been stopped in town by someone who wanted to know where she bought the jacket, so I'm counting that as a success! I suppose that (scarily!) it won't be long until I need to start thinking about sewing Christmas presents - will you be making any gifts this year?

Wednesday, 5 October 2016

Knitting - Patons 3769 Classic Knits cardigan

Today it's time for a quick break from all the sewing to share my latest finished knitting project - a cardigan knit using Patons leaflet 3769.


The pattern leaflet has quite a few different options that you can combine to make just the style that you want - a cardigan or waistcoat, different body and sleeve lengths, a range of stitch patterns and lace trim options. In spite of all of those possibilities, I still went a bit off piste and although the cardigan I knitted is very close to the pattern, it's not exactly the same as any of the versions in the leaflet.


The main change I made was to knit a cardigan that is mid-way between the regular length and cropped length specified in the pattern. This has given me a cardi that's the perfect length for wearing with my customary fit and flare style dresses. 

I originally intended to use the purl stitch rib stitch pattern, but when I started knitting there didn't seem to be great stitch definition with the yarn that I was using and it all just looked a bit of a mess. So I ripped it all back, and switched to one of the lace patterns included in the leaflet.


At this point I should probably mention, in case you're thinking of using the pattern, that the lace stitch patterns are labelled the wrong way round in the photos. Thankfully, while I'm no expert by any stretch of the imagination, I've knit enough lace in the past that I worked that out before I started. 

I chose the clover lace for my second attempt, but when I started knitting it felt like the repeats of the lace pattern were too close together and that I'd end up with a cardigan that was more holes than yarn. I decided to rip back again and restart the same pattern, but adding two extra rows of stocking stitch between each sequence of lace. Thankfully it was third time lucky and I was happy with that stitch pattern. 


Another change I made was to knit the sleeves in plain stocking stitch instead of using the lace pattern. That's just a personal preference because I sometimes feel like when I'm wearing a cardi with lace sleeves, the holes in the lace somehow seem to funnel the air onto my arms and make my arms feel colder than they would without a cardi on, which sort of defeats the point really! Am I weird or does anyone else have that problem?!


The yarn I used is Bergere de France Sonora, the same yarn that I used for my last cardigan, but this time in the colour Vapeur. It's a cotton and acrylic mix, which I really like - I think the acrylic content makes it feel more hardwearing than the pure cotton yarns I've used in the past. It's nice to knit with and comfy to wear and, just to make it even better, I got a complete bargain when I bought this (I think because the colour might have been discontinued). 

In terms of sizing, the finished measurements that I wanted are right between the small and the medium from the pattern. When I knit my tension swatch, the width was fractionally larger than it should have been. I did some calculations and worked out that if I knit the small with my slightly different tension then it should turn out to be pretty much the exact size I wanted. Possibly a bit of a gamble, but my maths must have been accurate that day because the fit turned out just right. 


Thankfully, after making all of those changes along the way, I'm really happy with how this cardigan turned out. Its just the right length for wearing with my dresses, and is a colour that will get a lot of use in my wardrobe. It is a kind of summery cardigan, but it's also warm enough that it's still going to be worn a lot this autumn. Now it's time to cast on a more wintery cardi! Are you knitting anything at the moment?

Wednesday, 21 September 2016

Simplicity 1418 dress

This weekend just gone my brother got married. An occasion like that demands a new dress, don't you think? And obviously I had to make that dress. I knew I wanted to stick with my favoured fit and flare silhouette, but with some sort of feature to stand out from the dresses I wear on a daily basis. I looked through my pattern stash and eventually settled on Simplicity 1418.


This is a pattern that I got free with a magazine at some point and to be honest I'd forgotten I even owned it, but it was just what I wanted for this project. Simplicity 1418 is one of the Pattern Runway series, which has various bodice options and a pleated skirt. I decided to omit the back inserts and shoulder straps, and use the off-the-shoulder sleeves.


I made a toile of the bodice using a size 16 at the bust and grading to an 18 at the waist, and making my standard adjustment of adding an inch to the length. The fit was good, apart from when it came to the sleeves - they were huge! I took a large wedge out of the middle of the sleeve piece, which greatly improved things but there was still a bit of extra room so I slimmed them down again. I think in the end I took around 3 inches out of the sleeve, and adjusted the elastic and casing that help hold the sleeve in place by the same amount.


That meant I was ready to move on to creating the actual dress. I considered a whole range of fabric options, but the winner in the end was this lovely viscose and linen mix from Sew La Di Da. It's a really gorgeous fabric, and I think the large scale print helps to make it stand out from my everyday dresses.

It is quite a thin fabric so I decided to underline everything with white cotton lawn. I'm really happy I made that choice - not only does it ensure that the fabric is opaque, it also makes the colours look more vivid.


I cut everything out in a single layer to make it easier to get the print placement right. I wanted to make sure I had one of the groups of 3 poppies in the centre of the bodice, and then carry that on down through the skirt. The front bodice also has princess seams, and I matched the pattern up as closely as possible between the centre front and side front sections. I'm glad I put in the effort to do that - I think the bodice could have ended up looking a bit of a mess with this print otherwise.

+

The sewing process was all straightforward and the instructions were easy to follow. I decided to line the bodice instead of using the facings. I used the facings on my toile and there's absolutely nothing wrong with them, but I just prefer the clean finish of a lined bodice, especially for a dress like this. I also added 2 inches to the length of the skirt pieces just to make sure that it would be a nice elegant length.

To top it all off, I used some of the remnants of the fabric to make the simple flowers that you can hopefully just about see in my hair in these photos. The benefit of making your own outfit is that it's easy to make sure your accessories match because you can just use the same fabric!


 I really enjoyed wearing this dress - I was slightly concerned that the off-the-shoulder sleeves would annoy me, but they didn't at all. I think having the elastic underneath the sleeves really helps them to stay in place and stops the bodice from slipping. It's not going to be one of my most worn dresses because it is a bit special, but it is definitely one of my favourites. Now I just need someone else to get married so that I can wear it again!

Tuesday, 6 September 2016

Megan Nielsen Reef PJs

My summer pyjama selection has started to look a bit sorry for itself. Winter sleepwear has a regular annual replenishment in the form of cosy Christmas presents, but most of my warmer-weather PJs have been worn so much that they're verging on falling apart and really need replacing. I've considered various summer PJ patterns before, but none of them ever seemed quite right - apparently I'm quite picky in my loungewear requirements. Then Megan Nielsen released the Reef camisole and shorts set, which ticked all my boxes.


The camisole is cut on the bias, has a V neckline, a cross-over back yoke and a high-low hem. The shorts come in two versions - one with pockets and a curved hem, and a second shorter version with no pocket and a straight hem. I made the first version, but omitted the pockets because I wasn't sure how they'd work with this fabric and, much though I love pockets in my daytime clothes, I didn't think I'd use them much in pyjamas.


One of the first things to point out about my version is that I did something a bit wrong when constructing the back - mine doesn't cross over as much as it should. I think I must have matched up the wrong notches or something, but everything seemed to be working out fine so I only noticed once I was a bit further down the line. Being as they're pyjamas, and so it wouldn't matter if the fit was a bit off, I decided just to plough on and not go back and unpick things. Happily, the camisole still fits nicely, although I'll make sure that I get it right next time because I do like the cross-over yoke.


I would say that this mistake is entirely down to me, and in no way a reflection of the instructions or the pattern. I'll openly admit that I was reading the instructions pretty quickly as I went along. When you're actually paying attention to them, the instructions are perfectly clear and easy to follow, with helpful added tips along the way like block fusing the interfacing instead of cutting out the interfacing and fabric pieces separately and then fusing afterwards.


In terms of sizing, for the camisole I graded between a medium at the bust and a large at the waist. Due to the loose shape, I could probably have got away with making the whole camisole in a medium, but I wanted to stay true to the breezy, flowing shape intended in the pattern. I made the shorts in a straight size large, and they fit nicely.

I'd say that both the camisole and the shorts have just the right amount of ease to make them nice and comfortable (as you want pyjamas to be), whilst not being so baggy that they become sack-like and unflattering.


The fabric I used is a pretty viscose that I picked up on a whistle stop tour through the rag market in Birmingham. My uni friends (none of whom are into sewing) and I have a habit of converging on Birmingham to meet up for the day from our various areas of the country, and I always seem to arrive before everyone else, which really just "forces" me to go and look at fabric while I'm waiting. It's a tough old life, isn't it?!

Anyway, this is lovely and drapey and was only £2 a metre. Perfect for trying this pattern out for the first time. I'm happy to make toiles for actual clothes, but it would seem a bit over-the-top for pyjamas to me, but at the same time I wouldn't want to commit expensive fabric to a pattern and end up disappointed. This way, it wouldn't be a disaster if things went a bit wrong. Thankfully that didn't happen!


I really love my Reef set. For me, they're pretty perfect as summer pyjamas - small enough to be nice and cool to wear, whilst still being covered up enough for me to be able to wander round my flat in them quite happily without having to worry about the fact that my neighbours can see right into most of my windows. The only thing I regret about this is that I didn't get round to sewing them earlier in the summer. I think I probably won't fit in sewing a second set this year, but another Reef set will definitely be high on my sewing list for next summer.