Showing posts with label Helen's Closet. Show all posts

Wednesday, 24 April 2024

Helen's Closet Wildwood Jacket

This project has been a long time coming. It's something I've fancied making for a while but always felt intimidated by, once I got up the courage to make it the project itself took some time, and then I had to wait ages to get photos of it because the weather kept being too rainy. At long last, I'm happy to share my Helen's Closet Wildwood jacket!

The Wildwood is a quilted jacket or vest/gilet that comes in high hip, low hip and mid thigh lengths. It has overlapping shoulder and side seams, and the edges are bound with bias tape. The pattern also includes patch pockets, and the jacket/vest closes with front snaps.

The pattern covers bust sizes from 31 to 60" and hip measurements from 33 to 62". 

If, like me, you find the idea of making a quilted jacket appealing but a bit daunting, I'd definitely recommend the Wildwood pattern. 

The instructions are really clear and detailed. In addition to telling you how to make the actual jacket/vest, they also guide you through making and attaching bias binding, quilting your pieces, choosing the stitching pattern for quilting and pre-shrinking your pieces. 

They answered all of the questions that I had in my mind about making the jacket and made me confident that I could tackle the project successfully.

Sewing the jacket itself is actually relatively straightforward, and the overlapped shoulder and side seams are helpful if you need to adjust your fit a bit. Binding all the outside edges and the interior seams does take a bit of time, but it's not difficult. 

I made sewing my Wildwood jacket more time consuming because I pieced the patchwork for the outside of my jacket rather than just using a fabric. I was lucky enough to win the fabric I used in a fat quarter bundle from Sew Scrumptious a year or two ago. They're Liberty quilting cottons from The Artist's Home collection. As they're such pretty prints, I took my time deciding what to use them for - they were almost turned into a bag or a quilt, but I'm glad that I went down the quilted jacket route in the end.

The pieces I cut for my patchwork were 5.25" x 4.75" (so ended up 4.75" x 4.25" once sewn) - a slightly random size that I chose to make maximum use of the fat quarters. I had 11 fat quarters and that gave me plenty of fabric; I have small sections left of each of them. 

Once I'd pieced together my outer "fabric", I had to decide how to quilt the pieces. I debated a couple of options, and eventually decided to keep things simple and stitched horizontal lines one inch from each horizontal seam. Thankfully that seems to have worked out nicely. 

I bought my batting from 1st for Fabrics, and the lining fabric that I used is a vintage Laura Ashley cotton that I've had for so long that I can't remember where it came from!

The next decision to make was about the binding. I wanted something that would stand out whilst also complementing all the pretty prints in my quilted pieces. In the end, I plumped for a red cotton with small white spots, and made my own bias binding. I'm happy with that choice - it's just the look I was after.

I made the possibly controversial choice to omit the pockets from the jacket. I like pockets as much as the next person, but I felt like my jacket had enough going on as it was and that adding patch pockets might be taking things one step too far. I also decided to use sew on snap fasteners instead of setting in snaps - I've had some disasters with snaps before, and I'd invested so much time in the jacket by that point that I didn't want to risk that happening to this project! Sewing on snaps seemed far less risky, and they work fine.

I used the size recommended for my measurements (blending from a 14 at the bust to a 16 at the hips) and I'm happy with that. There is a bit of ease in the jacket and some people might like it slightly more fitted, but I'd prefer to have it as it is to allow for wearing layers underneath. 

I used the high hip view of the pattern, and it's the perfect length for me - long enough to cover my waist if I'm wearing separates, but short enough to look good with dresses too. 

All in all, in case it's not obvious already, I'm so proud of how my Wildwood turned out! It wasn't a quick project, but I really enjoyed working on it, and my jacked turned out just how I hoped it would. I'd heartily recommend the pattern if you're looking for a quilted jacket/vest. And I'm very tempted to make another version - that's always a good verdict on a pattern, isn't it?!

Thursday, 12 August 2021

Helen's Closet Reynolds Dress Review

As I mentioned in my previous post, having finished my first version of the Helen's Closet Reynolds pattern in the shape of the top for my Ankara two-piece set, I liked it so much that I almost immediately started working on a Reynolds dress. Thankfully the dress is just as good as the top!
The Reynolds top and dress is described as "your go-to summer garment", and I would definitely agree with that. It's a pull-on top or dress (in either knee or full length) with wide shoulder straps and, for the dress versions at least, in-seam pockets and a side slit with mitred corners at the hem. It comes with 0-22 (B-cup) and 12-34 (D-cup) size ranges, which together cover hip measurements from 33 to 62 inches.

I was initially drawn to the Reynolds pattern because it seemed like it would be a great dress to throw on in hot weather. I liked the fact that it has a loose, relaxed fit but with the added bonus that there's shaping in the side and centre back seams, meaning that it's not boxy or baggy.

For my Reynolds dress and top I used the smaller B-cup size range and made a 12 at the bust blending out to a 16 at the hips (for my top, I made a 12 at the bust blending out to a 14 at the hem). They're pretty much the sizes recommended for my measurements (my hips are actually between a 14 and 16 but I'd rather have more room at the hips than less!). 

I'm only including photos of my dress in this post - if you want to see my top, there are plenty of photos in my post from last week.

I lengthened the top by 1 inch, and the dress by 1 inch above the waist and 2 inches in the skirt section - this is fairly standard for me, and is only to be expected as I'm about 3 inches taller than the height the pattern is drafted for.

Sewing both the dress and the top was no trouble at all. With no closures, they're fairly simple garments to sew and the instructions are very detailed and full of helpful tips to make the process even easier. The sewing level is rated is being advanced beginner, which I think is fair - there's nothing particularly complicated about the pattern, but there are a couple of steps that might be a bit challenging for an absolute beginner. 

There are some nice touches in the way that the pattern is sewn, such as turning the bottom of the facing under and topstitching around the facing for a clean finish and the side slit with mitred corners at the hem.

The fabric I used for my dress is a cotton sateen that I got from Sew Me Sunshine last year (unsurprisingly, it's no longer available). It's probably on the heavier side of the fabrics recommended for Reynolds, and it has slight stretch whereas non-stretch fabrics are called for, but it is only slight stretch and the fabric has reasonably good drape so I thought it should work out OK. Thankfully I think I was right. 

It's worth noting that as my print was non-directional, I was able to cut the dress out of just over 1.5 metres of 150 cm wide fabric, which is less than suggested in the instructions.

I'm really pleased with how my Reynolds top and dress have turned out, and think I'll be wearing both of them a lot. It's the kind of garment that allows fabric to shine so could look very different depending on what print or fabric base you used. I can definitely see myself using this pattern again!

Wednesday, 4 August 2021

Ankara Reynolds x Peppermint Loungewear Set

Hot on the heels of the coordinating set that I shared last week, here's another! Although I think we can agree that this week's combination of Ankara fabric, a strappy top and less swishy trousers have quite a different feel about them to last week's blue viscose creation.

I've been wanting to try sewing with Ankara/African wax print fabric for a while now and was finally given the push to order some by Ankara appreciation week, which was hosted on Instagram recently by Lena King and Juliet Uzor. Thanks to their inspiration, I found this lovely print at Ankara Shop - I really liked the colours and the fact that the print was bold but slightly smaller scale than some other Ankara fabrics. 

I wasn't disappointed when it arrived! The colours are just what I wanted, and I love the fact that the background colour is dark navy rather than black. It's quite crisp and doesn't have a lot of drape so you need to consider that when choosing patterns to make with it, but unsurprisingly for cotton it's very easy to work with so once you've picked the right pattern the sewing itself is plain sailing.

When it came to picking patterns, I knew that this time I wanted to use the new Helen's Closet Reynolds as the top. I was fairly confident that the cropped top version of Reynolds would work well with this crisp cotton, and thankfully I was proved right.

I like the top so much that I'm actually making a Reynolds dress this week so I'll write another post talking about the pattern in more detail once that is finished. If you want the abbreviated verdict though - it's a great pattern with good instructions and the sizing seems accurate. More to come in the not too distant future hopefully!

As for the trousers, I originally intended to make the culottes that are featured in the book Sewing with African Wax Print Fabric by Adaku Parker, but when I came to trace them out it struck me that the overall shape of the pattern is actually fairly similar to the trousers from the Peppermint Loungewear set which I made recently. Being as I had that pattern traced out already and knew that it fit me, it seemed sensible just to use that. So I'm possibly taking the concept of secret pyjamas a bit too far by wearing a pattern that's intended to be loungewear as actual trousers, but that really doesn't bother me!

I think that the finished set works really well together - it's definitely a good combination of fabric and patterns. I also really enjoyed working with the Ankara fabric, and there's still a fair amount of the 6 yard precut that I bought left so I'm looking forward to finding something to sew with that. And I'll definitely be using more Ankara fabric in future!

Tuesday, 10 November 2020

Helen's Closet Yanta Overalls

Over the last few months I've been eyeing up various dungaree patterns and toying with the idea of making some for myself. I considered a range of options, but kept coming back to the Yanta overalls by Helen's Closet and eventually I decided that I just needed to give the pattern a go. Spoiler alert: I'm so glad that I did!

The Yanta overalls are a fairly popular pattern in the online sewing community but in case you haven't come across them before, they're a laid-back style with a relaxed fit. The straps are fastened to the front bib using buttons, they have a V-back, pointed front bib pocket, and front and back patch pockets. The pattern also has shorts or trouser views, and an optional side seam zip.

One of the things that eventually made me decide on the Yanta overalls was that I wanted the more relaxed fit of overalls-style dungarees, rather than the more fitted styles that are pretty much trousers with a bib attached (if that makes any sense?!). For me, this is definitely a project where comfort takes priority!

Sewing my Yanta overalls was a really enjoyable experience. The instructions are very thorough and help you to achieve a nice finish. I liked the fact that they include directions for topstitching most of the main seams, which I think helps to make the dungarees look more professional and will also make them more sturdy. 

The only point where I deviated slightly from the instructions was when I was inserting the invisible zip. There's nothing wrong with the instructions - they have you sew the seam and then insert the zip, whereas I've personally always achieved better results with invisible zips when I insert the zip before sewing the rest of the seam so that's what I did here too.

In terms of sizing, I went a bit rogue to get the fit that I personally wanted. My measurements (B 38", W 32", H 42") put me in a 12 bust, and 14 waist/hips. While I did want a relaxed fit, I didn't want the fit to be quite as loose as intended at the waist (I thought that might get draughty!), so I blended between sizes and made a 12 at the bust, blending in to a 10 at the waist and back out to a 14 at the hip. That meant I definitely needed to add the optional zip (you might not need it if making a straight size), but that doesn't bother me at all.

Other than that, the only changes I made were to lengthen the section between the waist and the crotch by an inch and to lengthen the legs by 2 inches. I also lengthened the straps by about an inch. Lengthening patterns is standard for me (I'm 5'9"), and also the pattern intends the trouser length to be slightly cropped, but I wanted them to be full length.

The fabric that I used is an 8oz washed denim from Threadquarters (unfortunately now it looks like it's sold out apart from a remnant). It's a lovely quality fabric and exactly what I wanted for these dungarees  - enough weight to make them appropriate for autumn/winter, but without being at all stiff. I also intentionally chose to use a dark blue denim because the colour will go with just about any top in my wardrobe so I'll have lots of outfit options.

While I wanted the outside of the dungarees to be neutral and practical, I decided to give myself pretty insides and used a contrast daisy print cotton for the facings (partly for aesthetic reasons and partly to reduce bulk) and added a lovely colourful Pink Coat Club label (also now sold out - sorry! But Joy has lots of other great designs).

I also couldn't stop myself from adding a bit of colour on the outside. I wasn't sure what buttons I wanted when I went shopping (thankfully I got that in before the new lockdown in England started), but then I found these unusual metal buttons with an elongated slot style hole rather than the usual small round ones, and I decided they'd look good if I attached them using a rainbow of thread. I slightly regretted that decision when it came to sewing them on and I realised I'd be effectively be doing the same amount of sewing as if I was using 12 buttons rather than 2 (6 threads each on both buttons), but I think it was worth it for the effect.

I was pretty pleased with my Yanta Overalls when I finished them, but now that I've worn them, I love them! As you can tell by the fact that I only finished them a couple of days ago and I've already worn them twice. Like other Helen's Closet patterns that I've made, the pattern was great to sew too. I'm now wondering whether I need a second, more colourful version! What colour would you go for?

Thursday, 24 September 2020

Helen's Closet Arden Pants

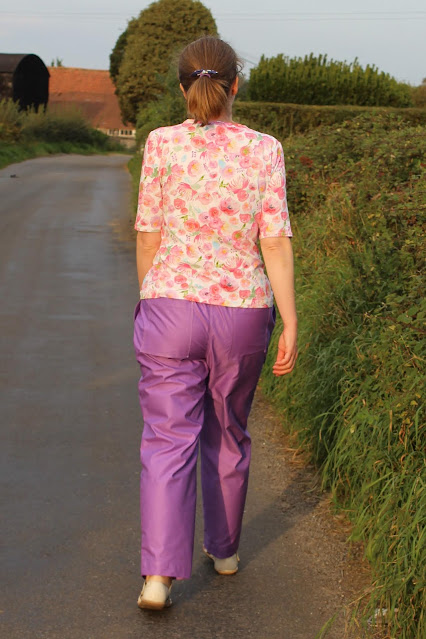
Welcome to the latest instalment in my ongoing quest to gradually add more trousers to my wardrobe! Today's project came about at least partly thanks to my mum, who saw some photos of the pattern when I was scrolling through Instagram and rather unsubtly encouraged me to buy it so I could try it out for myself and then make a version for her (I wouldn't listen to most people telling me to do that, but my mum's allowed to!). Here are my Helen's Closet Arden pants....

The Arden pants (which I will henceforth refer to as trousers because to me pants are undergarments!) are everyday high-waisted trousers with a classic elastic waist, as well as front and back pockets. The pattern also features views with an elasticated jogger style cuff in two different widths, and the option to topstitch the waistband and add a drawstring. 

I really enjoyed sewing my Arden trousers. The instructions are extremely thorough and easy to follow. They include lots of helpful tips such as pre-pressing the hems before sewing up the side seams of the legs - as the pattern itself points out, it's much easier to do this with a flat piece of fabric than a tube. 

The instructions also have you sew a double line of topstitching at the pocket opening, along the crotch seam and the inside leg, and add bar tacks at the stress points of the pockets. These are fairly simple steps, but aren't included in a lot of patterns and I think they really help to make the finished trousers look more professional.

I debated a bit about what size to use for this pattern. The instructions recommend that you pick a size based on your hip measurement - mine is slightly over 42" (a 14 for this pattern), but definitely below 44" (16). I looked at the finished garment measurements and thought that the hips might end up a bit snugger than I would like if I made a 14 so I went for the 16. I made a toile that turned out so wearable that I finished it off properly to use as pyjama shorts (above) - bonus! The only alteration I needed to make was to lengthen the legs by 2" (I'm about 5'9"). 

I'm pretty happy with how they turned out - I possibly could have them slightly slimmer through the legs, but I'm not sure that I want to. They're really comfy as they are and look nice in the flesh, although you might have to take my word for that because I don't think they photograph particularly well.

That's possibly partly due to my fabric. Don't get me wrong, there's absolutely nothing wrong with the fabric itself - it's a lovely quality cotton twill from Cloth Spot (sadly it no longer seems to be in stock) - but it has a very slight sheen in some lights that my camera seems to have emphasized. It's also on the crisper side of the recommended fabrics for this pattern so wrinkles more, and more prominently, than a drapier fabric would.

How they look in real life is more important than photos though, so that doesn't bother me. It also feels like the fabric will soften up quite a bit with wear. I'm happy with how my Arden trousers turned out, and it's just as well I enjoyed sewing them because my mum has already put in her request for a pair of her own!

Tuesday, 16 January 2018

Winslow culottes & Gable top

How's 2018 going for you so far? It's not been too shabby for me, and I've got a couple of projects finished and ready to share with you today. I decided to kick off this year's sewing with a couple of tried and tested patterns to get things off to a guaranteed good start. So here are my latest versions of the Jennifer Lauren Gable top and the Helen's Closet Winslow culottes...


I've really enjoyed wearing Gable tops and dresses this autumn/winter, which in part was prompted by spending a week wearing them for OWOP at the end of last year, and I knew that another one would definitely fit in well to my wardrobe. This one is made using some lovely Cotton and Steel jersey that I bought from Sew Me Sunshine. It's on the pricey side for my fabric buying budget, but sometimes it's worth splashing out for something that you know you're going to love sewing and wearing. 

Gable top worn with my Freja dress and a Pink Coat Club Seamstress pin

I haven't made any changes since I sewed my first Gable top, so all the details in that blog post still apply (I've just noticed that I said in that post that I might slim down the sleeves - I haven't subsequently felt any need to do that!).


Now onto the Winslow culottes (and I'm sorry, I had to cover the Gable top up with my purple cardigan - it was just too chilly without it!). My original cord Winslow culottes were a bit of an experiment, but happily that experiment had a very successful outcome and I wear them fairly frequently in autumn/winter. One of the main benefits being that culottes are much less prone to (although not always immune from!) blowing up in the wind than all my full skirts!

This version is sewn using some beautiful aqua babycord from SewLoco (a fairly new UK-based online fabric shop - check out the lovely fabrics that Lucy has available if you haven't already!).


I made a slight change to the pattern for this version of the Winslow culottes. After the problems I had with the invisible zip on my first cord Winslows, this time I decided to split the waistband piece into two (in the pattern, the waistband is folded over on itself to create the facing). I then cut the waistband itself in the babycord and cut the second waistband piece in some Tana lawn (left over from making my Vogue 9239 dress last summer) to use as the facing. 


Doing this reduced the bulk at the waistband seam, and meant that using an invisible zip was no problem. While there's nothing wrong with the regular zip I used in my navy culottes to get round the waistband bulk problem, I do prefer the look of the invisible zip that I've used here.


So all in all, I think I can safely say that this year's sewing has started successfully. I know that both my Gable top and my Winslow culottes will be worn a lot, and it's an added bonus that they look pretty good together! How's your sewing been going lately?

Thursday, 24 November 2016

Winslow & Susie - the autumn edit

Back in August, I wrote a post all about my first pair of Helen's Closet Winslow culottes and wore them with a scoop neck hack of the Sew Over It Susie blouse. Now a few months have gone past, and I'm back again with a more autumnal version of the same outfit.


I really enjoyed wearing my viscose Winslow culottes this summer, so I was keen to try making another version for the cooler weather. While the viscose was lovely when it was hot, I thought some made with a thicker fabric would be nice, and being as I would be wearing them with tights now I also fancied a pair that were a bit shorter than my original version.


Happily for me, I had a piece of navy needlecord sitting in my stash that I found in a charity shop a while back. I always see people online who've found great fabric in charity shops but, even though I'm a frequent charity shop rummager, this was the first time I'd found any actual fabric (as opposed to duvet covers/sheets etc., which I often buy to use for toiles). I had no idea what I would use it for at the time but, at £4 for over 2 metres, I wasn't going to leave it behind.


When the idea of making another pair of Winslow culottes came into my mind, the needlecord seemed to be the perfect candidate. While I was keen to give culottes and tights a try, I wasn't 100% convinced that I would like the look on me so using the charity shop corduroy meant that I wasn't putting expensive fabric at risk. And navy goes with everything (in my wardrobe anyway!), so I shouldn't be short of tops to wear with them.


I made up view B (above the knee) in a size 14 with no alterations, and I'm really happy with how they turned out in the end, although I did have a bit of a hiccup along the way.

I originally used an invisible zip as recommended in the pattern and unfortunately it didn't really cooperate with the needlecord and the thickness it created at the waistband. Zipping them up was a bit tricky but just about OK when I wasn't wearing the culottes, but when I had them on I just couldn't get the zip over the waistband. I think if I'd had someone else around, they'd have been able to do them up for me, but being as I live on my own that wouldn't be a practical long-term solution! So I took the zip out and replaced it with a regular centred zip instead. That wasn't the most fun process being as I'd already trimmed my seam allowances, but I got there in the end.


As I said before, the top is another scoop neck hack of the Sew Over It Susie blouse - which is fast becoming a favourite top pattern for me (my first of these hacks is here).

This time I used the three-quarter sleeves to make it slightly more seasonal. Only slightly though - it definitely wasn't warm enough to be wearing it outside without a cardigan and/or coat when I was taking these photos, and I did get some very odd looks from passers-by.


The fabric is a lovely Liberty lawn which I picked up for a bargain price in the Fabric Rehab closing down sale. It's sad that they're closing - I haven't bought huge amounts of fabric from them, but I've always been really happy with any purchases that I have made. I think there's still time to pick up a bargain in their sale if you're interested...


I wore this outfit (with added cardigan and coat!) last weekend, and I really liked it. The culottes are really comfy, and it turns out I quite like how they look with tights. So much so that I think I might need to make another pair in the not too distant future!