Tuesday, 7 June 2022

Waves and Wild Kinjarling Dress Sewing Pattern Review

It's been a while since I sewed a new favourite dress, but I think that the project I have to share with you today may be just that! Here's my Waves & Wild Kinjarling dress...

The Kinjarling is a relaxed pull-on style dress with short grown-on sleeves. It has three length options (below the knee, calf and full length), two necklines (round or soft V-neck) that can be finished with either a facing or a binding, in-seam or hip pockets, and two different optional waist ties.

I used the round neck (with the facing), calf length skirt, in-seam pockets and no waist ties.

The pattern comes in bust sizes from 28" to 57" and hip measurements from 33" to 63", and there are separate full bust bodice pattern pieces.

The pattern is rated as being for intermediate level sewists, but I think adventurous beginners would be able to tackle this pattern too - there aren't any fastenings, you don't have to set in sleeves and there's really nothing particularly tricky involved. I think it would also be relatively easy to get a good fit because of the relaxed style.

The instructions have a good level of detail and I found them easy to follow where I used them. I did deviate from the instructions as they have you sew the whole front and whole back and then join them down the side seams to form the dress, whereas I sewed the whole bodice and whole skirt and then joined them at the waist. I don't think there's anything wrong with the method from the instructions, I just personally prefer the process I used.

The instructions have you use French seams on all the seams apart from the waist. I do like French seams because they give you a really nice finish on the inside of a garment, but with the fabric I used I found that the seams around the pockets ended up a bit bulky so if I make this dress again (a very definite possibility!), I'd probably just use French seams on the bodice and use regular seams for the skirt.

I didn't have any problems making my Kinjarling - it was a nice relaxing sewing process!

The size recommended for my measurements (currently bust 38.5", waist 33", hips 43") is L and that's the size I made. The only adjustment I made was to lengthen the bodice by 1.5", which is a normal adjustment for me (I'm 5'9"). I think the fit is good - it's relaxed as intended (and as needed being as there are no fastenings), but it's not too oversized so doesn't feel at all baggy or shapeless. 
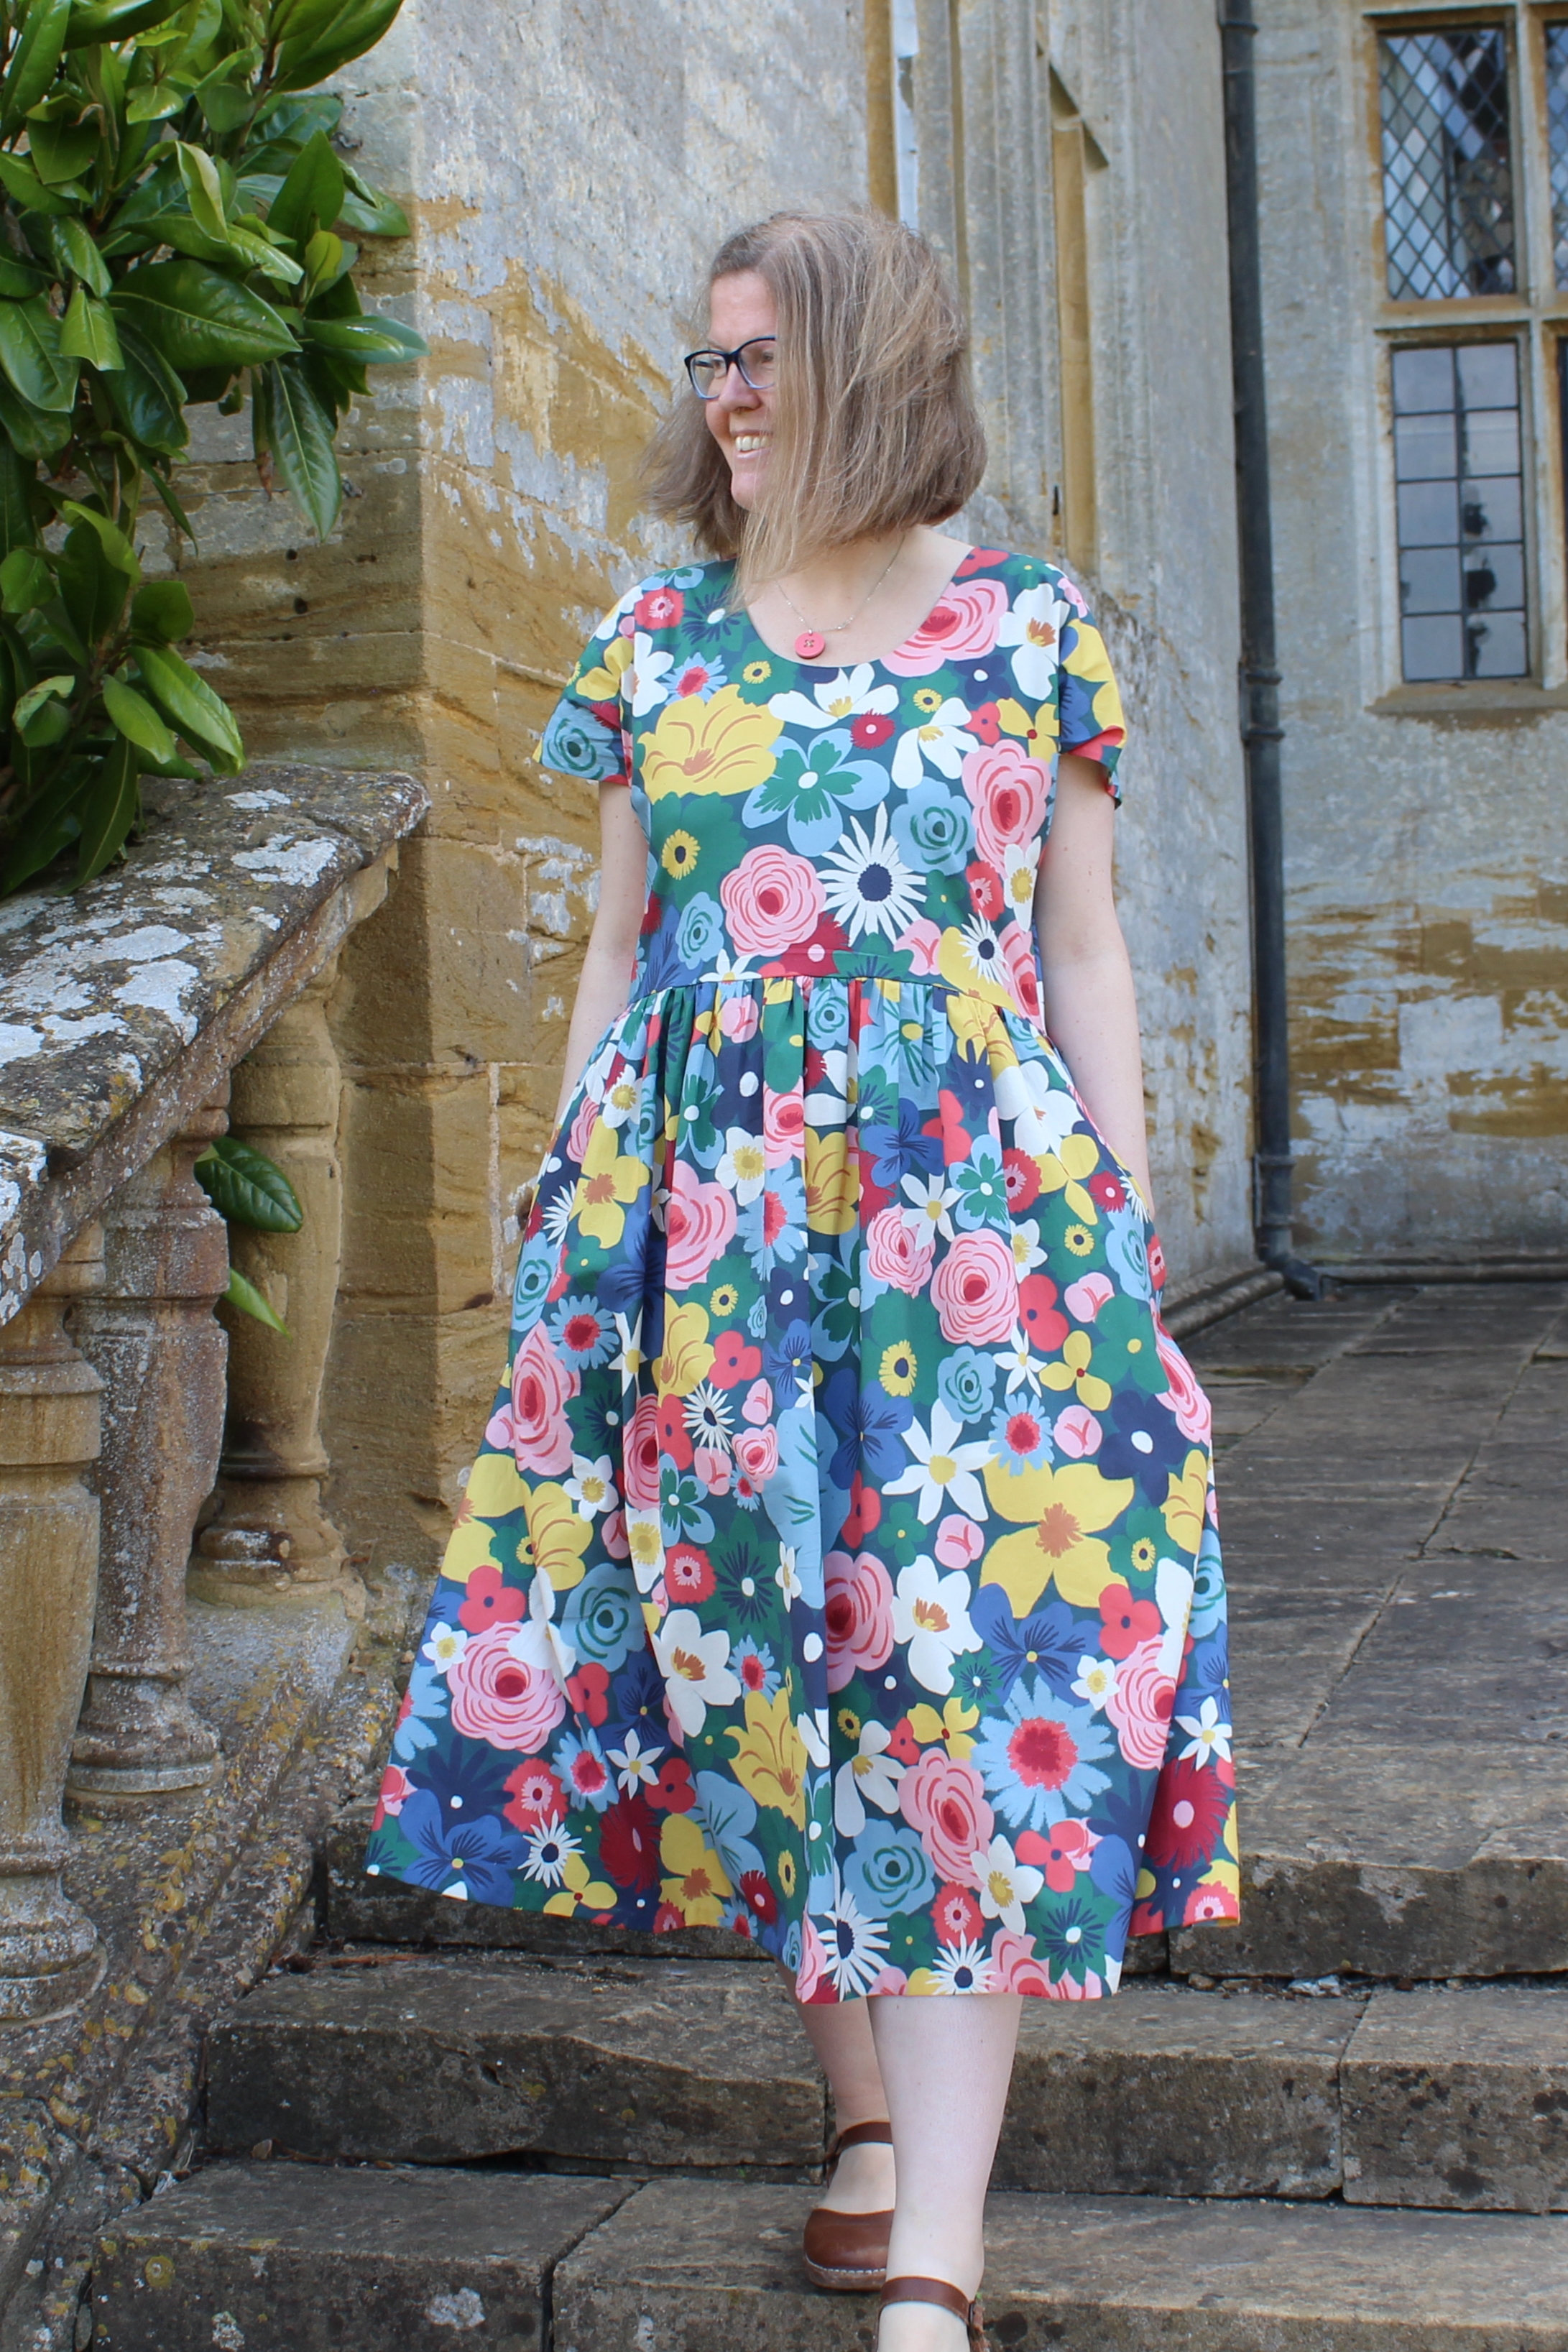
The fabric that I used for my Kinjarling dress is a Nerida Hansen cotton that I bought a little while ago from a shop that has since closed. I've been very tempted to try various Nerida Hansen fabrics for a while as they're generally great prints, but they're not cheap! I managed to pick this one up at almost 50% off, and I'm glad I finally got to give the fabric a try. It's an excellent quality cotton and the print really is lovely. 

The Kinjarling is a great pattern for showing off a statement fabric like this as there aren't too many seams to break up the print.

As you may have guessed, I'm quite a fan of my Kinjarling dress. It was easy and fun to sew and it feels lovely to wear. On its first outing it got a number of compliments from strangers and that's always a good sign, isn't it?! Something tells me this might be the first of many versions that I make of this pattern!

Wednesday, 20 April 2022

Emporia Patterns Cassie Dress

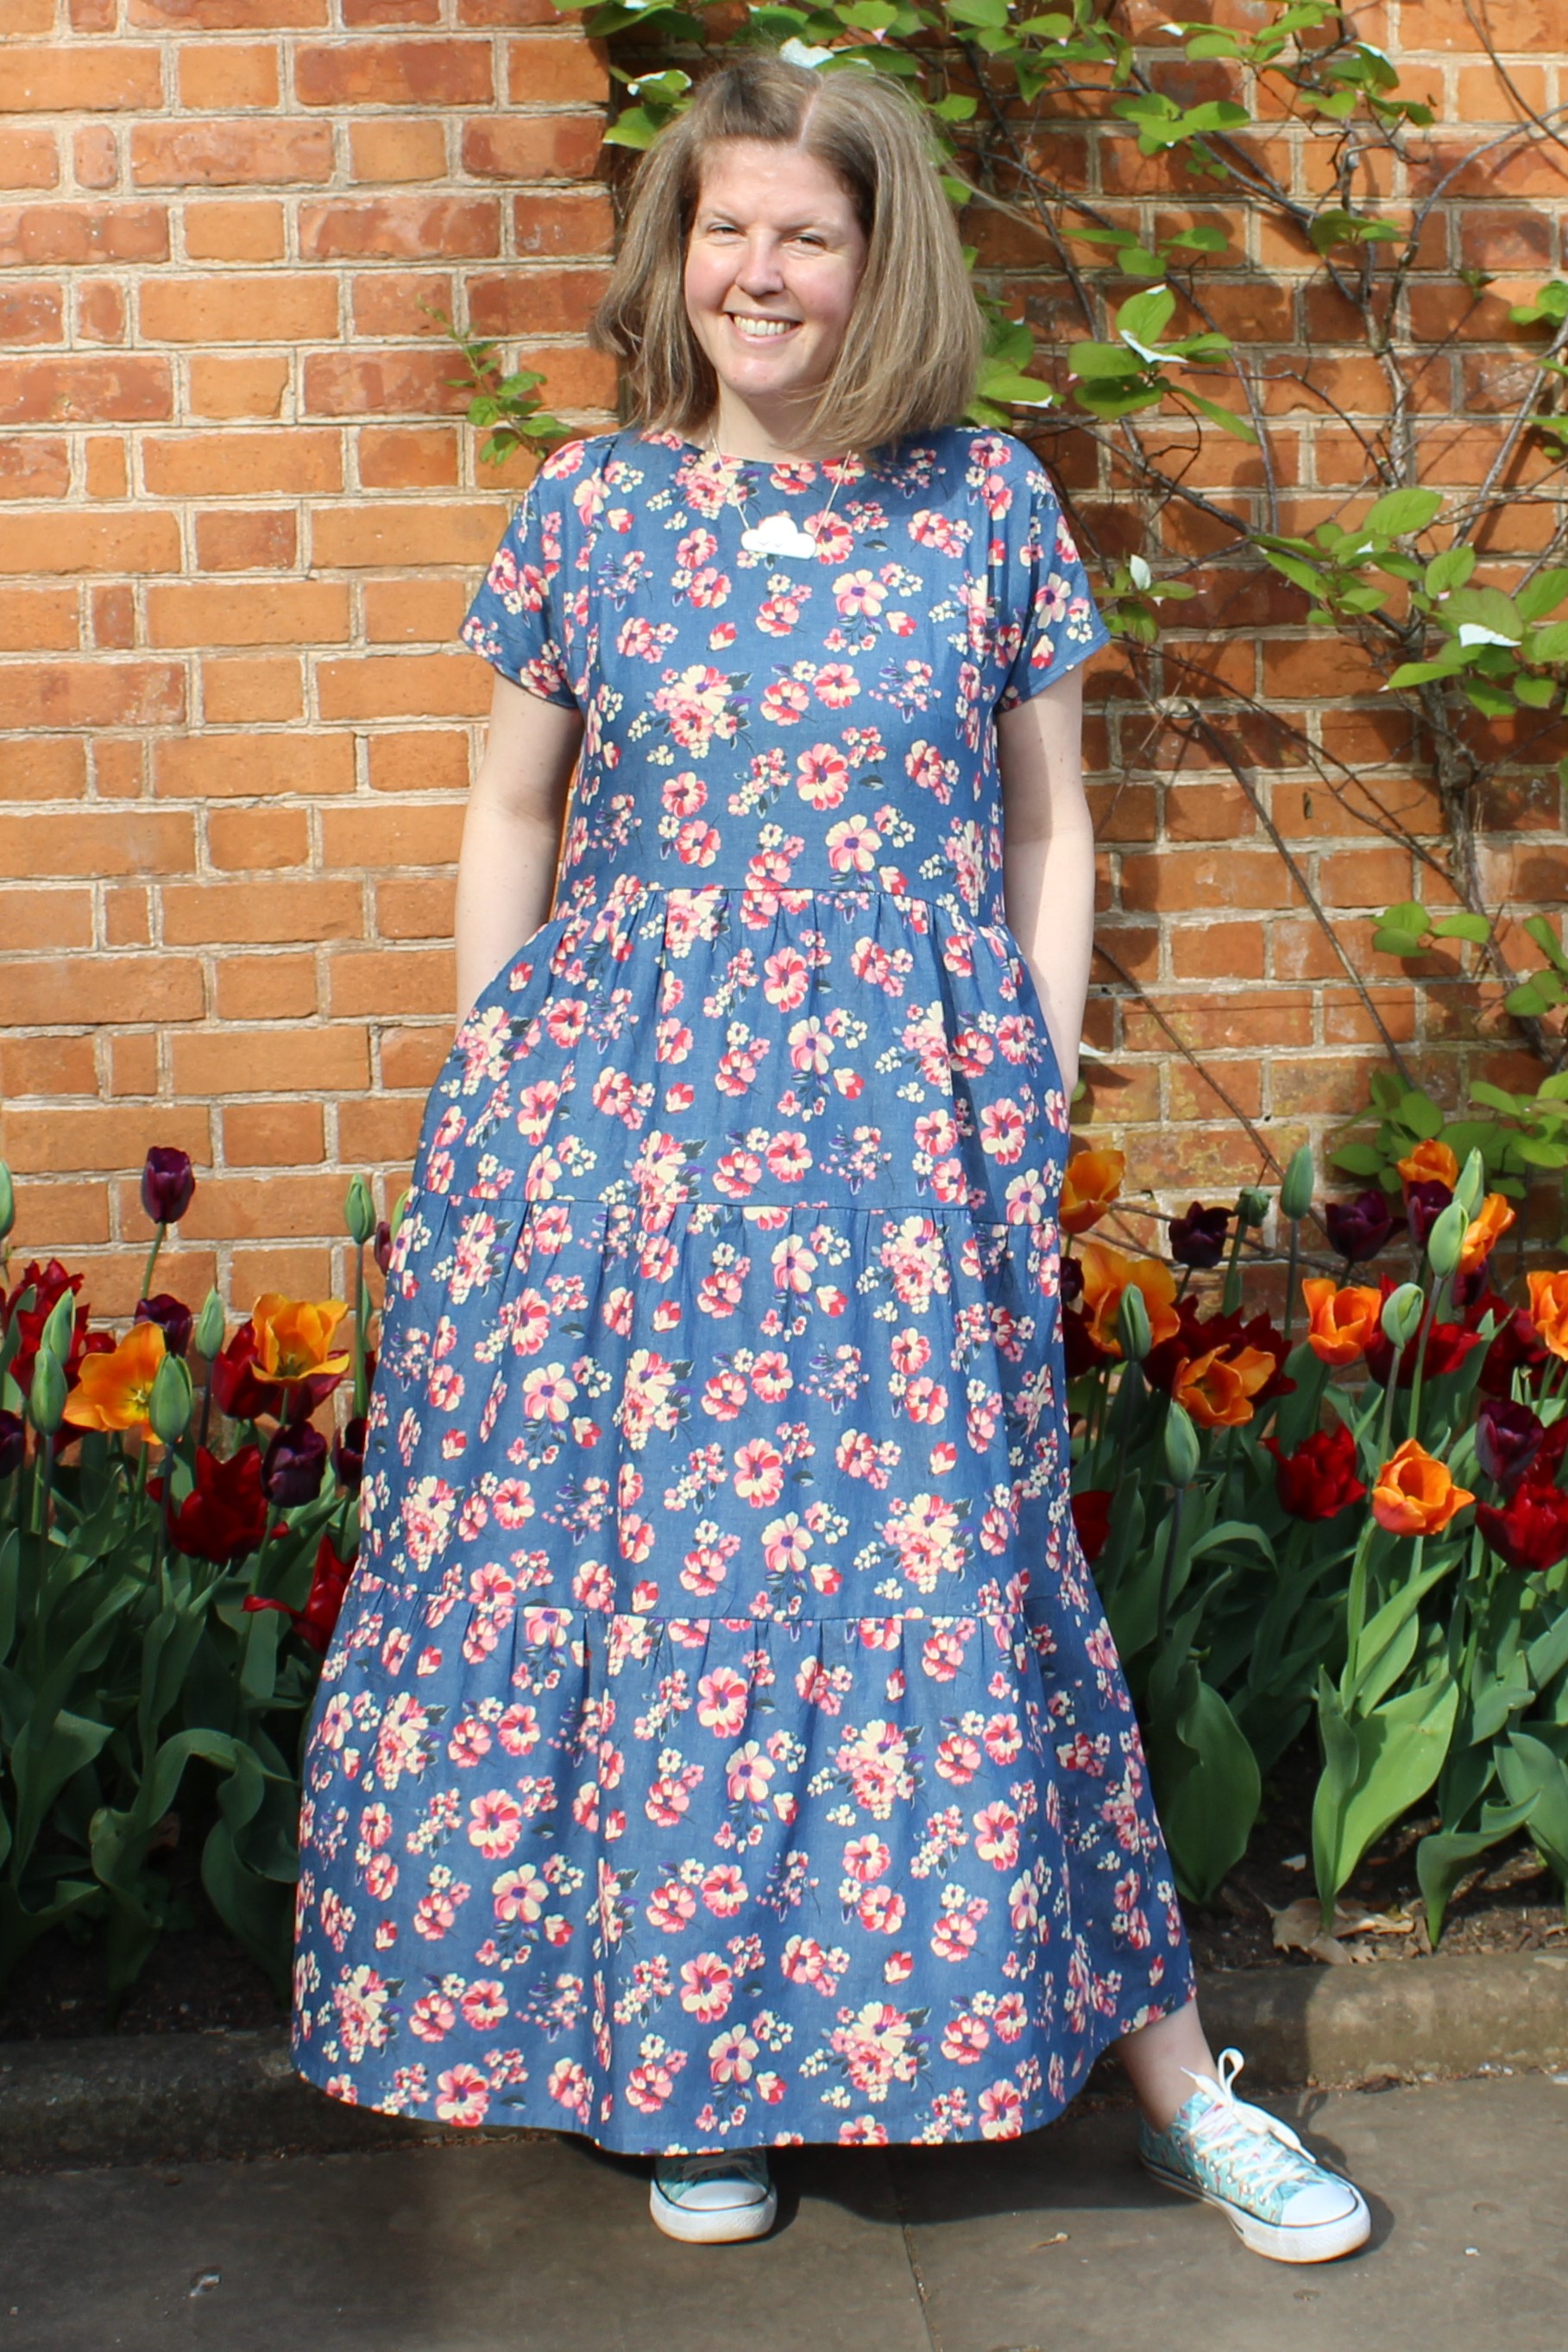
Here in the UK, we've just enjoyed a beautifully sunny Easter bank holiday weekend and that gave me the opportunity to wear my newly finished Emporia Patterns Cassie dress for the first time.

Cassie is a loose-fitting dress with options for a t-shirt style bodice with grown-on short sleeves, or a tie strap bodice. It has a gathered skirt that can be made with two tiers for a roughly knee-length style or three tiers for a full-length maxi dress. It's a pull-on dress with no fastenings, so it's a fairly simple project.

It's available in finished bust measurements up to 49" (tie strap bodice) or 50.5" (t-shirt bodice).

The instructions for the dress seem to be fairly easy to follow, although I have to admit that I ignored them and did my own thing. The instructions have you sew the entire front and entire back of the dress, then join the front to the back at the shoulders and all down the side seams. I decided I'd rather construct the bodice and the skirt separately and then join them together. I don't know that either method is necessarily better, the method I used is just what I'm more familiar with doing.

One thing I would recommend is to stay-stitch the neckline - this isn't mentioned in the instructions, but it will help to stop the neckline stretching out, particularly as this ends up being sewn as one of the last steps if you follow the instructions. I also interfaced the neckline facing, which isn't mentioned in the instructions. 

Personally, I also always find it better to sew two or even three lines of gathering stitches - the instructions only tell you to sew one.

I thought that the pattern/instructions were a bit lacking when it came to the measurements. They only give the finished bust measurements, with no body measurements at all and no waist/hip finished measurements. To some extent this isn't a problem because the waist and hip are loose-fitting so the measurements aren't crucial here. However, I think it would be beneficial if some guidance were given on how much ease you should aim for at the bust, and personally I would have found some extra measurements helpful.

My bust measurement is 38" and I made the size 16 (which has a finished bust measurement of 41"). 

I also made a couple of fitting adjustments. I lengthened the bodice by 2", which is fairly standard for me (I'm 5'9"). I also added two waist darts to the back bodice - when I made a toile there seemed to be too much fabric at the back compared with the front and the darts helped to fix that. I think they removed a total of about 4cm from the back waist.

As you may have noticed from the photos, I also added pockets. Because pockets are important!

The fabric that I used for my dress is a lightweight denim/chambray from Croft Mill. It's a pretty print and a really nice quality, especially for the price (£7.50 per metre). I think it works fine for this pattern, although I think I might prefer the dress in a fabric with slightly more drape (that's nobody's fault but my own!). 

Overall, I'd say that I like my Cassie dress but I don't love it - not every dress can be a favourite after all. Similarly, I think that the pattern is alright but it could be better. At the end of the day though, it's a really comfy dress and I like the floral print so it'll definitely get plenty of wear - not a roaring success, but definitely not a failure either!

Wednesday, 6 April 2022

Closet Core Patterns Core T-shirt

When you finish sewing a pattern for the first time and immediately cut out a second version, that's a fairly good verdict isn't it? That's what I've just done with the Core t-shirt, a free pattern from Closet Core Patterns.

The Core t-shirt is a classic crew neck t-shirt. It has a slightly boxy silhouette and comes in two lengths (semi-cropped and hip length) with two sleeve options (short or three-quarter), as well as optional features of a patch pocket and a back neck and shoulder binding. For both of my versions, I've used the semi-cropped length with the short sleeves and added the shoulder/neckline binding. 

It comes in two size ranges - 0 to 20 (full bust 31" to 46") and 14 to 32 (full bust 42" to 60"). 

The pattern was fun to sew. The instructions are really detailed and I found them easy to follow. I have made a fair few t-shirts before so was familiar with a lot of the steps, but the neckline binding was new to me and that was also no problem. You do need to be precise and take your time with that step, but as long as you follow the instructions you shouldn't have any trouble.

The binding is actually one of my favourite things about the pattern - it gives a really neat finish to the neckline, and as a bonus is a perfect place for adding a pretty label. The two that I've used here both come from This Is For Makers - I'd definitely recommend their labels as they're excellent quality and come in lovely designs.

I made a size 12 at the shoulders/bust blending out to a 14 at the waist hip. They're the sizes recommended for my measurements and I think the fit worked out nicely. It's boxy as intended, but it's not at all baggy. I added 1.5 inches to the length of the semi-cropped version - I'm about 5'9" so lengthening patterns is very standard for me.

The fabrics that I've used for my t-shirts are both coincidentally left over from making pyjamas last year. The paler pink geometric flowers originally came from Simple Life Fabrics, and the brighter pink with the ladies printed on it I'm pretty sure came from Sew Totally Me. I really like both fabrics, so I'm glad that I've been able to squeeze a second project out of them!

As I've already sewn two versions of the Core t-shirt, it's probably no surprise to hear that I really like this pattern. It's enjoyable to sew and comfy to wear, with a really nice fit. If you're on the lookout for a classic crew neck t-shirt, I'd definitely recommend giving this one a try. Thank you Closet Core Patterns for the great free sewing pattern!

Thursday, 31 March 2022

Peppermint Pocket Skirt Sewing Pattern Review

I've been meaning to sew the Peppermint Pocket Skirt for a while, and the #SewFrugal challenge hosted by Sam @frugalisama and Ruan @theyorkshiresewgirl seemed like a good opportunity to give it a try.


The idea of the #SewFrugal challenge is to make a free sewing pattern using fabric from your stash. I have some sizeable pieces of fabric left over from other projects, so that gave me a second good reason to join in. The fabric I've used for my skirt is some Ankara fabric that I had left from a coordinating top and trousers set that I made last year, and it originally came from Ankara Shop.


If you're not familiar with the sewing patterns from Peppermint magazine, I'd definitely recommend checking them out - there's a whole library of them here. All of the patterns are produced in collaboration with various indie pattern designers and they're available to download for free, with the option to make a voluntary contribution if you are able to. 


The Pocket Skirt was designed by Tara Viggo of Paper Theory. It's a relaxed midi-length skirt with a gathered, elasticated waist and oversized panel pockets, and is available in waist/hip sizes from 24"/34" to 47.5"/57.5".


Sewing the skirt was no problem at all. It's a fairly simple construction, and the instructions were good.  One point I would mention is that I added a couple of extra millimetres when folding the top of the skirt over to form the waistband - if you follow the instructions exactly I think it would be a bit of a battle to feed the elastic through (they have you fold a 4cm waistband and sew it down 2-3mm from the edge, when you're meant to use 38mm elastic). It does literally only need an extra millimetre or two though. Other than that I just followed the instructions.

One point to note - this is one of those patterns where you definitely need to mark the notches. You'll need them on the upper and lower side panel pieces in particular because they're used to make the pockets.


I made a size 16 as is recommended for my measurements, and the fit is good. Having said that, the fit is mainly just based on the length of elastic that you use in the waistband so that isn't much of a surprise! In case it helps to know - my skirt is the length that the pattern intends and I'm about 5'9".


I really like how my Peppermint Pocket Skirt turned out, and I can definitely see myself making more. My only slight disappointment is that I was hoping this would be a year-round kind of skirt but the fabric clings to tights terribly (as you might be able to see in some of these photos!) so it'll have to be kept for bare-leg weather. Never mind - that's only a small hardship really isn't it?!

Monday, 7 March 2022

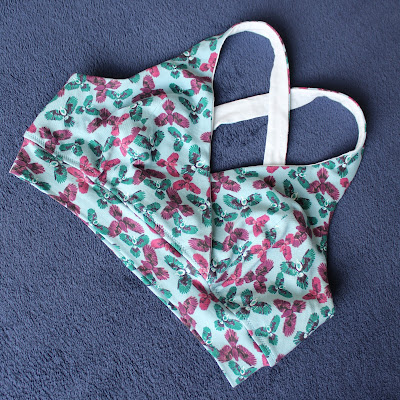
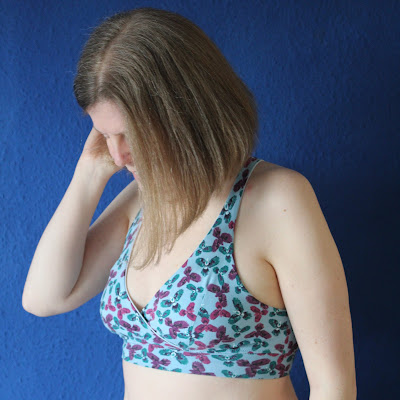
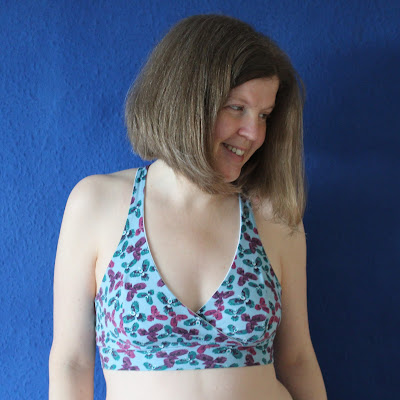
Waves & Wild Superstar Bra

I've tried making a bra before and it wasn't very successful - I didn't particularly enjoy the process, and the end result wasn't brilliant. I was quite content not to get sucked into the world of lingerie sewing, but when Waves & Wild released the Superstar bra it looked like it would be easy to sew and comfy to wear so I was tempted to give bra making another try!

The Superstar bra is a lounge bra with crossover back and three band options (regular jersey, cropped top jersey and elastic). It's for high bust sizes between 28" and 52", and has cup sizes A to H.

It can be made using just jersey fabric (with options to add clear elastic or sew in cups if you want), which appealed to me for two reasons; firstly it meant I could potentially make it using jersey left over from other projects without the need to buy lots of extra notions. Secondly, it was all the little rings, sliders and various types of elastic that made me not enjoy my first bra making experience - I don't like sewing fiddly things!

The instructions for the pattern are really good - they're clear, easy to follow and contain just the right amount of detail. They also provide good information on picking a size and on possible fitting adjustments. 

I found the process of making the bra fairly simple, and didn't have any problems.

In terms of sizing, my high bust measurement is 36.5" and my full bust is just over 39" so I made the size L in a C cup. 

I lengthened the straps because I almost always have to lengthen tops as I'm slightly taller than average. I decided to add 1.5" because I usually have to lengthen patterns by somewhere between 1 and 2 inches, and I was intending this version to be a wearable toile so I was happy to experiment a bit.

Thankfully the experimenting worked out well and I'm really happy with the fit.

The main fabric I used is some cotton jersey that I had left over from making some Juno pyjamas a while ago - I don't think they ever made it to my blog, but they're on my Instagram here. The bra is lined, and my lining fabric was some slightly thinner cotton jersey, also left over from another project.

Having worn the Superstar bra a couple of times, I'm happy to report that it's really comfy! As it's designed to be a lounge bra, it's not as supportive as a "proper" bra might be, but I found it's perfectly fine for my not-very-large bust for daily life.

I'm really pleased that I gave bra making another try with the Superstar bra, and I can definitely see myself making more. If you fancy giving the pattern a try yourself and happen to be reading this in the next few days after I post this, now would be a really good time to treat yourself to the pattern because Waves & Wild have a 50% off birthday sale running - grab yourself a bargain!