Thursday, 29 April 2021

Jennifer Lauren Aisling Blouse

 The Aisling blouse from Jennifer Lauren is a pattern that I've been meaning to sew pretty much since it was released, and definitely since I made and loved its sister pattern - the Asteria dress (my Asteria is here). I was given the final push to make it when the pattern was included with issue 80 of Simply Sewing magazine.

Aisling is a square-necked blouse with a slight A-line shape and blouson style sleeves with an elasticated cuff. It has options of a button front and collar, or you can make a simple cut-on-the-fold blouse as I did.

The pattern has A-D cup sizes, and hip sizes from 35"-53". I made a 14 with the B cup option, as is recommended for my measurements. I know from previous experience that Jennifer Lauren's patterns tend to fit me fairly well, and the Aisling is no exception - I didn't need to make any adjustments. 

To me, the fit seems good - it sits nicely at the shoulders and bust and then flares outwards slightly to be roomy enough to make it really comfortable to wear without feeling at all baggy. 

The instructions are clear and with enough detail to make sewing the blouse a breeze. Actually, in the version that I made there's really nothing complicated about this pattern so it came together fairly quickly. Obviously it would take a bit longer if you were making the buttoned version or using the collar, but even then I'm sure the instructions would mean that you wouldn't have any trouble with it.

For my fabric, I chose a cotton lawn that I got from Emporia Fabric. It has a really pretty floral print and, possibly more importantly, it feels just as good as it looks - it's so soft to wear, and perfect for this pattern I think.

I also added a little bit of hidden positivity in the form of a 'Today is a good day' label from This Is For Makers. I was fairly late to the party when it comes to adding labels to handmade garments, but now I really like sewing one to my projects as a little finishing touch to make them extra special.

I think that my Aisling blouse has turned out really nicely - the square neckline is lovely, and I particularly like the elasticated blouson sleeves. Add in a pretty fabric and you can't go far wrong really, can you?

Thursday, 1 April 2021

Sew Over It Salma Dress(es and top!)

Today I'm here to talk to you about a relatively new sewing pattern - the Sew Over It Salma dress. It was released at the start of the year and I've already made three versions so it's probably not hard for you to guess that I'm a bit of a fan!

Salma is a classic jersey shift dress that offers a few different options to make it a bit more exciting. You can choose from a round neck, V-neck or roll neck, as well as a standard or puff sleeve in two different lengths. The pattern has above-the-knee or knee length views. It's available in sizes from a 31" to 57" bust.

The first version of Salma that I made was actually a top rather than a dress. I made this as a wearable (thankfully very wearable!) toile using some ponte roma that I had left over from making a dress a couple of years ago. For this version I used the V-neck and standard sleeve options. To make a top instead of a dress, I very simply just measured how long I wanted the top to be and cut the pattern at that length - happily it turned out that I had just enough fabric for the length I wanted.

I really like how the top turned out and the fit seemed good, so I went on the lookout for some fabric for a dress version.

I found this grey floral sweatshirting on the Sew Over It website. It's a bit of a different choice for me - the fabric is available in a blue colourway too, which would be my default option, but I felt like stepping outside the box a bit. 

Unfortunately I'm not sure that was the wisest choice! The fabric is lovely in itself and super soft, but the finished dress just doesn't feel quite me. It's just not quite vibrant enough! I'll definitely still wear it though - since taking these photos I've tried pairing it with a pink cardi, which really helps to lift it a bit, and I think if I layer it over a roll neck top that could be good too. I love the shape of the dress (I used the V-neck and standard sleeve again for this one) though so decided that I might need another version that's more me!

Now, you definitely couldn't accuse this fabric of not being vibrant enough! It's a lovely French terry that I got from Backstitch (side note - I've ordered from Backstitch a few times over the last year and have been really impressed with their customer service. My orders have always arrived super quickly even when everything else was delayed due to the pandemic). For this version I used the round neck and standard sleeve. I love how this one turned out (hence most of the photos I'm sharing being of this one!) and I know I'll wear it a lot.

The Salma dress is really simple to sew - in terms of construction, it's pretty much just a lengthened t-shirt with the added benefit of bust darts and side seam shaping to give the dress a lovely silhouette. It's also designed for medium to heavy weight knits such as ponte roma, sweathshirting and French terry that tend to be quite stable and easy to handle in comparison with some jerseys. 

As with all Sew Over It patterns that I've made, the instructions are really detailed and easy to follow. I particularly like the method that they use for sewing the neck band on the V-neck option, and I think it helps to get a neater finish than I've sometimes got when sewing V-necks on other patterns.

I made a straight size 14 as recommended for my measurements, and I think the fit is good. It's fitted enough to have shape, without being at all tight anywhere. The only change I made was to lengthen the pattern by an inch above the waistline, which is very standard for me. For both my dress versions, I used the knee length option - as you can see, it's slightly above knee length on me (I'm about 5'9").

I think the Salma is a really versatile pattern - it's the kind of dress that can be really casual when made in colourful patterned fabrics like mine, but could also look smart if you made it in a solid colour ponte roma. And of course, being a knit dress, its super comfy - definite secret pyjamas! Three versions are probably enough for me for now, but I'll definitely be keeping my eye out for nice fabric for possible future versions!

Wednesday, 24 March 2021

Some recent knitting projects

 It's been a while since I shared any knitting, so I thought I'd write a little post today to talk about a few projects that I've finished so far this year. 

The first was actually mainly knitted last year, but the finishing touches were put on hold while I worked on some gift knitting and so were only completed this year.

The pattern I used here is the Rainbow Cardi (Ravelry link - pointing this out in case you're affected by photosensitivity) by Yelena Dasher from the book Mini Skein Knits (Ravelry link). It's essentially a very simple stocking stitch cardigan, made much more special by all the colourful stripes. The pattern calls for fingering weight yarn and, as you can imagine, all of the stripes are a great use for mini skeins and leftovers. 

For my version, I used West Yorkshire Spinners Signature 4 ply in the Milk Bottle colourway as the main colour (I used about 150g), and the stripes are all leftovers from various socks and shawls. It was fun to knit as you always had the incentive of getting to add in the next colour. I was very pleased to discover that I had the perfect buttons already - by some massive fluke, my button jar has done remarkably well at providing me with the right buttons for projects when we've been in various lockdowns and in-person button shopping hasn't been possible! 

I love how this cardi turned out and it's already been worn a fair few times since I finished it in January.

Next up we have my Lesedi shrug, a pattern by Noma of Bigger Than Life Knits. The relaxed shrug style is kind of like a shawl that won't fall off your shoulders, and the fact that it uses chunky yarn means that it knits up pretty quickly and it's beautifully squishy. Wearing it kind of feels like a hug! 

The yarn I used is King Cole Chunky Tweed in the colourway Skye. It's a mainly acrylic yarn so is pretty affordable, but does also contain 25% wool for added warmth. I love the combination of the main navy colour with the rainbow tweed neps. 

I made this specifically to wear when I'm working at my desk as my office gets sun in the morning but not in the afternoon so I often need to add an extra layer as the day goes on. The Lesedi is perfect for that so it's another winner for me!

Lastly we have a project I finished just last week. The yarn (Willow & Lark Nest in the colourway Bougainvillea) for this project had been in my stash for quite some time. I originally had a cardigan pattern picked out for this yarn, but whenever I went to cast it on something was telling me that the plan wasn't quite right so I had a rethink. I decided to use the Hoxton pattern by Martin Storey/Rowan - I've just realised it's available as a free pattern on Love Crafts if you fancy giving it a try (I used a pattern booklet that I bought in a bundle from a charity shop). 

This pattern is knit in pieces and seamed, and the combination of the simple garter stitch with the single large cable on the front and back was very relaxing to knit. I think it works really well in this yarn, and I'm very glad that I decided to abandon the original cardigan idea in favour of this sweater.

The only slight problem I have with this sweater is that I've made my standard mistake of finishing it just as the weather starts warming up so I probably won't be wearing it much in the near future. Never mind - that just means I'll have it to look forward to come autumn! Now to try and get warm weather knits finished in time to wear them in the right season - wish me luck!

Tuesday, 9 March 2021

The Patterns Room Joan Jacket

 Hello? Is anyone still there? It's been a while since my last post hasn't it? Over the last few months I was initially busy making Christmas presents, and since then I've mainly made repeats of patterns I've already used, and they never feel like I have enough to say about them to warrant a blog post. They're all on my Instagram (I'm @nightingaleanddolittle) though if you want to check them out. Today I'm back with a new project to talk about - here's my The Patterns Room Joan Jacket.....

I'd never heard of The Patterns Room until I saw the Joan Jacket mentioned in a newsletter from The Foldline. I've been looking for a pattern a bit like this for a while (more on that later...) and I fancied trying something new, so I decided to give it a go.

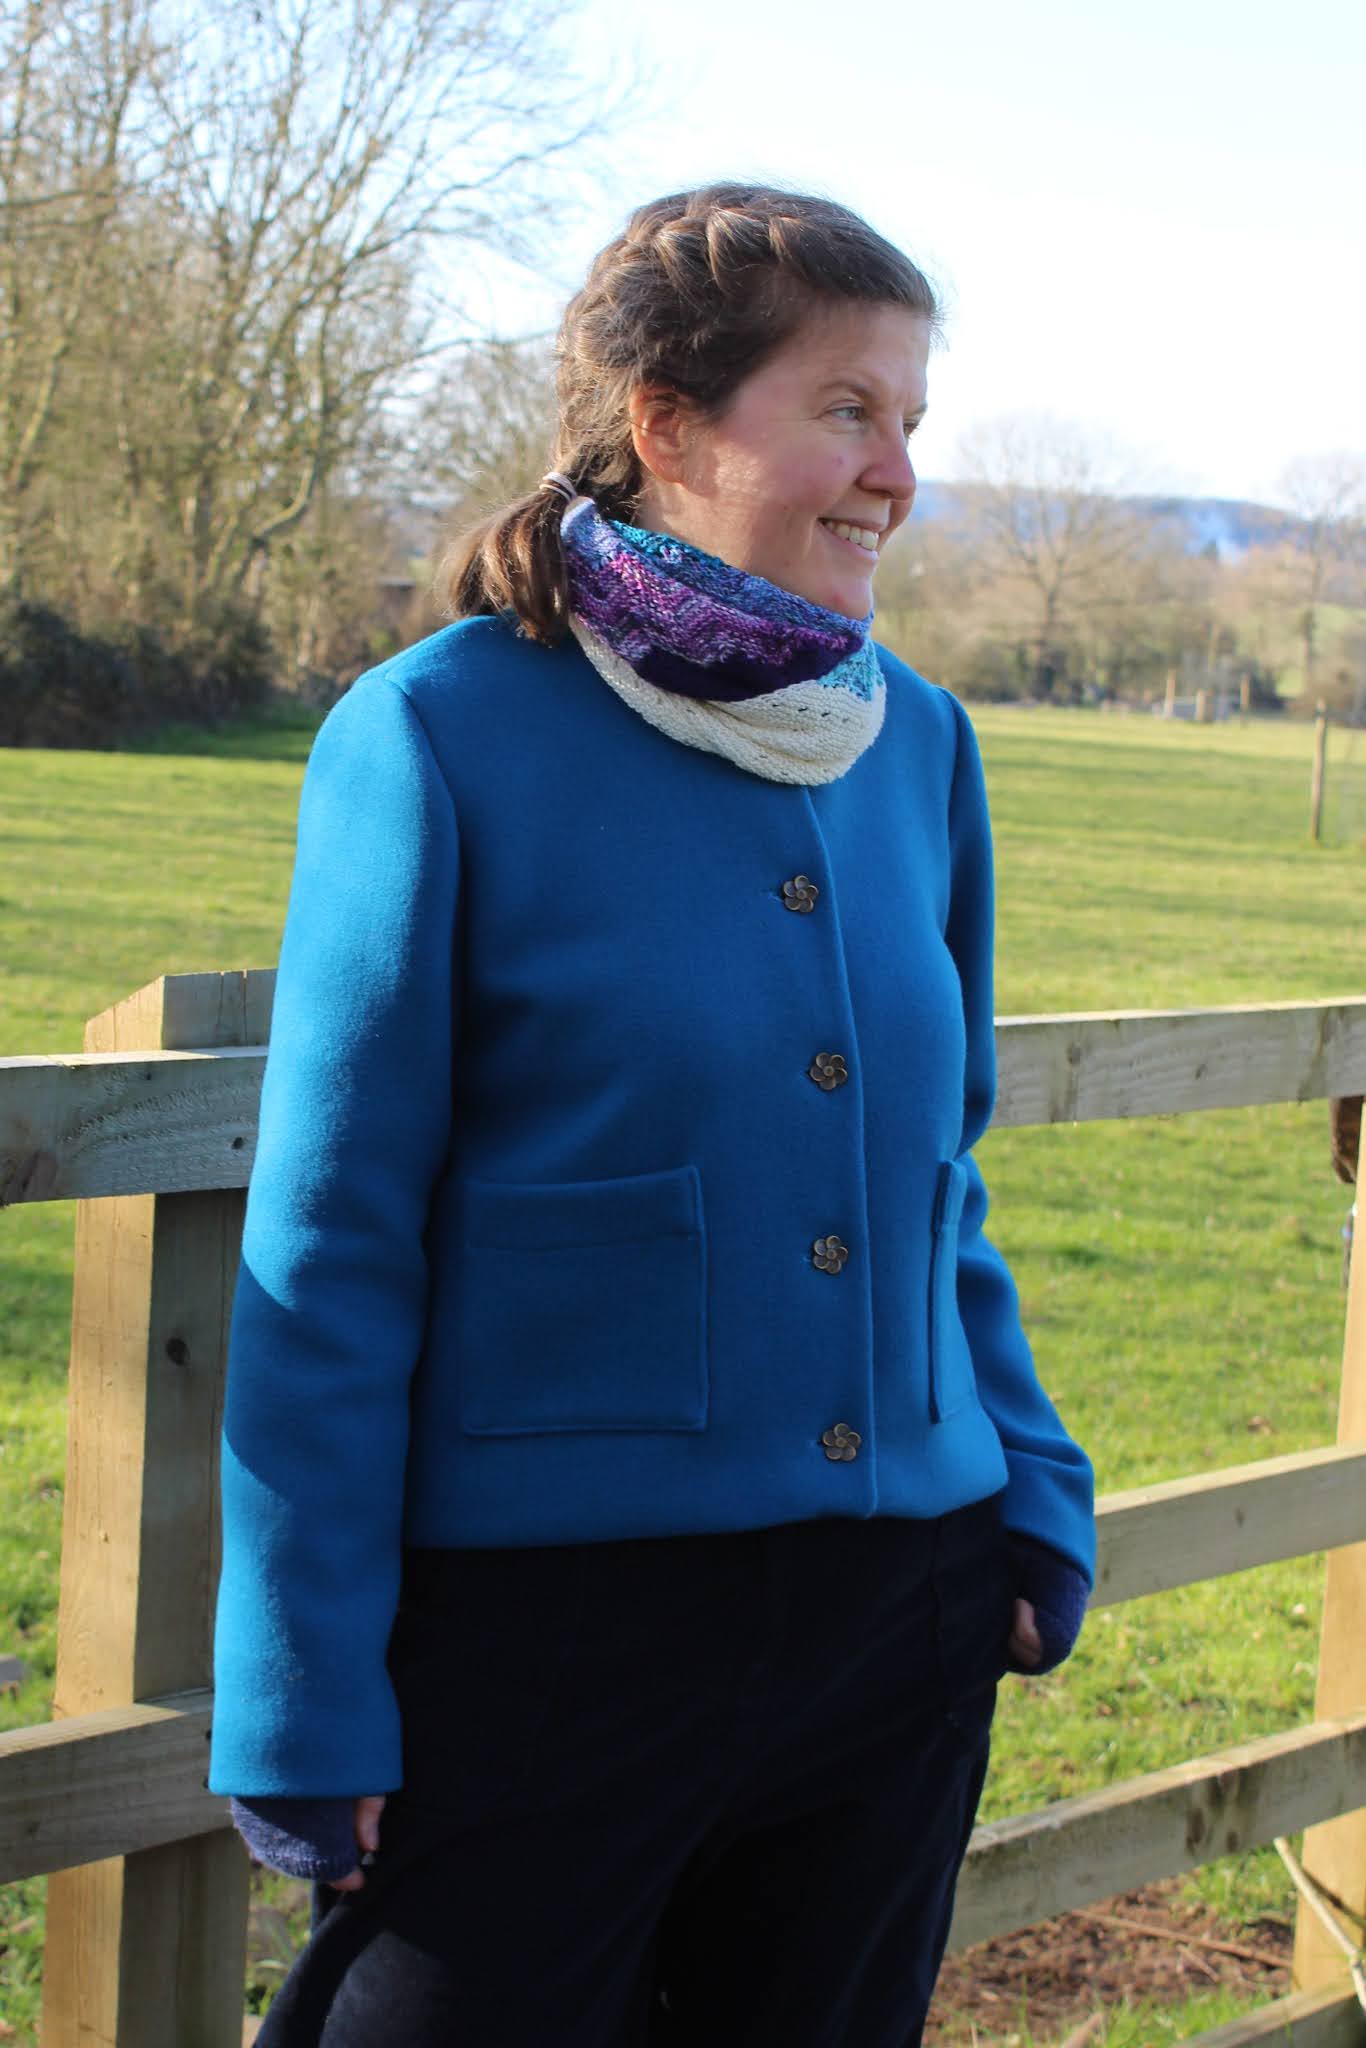
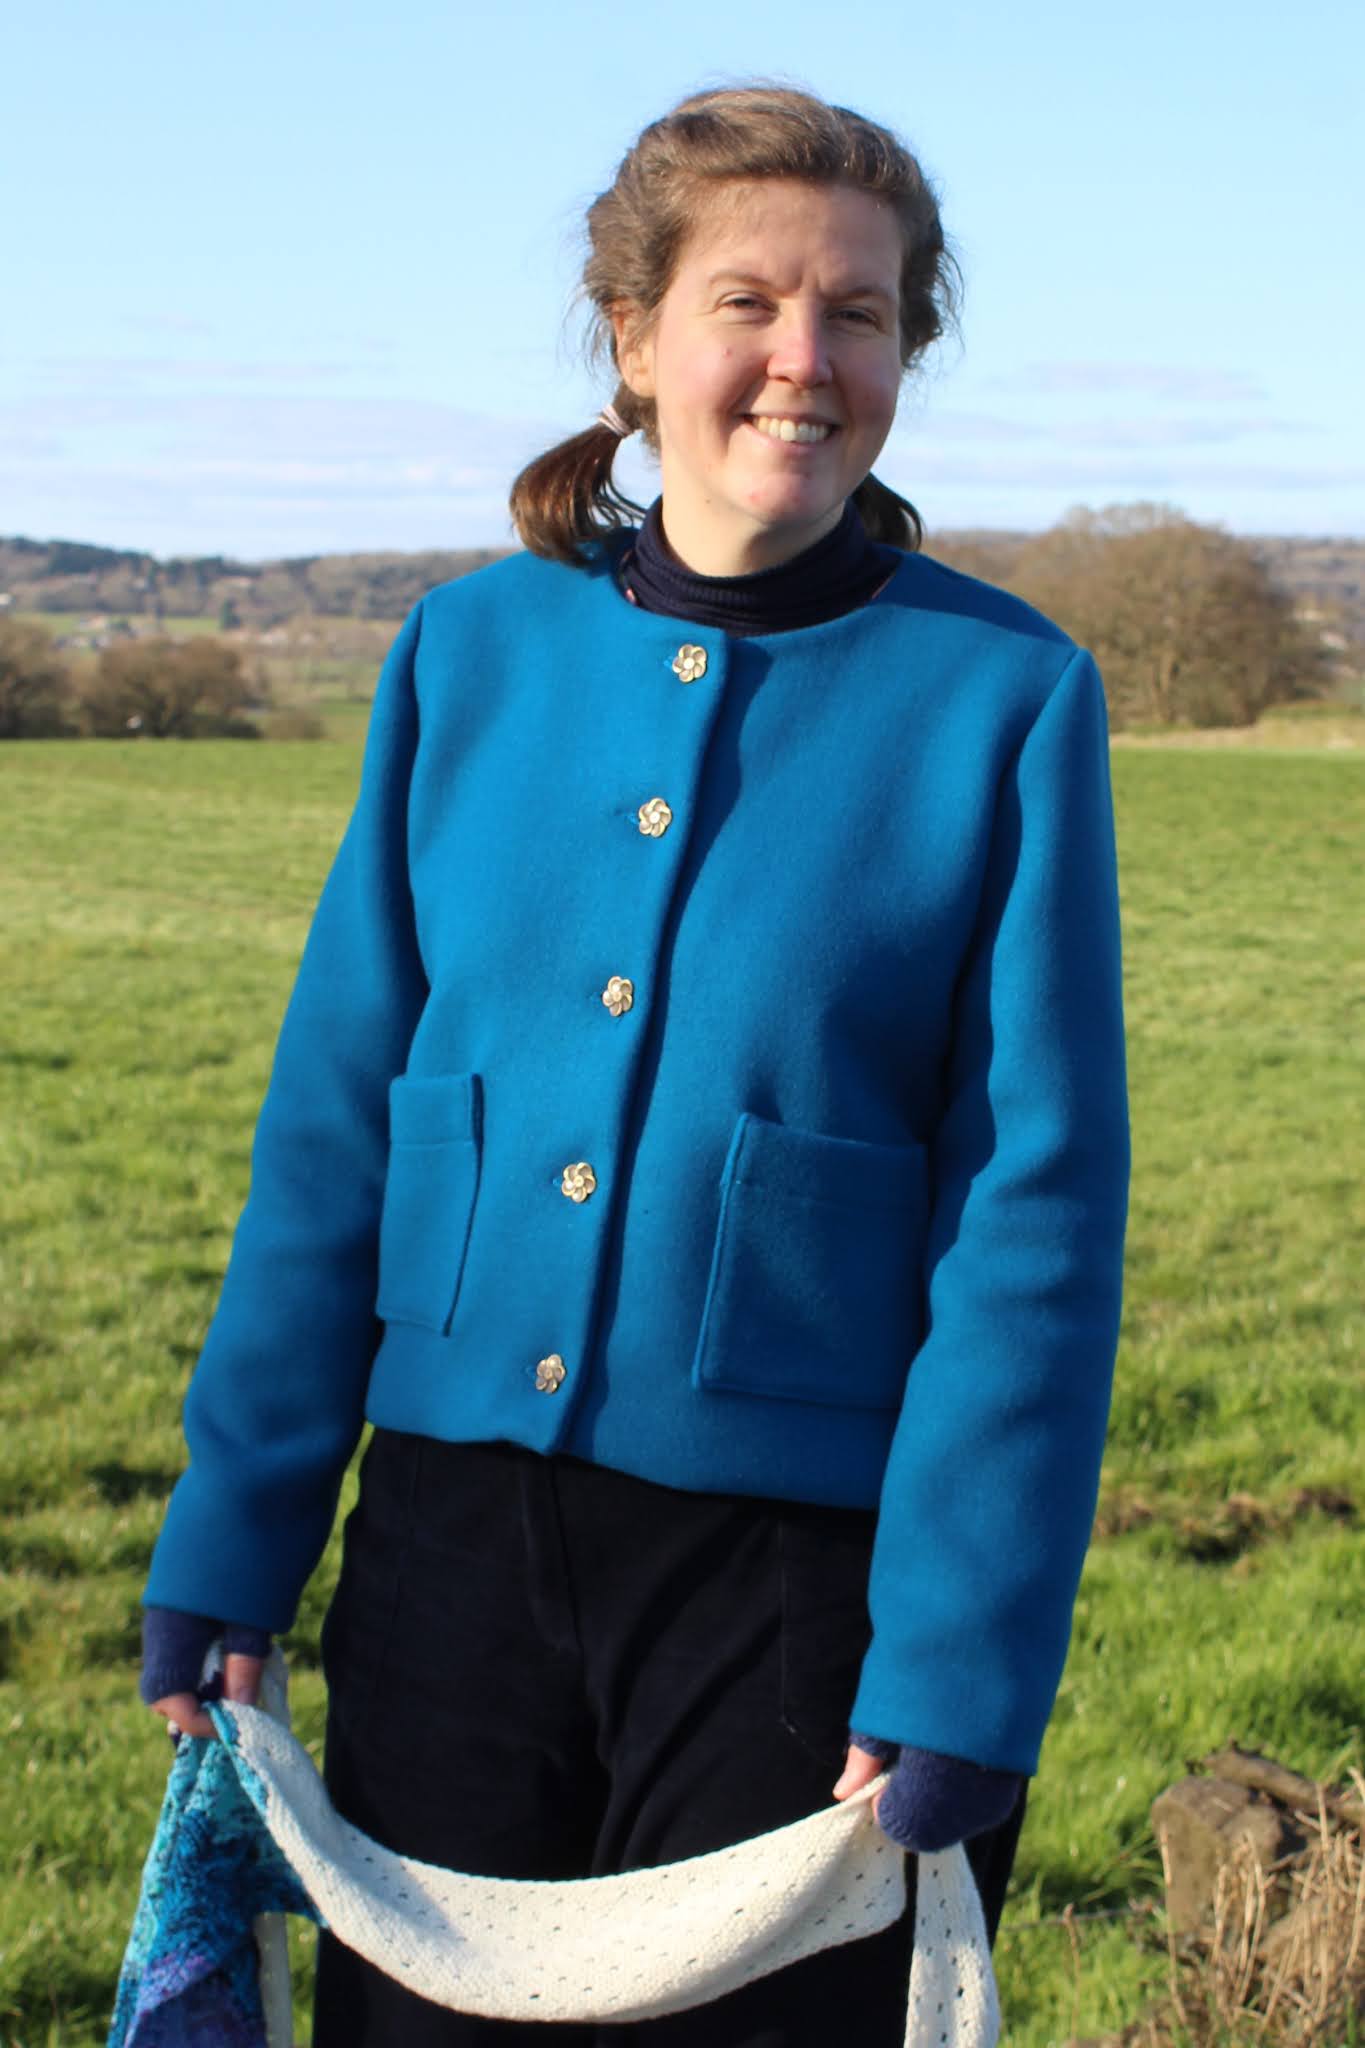
The Joan Jacket is described as a Chanel style jacket with a boxy fit. It's fully lined and has the options of a collar and patch pockets, and finishes about mid-way between waist and hip. It's available as a PDF in two size ranges (10-18 (bust 33"-39.5") and 20-28 (bust 41-50.5")). I ordered the pattern and had the A0 pattern printed by The Foldline - I really like the fact that they send you an envelope specially designed for storing the pattern when you order PDF printing.

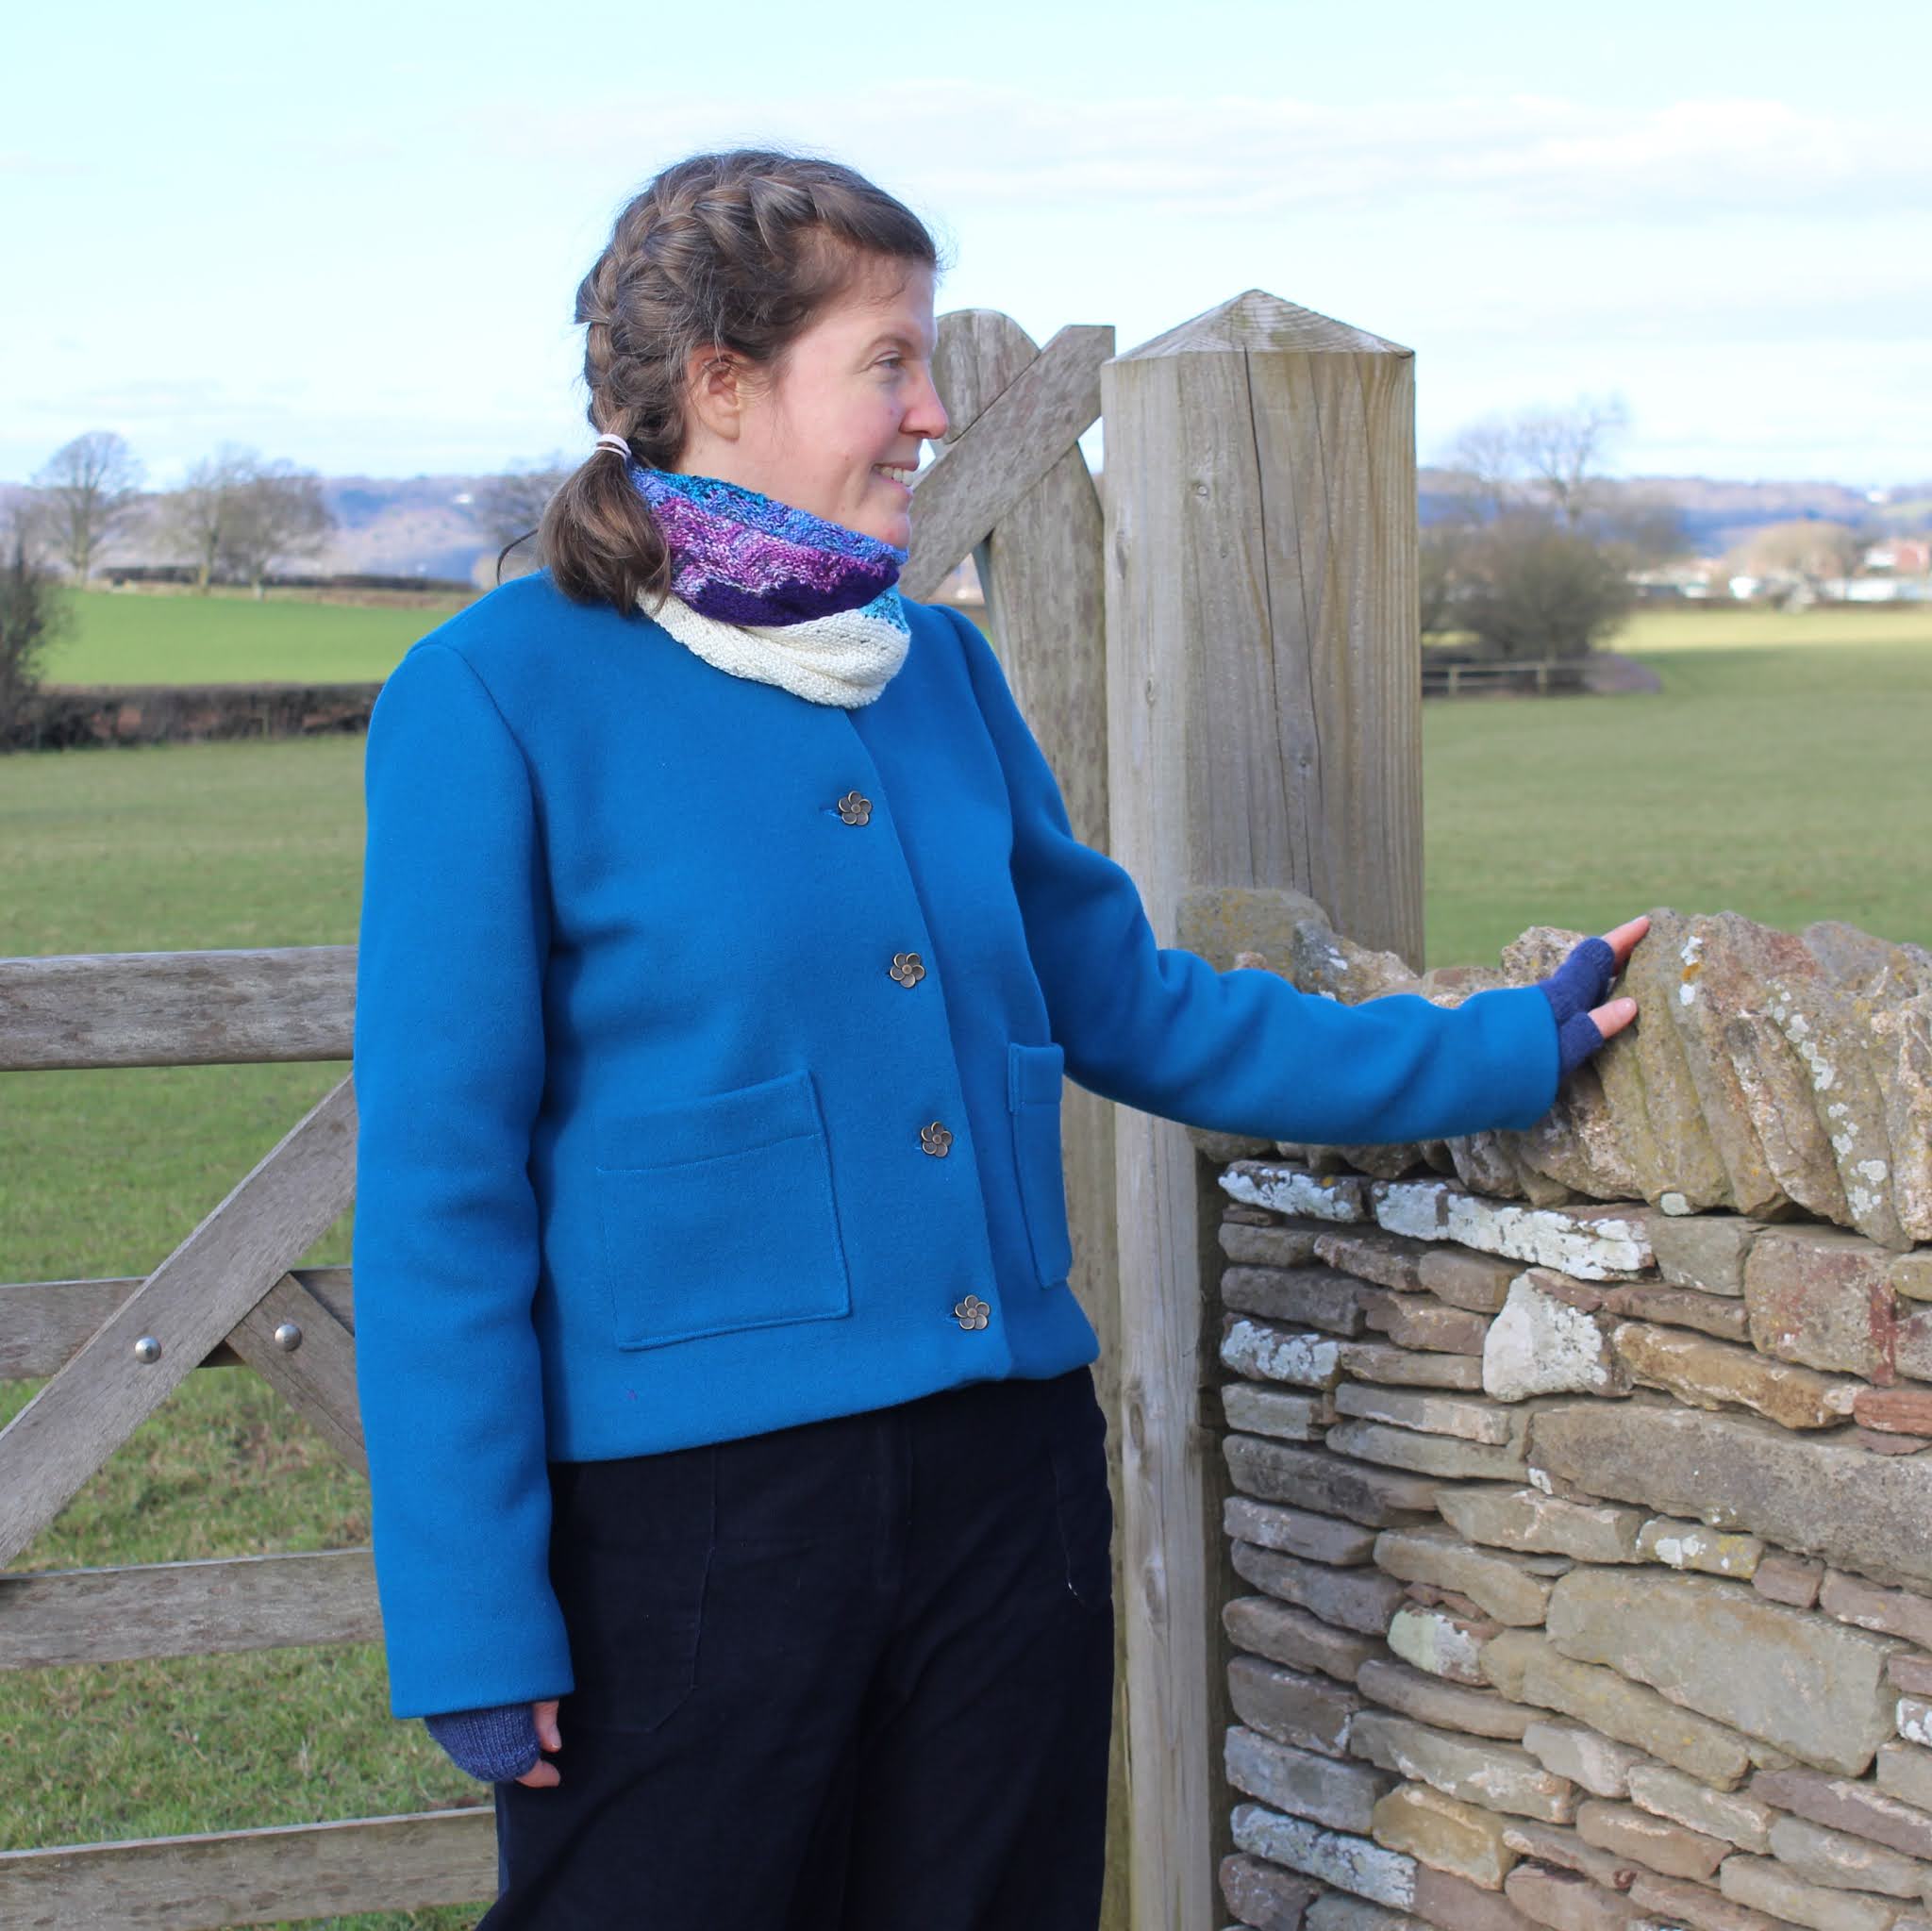
I made the collarless version of the jacket because I thought it would be good for showing off my handknit shawls (for the knitters out there, the one I'm wearing in these photos is my Minimania shawl, which I talk about in this blog post). I also used the patch pockets, because you've gotta have pockets! 

As I mentioned above, I'd been looking for a simple jacket pattern like this for a while. That's because I'd had this teal boiled wool for YEARS. It's definitely my longest stash resident. I'd got it for an absolute bargain price in a closing down sale, but it was a bolt end so I had just under two metres and every pattern I liked the look of needed considerably more fabric. Thankfully I had plenty for the Joan jacket. I've also had the lining for a couple of years - it's a black and white spotty viscose that I'm pretty sure came from Guthrie & Ghani.

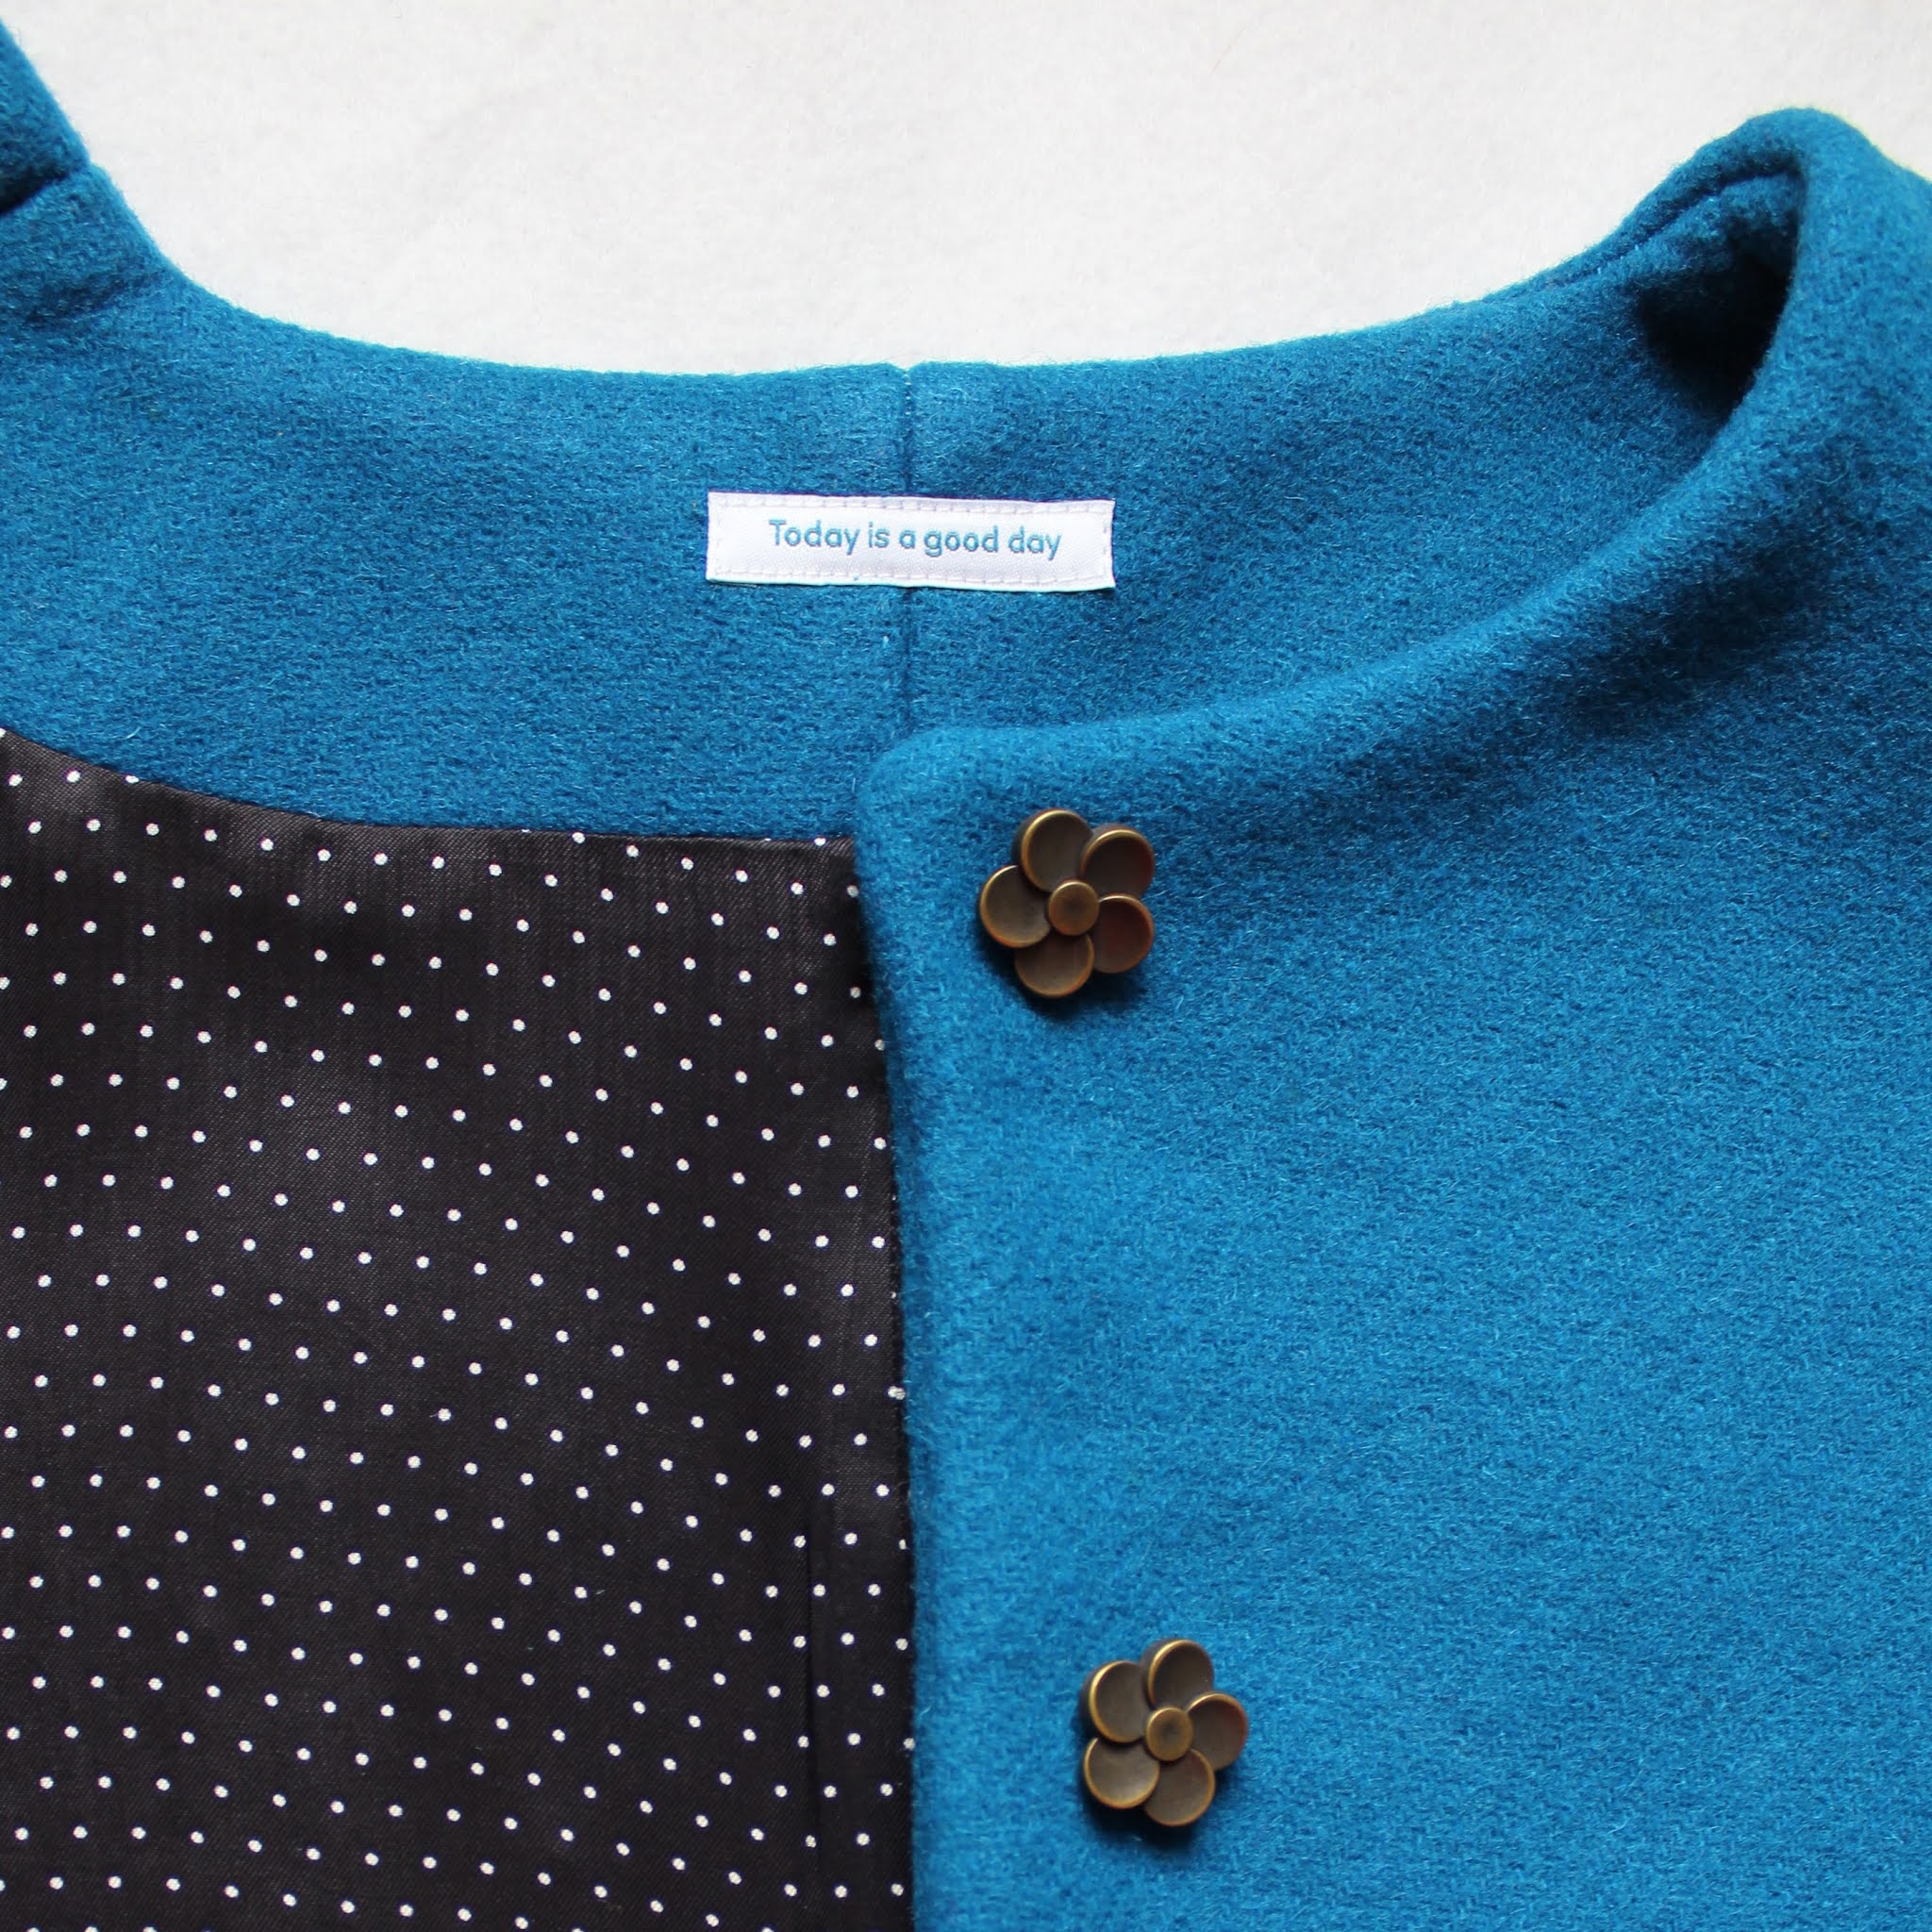
I added some fun finishing touches - a bit of positivity in the form of a lovely little label from This Is For Makers, and pretty antique brass flower buttons from Textile Garden.

Sewing the jacket was an interesting experience. I like to be positive, so I'll start with the good points! The pattern seemed to be well-drafted and everything fit together correctly. It also feels pretty true to size - I made the size 18 as recommended for my measurements (my bust is actually between a 16 and an 18), and it gives the boxy fit described but without feeling oversized at all. The pattern is also comparatively simple, so if you've made a lined jacket before then I would think you should be OK with it.

However, unfortunately I don't think I'd recommend this pattern to people who aren't familiar with bagging out a lining, or who aren't confident enough to trust their instincts a bit. 

The instructions are pretty brief in places, for example when it comes to sewing the outer together they literally just say "Stitch to attach all outer pieces". There's nothing about which order to stitch them in or whether or not you need to ease the sleeve head into the armhole (I found I did need to gather it just slightly). They also never actually tell you to stitch together the lining. 

Some of the phrasing used in the instructions is also a bit awkward/just not idiomatic and means that the instructions aren't always easy to follow. 

The instructions are illustrated with photos rather than diagrams, and I never find them quite as clear personally.

The pattern pieces also don't have that many notches and there's no marking of the centre front or the buttonhole placement. 

None of these things would stop you being able to make the jacket (obviously, because I've made it!), but all of them combined make it more complicated than it needs to be. 

For me personally, sewing the jacket went relatively smoothly. I've made jackets with similar constructions before so I was familiar with the steps. The only problem I had was with sewing the buttonholes and that was because for the first time ever the buttonhole function on my sewing machine was objecting to the thickness of the fabric. I got around it by marking out the buttonholes manually and sewing them first with a straight stitch and then with a narrow zigzag. They work fine, but they won't be winning any buttonhole beauty pageants! 

Overall, if you're looking for a simple jacket and are relatively confident that you know what you're doing then the Joan jacket is a good option. I like how mine turned out, and I'm very happy that this fabric has finally fulfilled its destiny to be worn instead of sitting on a shelf. I quite like the idea of making a collared version in a lighter fabric for summer, so there may well be a second Joan jacket in my future!

Tuesday, 10 November 2020

Helen's Closet Yanta Overalls

Over the last few months I've been eyeing up various dungaree patterns and toying with the idea of making some for myself. I considered a range of options, but kept coming back to the Yanta overalls by Helen's Closet and eventually I decided that I just needed to give the pattern a go. Spoiler alert: I'm so glad that I did!

The Yanta overalls are a fairly popular pattern in the online sewing community but in case you haven't come across them before, they're a laid-back style with a relaxed fit. The straps are fastened to the front bib using buttons, they have a V-back, pointed front bib pocket, and front and back patch pockets. The pattern also has shorts or trouser views, and an optional side seam zip.

One of the things that eventually made me decide on the Yanta overalls was that I wanted the more relaxed fit of overalls-style dungarees, rather than the more fitted styles that are pretty much trousers with a bib attached (if that makes any sense?!). For me, this is definitely a project where comfort takes priority!

Sewing my Yanta overalls was a really enjoyable experience. The instructions are very thorough and help you to achieve a nice finish. I liked the fact that they include directions for topstitching most of the main seams, which I think helps to make the dungarees look more professional and will also make them more sturdy. 

The only point where I deviated slightly from the instructions was when I was inserting the invisible zip. There's nothing wrong with the instructions - they have you sew the seam and then insert the zip, whereas I've personally always achieved better results with invisible zips when I insert the zip before sewing the rest of the seam so that's what I did here too.

In terms of sizing, I went a bit rogue to get the fit that I personally wanted. My measurements (B 38", W 32", H 42") put me in a 12 bust, and 14 waist/hips. While I did want a relaxed fit, I didn't want the fit to be quite as loose as intended at the waist (I thought that might get draughty!), so I blended between sizes and made a 12 at the bust, blending in to a 10 at the waist and back out to a 14 at the hip. That meant I definitely needed to add the optional zip (you might not need it if making a straight size), but that doesn't bother me at all.

Other than that, the only changes I made were to lengthen the section between the waist and the crotch by an inch and to lengthen the legs by 2 inches. I also lengthened the straps by about an inch. Lengthening patterns is standard for me (I'm 5'9"), and also the pattern intends the trouser length to be slightly cropped, but I wanted them to be full length.

The fabric that I used is an 8oz washed denim from Threadquarters (unfortunately now it looks like it's sold out apart from a remnant). It's a lovely quality fabric and exactly what I wanted for these dungarees  - enough weight to make them appropriate for autumn/winter, but without being at all stiff. I also intentionally chose to use a dark blue denim because the colour will go with just about any top in my wardrobe so I'll have lots of outfit options.

While I wanted the outside of the dungarees to be neutral and practical, I decided to give myself pretty insides and used a contrast daisy print cotton for the facings (partly for aesthetic reasons and partly to reduce bulk) and added a lovely colourful Pink Coat Club label (also now sold out - sorry! But Joy has lots of other great designs).

I also couldn't stop myself from adding a bit of colour on the outside. I wasn't sure what buttons I wanted when I went shopping (thankfully I got that in before the new lockdown in England started), but then I found these unusual metal buttons with an elongated slot style hole rather than the usual small round ones, and I decided they'd look good if I attached them using a rainbow of thread. I slightly regretted that decision when it came to sewing them on and I realised I'd be effectively be doing the same amount of sewing as if I was using 12 buttons rather than 2 (6 threads each on both buttons), but I think it was worth it for the effect.

I was pretty pleased with my Yanta Overalls when I finished them, but now that I've worn them, I love them! As you can tell by the fact that I only finished them a couple of days ago and I've already worn them twice. Like other Helen's Closet patterns that I've made, the pattern was great to sew too. I'm now wondering whether I need a second, more colourful version! What colour would you go for?