Monday, 30 June 2025

Sew Hello St Mawes Top

A couple of weeks ago I made myself another Waves & Wild Kinjarling dress (you can see that on my Instagram profile, and there's a blog post about my original version of the pattern here) and after cutting it out, I realised I had enough fabric left over to make a top. I had a look through my collection of patterns that I haven't used yet, and chose to make the Sew Hello St Mawes top.


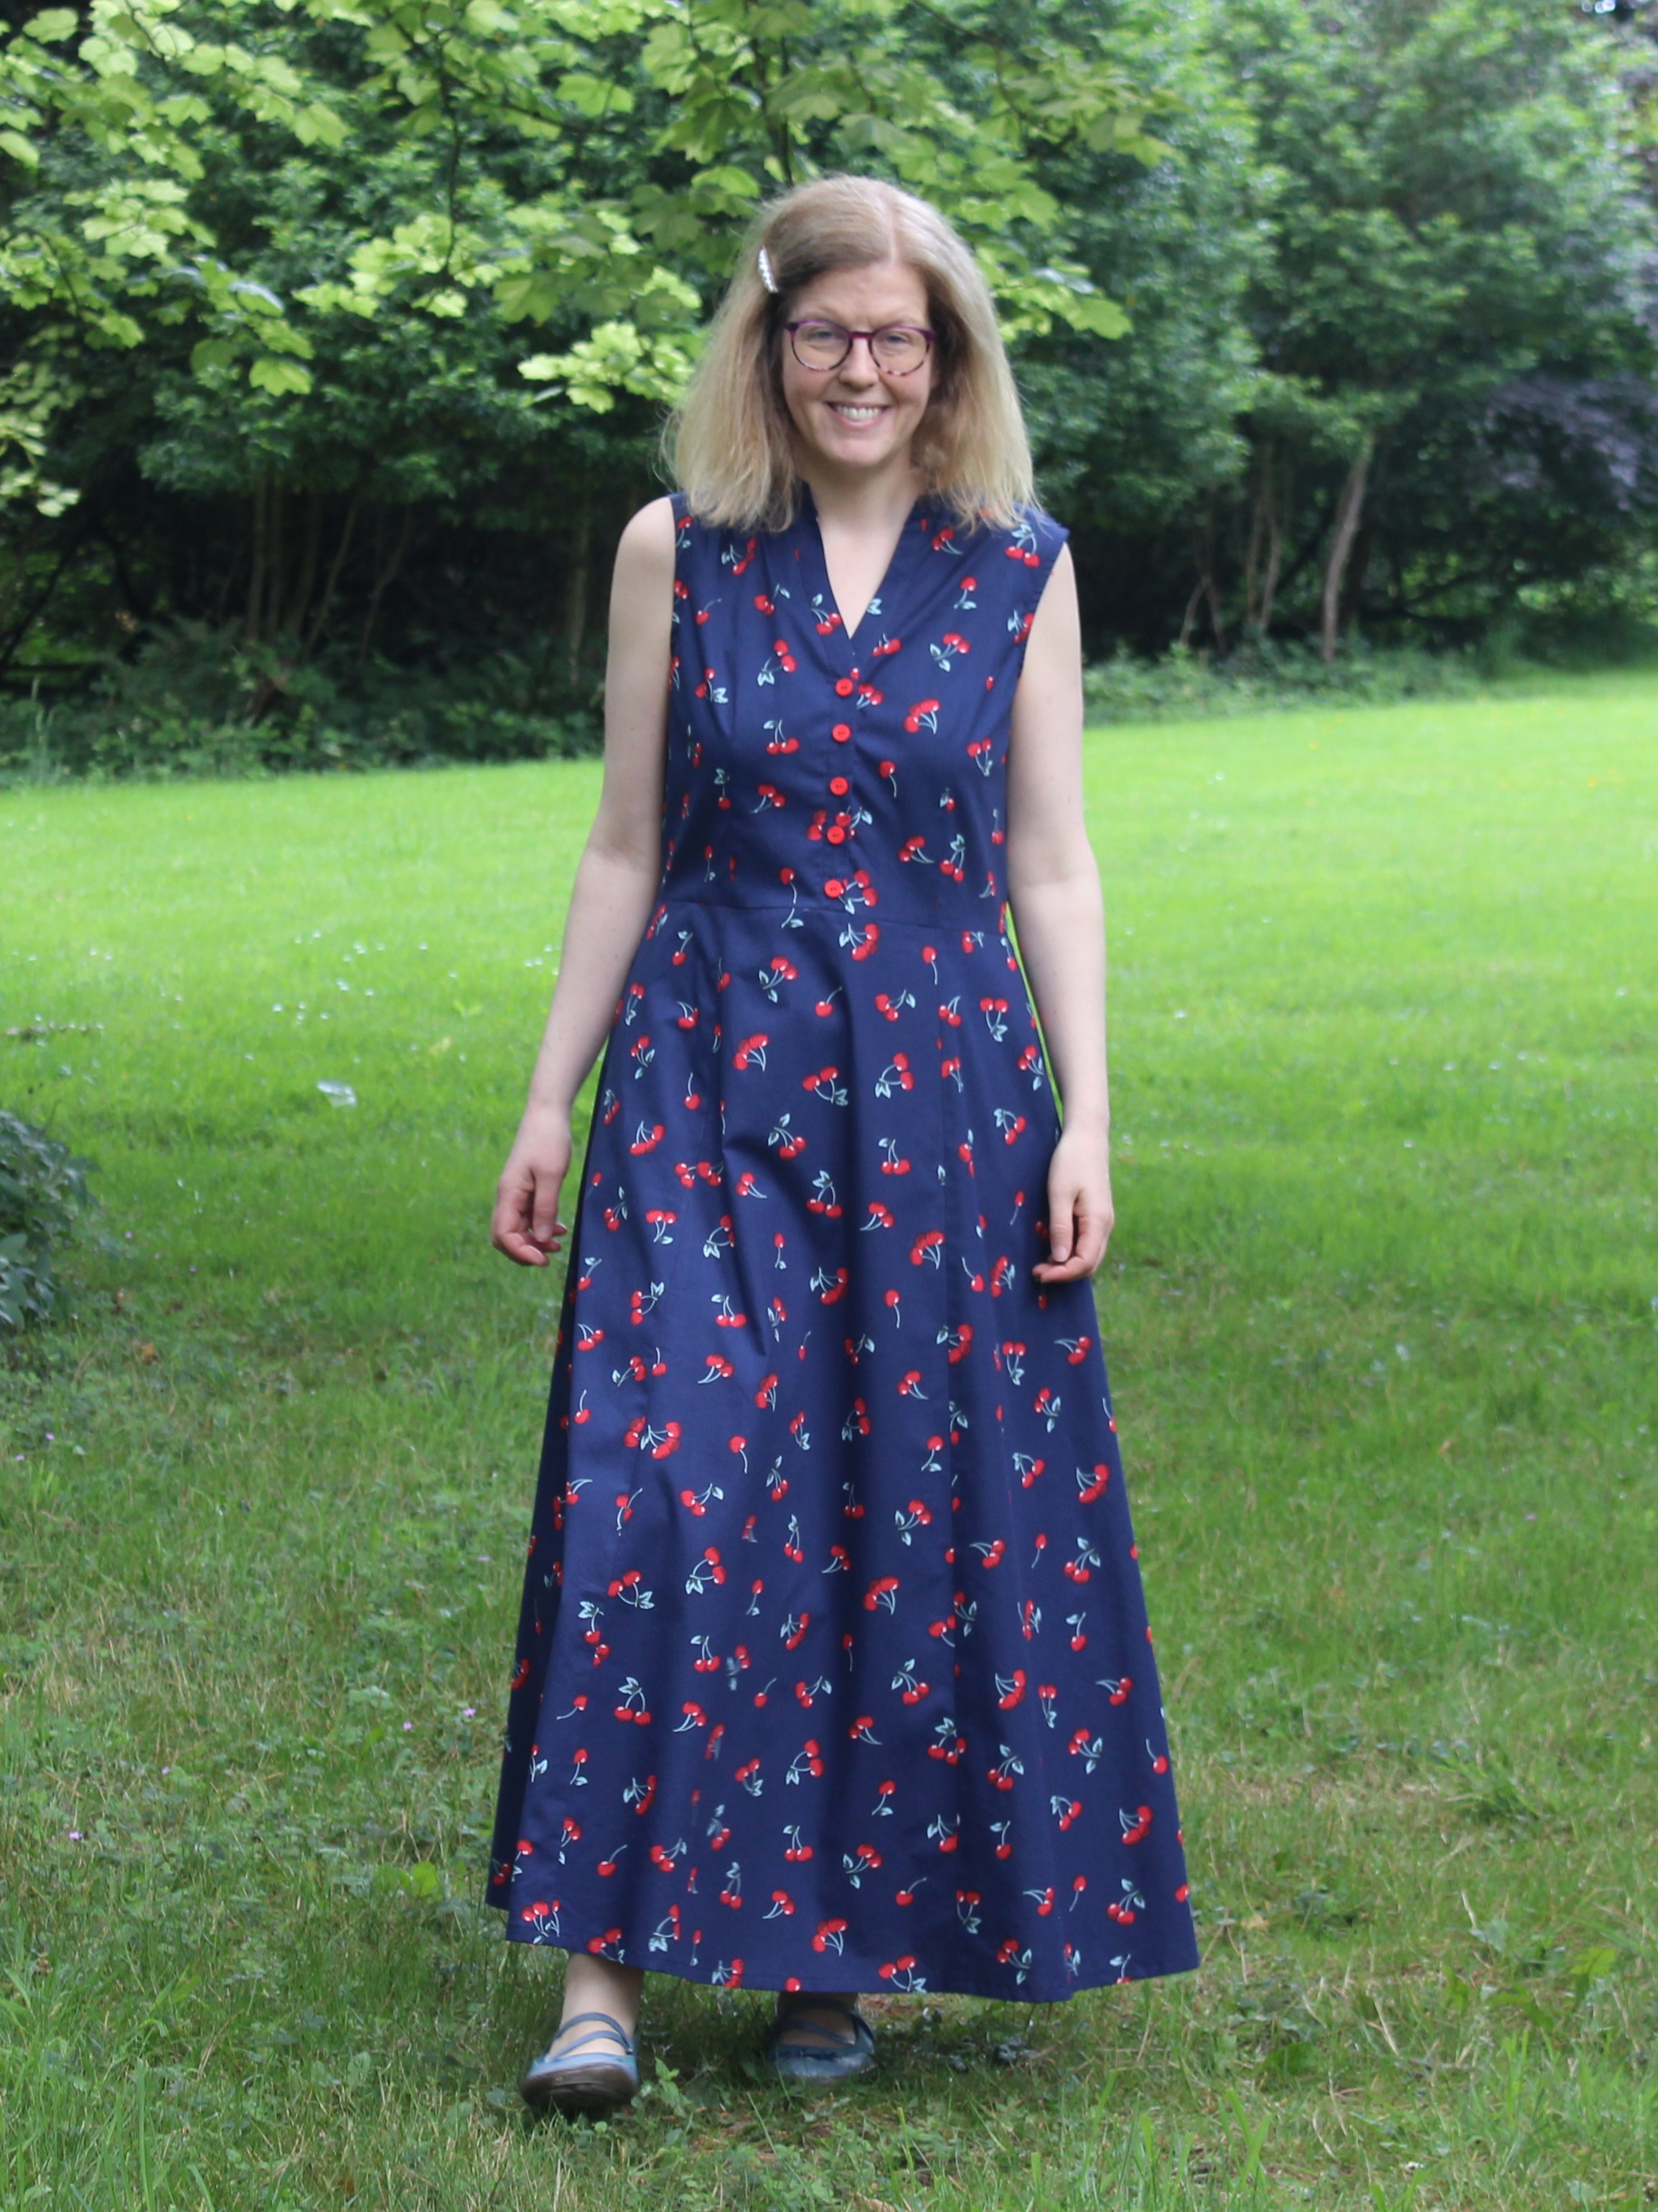
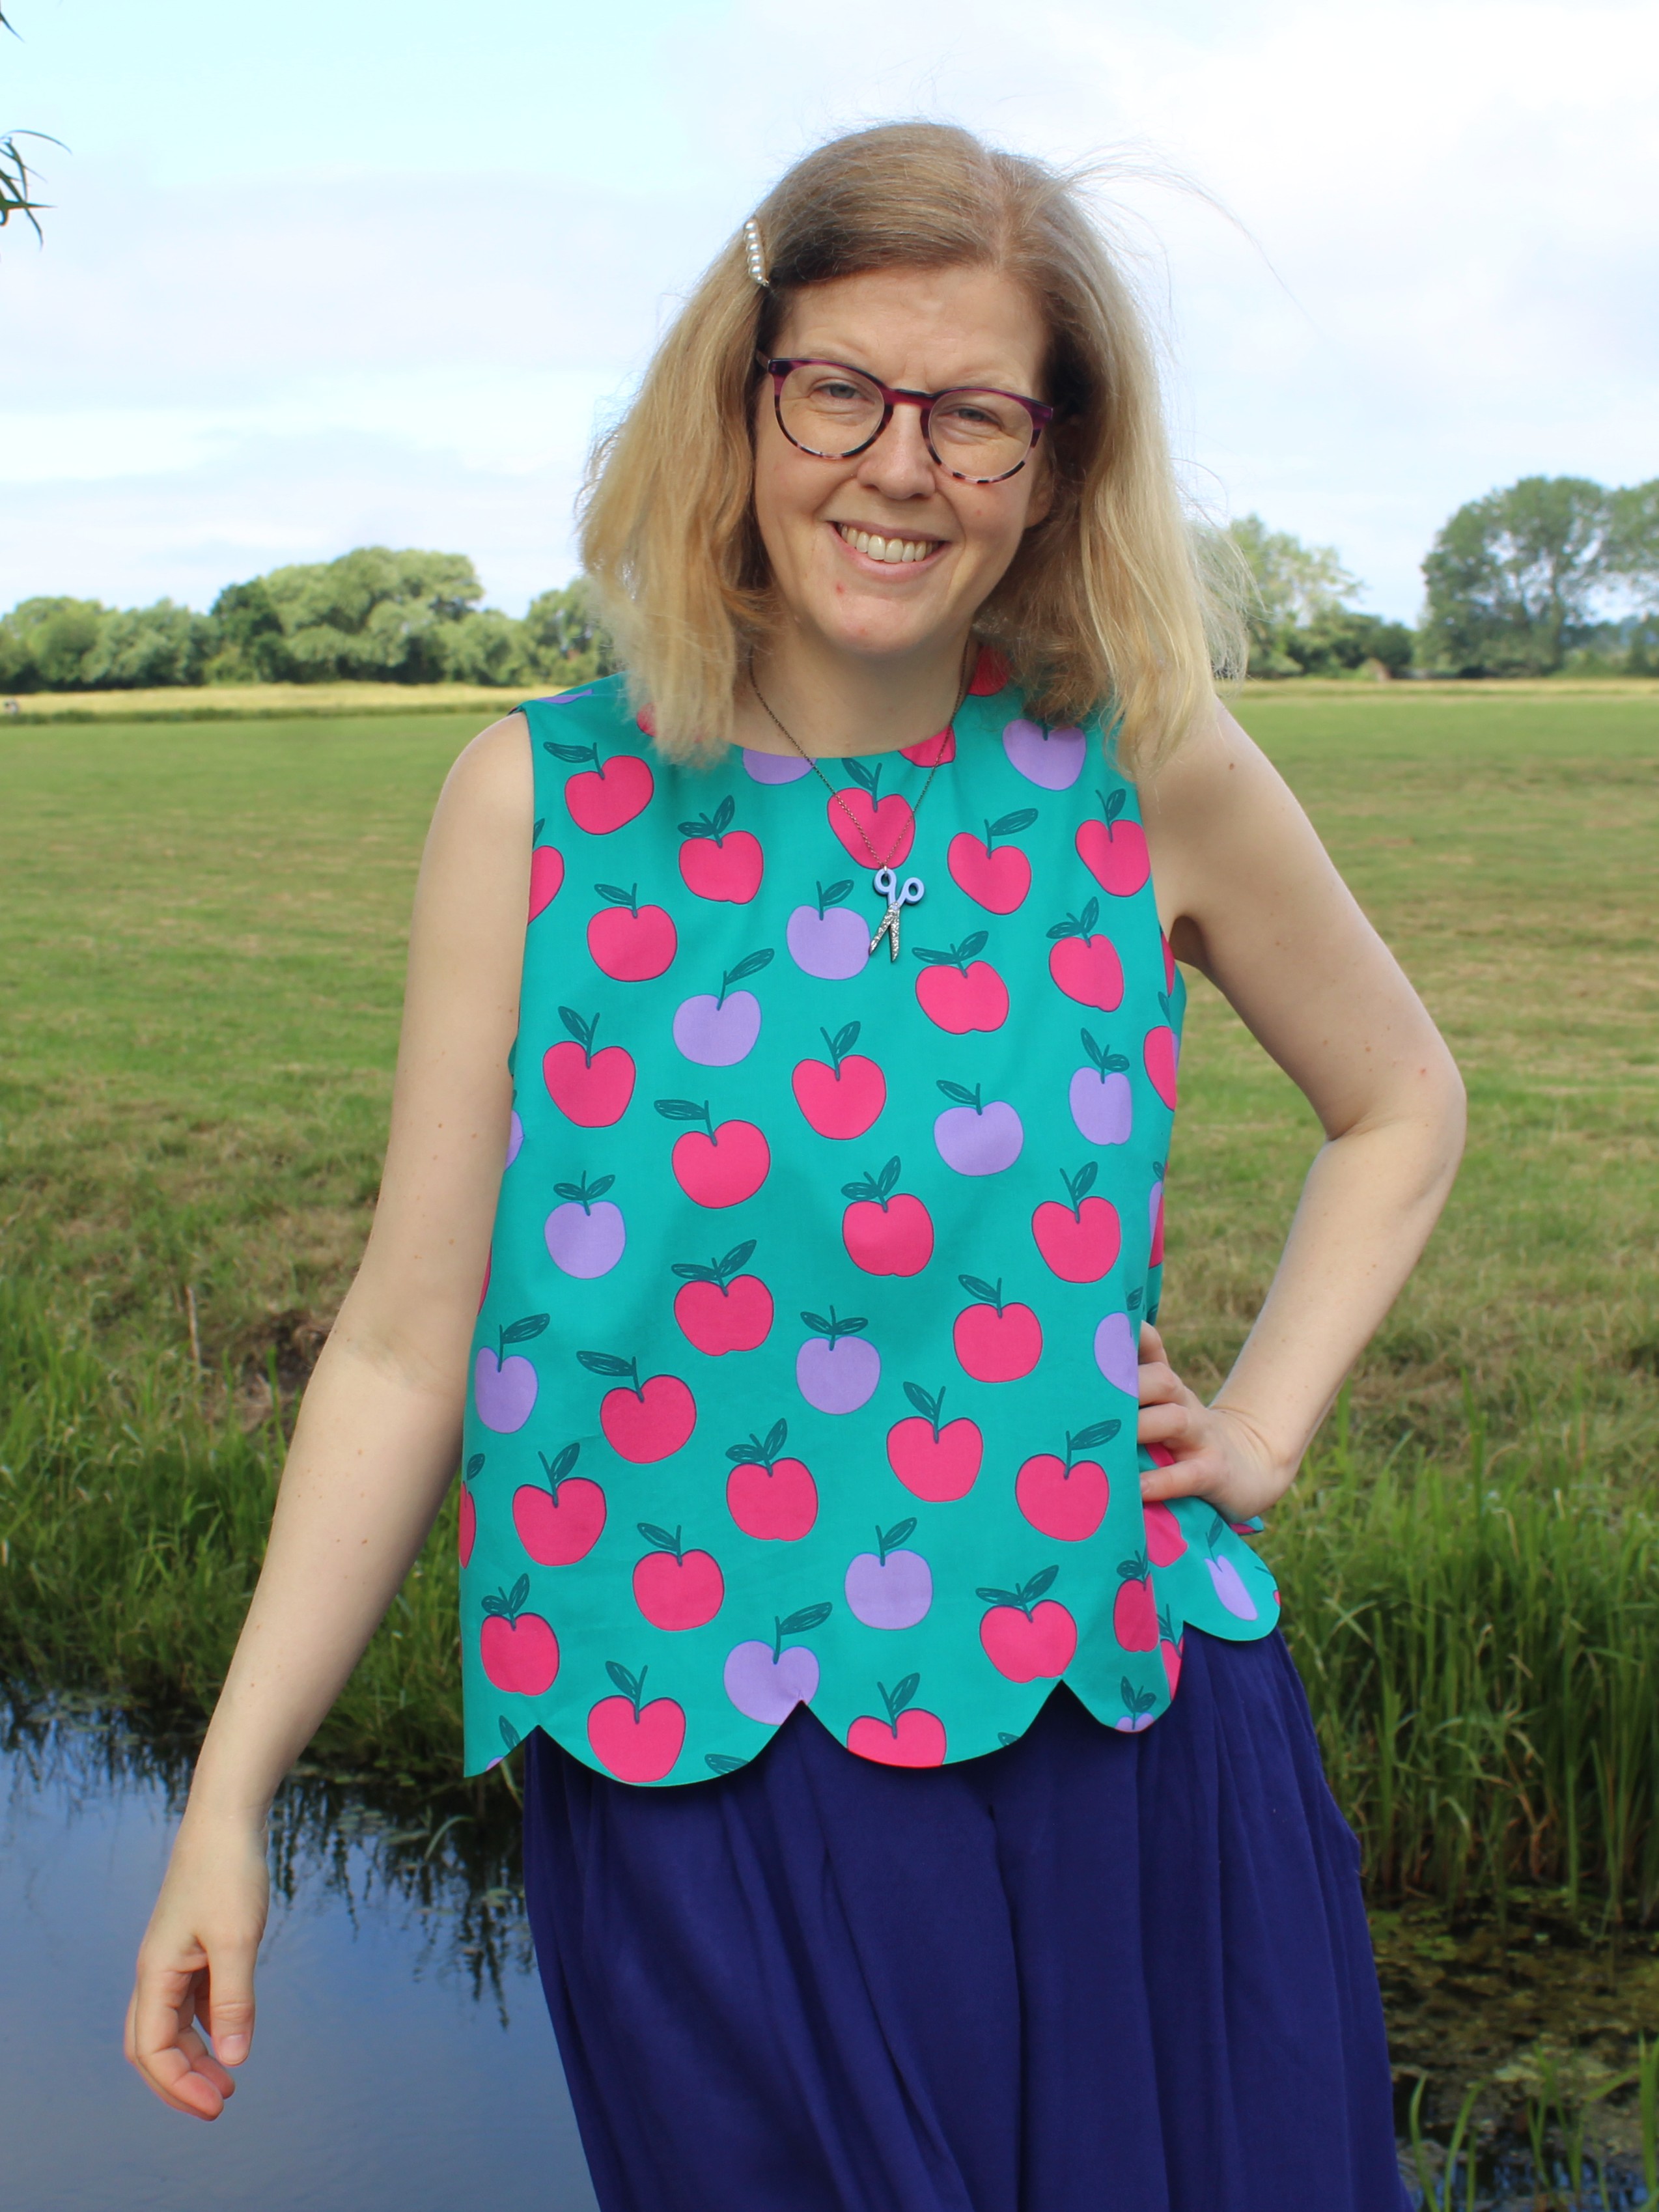
The St Mawes top is a cropped or long-length top with a scalloped or straight hem. The top can be made sleeveless, with straight short sleeves or with three-quarter length balloon sleeves. The sleeveless version has an all-in-one neck and armhole facing, while the neckline of the sleeved versions is finished with binding. The pattern also uses a hem facing in both the scalloped and straight versions.

The pattern caters for bust sizes from 31.5" to 59.5", and hip measurements from 34.75" to 62.5".


I enjoyed sewing my St Mawes top. It's quite a satisfying project to work on and the pattern seemed to be well drafted – everything came together with no trouble at all. I like the all-in-one neck/armhole facing (which is sewn using the burrito method). It gives a nice clean finish and means that there's no chance of the facing flipping to the outside as you're wearing the top.


The scalloped hem is a fun feature, and was nice and simple to sew with the facing. My top tip would be to mark the seam allowance at the top points between the scallops to make sure all of your pivot points are in the right place and are even.


The instructions are generally fine, although if I'm honest I don't think they're the best I've used. There were a couple of points that I think I might have found confusing if I hadn't already been fairly familiar with the processes. For example, the instructions refer to the facing as both a facing and a lining, and I think that the steps for the burrito method could have been a bit clearer. The diagrams are good though, and definitely help to clarify the steps.


I made a size 14, which is what is recommended for my measurements. I think the sizing is quite generous. I ended up sewing the side seams with a larger seam allowance at the underarm, tapering out to meet the intended 1 cm seam allowance at the hem. My top is fairly loose, but I quite like that in this sleeveless version and it was nice to wear on a hot day this weekend.


I made the long version, and that's a nice length on me – although I wouldn't say it's particularly long. The cropped version would have been very cropped on me, but I am 3" taller than the pattern is designed for.

One point I would mention is that when I made a toile I could only just get the top over my head. In my "proper" version, I used a 1.5 cm seam allowance around the neckline instead of 1 cm and that has helped. I do have an abnormally large head (all those hats that claim "one size fits all" are lying!) so it may not be an issue for most people, but it would be worth checking.


The fabric that I used is a lightweight cotton poplin that I bought a few months ago from a shop that has since closed. I did see it for sale in a few online shops at the time though, so it may still be around somewhere if you need some apples in your life!


All in all, I think my St Mawes top turned out quite nicely. I particularly like the scalloped hem, and it'll be a nice breezy top to wear on summer days. Plus, I always enjoy getting a bonus extra project out of a piece of fabric!

Thursday, 19 June 2025

Simplicity 8384 dress

I enjoy hunting out bargains in charity shops, and always keep an eye out for sewing patterns. A couple of months ago I stumbled upon a box of patterns and treated myself to a couple of them, one of which was Simplicity 8384. I particularly liked the look of view A, which is what I've sewn here. 

Simplicity 8384 is a shirt dress or top with various length options. All the views have a collarless rounded neckline, and buttons at the centre front of the bodice. There are sleeveless, short sleeve and three-quarter sleeve options. The dress has a handkerchief hem for the knee and mid-calf lengths, and a straight hem for the ankle length and peplum top versions. The back of the waistline is cinched in slightly with elastic.

The pattern covers bust measurements from 30.5" to 46".

I enjoyed sewing my dress. The neckline/collar band in particular turns out really nicely and was very satisfying to sew. 

The instructions in Big 4 sewing patterns often get a bad reputation, but I usually find them clear and easy to follow. They maybe don't hold your hand as much as indie patterns and they're generally a lot more concise, but that's not necessarily a bad thing. I had no problems while I was making my dress.

That said, I did take a slightly different approach to inserting the elastic in the back of the waistline. The instructions call for you to sew the edges of the seam allowances together to make a channel and insert the elastic into that. I thought that might be irritating to wear because the seam allowance could move about. Instead, I pressed the seam allowance up and made my channel by stitching the seam allowance to the back bodice to anchor it in place. It worked nicely, and isn't irritating at all (although, to be fair, I don't have any evidence that the version from the pattern would have been irritating either!).

Another thing that Big 4 patterns are renowned for is having lots of ease, and that's very much true for this pattern. It's definitely always best to look at the finished garment measurements (on the pattern paper) – I think in this case the pattern includes 5" of ease. 

That would have given me a dress that was looser than I wanted, so I went down a couple of sizes. I made a straight size 14, whereas my measurements would put me between a 16 and an 18.

I lengthened the bodice by an inch, which is normal for me (I'm 5'9"), and actually shortened the skirt by 3". Those skirt pieces are long! It's intended to be ankle length, but it would have been on the floor if I hadn't shortened it, and I'm a bit taller than average. 

It's also worth mentioning that if you have a non-directional print/plain fabric without nap, you can definitely get view A out of less fabric than the pattern suggests. It calls for 3.4 metres for size 14, but I managed to cut my dress out of just over 2.5 metres. 

Talking about fabric, this is a cotton poplin that I bought from Minerva but I can't seem to find it on their website now – sorry!

My finished Simplicity 8384 feels lovely to wear – the elastic in the back waist cinches it in nicely to give it some shape, but it's still really comfortable. It's a bit different from my other dresses, which is nice. I'm glad that I found the pattern in that charity shop box!