Monday, 29 August 2016

Father's Day shirt - SImplicity 1544

For Father's Day this year, I decided to make my Dad a shirt. But I also decided that it would be best not to make it as a surprise, but instead consult him so he coul pick what features he wanted in the shirt (he has quite specific opinions on pockets) and to make sure that I'd get the fit right. So I presented him with the pattern and fabric, and then I got to work on making him the shirt. Don't worry, it hasn't taken me this long to make the shirt for him - it's been finished for well over a month already - it just took a while to get a couple of pictures of him wearing it.


The pattern I chose is Simplicity 1544 -  a button front shirt with various options for pockets, shoulder tabs and yokes. The collar band, cuff and inside yoke are intended to be cut from a contrast fabric "for a fresh modern approach",

We instantly ignored the contrast fabric options, as well as the studded front yoke option, and the shoulder tabs. My Dad chose the pockets from view D (patch pockets with a buttoned top flap).


You've probably noticed the main difference between the pattern and the version I made is the sleeves - namely that the pattern comes with long sleeves only, and I made short sleeves. This is obviously an easy adjustment to make, and I simply measured the length sleeves on one of my Dad's short-sleeved shirts, added a bit extra for the hem, and then cut my traced pattern piece at that level.


The fabric I used is a pink Oxford stripe shirting from Fabworks. It's a really lovely quality cotton (especially for £4 per metre!), was great to work with and, I'm told, is lovely and soft to wear. Which is good news for me because I over-ordered so I think there may be just about enough left to squeeze out a top of some kind for me. Yay!

The buttons were a stroke of genius on my part (well, maybe not genius, but I was quite pleased with myself when I thought of the idea) because I harvested them from one of my Dad's old shirts. I tend to commandeer shirts that are a bit worn around the cuffs/collar to use the main fabric for linings, so there was one sitting here ready and waiting to have its buttons removed. More sustainable and I didn't have to wait till I could get to a shop to buy some. Everyone wins!


I've made shirts and shirtdresses for myself before, so I'm familiar with all the processes in making a collar, button plackets, etc. but they're still things that for some reason I imagine to be more complicated than they are. Does anyone else do that, or am I just weird?! I think making this shirt will have helped me get over that a bit though, because everything just seemed more straightforward. Admittedly, I did make things slightly easier for myself this time due to the fact that long sleeves and cuffs were eliminated, so maybe that helped.


The collar and collar stand is the area that I've struggled with most on other shirts, but this combination went together easily, and looked right first time without having to unpick and redo anything. Maybe the pattern is drafted particularly well, or maybe I've got better at inserting collars over time. Who knows.

In any case, the instructions were clear and easy to follow throughout. They're not overly hand-holdy, but they don't leaving you scratching your head wondering what on earth they're talking about either.


Shirts aren't necessarily the speediest of projects simply because of the number of pieces involved in creating a collar, button plackets etc. but there's definitely nothing to be afraid of as long as you've got a good pattern. I'm sure I'll be using Simplicity 1544 again in the future because I never usually know what to make for my Dad when it comes to present-giving times, but now I know this is a good option. And making things for people who appreciate the work that has gone into them is always nice, isn't it?

Thursday, 18 August 2016

Flora and ice creams

Some fabrics just demand to be bought, don't they? This fabric did that to me! It's I scream, you scream from the Boardwalk Delight collection, and I picked it up from The Village Haberdashery. Clearly I needed an ice cream dress. Because an ice cream dress is a complete necessity, and not at all frivolous in any way. Obviously. The only question then was what particular dress it should become.


With a fun print like this an Emery dress is usually my default choice but, as it's also a really summery print, I wanted something sleeveless. I've made a sleeveless Emery before, but ultimately I fancied trying something new. I've seen many versions of the By Hand London Flora dress that I liked, particularly the tank version, so I decided to give it a go.

Or at least give the bodice a go anyway! While I love the delightfully full skirt that Flora is intended to have, this fabric just wasn't wide enough, so I reverted to type used the gathered skirt and pockets from the Emery.


I made a toile of the bodice in a size 12, adding my standard inch to the length, and the general shape was really good, but the fit from the bust down was just slightly too tight for my liking. To some extent, fit is a matter of personal preference, and my preference is definitely to have a nicely fitted bodice but still to have room to breath and enjoy the odd slice of cake. I'm sure I'm not the only one!

As I only needed a tiny bit of extra ease, I decided not to mess with the pattern pieces and instead to sew the side seams with a slightly smaller seam allowance. We're talking 1.3 cm instead of 1.5, but even that little adjustment made all the difference.


I really enjoyed sewing this dress. The instructions are nice and clear so the whole process was a breeze, and it all seemed to go pretty quickly. I know some people wouldn't enjoy the hand sewing of the lining down the zip and around the waistline, but thankfully for me I enjoy hand sewing so it's all good!


The only problem that I had was with the pockets, and that was all to do with the fabric. I originally used the outer fabric for them, but realised pretty soon after sewing them that you could see the ice creams on the pockets through the background colour on the skirt. So the pockets were promptly unpicked, and replaced with pockets cut from the same white cotton lawn as I used for the bodice lining. Problem solved!


One thing I'm particularly pleased about with this dress is the fact that I realised that if I cut things right then I'd be able to get an ice cream on each shoulder strap (the photo above is from mid-construction, so excuse the unfinished centre back seam and any stray threads). Small things like that amuse me. It's not very noticeable when I'm wearing the dress, but I know they're there.


All in all, I'm really happy with how this dress turned out! I know it won't be one of my most worn dresses, purely because I think the print requires really warm weather to be appreciated, but that doesn't mean that I like it any less. And it'll be one of my top wardrobe choices for sunny days. There are still a couple of other summery projects on my sewing list, so I'd better hurry up and get sewing so I can actually wear them! I'm not the only one still sewing for summer am I?

Thursday, 4 August 2016

Winslow culottes

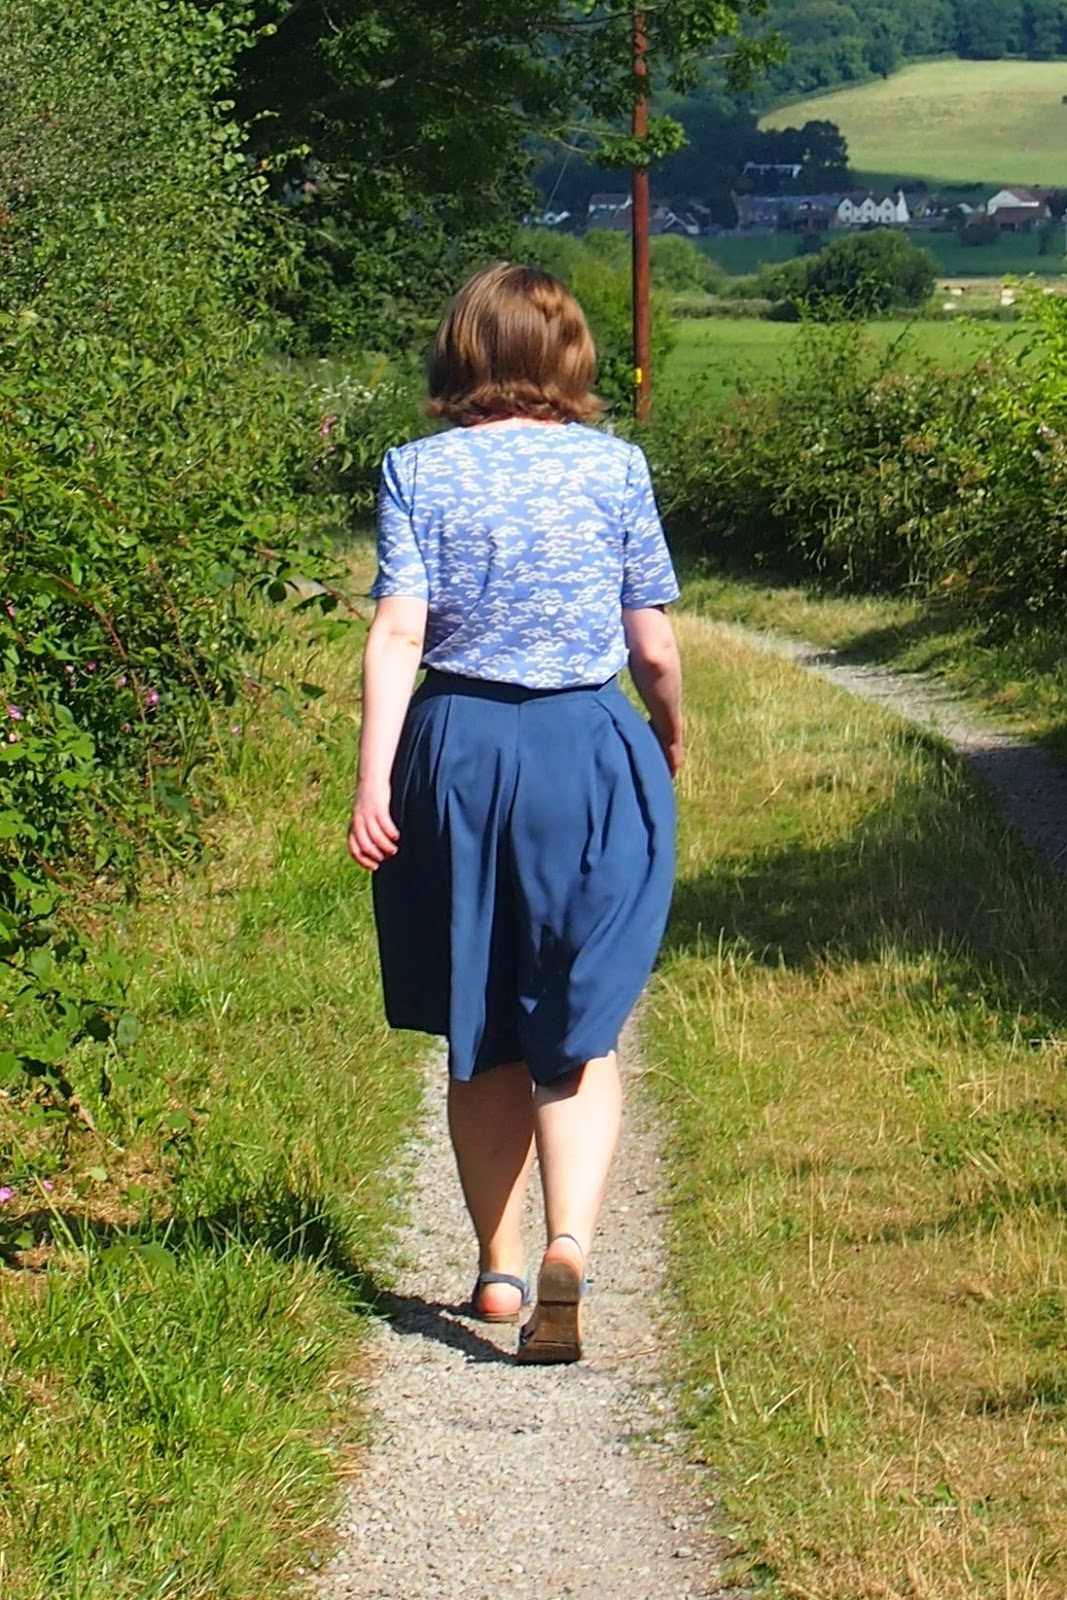
Where do you stand on the culottes trend? I'll be honest, it didn't really appeal to me at first. My main experience of wearing culottes was as part of Brownie/Guide uniforms back in the early 90s. Probably not the sartorial highlight of my life. But then photos of the Winslow culottes from Helen's Closet starting popping up on Instagram. They looked great on everyone I saw wearing them, so I decided to bend my usual "dresses and skirts only" policy and give culottes a chance.


The Winslow culottes are wide-legged, with the volume provided by four inverted box pleats (two each on the front and back), and are designed to be worn at any length from shorts to palazzo pants. The knee length version appealed to me most, probably because it's closest to the full skits and dresses that I'm used to wearing so gave me the chance to try out culottes whilst not really leaving my comfort zone.

The pattern was very straightforward, with thorough instructions and lots of clear illustrations to follow. All the notches and everything lined up perfectly, and the culottes came together really easily.


In terms of sizing, I made a straight size 14 based on my waist measurement. My hips should technically fall into the next size up, but as the instructions state, the wide legs mean there's plenty of room in the hips so there was no need for me to grade up.

I always intended to make a knee length version, but I actually cut out the midi length (view C) because I thought that I'd probably want my version a bit longer than view B, but I wasn't quite sure how much longer. This was both because I'm a couple of inches taller than the 5'6" that the pattern is designed for, and because I wanted knee length rather than above the knee. I made up the culottes, tried them on and then pinned them up to work out the length I wanted. In the end, my version is about 3.5" longer than view B from the pattern.


I chose to use a lovely viscose from Sewn because it drapes beautifully, and I thought that would work well for the culottes. Turns out I was right! It's really great fabric, especially for the price of £5 per metre. I was so impressed with it in the shop that I may have also bought some of the powder blue colourway to use for a top.


Talking of tops, the one I'm wearing here is another scoop-neck hack of the Sew Over It Susie blouse. I made this in exactly the same way as my first version - I'm really happy with how that one turned out and it gets lots of compliments (although I think that's mainly due to the fabric), so there was no need to mess with it.

This one uses some pretty Atelier Brunette fabric that I bought in the Black Friday sales last year and hid away to await the arrival of warmer weather. I'm happy it's now been used, because it's lovely to wear.


My Winslow culottes had their maiden outing last weekend and they were great - all the fullness of a skirt, but with the added practicality of shorts/trousers. Particularly welcome when you're out for a walk on a windy day because it means that you're in much less danger of unintentionally revealing more than you want to! I do love my slightly impractical skirts and dresses though, and these culottes won't do anything to change that, but I'll enjoy wearing them  and I'm already thinking of making a shorter version to wear with tights in winter. If you're thinking of giving culottes a go, I'd definitely recommend the Winslow pattern. Are you tempted?

Thursday, 28 July 2016

New Look 6217 x 3

Things have been a bit quiet around my little blog recently, initially because I was busy making things for other people (which don't always make it to the blog), and then because life itself got busy. I've got a couple of projects finished and waiting to be photographed now though, so there should be some more regular updates coming up. Starting with three versions of the same pattern - New Look 6217.


I'll be the first to admit that I would have completely overlooked this pattern if it hadn't been for the version that Handmade Jane made. I've seen a few versions cropping up online since then, so I suspect I wasn't the only one who she inspired to buy this pattern.

Personally, I was only really interested in view B - a woven t-shirt/top with grown on short sleeves. It's very similar to an old RTW top of mine that I'd been debating copying, but I knew it would have taken me a while to get round to doing that so I thought I'd take the easy option and get the pattern. Especially when New Look patterns went on a 50% off sale so it was less than £3!


The first version I made was the one above, using a fun seaside print viscose from The Textile Centre on ebay - they don't seem to have it in stock any more but they have lots of other lovely viscose prints.

I made a size 14, and the only alteration I made was to cut the back on the fold instead of as 2 separate pieces. This does eliminate the keyhole opening at the back neckline but, while they look pretty, I often find them a bit annoying, so that's fine for me. I have no problems getting the top over my head without the neckline opening - and if I can do that, then I suspect most people will be able to because I have quite a big head!


The top is a quick project - particularly when you eliminate the back seam, which leaves you with just one front and one back piece. The neckline is simply finished with bias binding (for all the versions I've sewn so far, I've made my own binding from the offcuts of the fabric), and there are no darts or anything even, so it's a really simple but effective piece.


My second version was using a star print viscose from Regency Rags, which again now seems to be out of stock. I think this version is slightly less successful than my first one, and that's entirely due to the fabric. It was definitely sold as a viscose, but is much crisper and has less drape than other viscoses that I've used before. This top really benefits from a fabric with a good drape, and this second version just doesn't hang quite as nicely as the first. It's still perfectly wearable though, and indeed has already been worn a couple of times since I finished it a few weeks ago.


Having seen my versions of the top, my Mum decided that she'd like one of her own - particularly when we went to Sewn the other week and she spotted this gorgeous Cloud 9 double gauze.

(As a side note, if you're in or near Bristol, I'd definitely recommend paying Sewn a visit - they're relatively newly opened and have a growing range of beautiful dressmaking fabrics, and a good selection of indie & vintage patterns, and haberdashery. And Marie who runs it is lovely, which just makes fabric shopping even better!).


Mum tried one of my tops on, and luckily it fit her nicely so making a version for her was no trouble at all. I haven't worked with double gauze before - I think mainly because I'd never felt any in the flesh and couldn't imagine quite what it would be like from online descriptions - but this definitely won't be the last time I use it. It did fray a little, but other than that it was no problem to sew and it feels so soft. I'll admit that I was slightly reluctant to hand this over to my Mum!

So there we go - three versions so far, and I'm sure there'll be more to come in the future. I think New Look 6217 has already proved to be a worthwhile investment for me!

Friday, 1 July 2016

Scoop-neck Susie & Emery skirt

This post is all about two patterns that I've made before, but in slightly different forms to how you may be used to seeing them. The first is a relatively new kid on the block - the Sew Over It Susie blouse, while the second is my most-used pattern - the Christine Haynes Emery dress.


I really like my first Susie blouse, which I made a couple of months ago. At the time, I mentioned that there was a piece of fabric sitting in my stash that I had earmarked for another version, and here it is! I bought the fabric - a lovely hot air balloon print cotton - from Guthrie & Ghani at some point last year. I bought it with the intention of making the Colette Aster, but then changed my mind. Since then, it's almost become a number of other tops, but something always stopped me from cutting into the fabric. When my first Susie was a success, I decided the pattern was what this fabric had been waiting for, but with a couple of changes.


Firstly, I thought that with a fun print like this, it might be better to keep things simple and make a collarless version - obviously a very easy adjustment because you just don't make the collar!

After pondering things for a while though, I thought that a collarless version might look better with a scoop rather than a V neck. This was also fairly simple - I just placed the scoop neck from a tried and tested pattern (the one I used for these two dresses) over the front piece of the Susie blouse, and traced it over. I think it worked nicely!


The Susie blouse is a straightforward and relatively quick project anyway, but omitting the collar means that it becomes really speedy. Much though I like the original pattern and the first version I made, I think I like this scoop neck even more.


Now for the skirt! This isn't exactly what I was planning to sew when I ordered this fabric. It's a linen and viscose mix from Fabric Rehab, which I bought to make a summery circle skirt. Sadly, either the fabric isn't quite as wide as it says on the website, or it shrank a bit during washing. I didn't measure it before washing, but mine's now a good 5cm less than the measurement on the website, and that 5cm was the difference between just about being able to eek out a circle skirt, and not having quite enough material to make a skirt long enough for my liking.


I had a brief strop to myself about not being able to do what I wanted, then decided the fabric would be equally as nice for a gathered skirt. I used the waistband from the Veronika skirt, which I know fits nicely from the versions I've made, and instead of just gathering a rectangle of fabric, I used the skirt pieces (and pockets, obviously!) from the Emery dress. For those of you not familiar with the pattern, the Emery skirt has a slight A-line shape, which slightly reduces the bulk of the gathers at the waist and I think is more flattering on me.


I'd definitely rate the top and the skirt as individual successes, made even better by the fact that they go really nicely together.

These two pieces of fabric both obviously decided that they had different destinies from what I had originally planned for them. That's fine by me, my sewing plans are always fairly flexible anyway, and it's always worth changing things around a bit to get the right outcome - don't you think?